background image

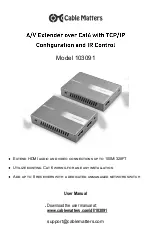
A/V Extender over Cat6 with TCP/IP Configuration and IR Control  

www.cablematters.com 


NOTE

:  

• 

Refer to the user manual of your monitor, TV, or projector for changing the resolution 

and sound input settings and verifying that audio is supported. 

• 

Test each new Receiver box directly with the original Transmitter box before connect-

ing with a network switch and installing permanently. 

8.  Plug the power adapters of the Transmitter and Receiver into an AC outlet (look for a blue 

LED) 

9.  Turn on the power to the source equipment and connected display and wait a few seconds 

for the signal to synchronize. Check that the blue LED is lit. 

Содержание 103091

Страница 1: ...to 100M 328FT Utilize existing Cat 6 wiring for an easy installation Add up to 8 receivers with a dedicated unmanaged network switch Model 103091 support cablematters com User Manual Download the use...

Страница 2: ...ONNECTION INSTRUCTIONS 3 1 Installation Checklist 3 3 2 Transmitter Panel Connections 4 3 3 Receiver Panel Connections 3 4 Connection Instructions 5 3 5 Connecting Additional Receivers 3 6 Troubleshoo...

Страница 3: ...heir respective owners Dolby Dolby Audio and the double D symbol are trademarks of Dolby Laboratories The terms HDMI HDMI High Definition Multimedia Interface and the HDMI Logo are trademarks or regis...

Страница 4: ...r a single Cat 6 UTP STP cable Connect up to 8 additional displays through a dedicated unmanaged network switch Plug Play installation automatically discovers HDMI receivers using existing Cat 6 cabli...

Страница 5: ...est length necessary Cat 6 cabling with 24 AWG wire is recommended for the best performance All cabling or network components connected to the A V Extender Transmitter and Receivers should be rated fo...

Страница 6: ...cable Blue LED Link status indicator verifies a live connection 6 Power LED Blue 7 DC 5V AC power adapter port 1 Video OUT Connect HDMI display mirror the output of the remote displays 2 Video IN Conn...

Страница 7: ...LED 8 Turn on the power to the source equipment and connected display and wait a few sec onds for the signal to synchronize Check that the blue LED is lit 3 4 Connection Instructions 3 5 Connecting Ad...

Страница 8: ...ing that audio is supported Test each new Receiver box directly with the original Transmitter box before connect ing with a network switch and installing permanently 8 Plug the power adapters of the T...

Страница 9: ...HDMI cable by connecting it directly to any equipment with HDMI When using HDMI cables longer than 10 feet they should be high quality cables If using a dedicated unmanaged network switch verify that...

Страница 10: ...0x1080i 1920x1080p 1920x1200 Color Spaces RGB YCbCr 4 4 4 YCbCr 4 2 2 Color Depth 8 bit HDMI Audio Formats LPCM 2 0CH 48KHz Matrix Housing LxWxH 2 41 x 3 46 x 0 65 Inches Weight 5 5 Transmitter Ounces...

Страница 11: ...ant its products from defects or damages arising from misuse abuse or normal wear In no event shall Cable Matters Inc including their officers directors employees or agents be liable for any damages w...

Страница 12: ...CP IP Configuration and IR Control www cablematters com View related products at www cablematters com Certified Premium HDMI Cable Model 300016 150 Snagless Cat 6 Patch Cable Model 160001 150 Shielded...

Отзывы: