6
7
3
Cleaning
3.1
Cleaning by the Operator
The following cleaning work is described in the “Operator's Manual“:
• cleaning the device
• cleaning the printhead
• cleaning the print roller
3.2
Cleaning the Label Sensor
1
2
3
4
5
6
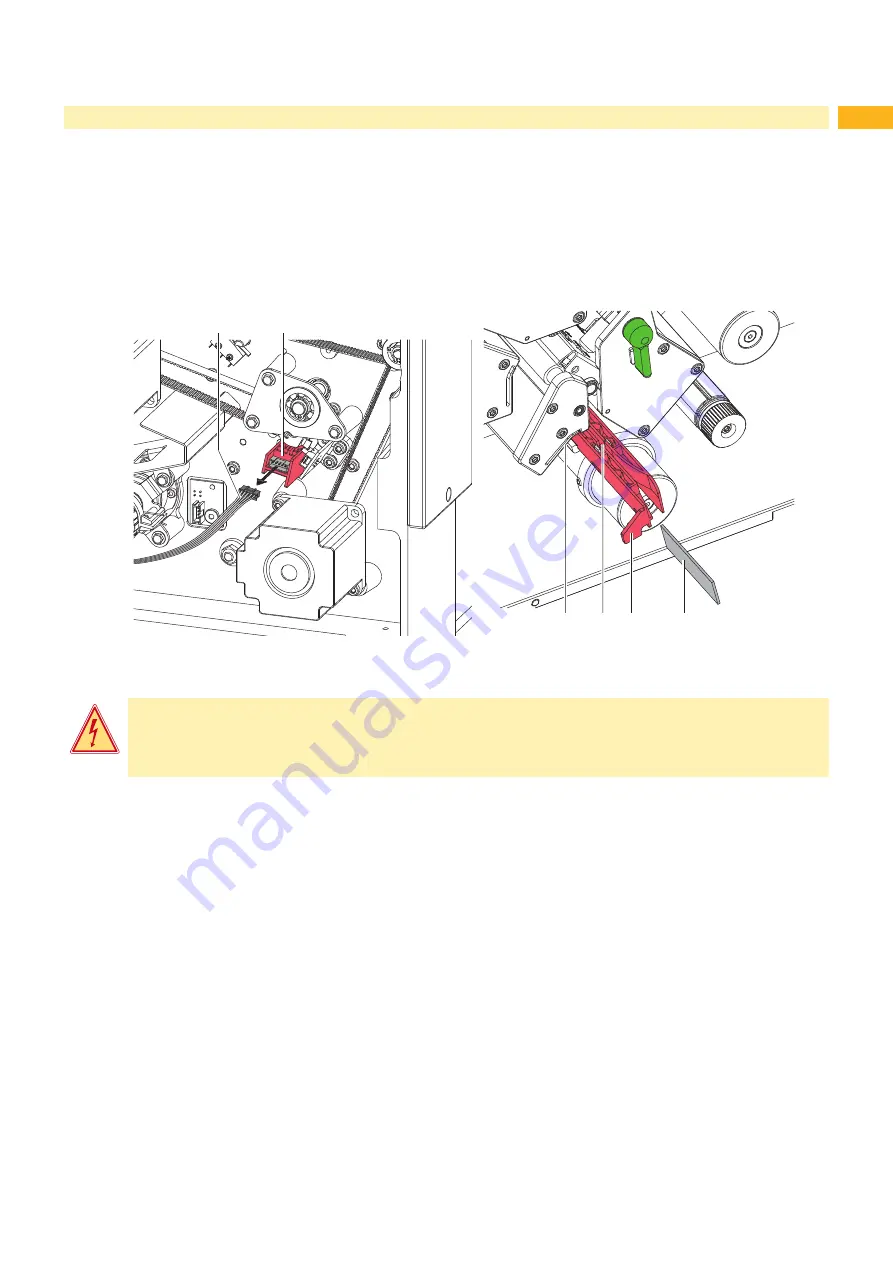
Fig. 2
Cleaning the label sensor
Danger!
Risk of death via electric shock!
Before opening the rear cover, disconnect the device from the mains supply and wait at lease one
minute until the power supply unit has discharged.
1. Remove the material from the printer.
2. Remove the rear cover.
3. Slide the label sensor assembly via the tab (5) toward the rear cover until it stops.
4. Unplug the cable (1) from the connector of the label sensor (2).
5. Press the latch (3) and slowly pull label sensor outward via the tab (5). That way at XC6 a distance plate (3) is
pushed out of label sensor guide.
6. Clean label sensor and sensor units (4) with brush or cotton swab soaked in pure alcohol.
7. Push label sensor back via tab (5) .
8. XC6 only : Press the latch (6) and push the distance plate (3) into the guide of the label sensor.
9. Connect the cable (1) to the label sensor (2).
10. Pull the label sensor (2) via the tab (5) as far as possible toward the front cover side.
This prevents the cable (1) from being pinched when installing the rear cover.
11. Install the rear cover.
Содержание XC Series
Страница 1: ...Service Manual Label Printer XC Series ...
Страница 34: ...34 34 7 Block Diagram Fig 32 Block diagram ...
Страница 35: ...35 8 Layout Diagram CPU Fig 33 Layout diagram CPU components side ...
Страница 36: ...36 36 8 Layout Diagram CPU Fig 34 Layout diagram CPU soldering side with measuring points ...


