


14
Configuration Instructions
Edition 5/06
Connecting label printer to computer
A2+/A4+/A6+/A8+
2
Connecting label printer to computer
You can choose from the following options for connecting a computer to the label printer:
•
Direct connection to the serial RS-232 interface (8) (see "2.1" on Page 14).
•
Direct connection to the Ethernet interface (5) (see "2.2" on Page 15).
•
Connection via a computer network to the Ethernet interface (5) (see "2.2" on Page 15).
•
Direct connection to a high-speed USB slave interface (7) (see "2.3" on Page 17).
•
Connection via an optional interface adapter (IEEE 1284, RS 422/485) to a USB master
interface (7).
2.1
Connecting label printer via serial RS-232 interface
2.1.1
Connecting label printer
The RS-232 interface is operated via an RS-232 cable.
1. Connect computer and label printer with a suitable cable.
2. Secure cable connections with the screws found at the plugs.
3. Configure the RS-232 interface of the printer to match the settings of the connected computer (see
"4.1.4" on Page 25).
If problems occur, contact the computer manufacturer for interface assignments and note the pin assign-
ment of the SUB-D jack described in Table 5 on Page 15.
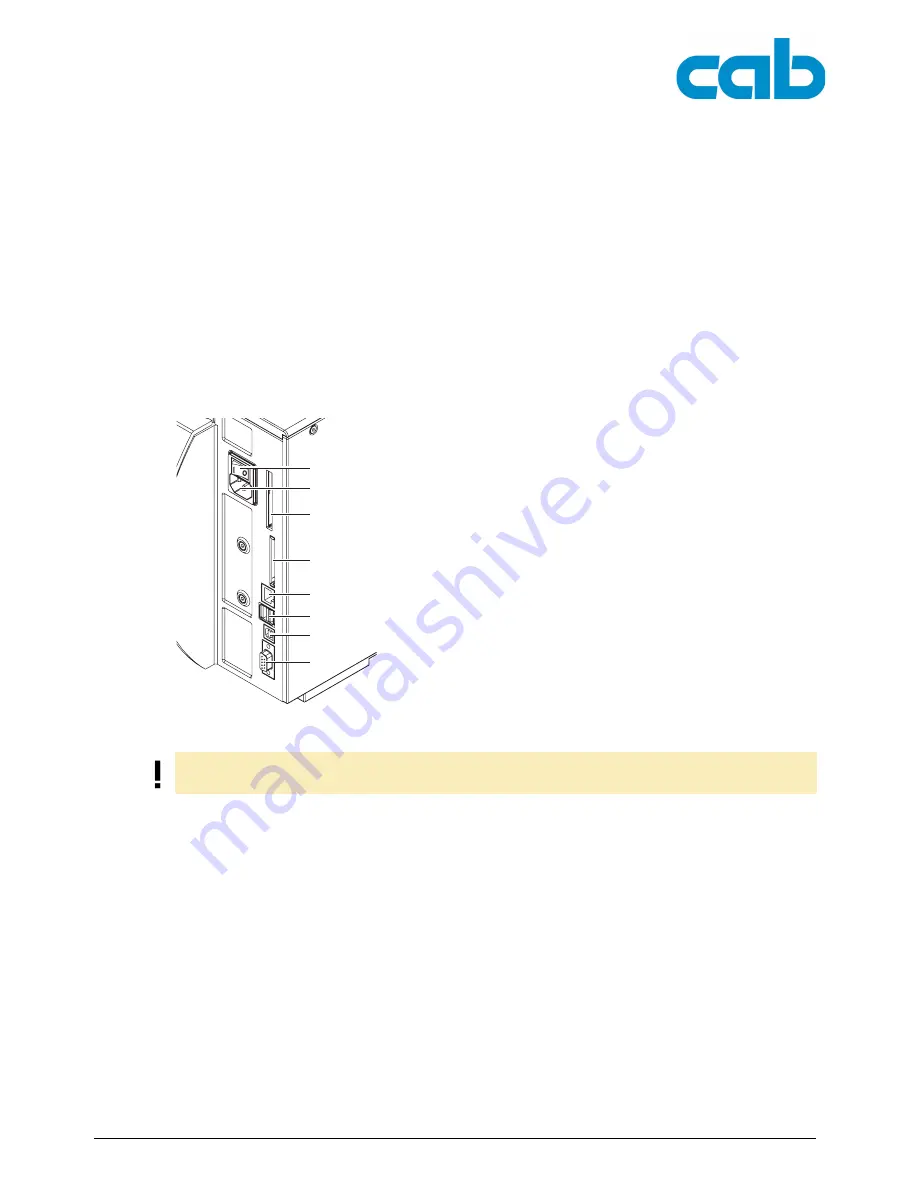
Fig. 4:
Power and computer connections
1
Power switch
2
Power connection jack
3
Slot for type II PC card
4
Slot for a CompactFlash memory card
5
Ethernet 10/100 Base-T
6
Two USB master interfaces for keyboard,
scanner or service key
7
Two high-speed USB slave interfaces
8
Serial RS-232 C interface
1
2
3
4
5
6
7
8
Insufficient or missing grounding can cause faults during operation.
Ensure that all computers and connection cables connected to the label printer are grounded.


