10
10
4.1
Adjusting the Air-Jet Module
1. Start a printing job
2. Set peel position
To optimize the transfer of the labels from the printer to the pad there two different parameters available for adjusting
the peel position.
!
Attention!
First adjust the parameter "Peel Position" in the printer configuration.
Then adjust the additional peel-off offset in the software.
It is very important to follow this course of action for a problem free start after loading labeling material or
when correcting errors.
Parameter "Peel Position" in the printer configuration.
Check the basic setting in the printer setup. Perform labelling cycles by reciprocally pressing
respectively
the
feed
key and
respectively Enter .
Adjust the "Peel Position" in such a way, that the blank labels are peeled-off completely from the liner
Configuration Parameters of the Applicator.
> Peel-off position
Shift the position of the dispensed labels relatively to the dispensing
edge. In the software an extra peel offset value is available. The offset
values from “Peel position“ and from software are added together for
execution.
0,0 mm
Peel-off offset in the software
Check the setting in the software. Perform labelling cycles by repeatedly pressing
respectively Enter
Adjust the peel-off offset in such a way, that the printed labels are peeled-off completely from the liner
Programming manual or software documentation.
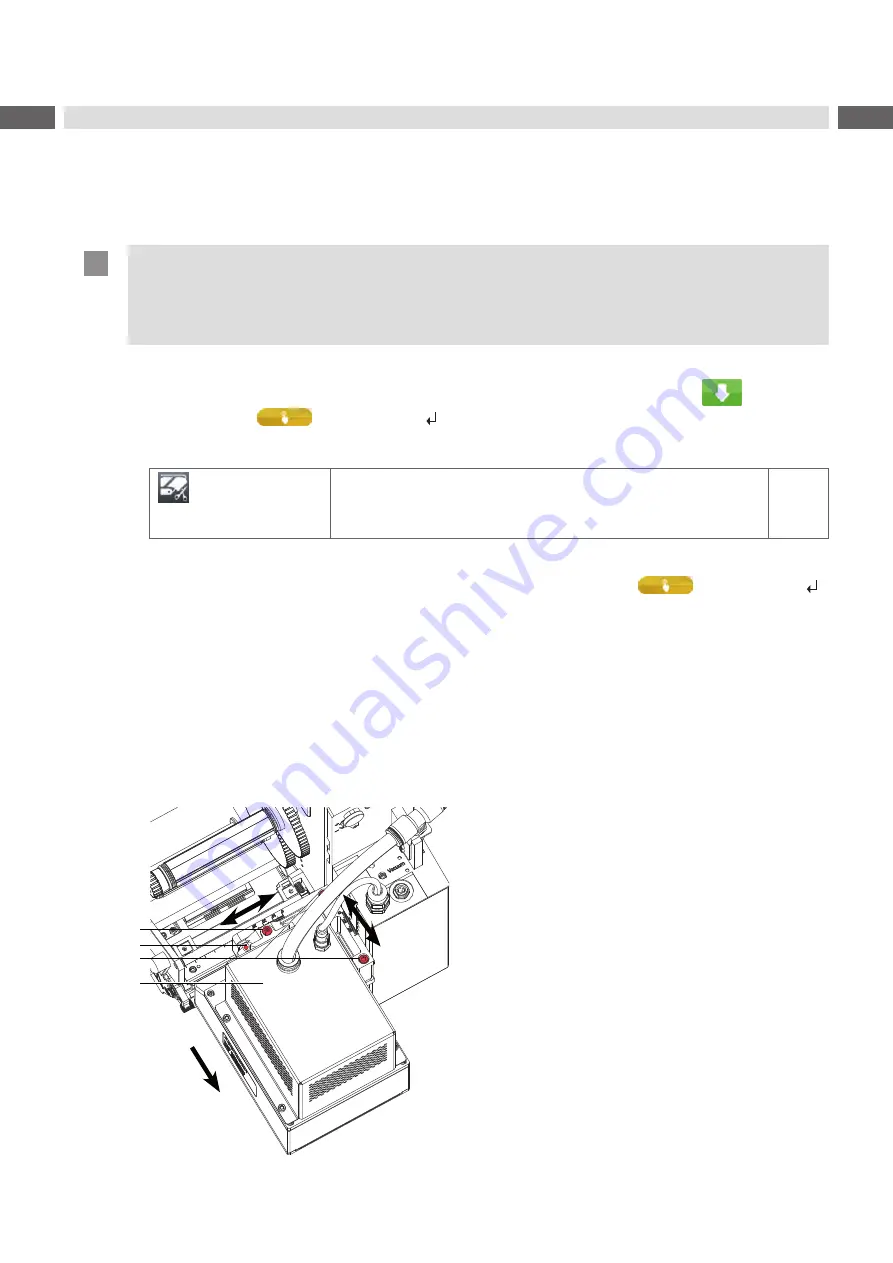
3. Move the air-jet module body (4) so that the labels move perpendicularly to it and has a row of holes preferably
running along the edges on the base.
- Loosen screws (3) to move the air-jet module (4) in the printing direction.
Move air-jet module (4) and tighten screws (3).
- Loosen screw (2) to move the air-jet module perpendicular to the printing direction.
Move air-jet module (4) and tighten screw (2).
Adjust the air-jet module so that the label is direct and in the center of the nozzle array.
4
3
2
Label
movement
1
Fig. 5
Adjusting the air-jet module sidewise
4
Settings


