background image

G

e

n

e

ra

l I

n

form

at

ion

A

ss

e

mb
ly
A

p

p

s & D

is

p

la

y
B

at

te

ry
S

af

e

ty & W

ar

n

in

g

M

ain

te

n

an

ce
W

ar

ran
ty

1.3. PAS & Throttle

Due to the powerful support of the motor, the rider will approach high speeds much faster than 
when riding a conventional bicycle. To get used to this effect, and for your safety, we advise you to 
first use the e-bike in a familiar setting without too much traffic in the surrounding area, when 
driving it for the first time. When you first start biking, be aware of the electrical powered acceler-
ation that will instantly be provided by the motor. We advise using the lowest power level when 
driving for the first time. When switching off pedal assistance, the e-bike can still be used just like 
a regular bike. However, please note that when biking without using the battery, the lights of the 
e-bike will not be in operation. When set at level 1 or above, the throttle will be on and will 
provide smooth acceleration. If the throttle, brake lever, pedal assistance, or lighting are function-
ing abnormally, intermittently, or not working, please stop using your e-bike immediately. With 
the throttle on-demand feature, you can use the throttle from a complete stop, rather than 
pedaling first, which can help when riding up steep hills or through an area with lots of stop 
signs. However, as a general practice, we recommend pedaling first, and before engaging the 
throttle, whenever and wherever possible.

3

Содержание ASTRO DELUXE

Страница 1: ......

Страница 2: ......

Страница 3: ...Please turn to the final page for tool kit checklist...

Страница 4: ......

Страница 5: ...ally appreciate your feedback We always look forward to seeing your photos or videos on Instagram Facebook and Twitter And don t forget you can tag us on your social media to win large discount coupon...

Страница 6: ......

Страница 7: ...User Manual Thank you for purchasing this C3STROM e bike ASTRO DELUXE...

Страница 8: ......

Страница 9: ...on in this manual should be read carefully and if you have any questions contact C3STROM immedi ately This manual and any other documents accompanying the e bike should be retained for future referenc...

Страница 10: ......

Страница 11: ...attery Charger Safety Warning 22 Apps Display 14 3 1 App Download 14 3 2 Fingertip Control 15 Assembly 4 2 1 What s in the Box 4 2 2 Assembly Process 6 1 2 3 4 5 6 7 8 Warranty 25 7 1 Warranty Terms 2...

Страница 12: ......

Страница 13: ...on Assembly Apps Display Battery Safety Warning Maintenance Warranty 1 1 Frame Components Rear light Fender Rear Suspension Motor Chain Crank Chainwheel Pedal Disc brake Front fork Front light Handleb...

Страница 14: ...K Top Tube Horizontal 35 7 C3STROM ASTRO DELUXE Specification Motor Enhanced 750W 1800W Peak Derailleur single speed 3 5 Inch LCD With USB Visual Turn Signals Removable Lithium ion 1040Wh 52V20Ah SAMS...

Страница 15: ...ving for the first time When switching off pedal assistance the e bike can still be used just like a regular bike However please note that when biking without using the battery the lights of the e bik...

Страница 16: ...General Information Assembly Apps Display Battery Safety Warning Maintenance Warranty 2 Assembly 2 1 What s in the box Fully wrapped C3STROM ASTRO DELUXE with foam and cardboard 4...

Страница 17: ...r Manual 1 4 mm Allen Wrench 1 5 mm Allen Wrench 1 2 5mm Allen Wrench 1 13 15 mm Double Wrench 2 8 10 mm Double Wrench 1 Toolbox 5 Pedal L Pedal R Charger User Manual Charger Cable TIO N RE EN TION Ke...

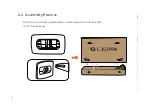
Страница 18: ...neral Information Assembly Apps Display Battery Safety Warning Maintenance Warranty 2 2 Assembly Process 6 Place the carton box upside down and remove the 4 safe buckles to lift the cover up c3strom c...

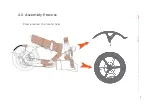
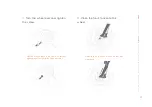
Страница 19: ...General Information Assembly Apps Display Battery Safety Warning Maintenance Warranty 2 2 Assembly Process Please loosen the front wheel 7...

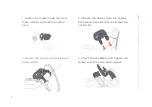
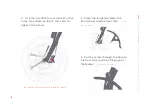
Страница 20: ...1 Loosen the screws using the 4mm Allen wrench and take the cap off here 3 Remove the display from the handle bar please take care that the screws do not fall off 4 Attach the handlebar and tighten t...

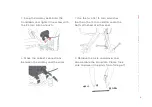
Страница 21: ...the iron plate Please take care to prevent the parts from falling off General Information Assembly Apps Display Battery Safety Warning Maintenance Warranty 5 Snap the display back onto the handlebar a...

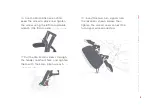
Страница 22: ...afety Warning Maintenance Warranty 9 Remove the plastic spacer nestled between the brake pads on the front fork of the wheel 10 Please take the screw nut of the Axle off as shown in the picture and in...

Страница 23: ...Warning Maintenance Warranty 11 11 Turn the wheel over and tighten the screw NOTICE Please leave some space for further tightening after following the next steps 12 Place the front fork onto the whee...

Страница 24: ...enches at the same time both on the 15 mm side to tighten the screws 13 1 5 1 3 13 Recommended tire pressure 120 KPA 1 2 BAR 14 Place the fender between the front wheel and the front fork As the pictu...

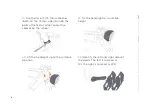
Страница 25: ...ace and tighten the screw using the 8 10mm double wrench the 10mm side As the picture 17 Put the M6 34mm screws through the fender and front fork and tighten them with the 4mm Allen wrench As the pict...

Страница 26: ...15 mm wrenches both on the 15 mm side to undo the bolts attached at either end of the skewer on the wheel 21 Fix the headlight to a suitable height 20 Lift the headlight up to the suitable position 1...

Страница 27: ...lay Battery Safety Warning Maintenance Warranty 15 23 Insert the pedals into the holes of the crank on each respective side and tighten the right side clockwise and the left side counterclockwise with...

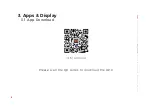
Страница 28: ...General Information Assembly Apps Display Battery Safety Warning Maintenance Warranty 3 Apps Display 3 1 App Download Please scan the QR codes to download the APP 16 iOS Android...

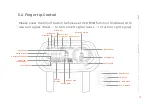
Страница 29: ...signal Press to turn on left signal press to turn on right signal 17 PEOELEC CLASS 3 OFF ROAD Speed Unit Motor Power Gear Display Turn Signal Speed Display Cumulative Mileage Password Lockout Alert To...

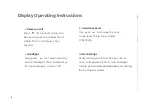
Страница 30: ...ble To turn it off press for 1 second c Headlight Long press for 1 second to turn on the headlight Press and hold for 1 second again to turn it off b Assistance Level Use or to change the assis tance...

Страница 31: ...ire malfunction Motor phase wire malfunction Controller temperature sensor malfunction Current sensor malfunction Battery internal temperature malfunction Motor internal temperature malfunction Speed...

Страница 32: ...tion Assembly Apps Display Battery Safety Warning Maintenance Warranty 4 Battery 4 1 Battery Information Samsung INR21700 50E 1040WH 4 5 hours 368mm 95mm 125mm 4A Cell Power Charging time Dimensions L...

Страница 33: ...ety Warning Maintenance Warranty 4 2 Battery Charging a b d c Open the charging port You can now view the power display Battery charging indicator light will turn on Connect the charger 21 3 Green 1Re...

Страница 34: ...r in a safe place away from children Charging the battery before each use will reduce the chance of excessive discharge Please only use C3STROM s specialized chargers to charge the batteries The charg...

Страница 35: ...d operation Damage caused by failing to follow instructions is not covered under warranty and could result in serious injury or death Contact C3STROM if you have any questions about assembly or operat...

Страница 36: ...ensure the bike is safe to ride Do not use high pressure water or air hoses for cleaning They can force water into electric components which may cause malfunctioning Do not wash the e bike components...

Страница 37: ...im on our website https ww w c3strom com warranty form A member of our support team will reach out to you once your claim has been reviewed The Limited Warranty is expressly limited to the replacement...

Страница 38: ...rom failure to follow instructions in the e bike owner s manual accidents misuse neglect abuse commercial use alterations modification improper assembly installation of additional parts and or accesso...

Страница 39: ...ed Component Return all original packaging and paperwork included with the e bike Note any immediately recognizable damage on the shipper s Bill of Lading prior to signing off on the shipment 7 3 Ship...

Страница 40: ...28...

Страница 41: ...C3STROM Images are actual size you can place the tool on the paper to check if you have selected the correct one 8 Tool Kit Checklist 29...

Страница 42: ...13 15 mm Double Wrench 15mm 13mm 13 15 mm Double Wrench 15mm 13mm 8 10 mm Double Wrench 10mm 8mm...

Страница 43: ...5mm Allen wrench 4mm Allen wrench 2 5mm Allen wrench...

Страница 44: ...Pedal L Pedal R...

Страница 45: ......

Страница 46: ...www c3strom com...

Отзывы: