background image

T

ABLE OF

C

ONTENTS

Chapter 1: Getting Started  . . . . . . . . . . . . . . . . . . . . . . . . . . . . . . . . .1–1

Introduction  . . . . . . . . . . . . . . . . . . . . . . . . . . . . . . . . . . . . . . . . . . . . . . . . . . . . . . .1–2

Conventions Used  . . . . . . . . . . . . . . . . . . . . . . . . . . . . . . . . . . . . . . . . . . . . . . . . . . .1–3

Product Overview  . . . . . . . . . . . . . . . . . . . . . . . . . . . . . . . . . . . . . . . . . . . . . . . . . . .1–4

Agency Approvals  . . . . . . . . . . . . . . . . . . . . . . . . . . . . . . . . . . . . . . . . . . . . . . . . . . .1–4

Part Number Key  . . . . . . . . . . . . . . . . . . . . . . . . . . . . . . . . . . . . . . . . . . . . . . . . . . .1–5

Product Label Example:  . . . . . . . . . . . . . . . . . . . . . . . . . . . . . . . . . . . . . . . . . . . . . .1–5

Serial Number and Date Code format:  . . . . . . . . . . . . . . . . . . . . . . . . . . . . . . . . . .1–5

Quick Start Steps . . . . . . . . . . . . . . . . . . . . . . . . . . . . . . . . . . . . . . . . . . . . . . . . . . . .1–6

Step 1 – Unpack and Inspect  . . . . . . . . . . . . . . . . . . . . . . . . . . . . . . . . . . . . . . . . . .1–6
Step 2 – Install Optional Hardware Accessories  . . . . . . . . . . . . . . . . . . . . . . . . . . . .1–7
Step 3 – Become Familiar with Available Communication Ports  . . . . . . . . . . . . . . . .1–8
Step 4 – Install 

C-more

6” Micro-Graphic Panel  . . . . . . . . . . . . . . . . . . . . . . . . . . . .1–9

Enclosure Clearances  . . . . . . . . . . . . . . . . . . . . . . . . . . . . . . . . . . . . . . . . . . . . . . .1–10
Step 5 – Connect 

C-more

6” Micro-Graphic Panel to Computer  . . . . . . . . . . . . . .1–11

Step 6 – Provide Power to the 

C-more

6” Micro-Graphic Panel  . . . . . . . . . . . . . . .1–12

Step 7 – Accessing the 

C-more

6” Micro-Graphic Panel Setup Screens  . . . . . . . . .1–13

Step 8 – Choose 

C-more

6” Micro-Graphic Panel to PLC Protocol & Cables  . . . . .1–14

Step 9 – Install the Programming Software and Develop a Project  . . . . . . . . . . . .1–15
Step 10 – Connect 

C-more

6” Micro-Graphic Panel to PLC  . . . . . . . . . . . . . . . . . .1–16

Содержание EA1-S6ML

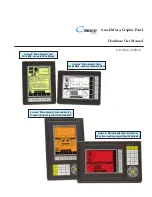
Страница 1: ...phic Panel EA1 S6MLW shown in Landscape Mode C more 6 Micro Graphic Panel Installed in a 20 button Landscape Keypad Bezel EA MG6 BZ2 C more 6 Micro Graphic Panel EA1 S6ML shown in Portrait Mode C more...

Страница 2: ......

Страница 3: ...hnical Support regarding this publication Manual Number EA1 MG6 USER M Issue 1st Edition Rev C Issue Date 09 10 Publication History Issue Date Description of Changes 1st Edition 07 08 Original issue R...

Страница 4: ......

Страница 5: ...hazardous environments requiring fail safe performance such as in the operation of nuclear facilities aircraft navigation or communication systems air traffic control direct life support machines or...

Страница 6: ...de vida o sistemas de armamentos en las cuales la falla del producto puede resultar directamente en muerte heridas personales o da os f sicos o ambientales severos Actividades de Alto Riesgo Automati...

Страница 7: ...cessitant une s curit absolue par exemple l exploitation d installations nucl aires les syst mes de navigation a rienne ou de communication le contr le de la circulation a rienne les quipements de su...

Страница 8: ......

Страница 9: ...3 Become Familiar with Available Communication Ports 1 8 Step 4 Install C more 6 Micro Graphic Panel 1 9 Enclosure Clearances 1 10 Step 5 Connect C more 6 Micro Graphic Panel to Computer 1 11 Step 6...

Страница 10: ...Portrait Vertical Keypad Bezel 3 11 D SUB 15 pin 90 degree Communication Port Adapter 3 14 D SUB 15 pin to Terminal Block Adapter 3 14 Clear Screen Overlay 3 15 Chapter 4 Installation and Wiring 4 1...

Страница 11: ...t 5 18 Exit 5 18 Chapter 6 PLC Communications 6 1 Introduction 6 2 Available PLC Protocols 6 3 C more 6 Micro Graphic Communication Ports 6 4 DirectLOGIC PLCs Password Protection 6 6 PLC Compatibility...

Страница 12: ...cks from the C more Micro Graphic Programming Software 7 6 Chapter 8 Troubleshooting 8 1 C more Micro Graphic Panel does not Power up 8 2 Display is Blank 8 2 Display is Dim 8 3 No User Program 8 3 Lo...

Страница 13: ...ation A 6 Allen Bradley DF1 Protocol PLC Error Code Tables A 7 Allen Bradley DH485 Protocol PLC Error Code Tables A 9 GE Error Code P499 Explanation A 11 GE SNPX Protocol PLC Error Code Tables A 12 Mi...

Страница 14: ......

Страница 15: ...tep 3 Become Familiar with Available Communication Ports 1 8 Step 4 Install C more 6 Micro Graphic Panel 1 9 Enclosure Clearances 1 10 Step 5 Connect C more 6 Micro Graphic Panel to Computer 1 11 Step...

Страница 16: ...dustrial control type devices you may be able to get up and running with just the aide of the Quick Start Guide that is included with each panel You may also refer to the online help that is available...

Страница 17: ...s immediate right will be a warning This information could prevent injury loss of property or even death in extreme cases The word WARNING in boldface will mark the beginning of the text Key Topics fo...

Страница 18: ...powered from a 12 24 VDC power supply or can operate in low power mode when powered from the serial communications port of select AutomationDirect PLCs Other features include 1792 KB memory Built in R...

Страница 19: ...blank Green Red backlight W White Red backlight Display Size 6 5 7 Backlight Type L LED Series Name EA1 C more Micro Graphic LISTED 7M17 Date code 5 4 3 2 1 R01 D MADE IN CHINA M EA1 S6MLW serialnumbe...

Страница 20: ...et function key label inserts Quick Start Guide b Unpack any accessories that have been ordered such as Keypad Bezel programming cable PLC communications cable etc c Inspect all equipment for complete...

Страница 21: ...2 Use the 4 Panel Mounting Clips EA MG BZ2 BRK that are supplied with the panel to secure panel to keypad bezel and compress the gasket between the panel and the keypad bezel Tighten screws to a torqu...

Страница 22: ...for additional details on the available communication ports protocols and cables NOTE The panel has a built in RJ12 serial communications port Port1 RS 232 and a built in 15 pin serial communications...

Страница 23: ...15 0 2 Nm See Chapter 2 Specifications for additional product dimensions Chapter 3 Accessories for accessory specifications and dimensions 0 260 6 6 0 256 6 5 0 256 6 5 0 260 6 6 R 118 R3 CUTOUT CUTO...

Страница 24: ...9 I T D I T D M 7 M 7 D te o e D te o e R01 R01 MAD IN HI A MAD IN HI A E 1 S6M W se a num er E 1 S6M W se a num er MODE A1 S6M MODE A1 S6M W N UT12 4V 6 5W N UT12 4V 6 5W NDC NT Q NDC NT Q 1 2 30 0...

Страница 25: ...rive for installing software from the CD or internet access to download free programming software USB port to use with an EA MG PGM CBL USB to RS232 Programming Cable Assembly for project transfer fro...

Страница 26: ...ations port on the C more Micro Graphic panel as shown below C more 6 inch Micro Graphic Panel USB Cable User PC Serial Cable PC to Panel Programming Cable Assembly Includes serial USB cables EA MG PG...

Страница 27: ...ble from CLICK and DirectLogic PLC RJ12 port DL05 DL105 DL205 DL350 DL450 H2 WINPLC RS 232C p n DV 1000CBL To PLC RJ12 Port To C more Micro Graphic Serial Port1 6 4 GND TXD 1 3 GND Wiring Diagram 3 RX...

Страница 28: ...ons BAK 1 Information 2 Setting 3 Test Menu 4 Exit UP DWN ENT ENT SETUP MENU BAK Total 1835008 Bytes Usage 26206 Bytes Free 1808802 Bytes MEMORY Setup Menu pg 5 5 1 Information pg 5 6 1 Memory pg 5 6...

Страница 29: ...WinPLC RS 232C EA 2CBL DirectLOGIC VGA Style 15 pin port DL06 D2 250 250 1 D2 260 RS 232C EA 2CBL 1 DirectLOGIC PLC RJ 11 port D3 340 RS 232C EA 3CBL DirectLOGIC DL405 PLC 15 pin D sub port DL405 RS...

Страница 30: ...2 or RS 485 communications EA1 MG6 USER M Hardware User Manual 1st Ed Rev C 09 10 1 16 Chapter 1 Getting Started 1 Port 1 Port 2 DV 1000CBL serial cable CLICK PLC C more 6 Inch Micro Graphic Panel Por...

Страница 31: ...SPECIFICATIONS CH CHAPTER 2 2 CHAPTER In This Chapter Available Models 2 2 Model Specifications 2 3 Panel Dimensions 2 5 Communications Ports 2 6 Chemical Compatibility 2 7...

Страница 32: ...more Micro Graphic Touch Panel with STN LCD monochrome 320x240 dot display The panel has red and green LED backlights Supports 5 selectable backlight colors Red Green Amber Lime and Yellow Includes 5...

Страница 33: ...6 o clock axis 40 degrees 12 o clock axis 20 degrees Backlight Type LED Color Model EA1 S6ML 5 user defined colors Red Green Amber Lime and Yellow Model EA1 S6MLW 5 user defined colors White Pink1 Pin...

Страница 34: ...d Fuse No fuse required when directly connected to a PLC or PC with recommended cable Type AGC fast acting glass fuse 750 mA 250 VAC ADC p n AGC 75 Max Inrush Current 1 A for 500 s 10 A for 500 s Acce...

Страница 35: ...9 2 13 54 1 GASKET MOUNTING CLIP 4 places Units Inches mm 4 770 121 3 5 331 135 4 ENCLOSURE MOUNTING THICKNESS RANGE 0 04 0 2 1 5mm S D M 7 D te od 5 4 3 2 1 R 1 MADE N CH NA 1 EA 6MLW 0 52 15 01 MODE...

Страница 36: ...re Programming Cable Assembly to transfer projects between the PC and panel IS ED IS ED 7M17 7M17 Date code Date code 5 4 3 2 1 R01 R01 MADE IN CHINA MADE IN CHINA EA1 S6MLW ser alnumber EA1 S6MLW ser...

Страница 37: ...r Excellent Good Not Recommended or Not Usable Because the ratings are for ideal conditions at room temperature consider all factors when evaluating your application Areas left blank have not been tes...

Страница 38: ...lent Ammonium nitrate Excellent Ammonium persulfate Excellent Ammonium phosphate Excellent Ammonium sulfate Excellent Amyl acetate Not Usable Amyl alcohol Good Aniline dyes Not Recommended Animal oil...

Страница 39: ...chloride Excellent Calcium hydroxide Excellent Calcium hypochlorite 20 20 C Excellent Calcium nitrate Excellent Calcium sulfide Excellent Cane sugar liquors Excellent Carbon dioxide Excellent Carbon d...

Страница 40: ...Not Usable Cyclohexane Good Cyclohexanol Good Cyclohexanone Not Usable Not Usable Developing solutions Hypos Excellent Dibutyl phthalate DBP Not Usable Dichlorobenzene Not Usable Diethylene glycol Goo...

Страница 41: ...ommended Fluorobenzene Not Usable Fluosilicic acid Not Recommended Formaldehyde 40 20 C Good 25 20 C Excellent 50 20 C Good 90 20 C Not Recommended Freon 45 C Excellent Freon 11 Not Recommended Freon...

Страница 42: ...llent Hydrogen peroxide 5 20 C Not Recommended 5 50 20 C Not Recommended 30 20 C Not Usable Hydrogen sulfide Excellent Hydorquinone Not Recommended Hypochlorous acid Not Recommended Isobutyl alcohol G...

Страница 43: ...Methyl chloride Not Usable Not Usable Methyl ethyl ketone MEK Not Usable Methyl isobutyl ketone MIBK Not Usable Methyl methacrylate Not Usable Methyl dichloride Not Usable Methyl Salicylate Not Usabl...

Страница 44: ...Recommended Palmitic acid Excellent Perchloroethylene Not Usable Petroleum Excellent Phenol Not Usable Not Usable Phospheric acid 50 20 C Good 50 70 20 C Not Usable 75 20 C Not Usable Pickling soluti...

Страница 45: ...rbonate 10 Excellent Sodium chloride Excellent Sodium cyanide Excellent Sodium hydroxide 10 20 C Excellent Good 1 Excellent 30 20 C Excellent 30 70 20 C Not Usable 10 Not Usable Sodium hydrochlorite 5...

Страница 46: ...Usable Vapor 20 C Not Usable Sulpherous acid 10 20 C Good Tannic acid Good Tar Not Recommended Tartaric acid Excellent Terpineol Not Recommended Tetrachloroethane Not Usable Excellent Tetraethyl lead...

Страница 47: ...Programming Software 3 3 USB to RS 232 Programming Cable Assembly 3 6 20 Button Landscape Horizontal Keypad Bezel 3 8 21 Button Portrait Vertical Keypad Bezel 3 11 D SUB 15 pin 90 degree Communication...

Страница 48: ...ar screen overlay used to protect C more Micro Graphic displays from minor scratches and wear Package contains 3 clear screen overlays Micro Graphic Programming Software Programming Cable Part Number...

Страница 49: ...simulator Runs your project on your PC Test all of your screens before downloading Time savings pays for the panel PC Requirements Following are the minimum system requirements for running C more 6 M...

Страница 50: ...the value stored in up to two PLC tags over a history of up to 24 points each One point is added at each refresh The Pushbutton object is available from the Button Category of the Object List window T...

Страница 51: ...e features and defaults with data from screens in the project This helps to save time by not having to create Screen change buttons for each screen This object may be edited to various colors and size...

Страница 52: ...l programming cable from the converter s RJ12 port to the panel s RJ12 serial port The panel receives power from the USB port of the PC that it is connected to through the USB to RS 232 converter asse...

Страница 53: ...Baud Rate 115 2 kbps Maximum Input Voltage 5 VDC Supplied thru serial interface cable Power Consumption 50 mA Does not include power to panel and or bezel Accessory Cables USB Cable USB Type A plug to...

Страница 54: ...buttons It can also be used to access and navigate the screen selector feature The keypad bezel is designed for easy drop in of a C more 6 Micro Graphic panel No panel configuration is required 7 8 9...

Страница 55: ...20 to 60 C 4 to 140 F Humidity 5 to 95 RH non condensing Environmental air No corrosive gases permitted Vibration IEC60068 2 6 Test Fc 5 9 Hz 3 5 mm amplitude 9 150 Hz 1 0G sweeping at a rate of 1 oc...

Страница 56: ...supplied with the panel to secure panel to keypad bezel and compress the gasket between the panel and the keypad bezel Tighten screws to a torque of 21 28 oz in 0 15 0 2 Nm 3 Use 8 Bezel Mounting Cli...

Страница 57: ...ttons It can also be used to access and navigate the screen selector feature The keypad bezel is designed for easy drop in of a C more 6 Micro Graphic panel No panel configuration is required nter nte...

Страница 58: ...g Temperature 0 to 50 C 32 to 122 F Storage Temperature 20 to 60 C 4 to 140 F Humidity 5 to 95 RH non condensing Environmental air No corrosive gases permitted Vibration IEC60068 2 6 Test Fc 5 9 Hz 3...

Страница 59: ...EA MG6 BZ2 1 Remove Expansion Connector Protective Cover from rear of panel 2 Use the 4 Panel Mounting Clips EA MG BZ2 BRK that are supplied with the panel to secure panel to keypad bezel and compres...

Страница 60: ...on the rear of the 6 panel to allow wire terminal connections for an RS 422 RS 485 DH 485 PLC communication cable UL Recognized 3 14 Chapter 3 Accessories EA1 MG6 USER M Hardware User Manual 1st Ed Re...

Страница 61: ...96 4 0 197 5 0 0 157 4 0 EA 6 COV2 Dimensions NOTE The protective cover ships with a thin protective sheet on the face of the cover that needs to be carefully removed If your panel is not clear the p...

Страница 62: ......

Страница 63: ...4 4 INSTALLATION WIRING CH CHAPTER CHAPTER In This Chapter Safety Guidelines 4 2 Introduction 4 3 Panel Cutout Dimensions all models 4 4 Wiring Guidelines 4 5...

Страница 64: ...for the proper installation and use of your equipment Plan for Safety The best way to provide a safe operating environment is to make personnel and equipment safety part of the planning process You s...

Страница 65: ...enience The C more 6 Micro Graphic panels include four mounting clips They are fitted to the panel by inserting two tabs into mating slots on the panel and then sliding the clip into a narrower slot t...

Страница 66: ...ar of the panel to keep it in place Next tighten the mounting clip screws to pull the rear of the panel s bezel to the control cabinet s mounting surface The screws need to be tightened to the torque...

Страница 67: ...isions of the product Providing Power to the C more 6 Micro Graphic Panel Power can be supplied to the C more Micro Graphic panel in one of three different ways 1 The C more 6 Micro Graphic panel is p...

Страница 68: ...next page 4 6 Chapter 4 Installation and Wiring 4 EA1 MG6 USER M Hardware User Manual 1st Ed Rev C 09 10 Power Supplied to Panel through Cable from CLICK and DirectLogic PLC RJ12 port DL05 DL105 DL20...

Страница 69: ...al 12 24 VDC power source when the panel is installed in its application Cable wiring example when power is supplied to panel from an external DC Power Adapter To PLC Port Connector To C more Micro Gr...

Страница 70: ......

Страница 71: ...etting Menu 5 7 LCD Contrast 5 7 Backlight Model EA1 S6ML 5 8 Backlight Model EA1 S6MLW 5 9 Beep 5 10 Calibration 5 11 Clear User Memory 5 12 Reset to Factory Default 5 12 Hourglass 5 13 Rotation 5 14...

Страница 72: ...or the firmware and boot loader Setting This is the area for adjusting the contrast of the display selecting one of the five backlight colors red amber yellow lime or green for EA1 S6ML or white pink1...

Страница 73: ...l be displayed as shown at the bottom of this page Press both the F1 and F5 function keys simultaneously for 3 seconds to bring up the System Setup Screens Setup Menu C more 6 Micro Graphic Panel BAK...

Страница 74: ...3 Beep pg 5 10 4 Calibration pg 5 11 5 Clear User Memory pg 5 12 1 Serial Port1 Loop Back Test pg 5 15 2 Serial Port2 Loop Back Test pg 5 16 3 PLC Enquiry Test pg 5 17 Do you want to exit from System...

Страница 75: ...Pressing ENT F5 with Setting highlighted will take you to the Setting menu screen See page 5 7 Pressing ENT F5 with Test Menu highlighted will take you to the Test Menu screen See page 5 15 Pressing E...

Страница 76: ...Version 2 0 or later is required with models EA1 S6ML and EA1 S6MLW Available for free download at www automationdirect com 5 6 Chapter 5 System Setup Screens 5 EA1 MG6 USER M Hardware User Manual 1s...

Страница 77: ...3 Rotation page 5 14 Setting LCD Contrast With LCD Contrast highlighted press ENT F5 to bring up the screen showing the current value The default is 8 The contrast can be adjusted between 1 and 16 wit...

Страница 78: ...r color is choosen from the System Setup Screens Backlight color selection screen The selected color is displayed only when in the System Setup Screens 5 8 Chapter 5 System Setup Screens 5 EA1 MG6 USE...

Страница 79: ...re are the various backlight colors Note Loading a project to the panel will override whatever color is choosen from the System Setup Screens Backlight color selection screen The selected color is dis...

Страница 80: ...on off selection screen The Beep on off choice can be changed through the System Setup Screens after a project is loaded Note When the panel is powered through Port1 from a connected PLC or PC the be...

Страница 81: ...alibration procedure or allow you to retry If the points that were touched are not within the calibration tolerance you will be returned to the first calibration screen and will need to start over ENT...

Страница 82: ...E User memory is cleared when factory defaults are reset Use the C more Micro Graphic programming software to read the program from the panel iand save a backup copy 5 12 Chapter 5 System Setup Screen...

Страница 83: ...function key to apply the selection Explanation An hourglass icon is displayed on the panel anytime a new screen is being loaded until communication is established with the new screen If communication...

Страница 84: ...n the portrait vertical and landscape horizontal orientation Use the APL F5 function button to apply the selection Note Loading a project to the panel will override the orientation choosen from the Sy...

Страница 85: ...tructed as shown here and press ENT F5 to start the test If the test is passing the Receive Counts will equal the Bytes Sent If the serial port is not working then the Error Counts will equal the Byte...

Страница 86: ...ght The test will continue until the BAK F1 key is pressed 1 15 15 pin D sub male 2 3 TXD RXD 7 8 CTS RTS RS 232 Loop back Connector Wiring Diagram 1 15 15 pin D sub male 7 8 CTS RTS 9 11 RXD TXD 10 1...

Страница 87: ...e is not selectable The beeper function can not be turned on or off from this screen refer to the Setting menu Note When the panel is powered through Port1 from a connected PLC or PC the beep will not...

Страница 88: ...press ENT F5 to bring up the screen shown to the left You will be given the choice to either proceed with exiting the System Setup Screens by pressing F5 for YES or allowed to cancel by pressing F1 fo...

Страница 89: ...d Connection Charts 6 6 AutomationDirect CLICK PLC 6 6 Direct LOGIC PLCs RS 422A RS 485A 6 7 Allen Bradley 6 7 GE Mitsubishi Omron Modicon and Siemens 6 7 How to use the PLC Compatibility and Connecti...

Страница 90: ...MicroLogix 1000 1100 1200 1500 15 pin D sub 8 pin DIN EA SLC 232 CBL connects to AB SLC 5 03 04 05 ControlLogix CompactLogix FlexLogix 15 pin D sub 9 pin Dshell female EA PLC5 232 CBL connects to AB...

Страница 91: ...ontact our technical support group at 770 844 4200 6 3 Chapter 6 PLC Communications 6 EA1 MG6 USER M Hardware User Manual 1st Ed Rev C 09 10 Available PLC Protocols PLC Drivers Serial port1 or port2 S...

Страница 92: ...Ed Rev C 09 10 Port 2 Port 2 Panel to DirectLOGIC VGA 15 pin port serial cable p n EA 2CBL 1 DL06 PLC C more 6 Inch Micro Graphic Panel Example of panel s Port2 connected to a DL06 PLC Port 1 Port 2...

Страница 93: ...te code Date code 5 4 3 2 1 R01 R01 MADE N CH NA MADE N CH NA EA1 S6MLW ser alnumber EA1 S6MLW ser alnumber MODEL EA1 S6MLW MODEL EA1 S6MLW INPUT12 24V 6 5W INPUT12 24V 6 5W NDCONTEQ NDCONTEQ 6 5 4 3...

Страница 94: ...PLC port and panel port The charts list the recommended cables and or manufactured devices that can be used to make up the communications link and also refers to wiring diagrams that can be used to co...

Страница 95: ...o enable the built in 120 Ohm Termination Resistor jumper pin 13 termination resistor to pin 9 RXD on the C more 15 pin PLC communications port Allen Bradley As stated in this chapter s introduction t...

Страница 96: ...bling Components Required for Specific Port and Protocol being used PLC Port Powered or External DC Power Supply External DC Power Supply Using panel s RJ12 Port1 Using panel s Port2 DB 15 pin female...

Страница 97: ...pin D0 DCM Port 1 RJ12 6 pin K sequence DirectNET Modbus RTU DV 1000CBL RS 232 K sequence DirectNET Modbus RTU EA 2CBL RS 232 Port 2 DB15HD female DV 1000CBL FA 15HD RS 232 EA 2CBL 1 RS 232 See Diagra...

Страница 98: ...RS 232 Port 2 RJ12 6 pin K sequence DirectNET K sequence DirectNET D2 250 1 Port 1 RJ12 6 pin K sequence DirectNET Modbus RTU DV 1000CBL RS 232 K sequence DirectNET Modbus RTU EA 2CBL RS 232 Port 2 D...

Страница 99: ...DB 25 pin female Not Possible DirectNET See Diagram 6 RS 422 D3 340 Port 1 RJ11 4 pin DirectNET OP 3CBL 1 RS 232 DirectNET EA 3CBL RS 232 Port 2 RJ11 4 pin DirectNET Modbus RTU DirectNET Modbus RTU D3...

Страница 100: ...D4 440 Port 0 DB 15 pin female K sequence D4 1000CBL or DV 1000CBL FA CABKIT RS 232 K sequence EA 4CBL 1 RS 232 Port 1 DB 25 pin female K sequence DirectNET DV 1000CBL FA CABKIT RS 232 K sequence Dire...

Страница 101: ...IX CBL RS 232 RJ45 8 pin phone plug DH485 AIC AIC EA DH485 CBL RS 232 Allen Bradley SLC500 5 03 5 04 5 05 9 pin D sub port DF1 Full Duplex DF1 Half Duplex EA SLC 232 CBL RS 232 5 01 5 02 5 03 RJ45 8 p...

Страница 102: ...GE 90 30 90 70 15 pin D sub port Not Possible SNPX EA 90 30 CBL RS 422 Micro 90 VersaMax Micro RJ45 Port 1 See Diagram 12 RS 232 15 pin D sub port Port 2 EA 90 30 CBL RS 422 Mitsubishi Melsec FX Seri...

Страница 103: ...LC 232 CBL Allen Bradley PLC 5 DF1 port RS 232C EA PLC5 232 CBL Allen Bradley MicroLogix SLC 5 01 02 03 PLC5 DH485 port RS 232C EA DH485 CBL GE 90 30 90 70 Micro 90 Versamax Micro Port2 15 pin D sub p...

Страница 104: ...s from AutomationDirect cont d Part No D4 1000CBL Part No FA 15HD Part No FA CABKIT Part No DV 1000CBL Part No OP 3CBL 1 Part No EA MLOGIX CBL Part No EA SLC 232 CBL Part No EA PLC5 232 CBL Part No EA...

Страница 105: ...15 do not use 14 do not use 13 do not use 12 do not use 11 do not use 10 do not use 9 do not use 1 15 1 Sig GND 2 do not use 3 RXD 4 TXD 5 do not use 6 do not use 15 pin D sub male 1 2 3 4 5 6 3 1 TXD...

Страница 106: ...GND 12 do not use 11 do not use 10 do not use 9 do not use 1 15 15 pin D sub male 15 1 7 8 GND GND GND YOP CTS YOM See PLC user manual for pin out details To C more Micro Graphic Serial Port2 EA 4CBL...

Страница 107: ...sub male 3 7 TXD RXD GND 3 2 5 1 RXD TXD shield 25 pin D sub male Wiring Diagram Note Use the above wiring diagram if you need to make your own cable We recommend using 22 AWG shielded cable 4 RTS 5 C...

Страница 108: ...C more Micro Graphic Serial Port1 DirectLogic DL405 PLC Port 0 DL 450 Port 0 RS 232C p n D4 1000CBL To DL405 PLC Port 0 6 4 15 3 Wiring Diagram 3 2 1 14 1 2 3 4 5 6 RJ12 6 pin Phone Plug 6P6C 1 GND 2...

Страница 109: ...not use 1 15 15 pin D sub male 2 5 TXD RXD GND 3 2 5 1 RXD TXD shield 9 pin D sub female Wiring Diagram Note Use the above wiring diagram if you need to make your own cable We recommend using 22 AWG...

Страница 110: ...te The LE signal is wired in the cable as shown but not required for point to point communications To C more Micro Graphic Serial Port2 DH 485 Peripheral CPU J1 Power Allen Bradley SLC 500 Modular PLC...

Страница 111: ...ey DH485 AIC network using the AB AIC Advanced Interface Converter p n 1761 NET AIC Select the Allen Bradly DH485 AIC SLC500 MircroLogix driver in the C more Micro Programming Software when starting t...

Страница 112: ...ot use 13 Termination 12 SD RS422 11 SD RS422 10 RD RS422 9 RD RS422 1 15 15 pin D sub male 4 GND To C more Micro Graphic Serial Port2 EA MITSU CBL 6 24 Chapter 6 PLC Communications 6 EA1 MG6 USER M H...

Страница 113: ...ro Graphic Serial Port2 EA MITSU CBL 1 EA1 MG6 USER M Hardware User Manual 1st Ed Rev C 09 10 Omron Host Link C200 Adapter C500 RS 232C p n EA OMRON CBL 8 do not use 7 do not use 6 do not use 5 Logic...

Страница 114: ...15 To C more Micro Graphic Serial Port2 DirectLOGIC DL06 D2 260 both Port 2 RS 485A To PLC 15 Pin Port Wiring Diagram Note Use the above wiring diagram to make your own cable We recommend Belden 9842...

Страница 115: ...and D3 350 Port 2 all RS 422A To PLC 25 Pin Port 25 pin D sub male Wiring Diagram Note Use the above wiring diagram to make your own cable We recommend Belden 8103 shielded cable or equivalent 1 25 25...

Страница 116: ...o C more Micro Graphic Serial Port2 DirectLOGIC D2 DCM D3 DCM D4 DCM RS 422A To PLC 25 Pin Port 25 pin D sub male Wiring Diagram Note Use the above wiring diagram to make your own cable We recommend B...

Страница 117: ...9 1 do not use 2 TXD 3 RXD 4 RTS 5 CTS 6 do not use 7 do not use 8 do not use 9 Signal GND RTS CTS 4 5 To C more Micro Graphic Serial Port2 Omron Host Link CQM1 using CQM1 CIF02 Peripheral Port Conne...

Страница 118: ...1 do not use 2 RXD 3 TXD 4 DTR 5 Signal GND 6 DSR 7 RTS 8 CTS 9 do not use 4 DTR 6 DSR 7 RTS 8 CTS To C more Micro Graphic Serial Port2 User Constructed AEG Modicon Micro Series 110 CPU 311 xx 110 CPU...

Страница 119: ...nd using 22 AWG shielded cable 6 RTS 7 CTS 1 do not use 2 do not use 3 TXD 4 RXD 5 Logic GND 6 RTS 7 CTS 8 do not use RJ45 8 pin Phone Plug 8P8C To C more Micro Graphic Serial Port2 User Constructed G...

Страница 120: ...RD RS485 9 RD RS485 1 15 15 pin D sub male 9 pin D sub male 1 9 1 Logic Com 2 Logic Com 3 RS485 Sig B 4 do not use 5 Logic Com 6 5 VDC 7 24 VDC 8 RS485 Sig A 9 do not use To C more Micro Graphic Seri...

Страница 121: ...adley PLC5 DF1 RS 422 8 do not use 7 do not use 6 do not use 5 Logic GND 4 do not use 3 do not use 2 do not use 1 Frame GND To PLC 25 Pin Port 2 15 do not use 14 do not use 13 do not use 12 SD 11 SD 1...

Страница 122: ...e 8 do not use 7 Sig GND 6 RXD 5 do not use 4 do not use 3 do not use 2 do not use 1 do not use 15 CTS 14 CTS 13 RXD 12 RTS 11 RTS 10 TXD 9 TXD 1 6 15 7 RTS CTS CTS RTS RXD RXD TXD TXD GND 10 9 6 13 1...

Страница 123: ...do not use 5 Logic GND 4 do not use 3 do not use 2 do not use 1 Frame GND 15 do not use 14 do not use 13 Termination 12 SD RS422 11 SD RS422 10 RD RS422 9 RD RS422 1 15 15 pin D sub male DirectLOGIC D...

Страница 124: ...15 pin HD D sub male 8 do not use 7 Sig GND 6 RXD 5 do not use 4 do not use 3 do not use 2 do not use 1 do not use 15 CTS 14 CTS 13 RXD 12 RTS 11 RTS 10 TXD 9 TXD 1 6 15 7 RTS CTS CTS RTS RXD TXD RXD...

Страница 125: ...D RXD TXD RXD Signal GND HD High Density 15 pin HD D sub male 8 do not use 7 Sig GND 6 RXD 5 do not use 4 do not use 3 do not use 2 do not use 1 do not use 15 CTS 14 CTS 13 RXD 12 RTS 11 RTS 10 TXD 9...

Страница 126: ......

Страница 127: ...rating Voltage 7 2 Check Transmit and Receive Indicators 7 3 Check Physical Conditions 7 3 Run Tests under the System Setup Screens 7 4 Check Settings under the System Setup Screens 7 5 Cleaning the D...

Страница 128: ...s and gasses Check Operating Voltage Check the input voltage that is powering the C more Micro Graphic panel to make sure it is within the appropriate range 5 VDC If the panel is being powered with 5...

Страница 129: ...ere are any signs of deterioration or if there is any evidence that moisture liquids have penetrated to the inside of the enclosure where the panel is mounted Information on replacement gaskets can be...

Страница 130: ...nected PLC Is used with both Port1 and Port2 Buzzer Test Use this option to test the internal audible beeper of the panel Touch Panel Test Tests the response of the touch screen area to contact This t...

Страница 131: ...ng the Display Screen The display screen should be cleaned periodically by wiping it with a lint free damp cloth using a mild soap solution Dry the surface when finished with a lint free cloth Do not...

Страница 132: ...ow is a good time to also check these aids Checks from the C more Micro Graphic Programming Software If you have a PC available with the C more Micro Graphic Programming Software EA MG PGMSW installed...

Страница 133: ...Notes 7 7 Chapter 7 Maintenance 7 EA1 MG6 USER M Hardware User Manual 1st Ed Rev C 09 10...

Страница 134: ......

Страница 135: ...8 2 Display is Dim 8 3 No User Program 8 3 Lost Firmware Red Update Mode Screen Displayed 8 4 Updating Firmware 8 4 No Communications between Panel and PC Personal Computer 8 5 No Communications betwe...

Страница 136: ...unicating with the PLC The LED indicators should be on or flashing at a fast rate Indicator activity shows that the panel is communicating with the PLC If there is communication activity but the displ...

Страница 137: ...ontrast should become greater as the value moves toward 16 and it should become less as the value moves toward 1 If this does not happen then the panel may need to be replaced See note above LCD Contr...

Страница 138: ...re is still a problem call Tech Support 770 844 4200 Updating Firmware The panel firmware version must match both the programming software version and the version that the program was saved as If a ve...

Страница 139: ...ultaneously for three seconds to enter the setup screen 2 Cable not connected Double check the programming cable asembly to make sure the panel is correctly connected to the USB port on the PC No comm...

Страница 140: ...anel uses a USB driver called Koyo USB Serial Comm Port COM4 is the USB port used in this example If you cannot find the Koyo USB Serial Comm Port under Ports COM LBT in Device Manager the USB driver...

Страница 141: ...t is selected Verify that the correct PLC protocol is selected and properly configured The cable is bad and needs to be replaced Try a proven cable Test panel serial port See Chapter 5 Serial Port Loo...

Страница 142: ...LC generated errors are interpreted by the C more Micro Graphic programming software and are displayed across the top of the panel s display embedded as a hexadecimal value in error code P499 If a C m...

Страница 143: ...ive 8 9 Chapter 8 Troubleshooting 8 EA1 MG6 USER M Hardware User Manual 1st Ed Rev C 09 10 Micro Graphic Panel Errors Error Code Error Message Possible Solutions R001 PC software tool Timeout Check ca...

Страница 144: ...to noise than the other wires in your system Review Chapter 4 Installation Wiring if you have questions regarding how to ground the touch panel Electrical noise can enter the system through the power...

Страница 145: ...9 9 REPLACEMENT PARTS CH CHAPTER CHAPTER In This Chapter Replacement Parts Overview 9 2 Replacement Parts 9 2 Customizing the Function Keys Insert Label 9 3...

Страница 146: ...Replacement mounting gasket for C more 6 Micro Graphic keypad bezels EA MG BZ2 P EA MG S6ML FKL Replacement function key label insert for C more 6 Micro Graphic panels pk of 5 3 blank 1 F1 F5 for land...

Страница 147: ...mm 0 282 7 15 0 709 18 0 Typical Step 1 Remove existing function key label insert using a small tool such as jeweler s screw driver Step 2 Remove the protective film from the blank key label insert S...

Страница 148: ......

Страница 149: ...ror Codes A 5 Allen Bradley Error Code P499 Explanation A 6 Allen Bradley DF1 Protocol PLC Error Code Tables A 7 Allen Bradley DH485 Protocol PLC Error Code Tables A 9 GE Error Code P499 Explanation A...

Страница 150: ...e C more Micro Graphic panel also monitors any errors that are generated by the PLC that is connected to it If any of the PLC generated errors are detected they are displayed across the top of the pan...

Страница 151: ...Check CRC control code in the communications packet received from the PLC This is an indication that the data in the packet is corrupted P008 Address NotMatch The address value returned in the data pa...

Страница 152: ...LC protocol layer PLC Error Codes Modbus Protocols Panel Error Code Name Meaning 0x0001 ILLEGAL FUNCTION The function code received in the query is not an allowable action for the server or slave This...

Страница 153: ...tLOGIC PLC when using the K Sequence protocol Note The following errors can be generated from the designated PLC are monitored by the C more Micro Graphic panel and displayed on the panel s screen as...

Страница 154: ...09 10 A A 1 1 1 0 1 0 0 0 0 0 0 0 1 1 1 1 Local 0 3 bits Remote 4 7 bits EXT STS byte 1 7 F 0 hex P499 Error Code Message Displayed Hexadecimal Value AB DF1 Protocol Error Code P499 Breakdown 16 bit W...

Страница 155: ...ion 0x0 Success no error 0x1 DST node is out of buffer space 0x2 Cannot guarantee delivery link layer The remote node specified does not ACK command 0x3 Duplicate token holder detected 0x4 Local port...

Страница 156: ...ndition cannot be generated resource is not available 0xD Condition already exists resource is readily available 0xE Command cannot be executed 0xF Histogram overflow 0x10 No access 0x11 Illegal data...

Страница 157: ...ecified does not ACK command 0x3 Duplicate token holder detected 0x4 Local port is disconnected 0x5 Application layer timed out waiting for response 0x6 Duplicate node detected 0x7 Station is offline...

Страница 158: ...ned 0xB Access denied privilege violation 0xC Resource not available or cannot do 0xE CMD cannot be executed 0x12 Invalid parameter 0x14 Failure during processing 0x19 Duplicate label 0x1A File open b...

Страница 159: ...e can be looked up in the specific PLC s error tables to determine the cause of the error The possible PLC generated error codes for the GE 90 30 90 70 Micro 90 and VersaMax Micro SNPX communication p...

Страница 160: ...he requested service is either not defined or not supported This value is returned in lieu of the actual 01h value passed in the SNP error message to avoid confusion with the normal successful COMMREQ...

Страница 161: ...s unable to transmit the modem autodial output from the serial port May be due to missing CTS signal when the CMM is configured to use hardware flow control PLC Error 0x040F Invalid slave memory addre...

Страница 162: ...ted command Check the modem command string and modem The modem response is expected to be either CONNECT or OK 0x0C0C COMMREQ Data Block Length is too small When expected COMMREQ length is 6 words or...

Страница 163: ...o If this request will be followed with a buffer message more than 2 byte the Next Message Type must be 54h T and the Next Message Length must specify the length of the X Buffer message Valid X Buffer...

Страница 164: ...he COMMREQ did not complete within the configured time interval 0x330C An SNP Request or Response was aborted prior to completion due to reception of a Break 0x340C PLC backplane communications error...

Страница 165: ...the Establish Datagram COMMREQ command The datagram has been partially established but is not usable the datagram should be cancelled by using the Datagram ID returned by the COMMREQ 0x430F The SNP X...

Страница 166: ...nse message 0x600F A parity error has occurred in a received X Request message 0x610C A framing or overrun error has occurred on an X Response message 0x610F A framing or overrun error has occurred in...

Страница 167: ...ot be enabled or disabled 0xC805 Password s already enabled and can not be forced inactive 0xC905 Login using non zero buffer size required for block commands 0xCA05 Device is write protected 0xCB05 A...

Страница 168: ...d 0xEC05 Task unable to be created 0xED05 VME bus error encountered 0xEE05 Could not return block sizes 0xEF05 Programmer is already attached 0xF005 Request only valid in stop mode 0xF105 Request only...

Страница 169: ...e according to size request in header 0x4006 Serial communications could not be initialized 0x4008 CPU busy or buffer full 0x4010 Request cannot be serviced while CPU is running CPU must be stopped 0x...

Страница 170: ...g executed 0x408B The remote request cannot be performed 0x40A0 A block number out of range was specified 0x40A1 The number of blocks requested exceeds the range of the PLC 0x40A2 A step number was sp...

Страница 171: ...essage This value can be looked up in the specific PLC s error tables to determine the cause of the error The possible PLC generated error codes for the Omron Host Link communication protocols breakdo...

Страница 172: ...r 0x12 Overrun 0x13 FCS error 0x14 Format error parameter length error 0x15 Entry number data error parameter error data code error data length error 0x16 Instruction not found 0x18 Frame length error...

Страница 173: ...k 0x0202 Destination Node Error Unit Missing 0x0203 Destination Node Error Third Node missing 0x0204 Destination Node Error Destination Node busy 0x0205 Destination Node Error Response Timeout 0x0301...

Страница 174: ...sing 0x2106 Write Not Possible File missing 0x2107 Write Not Possible File name already exists 0x2108 Write Not Possible Cannot change 0x2201 Not executable in current mode Not possible during executi...

Страница 175: ...nd Error No protection 0x2602 Command Error Incorrect password 0x2604 Command Error Protected 0x2605 Command Error Service already executing 0x2606 Command Error Service stopped 0x2607 Command Error N...

Страница 176: ...ommunication protocols breakdown into a four digit hexadecimal value as shown in the following diagram Siemens Error Code P499 Message Example 0 1 1 0 0 0 0 0 0 0 0 0 0 0 6 0 0 hex P499 Error Code Mes...

Страница 177: ...s not allowed 0x8104 Function not supported 0x8105 Address invalid 0x8106 Data Type not supported 0x8107 Data Type is not consistent with size 0x810A Object does not exist 0x8500 PDU Size is incorrect...

Страница 178: ......

Страница 179: ...B B C MORE MICRO GRAPHIC PANEL RUNTIME ERRORS AP APPENDIX APPENDIX In This Appendix Introduction B 2 Panel Errors B 2...

Страница 180: ...Solutions R001 PC software tool Timeout Check cables and connections Cycle power at the panel See Chapter 8 for Electrical Noise Problems Check the area for sources of noise electrical motors transfo...

Страница 181: ...ore Micro Graphic Panel Runtime Errors 8 9 C more Micro Graphic Programming Software 3 3 Cables 6 15 Cables from AutomationDirect 6 15 Wiring Diagrams 6 17 6 18 6 19 6 20 6 21 6 22 6 23 6 24 6 25 User...

Страница 182: ...4 Entivity Modbus RTU A 4 Modicon Modbus RTU A 4 Omron A 23 Siemens A 28 Exit Menu item 5 18 F Function Keys Insert Label 9 3 Customizing 9 3 I Installation 4 3 Introduction 1 2 K Keypad Bezel 20 But...

Страница 183: ...r the System Setup Screens 7 4 Mounting Clip Screw Torque 2 5 Mounting Clips 4 3 P Panel PLC Error Code Tables A 2 Allen Bradley DF1 Protocol A 7 A 8 Allen Bradley DH485 Protocol A 9 A 10 C more Micro...

Страница 184: ...3 4 Numeric Entry 3 4 Pushbutton 3 4 Real Time Graph 3 4 Recipe 3 5 Rectangle 3 4 Screen Change Pushbutton 3 5 Screen Selector 3 5 Scroll Text 3 5 Static Bitmap 3 4 Static Text 3 5 Switch 3 4 Part Num...

Страница 185: ...stall C more Micro Graphic Panel 1 9 Step 5 Install the Programming Software and Develop a Project 1 11 Step 6 Connect C more 6 Micro Graphic Panel to Computer 1 12 Step 7 Providing Power to the C mor...

Страница 186: ...on 5 14 Setup Menu 5 5 Information Menu 5 6 Extensions 5 6 Memory 5 6 Protocol 5 6 Versions 5 6 Specifications 2 3 System Setup Screens 5 2 Accessing 5 3 Flowchart 5 4 Information 5 2 Introduction 5 2...

Страница 187: ...Problems 8 10 No Communications between Panel and PC 8 5 No Communications between Panel and PLC 8 7 No User Program 8 3 PLC Protocol Error Codes 8 8 PLC Protocol Error Example 8 8 U Updating Firmware...

Страница 188: ......

Страница 189: ......

Отзывы: