18
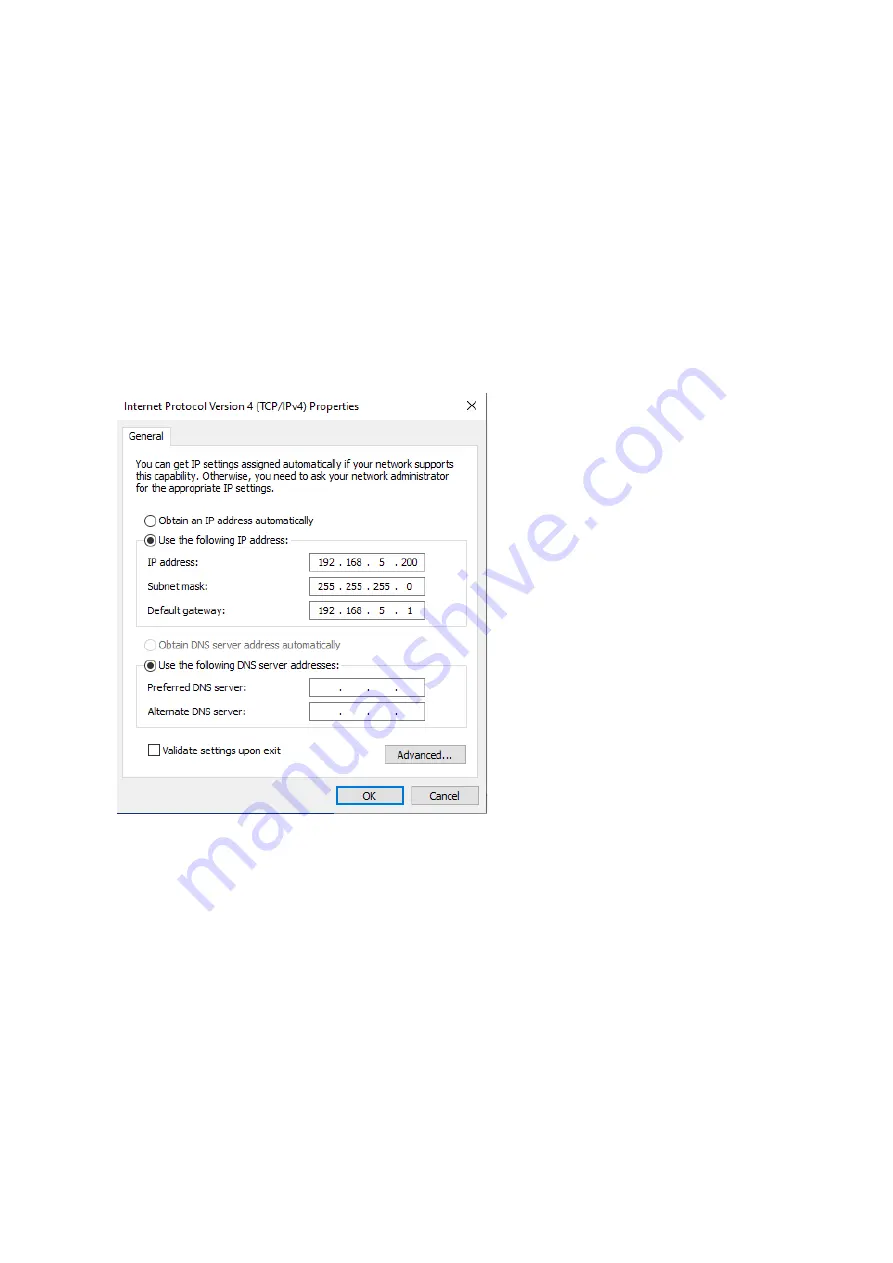
For the following steps refer to the diagram below.
Click on the bubble for “
Use the following IP address
”
In the
IP address
field enter a non-conflicting IP address on the same subnet as the camera. If there is another device with the same
IP address you will not be able to connect. In the example below we are using 192.168.5.200
In the
Subnet mask
field enter 255.255.255.0
In the
Default gateway
field type 192.168.5.1
You can leave the DNS fields blank.
Click
OK
to apply your settings.
NOTE:
When you are finished configuring the camera you will need to return to this screen and click the bubbles for “
Obtain an IP
address automatically
” and “
Obtain DNS server automatically
” to restore internet connectivity to your computer. Also make sure
to reconnect any ethernet cables you may have unplugged.
4.2 Web Browser Login
4.2.1 Web client
1) Web client Log In
Enter 192.168.5.163 in the address bar of your internet browser and click Enter. If logged in as administrator (Default
Username/Password: admin), users can preview and configure in the Web Client. If logged in as a normal user (Default
Username/Password:user1 or user2), users can only preview with no options for configuration.
2)Download/Install Plug in
The first time you connect to the camera you will receive a prompt to allow the Flash player to run. This is required to display the
image in your web browser.
Содержание BG-ND-20XHSRP
Страница 1: ...BG ND 20XHSRP BG ND 30XHSRP HD Color Video Camera User Manual...
Страница 7: ...1 2 Ceiling mount guide...
Страница 8: ...2 2 Product overview 2 1 Product Introduction...


