background image

8

9

Using The Flash

Using The Macro Focus and Self Timer

The default setting is “Auto Flash” when the camera is turned on, meaning the flash will fire only if needed, in low 
light conditions. Pressing the right button on the 4-way keypad 

 will select other options: Red-Eye Reduction 

 (short pre-flash to reduce pupil size for portraits ), Flash On 

 (forces flash to fire in bright conditions-good 

for filling in shadows on a person’s face with the sun behind them), and Flash Off 

 (will not fire in any light 

conditions-useful in museums or theatres where flash is prohibited.) The icon corresponding to the current flash 
setting is displayed on the LCD (see “LCD Display Icons”). NOTE: When on “normal”  Auto Flash, no icon will be 
seen. After taking a flash photo, there will be a  delay of several seconds before the next  photo may be taken, while 
the flash circuits are recharging, . 

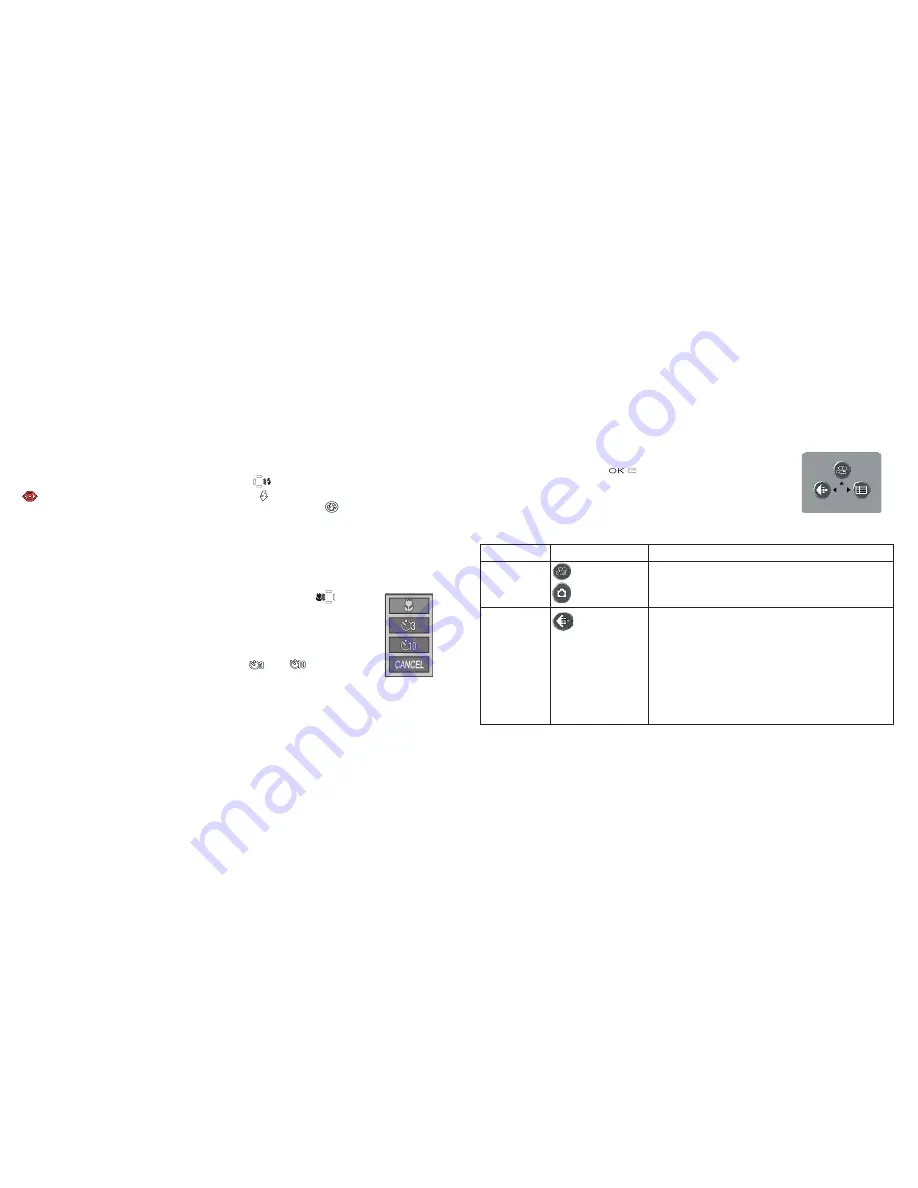
      Macro  focus  allow  you  to  photograph  close  up  subjects  in  a  range  from  approx.  4”  to  24”  
(10-60cm). To set the camera to macro focus mode, press the left keypad button. 

 The macro/

timer menu will be displayed on the LCD. With the macro (flower) icon highlighted, press “OK” to 
select it. The macro icon will be seen on the preview LCD. Be sure to hold the camera steady and wait 
for the autofocus light when taking photos in macro mode. To return to normal focus range, press the 
left key button, select macro again and press OK. 
    Once  in  the  macro/timer  menu,  pressing  the  down  keypad  button  will  highlight  the  self  timer  
options, which allow you to include yourself in a photo, with 3

 or 10

 second delays avail-

able. Press OK with the desired time selected. With the camera set up on a tripod or sturdy level 
surface, press the shutter release-the shutter will snap at the end of the time. The timer is also useful 
for avoiding shaking the camera when taking night scene photos, as the camera will operate at slower 
shutter speeds. To return to normal shutter operation, press the left key button, select the current timer, 
and press OK. 
            Press Cancel while in the macro/timer menu to exit it without making a selection.

Macro/

Timer 

Menu

Using The Top Menu

Pressing the OK/Menu button 

 below the arrow pad will display the 

top menu selections on the LCD. There are 2 “Shortcut” menus, which allow 
you to quickly change the photo size/quality or switch to movie mode, and a 
Mode menu containing multiple settings arranged in groups or “tabs.” Press 
the keypad button in the same direction of the icon for each menu to enter it. 
The menus and their functions are :

Menu

Icon

Action

Movie Mode/
Still Photo 
Mode


from photo mode 


from movie mode

Switches  from  still  photo  to  movie  mode  for  recording 
video clips (avi format). Press the “up” arrow key again to 
return from movie mode to still photos.

Image Size  & 
Quality 

Image  (file)  Size  can  be  set  from  2048x1536  down  to 
800x600 pixels in 5 steps. Larger image sizes provide higher 
resolution (sharpness) but use more storage memory. Image 
Quality can be set to “FQ” (fine quality), “NQ” (normal) 
or  “EQ”  (economy). This  affects  the  amount  of  .jpg  file 
compression, with FQ being the least compression/highest 
quality/largest  file. The  smaller  size/lower  quality  settings 
will use less memory , if you know you will only make small 
prints or email your photos.  

Menu Selection 

Display

Note: only the first # is 
shown in the size menu:

2048

 x 1536

1600

 x 1280

1280

 x 960

1024

 x 768

800

 x 600

Содержание 11-0013G

Страница 1: ...Instruction Manual Model 11 0013G 11 0013Y LIT 98 0494 10 04 OUTDOOR DIGITAL CAMERA ...

Страница 2: ...CONTENTS ENGLISH 1 FRANÇAIS 25 ESPAÑOL 49 DEUTSCH 72 ITALIANO 97 PORTUGUÊS 121 ...

Страница 3: ... its auto flash and close focus capabillity it will also deliver great photos indoors as well Before using the camera please read the instructions contained in this manual and take time to familiarize yourself with the camera s operation and many great features Please note that although the camera is weatherproof JIS Grade 4 water resistance it should not be used underwater submerged or washed with...

Страница 4: ...SHNELL OUTDOOR DIGITAL CAMERA 11 0013G Y 5 Take A Photo Press the shutter release button halfway down to set the autofocus green AF light comes on then fully down when you are ready to take the photo The frame marks in the center of the LCD show the area used to set focus For off centered subjects place this frame over the main subject press the shutter button until the AF light is on continue to ...

Страница 5: ...play Icons Indicator Icons 6 Date Display 2004 06 20 7 Image Quality compression FQ NQ EQ 8 Image Size resolution 2048x1536 1600x1200 1280x960 1024x768 800x600 9 Digital Zoom Bar 10 Self Timer 11 Macro 12 Sequence Shot 3 frames 13 Movie Mode 14 White Balance 15 Meter Pattern Center Average 16 ISO Setting AUTO ISO100 ISO200 ISO400 17 Exposure Value EV 2 2 18 Auto Focus Area Indicator Indicator Icon...

Страница 6: ...he AF marks 2 When focus is complete the green AF light by the viewfinder comes on and the AF marks on the LCD will change from red to green you can snap a photo while the marks are still red but it may not be sharp For off center subjects set focus with AF area centered on the subject then move the camera as desired while continuing to hold the shutter release halfway Press the release down all th...

Страница 7: ...with the desired time selected With the camera set up on a tripod or sturdy level surface press the shutter release the shutter will snap at the end of the time The timer is also useful for avoiding shaking the camera when taking night scene photos as the camera will operate at slower shutter speeds To return to normal shutter operation press the left key button select the current timer and press ...

Страница 8: ...n until you return to the normal display The Mode Menu groups and the item settings submenus within each are arranged in the following order default settings are in bold Inside the Mode Menu Groups Items Settings Group Item Settings Description 1 Exposure Scene P Program Standard auto exposure for normal photos Landscape Deeper zone of focus for extended sharpness from foreground to background Por...

Страница 9: ...Settings Description 3 Set Language English Spanish French Deutsch Ital ian Portuguese Selects the language displayed in all menus Rec View Off 1 2 or 3 Sec Sets duration of photo review display after a photo is taken File Name Reset or Series File numbering for new photos after deleting all starts over at 1 Reset or continues to advance from last used Series LCD Brightness Set to any of 7 levels ...

Страница 10: ...the photos to your PC first When you are done review ing your photos press and hold the Quick View button to return to the live preview display Review Menus After pressing the Quick View button to enter Review mode pressing the OK Menu button will enter the review set of menus These operate in the same way previously described in the still photo mode menu instructions use the arrow pad keys to navi...

Страница 11: ...you are finished shoot ing videos Press OK for the top menu then the up button still camera icon to return to normal photo mode Please note the following menu feature option differences for Movie mode vs Photo mode Movie Mode Operation and Menus continued In movie mode all features and menu options are identical to those in normal still photo mode with these exceptions No scene preset options are a...

Страница 12: ...side they have the prefix BUSH__ followed by a number same as seen earlier on the camera s display when you review photos Single clicking any file should show a small preview image 5 Click Edit Select All or click on one photo contol click to select multiple photos then Edit Copy to Folder in Windows menus Select an existing folder on your hard drive such as My Pictures or create a new folder 2004 V...

Страница 13: ... the brightness contrast sharpness and color of your photos you can resize the photo to fit the paper if you are printing or save a smaller low or medium resolution file for email or inserting into documents When you are ready to save your edited file you may want to use Save As and give it a more descriptive name than BUSH0001 Doing this also preserves the original file as a backup to reopen and re e...

Страница 14: ...RASSE 4 D 50769 KÖLN GERMANY Tél 49 0 221 709 939 3 Fax 49 0 221 709 939 8 This warranty gives you specific legal rights You may have other rights which vary from country to country 2004 Bushnell Performance Optics FCC Note This equipment has been tested and found to comply with the limits for a Class B digital device pursuant to Part 15 of the FCC Rules These limits are designed to provide reasona...

Страница 15: ...24 ...

Отзывы: