background image

35

For any help concerning set up and use of your TV please call the 

Customer Helpline: 0345 604 0105

Entertainment

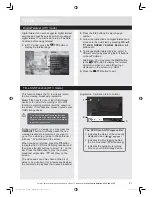
Using the Features via USB Port

1.

Switch off the TV before connecting any USB
storage device.

2.

Connect your USB storage device to the USB
port of your TV.

3.

Press the

button on the top of the TV or

the

button on the remote control to turn on

your TV and your USB storage device.

4.

Press the

SOURCE

button on the top of the

TV or the

SOURCE

button on the remote

control to display the Source List. Use the

buttons to select USB and then press the

OK

button to confirm.

Attention:

‡

Some versions of portable hard disk may
require more power than the TV USB socket
can provide. To ensure correct operation
please use power adapter for that device.

‡

If a USB hub is used make sure its mains
adapter is connected to the mains supply as
the total current consumption exceed 500mA.

‡

The maximum supported storage space of the
hard disk is 1 TB.

‡

The file system only support FAT32 format.

‡

If you want to store the video streaming of
a DTV programme, the transfer rate of the
USB storage device must not be less than
5MB/s, otherwise the picture and sound of
the programme will be affected and a warning
statement will be shown on the screen. If this
happens, please upgrade your USB storage
device.

‡

The TV screen will be blank temporarily as
it will take time to start up and stabilize the
connected hard disk. This is normal and the
starting time may vary depending on the brand
and the memory size of the connected hard
disk.

‡

Disconnect the USB storage device if it is not
in use.

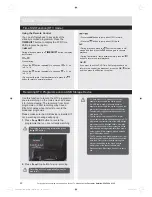
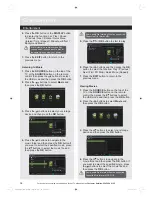
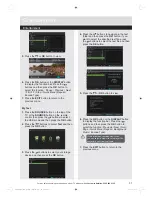
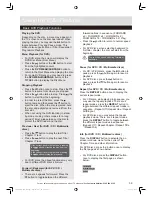
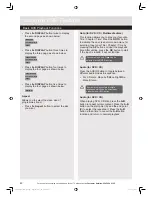
Viewing Photo

1.

Press the

SOURCE

button on the top of the

TV or the

SOURCE

button on the remote

control then press the

buttons to select

the USB mode and then press the

OK

button.

2.

Press the

buttons to select

Photo

and

then press the

OK

button.

3.

Press the

buttons to select your storage

device and then press the

OK

button.

4.

Press the

buttons to navigate in the

picture folder and then press the

OK

button.

If you want to select the specified photos,
press the

buttons to select the picture

file and then press the

OK

button.

5.

Press the

or

OK

button to view.

Entertainment

Photo

Music

Movie

Text

Photo

Move

CH + / -  Change Page         OK   Selete               Quick Menu         EXIT  Return

USB1

. . .

USB1

1/1

File format supported: JPG.

Photo

Photo

Move

CH + / -  Change Page         OK   Selete               Quick Menu         EXIT  Return

AITEMP

MY PVR

Movie

Music

Photo

Text

LE32G

. . .

USB1/Photo

OK PLAY / PAUSE

Previous / Next             Rotate        EXIT Back               Quick Menu

Date  2010-05-13 20:28:40
Resolution  1366x768

6/12

5_1366x768x24b.jpg

LE-28GBR-A+DVD HD 黑色 (英国 SY13097)_IM V01.indd   35

2013-5-3   13:22:48

Содержание LE-22GY14R

Страница 1: ... safe and correct installation and operation For any help concerning set up and use of your TV please call the Customer Helpline 0345 604 0105 Lines open 9am 8pm Monday to Saturday and 10am 4pm Sunday Important Please read these instructions fully before installing or operating Issue 1 10 05 13 LE 28GBR A DVD HD 黑色 英国 SY13097 _IM V01 indd 1 2013 5 3 13 21 39 HIGH DEFINITION MULTIMEDIA INTERFACE La...

Страница 2: ...LE 28GBR A DVD HD 黑色 英国 SY13097 _IM V01 indd 2 2013 5 3 13 21 39 ...

Страница 3: ...TV mode 19 Teletext ATV mode 20 Digital Teletext DTV mode 21 Time Shift Function DTV mode 21 22 Recording DTV Programme onto a USB Storage Device 22 Timer Programming 23 Play Recorded Programme 24 Picture management 24 25 Sound management 25 26 Basic Features 19 34 Viewing Photo 35 36 Listening to Music 36 Viewing Movies 36 37 My Text 37 Entertainment 35 37 Channel management ATV DTV Mode 26 29 Lo...

Страница 4: ...ld be easily accessible In case of storms and lightning when going on holiday or when the TV is not used for a long period of time t e k c o s r e w o p s n i a m e h t m o r f d r o c r e w o p e h t t c e n n o c s i d Mains plug is used as the disconnect device shall be readily operable Do not place the TV furniture etc on the power cord or pinch the cord Handle the power cord by the plug do no...

Страница 5: ...d replacement parts hazards Important Please read these instructions fully before installing or operating Servicing Warning Risk of exposure to radiation from class 1 class 3b visible and invisible laser beams Do not open the TV and stare directly into beam Warning Risk of electric shock do not attempt to repair service or modify this TV yourself Contact the manufacturer their approved service age...

Страница 6: ...emote control Any other technical issues you may need assistance with Call us today 0345 604 0105 Local call rates applies Lines open 9am 8pm Monday to Saturday and 10am 4pm Sunday Calls to Argos enquiry lines may attract a charge and set up fee from residential lines depending on your call plan tariff Mobile and other providers costs may vary see www bt com pricing for details For Security and tr...

Страница 7: ...tand Base 10 CH LIST P MODE S MODE LANG MENU SUBPAGE HOLD REVEAL AUDIO INDEX TITLE SIZE X TTX CANCEL GOTO SLOW FAV REPEAT A B TV RD DVD SETUP TIME SHIFT SUBTITLE Remote Control Batteries 2 x AAA Instruction Book Accessories included DVD CD CD R CD RW MP3 JPEG MPEG playback NTSC PAL playback according to disc content LPCM audio via coaxial and optical digital audio outputs optional Multi Audio up t...

Страница 8: ...hting is recommended for comfortable viewing Allow enough space between the TV and the wall to permit ventilation Avoid excessively warm locations to prevent possible damage to the cabinet or premature component failure WALL MOUNTING INSTALLATION GUIDELINES This television can be wall mounted as follows 1 Place the LED LCD Television onto a solid surface Please place some soft material over the fr...

Страница 9: ...Personal 8 TV RD Select TV program or Radio program DTV mode 9 LANG Select DTV audio language DTV mode 10 SOURCE Select among the different input signal sources DTV ATV AV SCART YPbPr DVD HDMI PC USB 11 DISPLAY Display the present screen information such as the current channel and the input source 12 CH Select a channel 13 VOL Adjust the volume 14 NICAM Switch between different audio channels only...

Страница 10: ...ess once to stop USB DVD mode FAV Display the Favourite Channel list ATV DTV mode 22 Record the current programme DTV mode Ejects a disc DVD mode 23 To start the timeshift playback DTV mode To start playback or pause USB DVD mode 24 TIMESHIFT Start the time shift function DTV mode DVD SETUP Displays the DVD OSD menu DVD mode 25 TTX Turn on and off the Teletext function ATV DTV mode To skip to the ...

Страница 11: ... REVEAL Reveals hidden information such as the answer to a quiz in teletext ATV DTV mode To advance playback rapidly USB DVD mode 32 SUBPAGE Displays the subpage on the teletext screen ATV DTV mode MENU Return to the main menu of a loaded DVD if available DVD Mode 33 Coloured buttons Accesses the TELETEXT items or channel edit when using Digital Freeview TV Channels ATV DTV mode Getting Started 10...

Страница 12: ...nnect the power cord plug to the mains power socket Aerial connection Power connection TV Control buttons Bottom side LE 28GBR A DVD HD 黑色 英国 SY13097 _IM V01 indd 10 2013 5 3 13 22 01 3 VOL button Decreases the volume 4 VOL button Increases the volume 5 CH button Moves down a channel 6 CH button Moves up a channel 7 MENU button Displays the OSD on screen display menu 8 SOURCE button Press to selec...

Страница 13: ...hould be removed Otherwise the remote control may be damaged caused by battery leakage and corrosion Getting Started Switching the TV On With power cord plug connected to the mains power socket and TV in Standby mode To switch the TV on from standby mode either a The Remote control Press the button b The TV Press the button on the top of the TV Switching the TV Off Either press the button on the r...

Страница 14: ... TV RD The remote control is designed to control all the functions of the model you selected Volume Setting Press VOL button to increase the volume Press VOL button to decrease the volume A volume level scale slider will be displayed on the screen Programme Selection Previous or Next Programme Press CH button to select the previous programme Press CH button to select the next programme Programme S...

Страница 15: ... pressing the button several times it means the language is not available on the disc When the DVD player is restarted or the disc is changed the subtitle selection is automatically changed back to the initial settings If a language is selected that is not supported by the disc the subtitle language will automatically be set to the disc s priority default language Usually a circulation will happen...

Страница 16: ... menu if available Display disc menu if available X X SUBTITLE Subtitle on off Press repeatedly to switch between subtitle option Subtitle on off Press repeatedly to switch between subtitle option X X HOLD Skip forward Skip forward Skip forward Skip forward REVEAL Rapid advance Rapid advance X Rapid advance MENU SUBPAGE Return to the main menu of a loaded DVD if available Return to the main menu o...

Страница 17: ...ing the DISPLAY button on the remote control General operation 6 If you want to skip the DTV tuning press the MENU button to interrupt the tuning half way You will then go straight to ATV tuning You may repeat the above step if you also want to skip the ATV tuning Initial setup First Time Setup OSD Language Mode Setting Country Auto Scan English Home Mode UK DTV ATV Start Move Adjust MENU Return E...

Страница 18: ...nected via the HDMI sockets or Component Socket No sound connection is needed for an HDMI to HDMI connection USB Input To connect devices to the TV providing fast data exchange USB will have function in USB DTV mode YPbPr YPbPr Input socket is just suitable for YPbPr Mini Cable Connect to a DVD player Digital Set Top Box or other AV devices with component YPbPr video output sockets Connect to the ...

Страница 19: ...a device to the TV via the PC cable you should also use an audio cable to connect your device to the PC AUDIO INPUT to enable audio SCART socket Inputs or outputs for external devices Connect the SCART cable between the SCART socket on the TV and the SCART socket on the external device decoder VCR or DVD player Note If an external device is connected via the SCART socket the TV will automatically ...

Страница 20: ...TV and the device before making any connections For more information refer to your device s own instruction book Note The Scart cable is not supplied You can connect a computer PC to the TV to display your computer s screen image on the TV Power off both computer and TV before making any connections Use a 15 pin D sub display cable to connect a PC to the TV Use an audio cable between PC AUDIO inpu...

Страница 21: ... in the schedule list Press the YELLOW button to return to the EPG BLUE Reminder Press the BLUE button while on the selected programme the Reminder setting menu will be displayed Press the buttons to adjust the settings and then press the Save button to confirm the settings After confirmation the EPG Schedule List will then be displayed with your preset reminders shown Press the YELLOW button to r...

Страница 22: ...ages of information that are listed in the teletext index To Turn on Teletext Function In ATV mode press the TTX button to enter Teletext mode Press the INDEX button to display the index page Press the TTX button once to exit and the TV will return to the channel you were watching To select a page of text Find the number of the page in the index and enter it using the 0 9 buttons The number of the...

Страница 23: ...will show on the screen The video and sound may have a little bit of delay or be out of sync for a few seconds when the unit starts to playback the missed broadcast programme It will soon turn to normal 2 Press the 0 9 buttons to select a page number 3 Follow the instructions on digital teletext and move onto the next step by pressing OK RED GREEN YELLOW BLUE or 0 9 buttons etc 4 To change digital...

Страница 24: ...n again to resume playback During fast forward fast backward state press the button to return to normal playback OK If you want to exit the PVR Time Shift progress bar and return to the current live broadcast press the OK button and then press the button to confirm Time Shift Function DTV mode Recording DTV Programme onto a USB Storage Device Recording will stop automatically when the disk is full...

Страница 25: ...eminders shown 5 Press the EXIT button to exit EPG Timer Programming Scheduled Record Group 1 Move Up Move Down Adjust Adjust Select Return Exit Hot Key OK MENU EXIT Setting Status Setting Is Not In Use Frequency Off 1 BBC ONE 2008 12 25 1 0 0 5 2008 12 25 1 0 1 5 Channel Start Time End Time Save When the preset time is reached the TV will start recording automatically If a programme recording sta...

Страница 26: ...corded Programme 1 Press the MENU button to display the main menu Press the buttons to select Picture in the main menu then press the or OK button it will highlight the first option 2 Press the buttons to select the option you want to adjust in Picture menu 3 Press the buttons to change the following settings TIPS You can change the value of brightness contrast sharpness and saturation when the pi...

Страница 27: ...c contrast Medium Strong Off Weak 4 Press the EXIT button to exit menu Picture management 1 Press the MENU button to display the main menu Press the buttons to select Sound in the main menu then press the or OK button it will highlight the first option 2 Press the buttons to select the option you want to adjust in Sound menu 3 Press the buttons to change the following settings TIPS You can change ...

Страница 28: ...els This is normally recommended if some channels have been added or removed by the broadcaster or you have moved house 1 Press the MENU button to display the main menu Press the buttons to select Channel in the main menu then press the or OK button it will highlight the first option 2 Press the buttons to select Auto Scan and then press the OK button to enter sub menu 3 Press the buttons to navig...

Страница 29: ...ess the MENU button to display the main menu Press the buttons to select Channel in the main menu then press the or OK button it will highlight the first option 2 Press the buttons to select Manual Scan and then press the OK button On the sub menu select Analog Manual Scan and then press the OK button Analog Scan Displays the current frequency press the buttons to change the frequency Channel to S...

Страница 30: ... the GREEN button to set the channel that you are currently watching as one of the favorite programmes Press the RED button to delete the selected channel Basic Features Channel Edit DTV mode 1 Press the MENU button to display the main menu Press the buttons to select Channel in the main menu then press the or OK button it will highlight the first option 2 Press the buttons to select Channel Edit ...

Страница 31: ...enu Press the buttons to select Channel in the main menu then press the or OK button 2 Press the buttons to select Signal Information and then press the OK button to view the Signal Information 3 Press the EXIT button to exit the menu Network Name Channel Frequency Modulation Strength Quality MENU Return EXIT Exit Signal Information South Yorkshire CH22 482 00 MHz 84 QAM 96 49 To insert the Common...

Страница 32: ... channels and ratings Press the buttons to select an age rating None 4 18 Lock Keypad Key Lock is designed to prevent children from pressing the buttons on the TV The Lock System must be set On for this function to operate New Password Use the 0 9 buttons to input the old password and then input the new 4 digit password Re enter new password for confirmation Clear Lock Reset all the lock settings ...

Страница 33: ...ondary Language English English Move Adjust MENU Return EXIT Exit Audio Languages Subtitle DTV Mode 1 Press the MENU button to display the main menu Press the buttons to select Setup in the main menu then press the or the OK button it will highlight the first option 2 Press the buttons to select Subtitle and then press the OK button to enter sub menu OSD Language Audio Languages Subtitle Teletext ...

Страница 34: ...t MENU Return EXIT Exit Setup OSD Language Audio Languages Subtitle Teletext Blue Screen Mode Setting Time Settings PVR Settings English On Home Mode Time Settings 1 Press the MENU button to display the main menu Press the buttons to select Setup in the main menu then press the or the OK button it will highlight the first option 2 Press the buttons to select Time Settings and then press the OK but...

Страница 35: ... Exit Function OK MENU EXIT Hot Key Scheduled Record File Manager Standby Delete All Zoom In Out Replay Channel Name Program Name Recorded Time Total Time BBC ONE Pinky and Perky 25 Dec 2008 10 05 00 00 20 BBC ONE_Pinky and Perky_20081225_100524 is BBC ONE_Pinky and Perky_20081225_100529 is BBC ONE_Pinky and Perky_20081225_100530 is Current Playing File Info Device List Select Device List to check...

Страница 36: ...isappear Setup management OAD Over Air Download 1 Press the MENU button to display the main menu Press the buttons to select Setup in the main menu then press the or the OK button it will highlight the first option 2 Press the buttons to select OAD and then press the OK button 3 Press the buttons to select the over air download type Manual OAD Download The TV auto detects the latest firmware throu...

Страница 37: ... a warning statement will be shown on the screen If this happens please upgrade your USB storage device The TV screen will be blank temporarily as it will take time to start up and stabilize the connected hard disk This is normal and the starting time may vary depending on the brand and the memory size of the connected hard disk Disconnect the USB storage device if it is not in use Viewing Photo 1...

Страница 38: ...en press the OK button 2 Press the buttons to select Movie and then press the OK button 3 Press the buttons to select your storage device and then press the OK button 4 Press the buttons to navigate in the movie folder and then press the OK button If you want to select the specified movie press the buttons to select the movie file and then press the OK button Entertainment If this folder also cont...

Страница 39: ...e Type 7 Press the EXIT button to return to the previous menu Entertainment Movie Move Change Page OK Selete Quick Menu EXIT Return USB1 Movie AITEMP Movie MY PVR Photo Text Music LE32G 1 1 Quick Menu 00 05 13 00 00 22 FileName VideoCodec Resolution Bitrate Animals AVI MPEG4 640 x 480 4158120 bps AudioCodec SampleRate Channel MP3 44100 Hz 2 Photo Music Movie Text Text Move Change Page OK Selete Qu...

Страница 40: ...ch the disc will not play The Region Number for this DVD player is described on the rear panel of the TV Disc Types DVD VIDEO Region code Compatible Disc Types LE 28GBR A DVD HD 白色 英国 SY13110 _IM V01 indd 38 2013 5 3 13 24 45 2 If the DVD player does not automatically play the disc press the SOURCE button on the top of the TV or the SOURCE button on the remote control to display the Source List Us...

Страница 41: ... are 4 speeds for forward Press the button to toggle between the different If the current track is the first one pressing the button will restart the disc from the beginning If the current track is the last one pressing the button will stop the playback forward options in sequence FORWARD x 2 FORWARD x 4 FORWARD x 8 FORWARD x 16 FORWARD x 32 Play Press the button to return to normal speed playback...

Страница 42: ...Time by pressing the 0 9 buttons or input the playback time After editing press the OK button to start If the input is invalid it will not function Audio for DVD CD Press the AUDIO button to toggle between different audio modes in sequence For CD discs Mono Left Mono Right Mix Stereo Audio for DVD CD When playing DVD CD disc press the A B button to repeat certain content Press the A B button on th...

Страница 43: ... audio languages Not all DVD discs support multiple audio languages LE 28GBR A DVD HD 白色 英国 SY13110 _IM V01 indd 41 2013 5 3 13 24 47 Disc 00 00 00 00 001 004 AUDIO PICTURE TEST In the DVD mode press the SETUP button on the remote control Press the buttons to select the Language Setup menu and then press the buttons to select the menu options Press the Setup button to exit the menu OSD Set the OSD...

Страница 44: ...etup TV System Brightness Contrast 4 3 LB 4 3 PS 16 9 OK Screen Saver Last Memory TV Display Screen Setup TV System Brightness Contrast Off On OK Screen Saver Last Memory TV Display 4 3 Pan Scan Widescreen picture shown in the full screen with some part cut 4 3 Letter box Widescreen picture shown in the full screen with black bars on the top and bottom of the screen 16 9 Widescreen picture shown i...

Страница 45: ...tart every time In the DVD mode press the SETUP button on the remote control Press the buttons to select the Audio Setup menu and then press the buttons to select the menu options Press the Setup button to exit the menu Downmix Lo Ro Mixed stereo surround output Lt Rt Mixed stereo Lt Rt output Using the DVD Audio Setup Page In Setup mode the disc playback function will not be available Audio Setup...

Страница 46: ... to the factory settings EXCEPT the password This function is available in stop state or when the tray is opened Using the DVD Custom Setup Page If you forget your DVD password please enter the master password 8899 LE 28GBR A DVD HD 白色 英国 SY13110 _IM V01 indd 44 2013 5 3 13 24 48 Custom Setup Change OK Parental Ctrl Old New Verify Password Default OK Custom Setup Factory Rest OK Parental Ctrl Pass...

Страница 47: ...rgy Consumption Data EEI A On Mode Power Consumption W 22W Standby Mode W 0 5W Maximum Power W 35W Standby Mode After 4 Hours Other Information Digital reception MHEG 5 ENGINE compliant with ISO IEC 13522 5 UK engine Profile 1 for UK Object carousel support compliant with ISO IEC 135818 6 and UK DTT profile for UK Frequency range 474 850 MHz for UK models 170 862 MHz for EU models Transmission sta...

Страница 48: ...marked with the letter L If the power lead is damaged it must be replaced by Plug replacement UK and Ireland only Connect blue lead to N Neutral Connect brown lead to L Live N L 5 This is called the product Fiche the information needs to be presented in the following order also this maybe in the form of a copy of the label in colour or black and white the label however must display all the informa...

Страница 49: ...properly 3 Are the plugs connected tightly to the aerial socket 4 Is the aerial cable damaged 5 Are suitable plugs used to connect the aerial 6 If you are in doubt consult your dealer No sound 1 Has the TV been set to mute To cancel mute press the button or increase the volume level 2 Sound is coming from only one speaker Is the balance set to one extreme Input sources can not be selected 1 If you...

Страница 50: ...ometime in the future for even longer duration play Subtitles These are lines of text appearing at the bottom of the screen which translate or transcribe the dialogue They are recorded on the DVD discs Time Number This indicates the playtime which has elapsed from the c scene quickly Not all discs permit the time search feature to be used Availability is determined by the disc s manufacturer Title...

Страница 51: ...dicate that equipment with these symbols should not be disposed of as general household waste If you want to dispose of the product or battery please consider the collection systems or facilities for appropriate recycling Notice The sign Pb below the symbol for batteries indicates that this battery contains lead Information for Users on Disposal of old Equipment and Batteries European Union only c...

Страница 52: ...PRODUCT GUARANTEE LE 28GBR A DVD HD 黑色 英国 SY13097 _IM V01 indd 50 2013 5 3 13 22 59 ...

Страница 53: ...LE 28GBR A DVD HD 黑色 英国 SY13097 _IM V01 indd 51 2013 5 3 13 22 59 ...

Страница 54: ...LE 28GBR A DVD HD 黑色 英国 SY13097 _IM V01 indd 52 2013 5 3 13 22 59 ...

Отзывы: