4
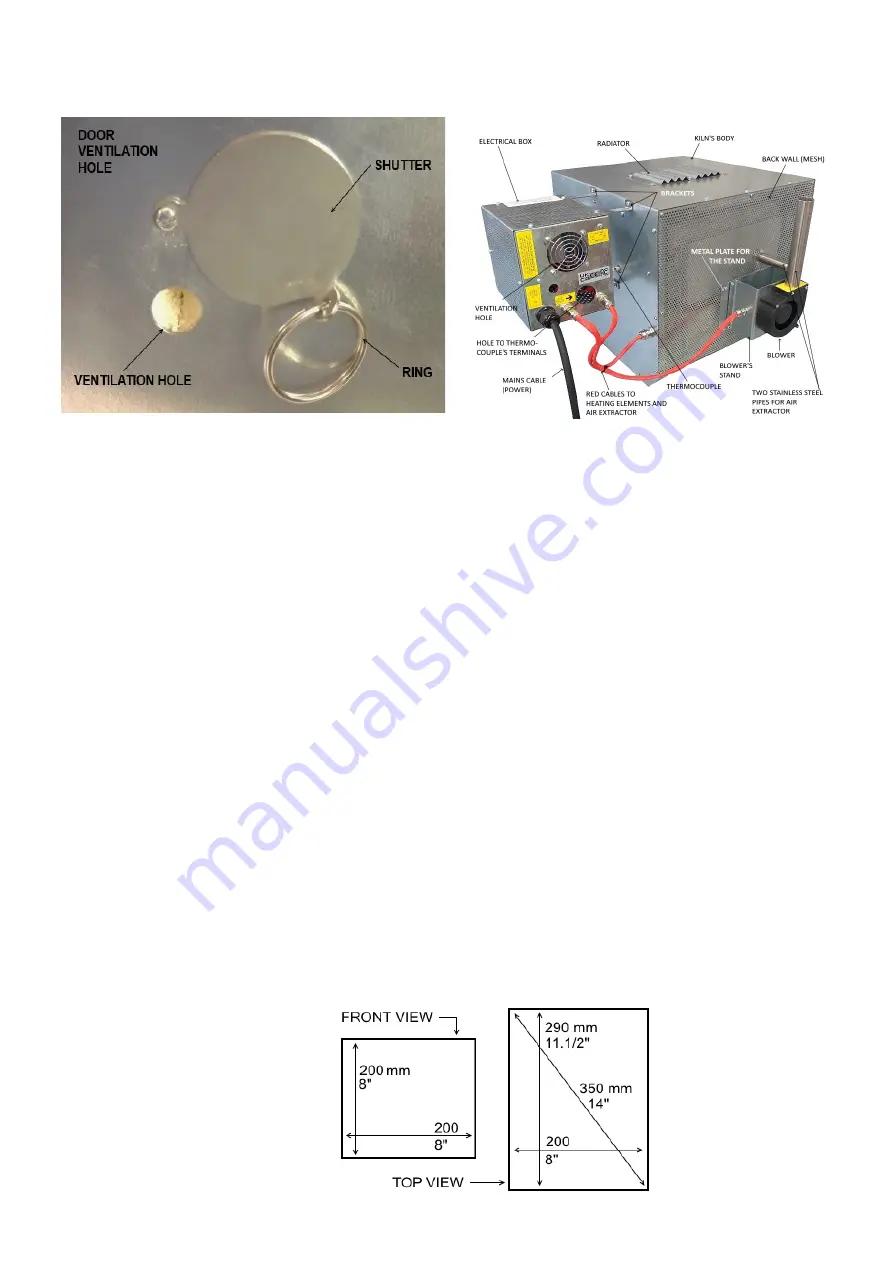
Your kiln door has a small ventilation hole with a stainless-steel shutter (Pic. 17).
To assemble your kiln’s extraction system (Pic. 18), please connect the main and internal
tubes, then attach the blower’s metal stand with the blower and these tubes to the metal
plate on the back of the kiln using the four screws. Next, connect the RED blower cable to
the appropriate socket on the back of the electrical box. Once assembled, please check that
the pipes fit together properly and that the main tube has been properly inserted into the
blower to ensure it works effectively.
Your kiln is now assembled. Close the door shutter (Pic. 17) to prevent heat leaking out
from inside the chamber. Connect the mains cable to a power supply, set the controller and
start your project.
When using the kiln for the first time, it must be heated up for approximately 70 minutes
(factory setting) to allow any water to evaporate from the chamber. Please do not be
alarmed if light smoke and/or a smell appears (when using the kiln for the FIRST time). This
is normal for new kilns as any water, grease or oils burn out from the heating element(s),
shelves, chamber and from inside the kiln. It should not happen again after the first time it is
heated. If your kiln is used less than once a month then please repeat this process each
time you use it.
Please also note that the temperature shown on the controller is the temperature around the
thermocouple(s) inside the kiln’s chamber. You may have to wait up to two hours for the in-
side of your kiln to heat up fully and reach the same temperature everywhere inside the
chamber.
USEABLE CHAMBER DIMENSIONS:
Pic. 19 shows
FRONT AND TOP VIEW drawings of the
kiln’s chamber.
Pic. 19
Pic. 17: Pic. 18:


