background image

Setup Menu 


39 

Setup Menu 


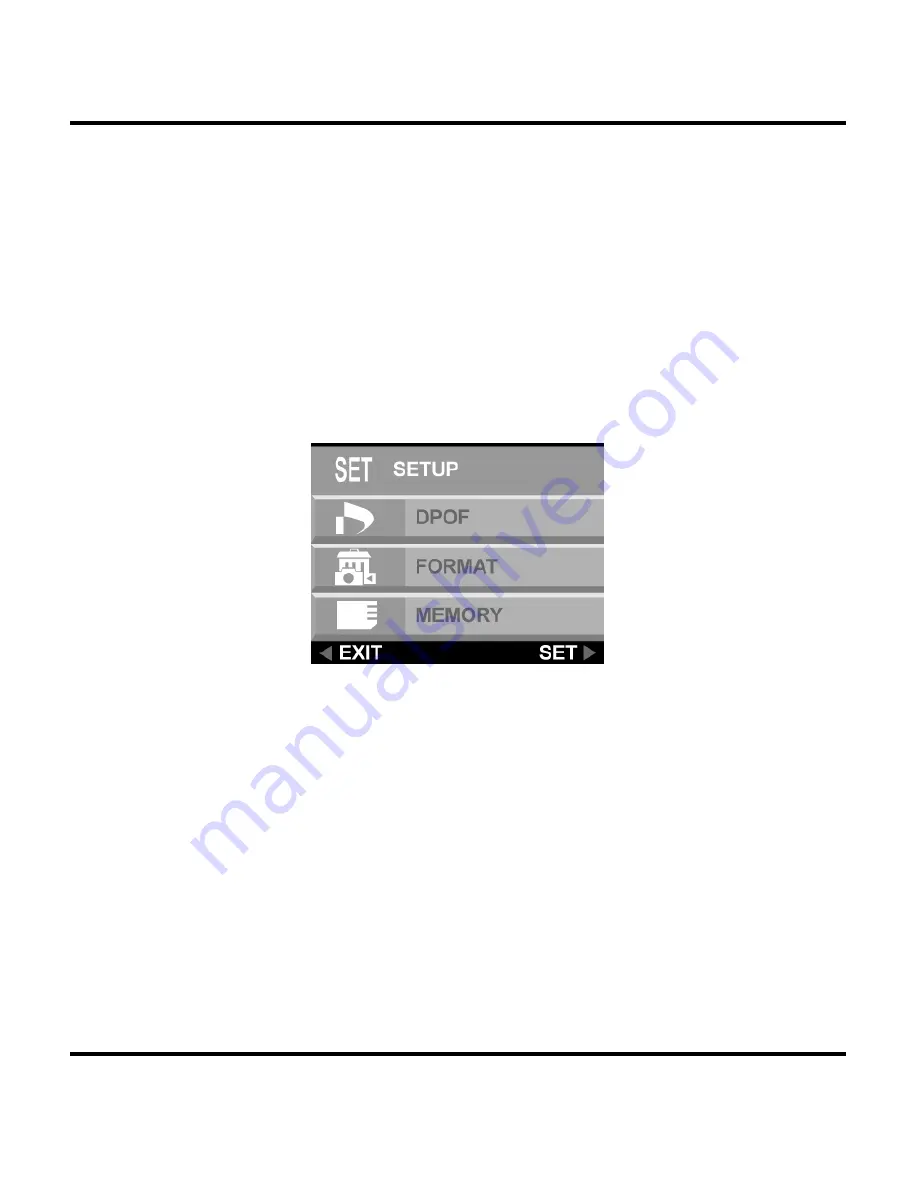
The Setup menu configures the camera. Follow these 

instructions to use the Setup menu. 

1. Press 

the 

MENU button. 

2.  Use the down button to select SETUP, and then 

press the right button to enter the Setup menu.  

The Setup menu appears. 


Содержание DSC 3312X

Страница 1: ...Digital Camera User manual 021229D...

Страница 2: ...however no guarantee is given to the correctness of the contents The information in this document is subject to change without notice Copyright c Copyright 2003 This document contains proprietary info...

Страница 3: ...Taking Pictures 15 Preparing the Camera 15 Selecting the Camera Mode 16 Framing the Shot 16 Zooming and Shooting 16 Automatic Image Processing 17 Taking a picture 17 Protecting the Camera 18 Chapter 3...

Страница 4: ...34 Digital zoom 34 Focus 35 Landscape 35 Portrait 35 Playback Mode 36 DPOF 37 Delete 38 Setup Menu 39 Language 40 Auto Off 41 Buzzer 42 TV Out 43 Preview 44 DPOF 45 Format 46 Memory Type 47 USB 48 Ch...

Страница 5: ...to 2048 x 1536 resolution Interpolated resolution up to 6 6 Megapixels 2976 x 2232 Video capture resolution 320x240 15 fps 1 5 TFT color screen USB 1 1 interface Built in 8 MB flash memory Auto exposu...

Страница 6: ...precautions when handling batteries The camera uses only AA Alkaline NiMH or Lithium batteries Batteries may leak or explode if handled improperly Remove the batteries and the memory card from the cam...

Страница 7: ...ra comes equipped with the following components Please check to make sure all items are included 1 User manual 6 Quick Reference Guide 2 Digital Camera 7 Pouch 3 Two 2 AA Alkaline Batteries 8 Video Ca...

Страница 8: ...l 4 Camera Overview The front rear bottom and top views of the digital camera are shown on the following pages Take a moment to review these illustrations to familiarize yourself with the terms used i...

Страница 9: ...shadows 5 Video Out Port Connect your video out cable here and the other end to your television set in order to use the television to preview your pictures 6 USB Port The USB Universal Serial Bus por...

Страница 10: ...s 2 Left Button Use the Left Button to cycle to the right during picture playback In capture mode and movie mode use the Left Button to reduce the EV level 3 Zoom in up Button Use the Zoom in Button t...

Страница 11: ...Strap Loop to fix the carrying strap to the camera for easy carrying 7 MENU Button Use the MENU Button to enter the menu system 8 DISP Button Use the DISP Button to cycle through the various display...

Страница 12: ...d Cover Opens to allow access to the battery chambers as well as the memory card slot 2 Battery Chamber Takes two AA Alkaline NiMH or Lithium batteries 3 Memory Card Slot Accepts an MMC or SD Card to...

Страница 13: ...he Memory Card 9 Installing the Memory Card To install the memory card 1 Turn off the camera 2 Open the battery memory card compartment by pressing the cover and sliding it in the direction of the arr...

Страница 14: ...l Camera User Manual 10 3 Insert the memory card with the notched corner facing the outside edge of the camera gold circuitry facing toward the back of the camera 4 Close the battery memory card cover...

Страница 15: ...s 11 Installing the Batteries To install or replace the batteries 1 Turn off the camera 2 Open the battery compartment on the bottom of the camera by pressing the cover and sliding it in the direction...

Страница 16: ...amera User Manual 12 3 Insert the batteries into the chamber making sure that the positive and negative ends are properly oriented as indicated by the battery icons in the compartment 4 Close the batt...

Страница 17: ...n French Italian Dutch Chinese and Japanese To select a different language 1 Turn the camera on 2 Press the MENU Button to display the menu 3 Use the down button to select SETUP then press the right b...

Страница 18: ...Digital Camera User Manual 14 5 Use the up and down button to select the language you want to use and then press the right button to set the language 6 Press the MENU button to exit...

Страница 19: ...tton to turn the camera on A startup image appears on the LCD Screen NOTES Make sure you have installed two AA batteries If you want to store your photos on a flash card make sure the card is installe...

Страница 20: ...ton selecting PRESET then selecting AWB Auto White Balance SUN FLORESCENT or SHADE To use the self timer press the MENU button select SELF TIMER and then select ON Framing the Shot Hold the camera ste...

Страница 21: ...t lighting and in auto flash mode detects whether or not the flash is required Taking a picture When you are satisfied with the preview slowly press the Shutter button Take care not to press the Shutt...

Страница 22: ...a When you are finished taking pictures press the power button to turn it off Slide the camera into the camera pouch The pouch will protect the camera against accidental damage of the lens TFT LCD scr...

Страница 23: ...Review The default Playback method is to show each individual picture one at a time at full screen size Press the left and right button s to cycle through the pictures you ve taken You can also use th...

Страница 24: ...to Thumbnail Review mode In Thumbnail Review mode up to nine pictures are shown on the LCD simultaneously Use the up down left and right buttons to cycle through the thumbnail pages To return to Full...

Страница 25: ...such as floppy disk or CD ROM for delivery to a photofinisher After transferring pictures to your computer any copies stored on the memory card or on the camera s internal memory can be deleted to pro...

Страница 26: ...tion 1 Insert the installation software CD into your CD ROM drive Don t connect the camera to the PC 2 The installation program should start automatically If not double click the My Computer icon on y...

Страница 27: ...an empty USB slot on your computer To locate USB slots on your computer look for the USB icon 3 The Windows Add Hardware Wizard will automatically detect the camera and lead you through the installat...

Страница 28: ...ke a standard storage device where you can copy delete and move files to and from the camera just as you would a normal disk drive PC Camera mode allows you to use the camera as a standard PC video ca...

Страница 29: ...D ROM To copy photos to your computer 1 Connect the digital camera to the computer with the USB cable 2 Turn on the camera 3 Open Windows Explorer The contents of your computer will be displayed inclu...

Страница 30: ...nnect it to the computer via the USB port 1 Turn the camera on 2 Press the MENU button to enter the menu system 3 Use the down button to select SETUP Then press the right button to enter the SETUP men...

Страница 31: ...ternet or save them on CD ROM for later viewing on your PC or with a VCD DVD player PC Camera mode can also be used with real time video conferencing software such as Microsoft NetMeeting CAUTION Do n...

Страница 32: ...ases the camera exposure value which allows in more light Left button Decreases the camera exposure value which gradually blocks light Zoom out down button W Widens the field framed by the camera s di...

Страница 33: ...the flash is used 1 Press the MENU button to show the menu system 2 Use the up and down button to select AUTO ON or OFF Press the right button to enter the selected option Note The image may be overex...

Страница 34: ...to obtain the optimum image brightness exposure when the subject is much brighter or darker than the background The available white balance values are between 2 0 to 2 0 EV in steps of 0 5 EV Use the...

Страница 35: ...omic 3 0M 2048 x 1536 Normal 0 7M 1024 x 768 Fine Small 512 x 384 Fine Photo 2016 x 1344 Photo The higher the quality the clearer your picture will be but at the same time the image file size will be...

Страница 36: ...as a tripod and frame the shot 2 Press the Menu button to show the menu system 3 Use the up and down button to select SELF TIMER Press the right button to enter the selected option 4 Use the up and do...

Страница 37: ...ng continuous picture To setup a continuous shot 1 Press the MENU button to show the menus 2 Use the up and down button to select CONTINUOUS Press the right button to select the option 3 Use the up an...

Страница 38: ...de setting 2 Frame your shot after the camera s LCD screen turns on 3 Press the Shutter button to begin recording The camera keeps recording until the memory is full or the Shutter button is pressed a...

Страница 39: ...uted to encompass everything within the frame Portrait This focus is optimized for taking head shots of people focusing more on the center of the frame than on the peripheral areas This focusing optim...

Страница 40: ...ve to the previous photo Right Button Move to the next photo DISP Button Cycles through the following LCD Screen settings LCD and status information all turned on LCD on but no status information Zoom...

Страница 41: ...a digital camera on media such as a flash Card 1 Press the left or right button to display the image for which you want to specify a DPOF setting 2 Press the MENU button and use the down button to se...

Страница 42: ...ess the MENU button to enter the menu system 3 Use the up or down button to select DELETE Press the right button to enter the menu 4 Use the up or down button to select YES or NO Press the right butto...

Страница 43: ...The Setup menu configures the camera Follow these instructions to use the Setup menu 1 Press the MENU button 2 Use the down button to select SETUP and then press the right button to enter the Setup me...

Страница 44: ...Manual 40 Language The digital camera can display menu items in the following languages English French Spanish German Italian Dutch Chinese and Japanese For more details on setting the default langua...

Страница 45: ...ital camera turns itself off automatically after a period of inactivity DISABLE The camera stays on until it is turned off manually 60 SEC The camera turns off if it is not used for 60 seconds 120 SEC...

Страница 46: ...nual 42 Buzzer When this feature is turned on the camera makes a beep when you push a button To activate the beeps select the BUZZER option from the Setup menu Select ON and press the right button to...

Страница 47: ...ou have the option to choose a transmission format compatible with that of your TV This allows you to record video images sent to the TV with a VCR Select the TV OUT option from the SETUP menu and cho...

Страница 48: ...to you can decide to preview the image before saving it OFF Saves the image without confirmation 1 SEC The image appears on the LCD screen for one second before being saved CONFIRM A confirmation mess...

Страница 49: ...rectory on a digital camera s storage card These files define the images that are to be printed how many copies of each image and if any information is to be overlaid on the image This is usually impl...

Страница 50: ...completely erases and reformats the storage device It is similar in function to formatting a PC hard drive Although format takes longer than delete be sure to format your storage device occasionally t...

Страница 51: ...or on a flash card Follow these instructions to set the default storage media 1 Turn the camera on 2 Press the MENU button to display the menu system 3 Use the down button to select SETUP and press t...

Страница 52: ...r CARD Press the right button to set your selection 6 Press the Menu button to exit USB The digital camera can be used with any commercially available video software as a video camera Simply connect i...

Страница 53: ...m ratio and number of pictures These icons are displayed in every camera mode except Setup mode This chapter describes the LCD Screen icons and their meanings Capture Mode Pictures Take Focus Mode Fla...

Страница 54: ...Digital Camera User Manual 50 Movie Mode Memory Type EV Value Movie Mode Preset Mode Battery Status Playback Mode Total Pictures Current Pictures Battery Status Playback Mode DPOF Image Type...

Страница 55: ...de This mode is used to view pictures stored on the camera s internal memory or on the memory card Movie Mode Indicates the camera is in Movie mode Movie mode allows you take record movie to your came...

Страница 56: ...itewashed pictures Shade Use this setting when taking pictures in shade or any time your pictures come out too dark Fluorescent Use this setting for taking pictures under fluorescent light DPOF The Di...

Страница 57: ...EV Increase EV Playback Select Photo Play Stop AVI file LCD W Text LCD W O Text Menu Off Menu On Playback Zoom in Panning up Playback Zoom out Panning down Previous Panning left Next Panning right Mov...

Страница 58: ...c with menu compensation 2 0 0 5 steps Preset mode Auto White Balance Sun Fluorescent Shade Flash mode Auto On Off File format JPEG compression DCF file system EXIF 2 2 file format PC Interface USB 1...

Страница 59: ...set to auto or always on Refer to Setting the Flash The flash doesn t work The batteries may be weak If the batteries are too weak the flash will be unable to recharge Turn the camera off and wait a...

Страница 60: ...screen D From the Stop a Hardware device confirmation screen select the device to be stopped and click OK to bring up the Safe To Remove Hardware confirmation E Disconnect the Digital Camera from your...

Отзывы: