


SYSTXBBECW01--A, SYSTXBBECN01--A
& SYSTXBBECC01--A
Evolution
r
Connex
t
Control
Installation Instructions
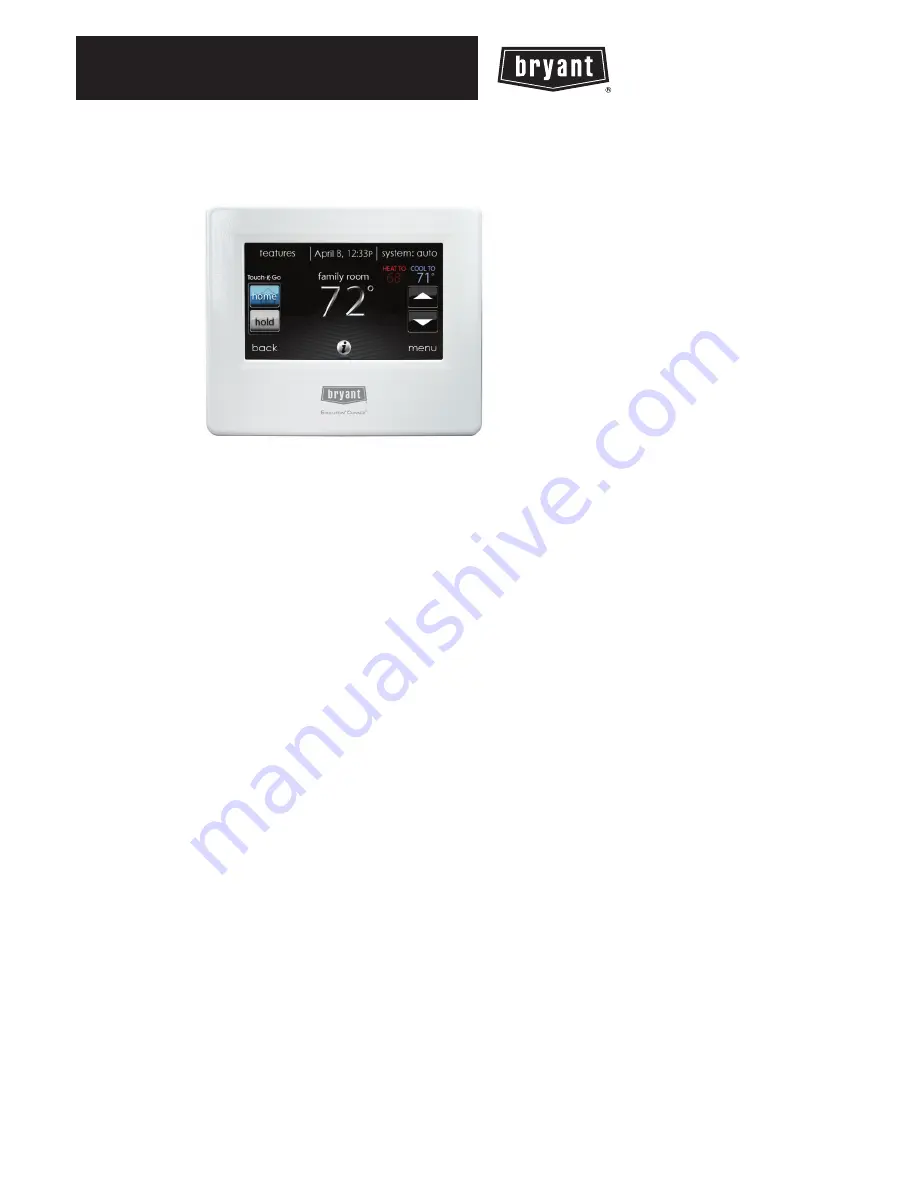
A12479
NOTE
: Read the entire instruction manual before starting the installation.
The features and functions outlined in the Installation Instructions reflect Version 11
software. See the Evolution Connex product page on the HVACPartner.com
website or the Downloads section of the www.MyEvolutionConnex.Bryant.com
website for the latest software release.
US Patents: Carrier U.S. Pat No. 7,243,004, Carrier U.S. Pat No. 7,775,452, pointSET
t
U.S.
Pat No. 7,415,102
Содержание Evolution Connex SYSTXBBECC01-A
Страница 2: ......
Страница 10: ......
Страница 95: ...85 R G FE Fan Coil or Variable Speed Furnace A07114 G Input Wiring for Blower Operation ...
Страница 96: ...86 R G FE Fan Coil or Variable Speed Furnace A07115 G Input Wiring for System Shutdown ...
Страница 97: ...87 NOTES ...
Страница 98: ...88 NOTES Cont ...
Страница 99: ......