MAINTENANCE:
WHAT IS COVERED
?
The limited warranty is extended to the original purchaser and applies to material and manufacturer’s defect provided
the item is maintained with care and used only for personal, residential purposes.
Warranty: 6 Months
WARRANTY:
WARNINGS:
GENERAL BEST PRACTICES FOR ASSEMBLY:
• Please read and understand this entire manual before attempting to assemble or install the product.
• Before beginning assembly of product, make sure all parts are present. Compare parts with package contents list and
hardware contents list. If any part is missing or damaged, do not attempt to assemble the product.
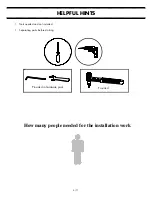
• Some parts may contain sharp edges. Wear protective gloves if necessary, during assembly.
• Check all nuts and bolts periodically for tightness and, when required, tighten them again.
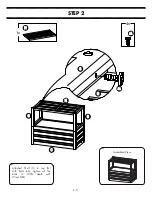
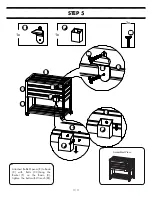
• Pay attention to the parts orientation
• Keep all children and pets away from assembly area. Children and pets should be supervised when they are in the
area of the construction.
•
If scratched please use touch up paint, to prevent rusting
• Do not place the product on a damp or conductive subsurface.
• Steel components for this cooler are treated with rust inhibiting paint that protects it from rusting. However, due to the
nature of steel, surface oxidation (rusting) will occur if these protective coatings are scratched. This is not a defect and
thus not covered by the warranty.
• To minimize this condition, it is recommended to use care when assembling and handling the product to prevent
scratching the paint. Should any scratching or damage occur, it is recommended to cover the scratch immediately
with rust inhibiting paint (not included).
• Do not use bleach, acid, or other abrasive cleaners on the cooler.
• Keep instruction manual for future reference.
• When not in use, store in a cool, dry area.
2/11
Содержание 810453421
Страница 3: ...EXPLODED DRAWING 3 11...


