9
GREENHOUSE ASSEMBLY
Order of activities to be carried out:
Before commencing the assembly of the greenhouse, check whether the packaging includes
all the elements required.
Using the numbering assigned to the set elements in the table, connect individual parts with
one another in the following order:
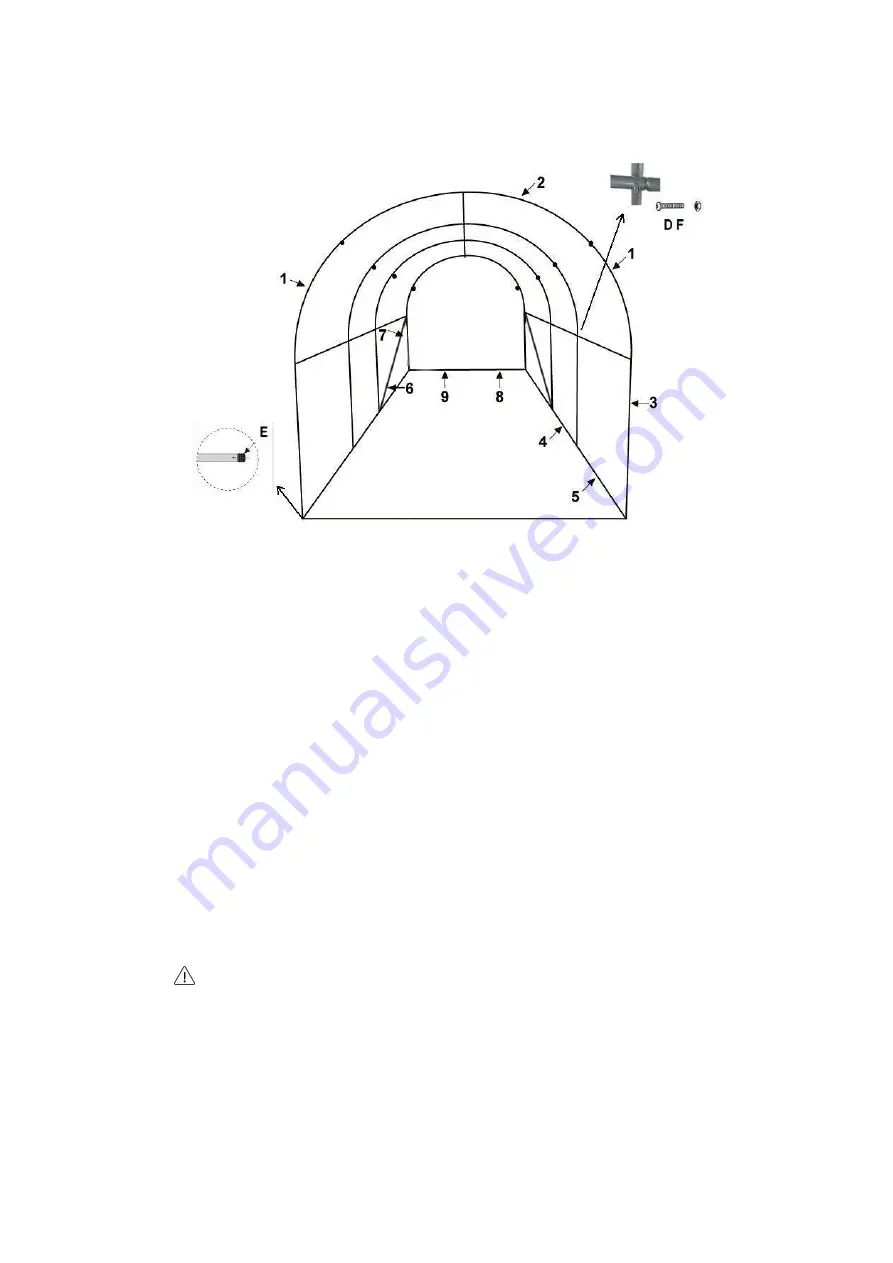
1. Assemble each of the four arches of the greenhouse framework (1 + 2 + 1).
2. Connect all of the four arches on both sides with side members
3.
(3 + 1 + 2 + 1 + 3).
3. Connect 8 with 9, creating the bottom horizontal bars of the shorter sides
of the greenhouse, and then connect each of these horizontal bars with the full arch
assembled earlier (connect 8+9 connected horizontally with 3 + 1 + 2 + 1 + 3 vertically).
4. Connect 5 + 4 + 5, forming each of the longer sides of the lower frame
of the greenhouse.
5. Connect 5 + 4 + 5 again, forming each of the two upper horizontal bars of the frame.
6. Connect the extreme arches with the lower frame of the greenhouse (at shorter sides)
- put the screws D into the openings in the structural tubes and tighten the nuts F.
Before the whole of the framework is assembled, do not tighten the connecting screws too much
– it will make it easier to assemble the next parts.
7. Tighten the connection between the upper horizontal members on the sides
to the extreme arches (using D and F).
It is the most convenient to do this when one person hold one arch, the second person holds the other
arch, and the third person connects the horizontal bars.
8. Fix both internal arches, connecting them with both upper and lower horizontal bars
on the sides using D and F.
9. Connect 6 + 7, forming each of the two diagonal connecting elements.


