6. USING THE OPERATION PANEL (ADVANCED OPERATIONS)
2
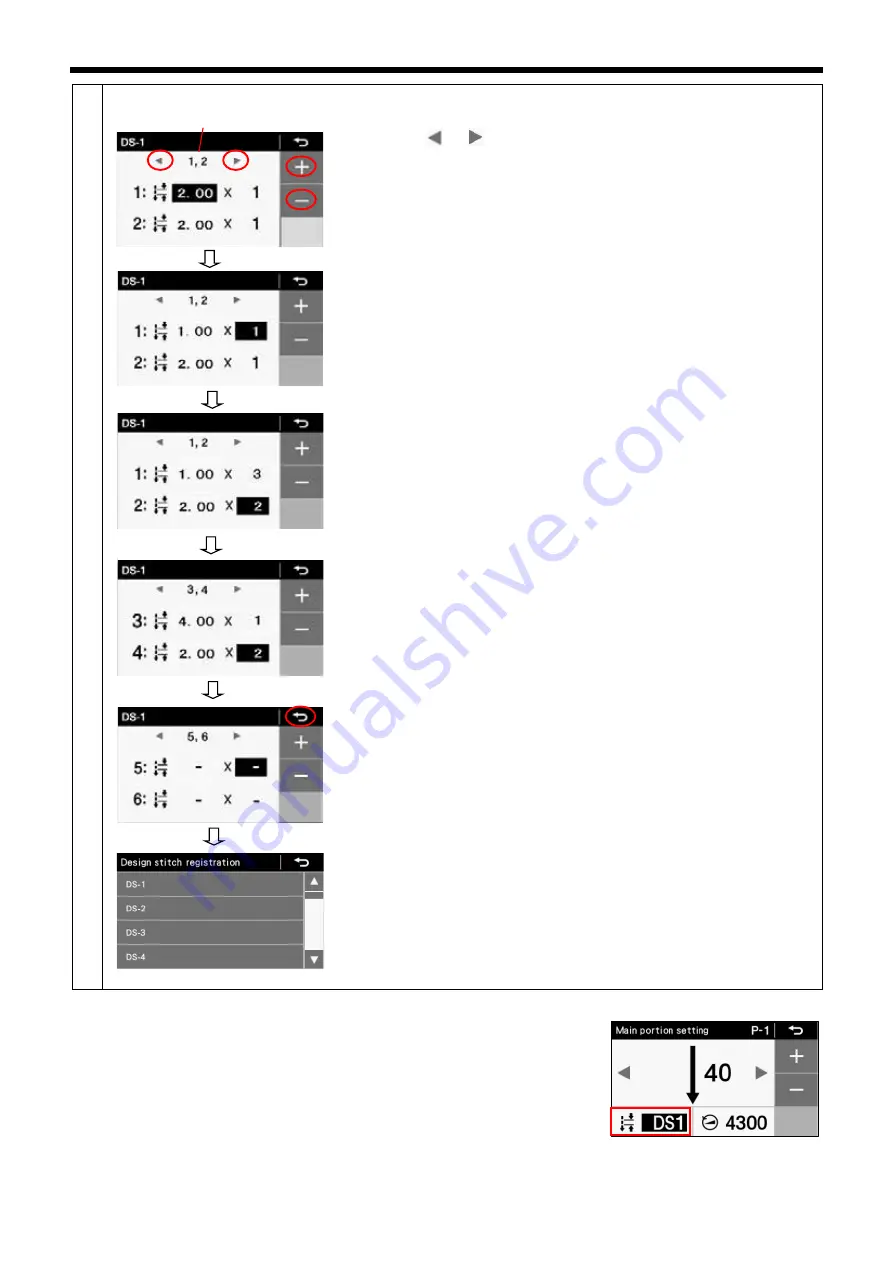
<Design stitch registration (content setting) screen>
The design stitch number (1) to be registered will be displayed.
1. Press the or key to change the group number (1).
2. Press the + or - key to set the stitch pitch (2) for group 1 to 1.00 mm.
The stitch pitch can be set to between 0.05 mm and 5.00mm.
The initial setting is 2.00 mm.
3. Touch the number of stitches (3) for group 1.
4. Press the + or - key to change the number of stitches (3) for group 1 to 3
stitches.
The number of stitches can be set to between 0 and 20 stitches.
The initial setting is 1 stitch.
5. Change the following in the same way.
For group 2, set the sewing pitch (4) to 2.00 mm and the number of
stitches (5) to 2;
For group 3, set the sewing pitch (6) to 4.00mm and the number of stitches
(7) to 1;
For group 4, set the sewing pitch (8) to 2.00 mm and the number of
stitches (9) to 2;
For group 5, change the number of stitches (10) to "-" (no stitches).
* If the number of stitches is set to "-", all of the subsequent numbers of
stitches will be set to "-".
6. Press the return key to return to the design stitch registration (number
selection) screen.
Press the menu key to return to the menu screen.
Press the home key to return to the home screen.
★
In order to sew design stitches, it is necessary to put the design stitches registered above into a program.
1. At the home screen, select the desired program number.
2. The display will switch to the main sewing setting screen.
3. Select the stitch pitch, and then press the + or - key to set the desired design
stitch.
* For DS1 to DS5, the maximum stitch pitch is displayed as follows.
4. Press the home key to return to the home screen.
(1)
(2)
(3)
(4)
(5)
(8)
(9)
(6)
(7)
(10)
S-7300A
47


