background image

132

CONTENIDO

CONOCIENDO LA

MAQUINA

BORDADO

MANTENIMIENTO

MENSAJES DE

ERROR

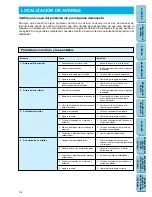
LOCALIZACION

DE AVERIAS

PATRONES

BORDADO USANDO

UN MARCO

PEQUEÑO

(OPCIONAL)

BORDADO USANDO

UN BASTIDOR

EXTRA PEQUEÑO

(OPCIONAL)

BORDADO

USANDO UN

MARCO GRANDE

(OPCIONAL)

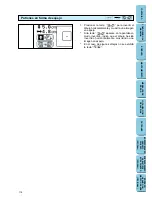
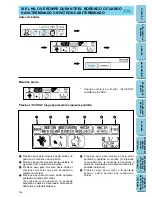
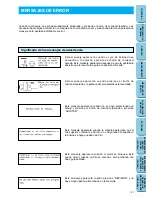
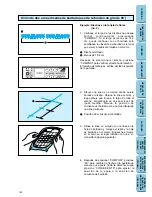
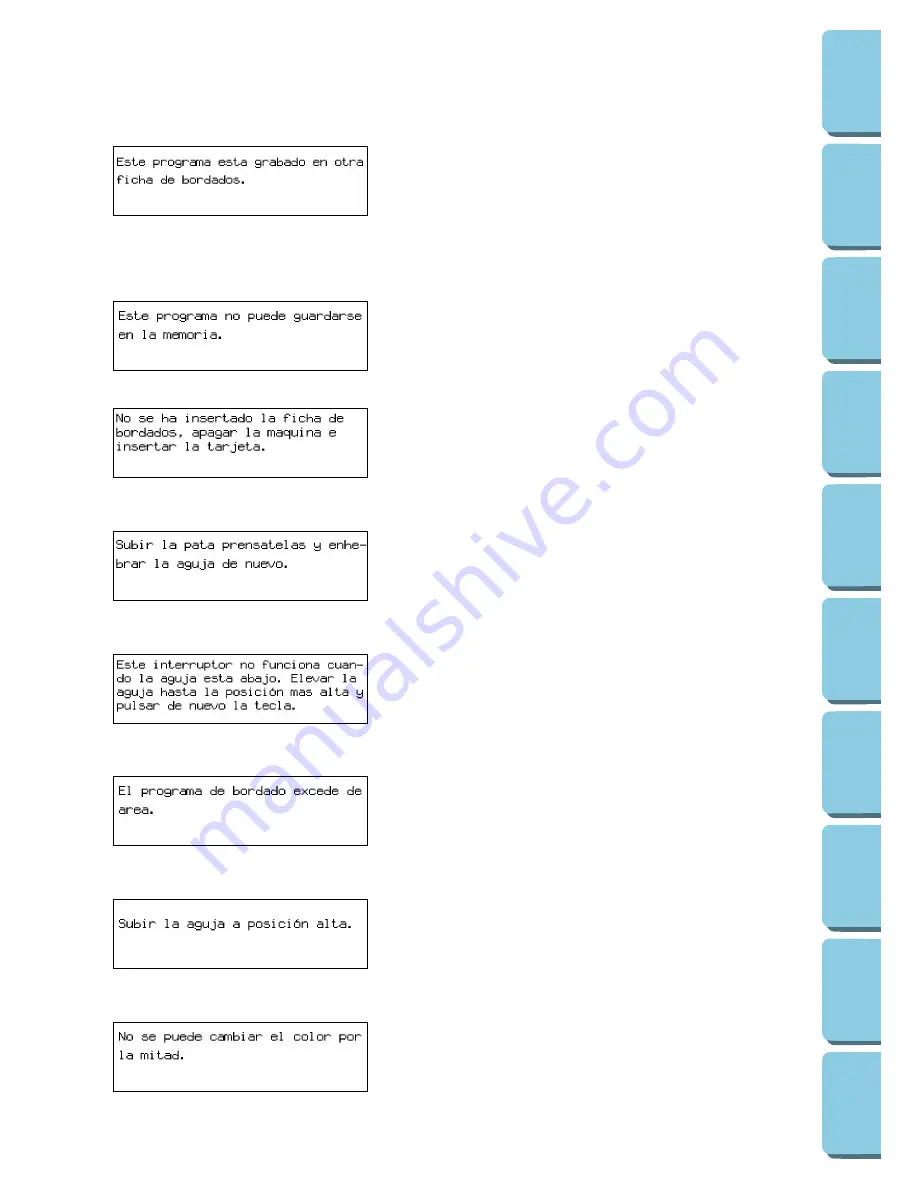
Este mensaje aparecerá cuando presione “REVISION” y el
diseño el diseño en la memoria de la máquina sea de una
tarjeta de memoria diferente.
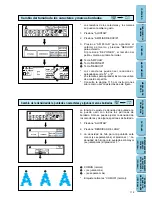
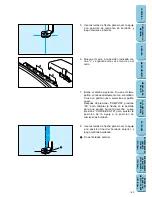
Los patrones de la tarjeta de memoria no se pueden almacenar
en la memoria de la máquina. Sin embargo, los caracteres de la
tarjeta de memoria 1, la tarjeta alfabética y la tarjeta de
monogramas se puede almacenar y recuperar mientras la
tarjeta está insertada. Siempre deberá insertar la tarjeta
correspondiente al diseño que quiere recuperar.

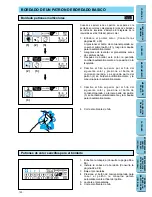
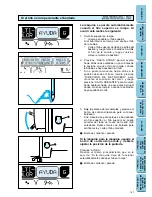
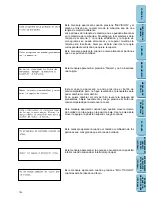
Este mensaje aparecerá cuando quiera almacenar patrones
que no se pueden combinar.

Este mensaje aparecerá si presiona “Tarjeta” y no ha insertado
una tarjeta.

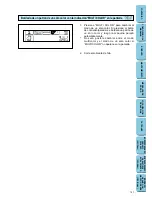
Este mensaje aparecerá cuando presione el botón de
comienzo/parada pero no haya levantado el prensatelas para
poder cambiar el color del hilo.
Si no quiere cambiar el color del hilo, levante la palanca del
prensatelas, bájela nuevamente y luego presione el botón de
comienzo/parada para comenzar a coser.

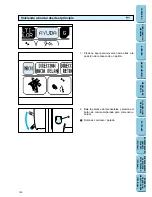
Este mensaje aparecerá cuando haya querido mover el marco
de bordado con la aguja en la posición baja. Use la polea para
mover la aguja a la posición superior. Luego continúe.

Este mensaje aparecerá cuando el tamaño combinado de los
patrones sea más grande que el área de bordado.

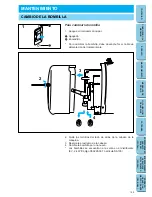
Este mensaje aparecerá si la aguja se encuentra en la posición
inferior cuando encienda el interruptor principal.

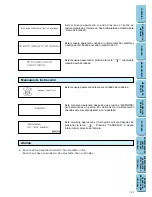
Este mensaje aparecerá cuando presione “MULTICOLOR”
mientras esté bordando un dibujo.

Содержание PE-150

Страница 1: ...PE 150 Personal Embroidery System Sistema de Bordado Personal ...

Страница 2: ...r mechanical adjustment 4 Never operate the embroidery machine with any air openings blocked Keep ventilation openings of the embroidery machine and foot control free from the accumulation of lint dust and loose cloth 5 Never drop or insert any object into any opening 6 Do not use outdoors 7 Do not operate where aerosol spray products are being used or where oxygen is being administered 8 To disco...

Страница 3: ...ed in accordance with the following code Blue Neutral Brown Live As the colours of the wiring in the main lead of this appliance may not correspond with the coloured markings identifying the terminals in your plug proceed as follows The wire which is coloured blue must be connected to the terminal which is marked with the letter N or coloured black or blue The wire which is coloured brown must be ...

Страница 4: ...e embroidery card inserted in the card slot while your machine turns on For a longer service life 1 When storing your embroidery machine avoid direct sunlight and high humidity locations Do not store your embroidery machine beside a space heater iron or other hot objects 2 Use only neutral soaps or detergents to clean the case Benzene thinner and scouring powders can damage the case and machine an...

Страница 5: ...cters and frame patterns 47 Changing thread density of the stitch on characters and some frame patterns 47 SEWING A BASIC EMBROIDERY PATTERN 48 Embroidering multi color patterns 48 Embroidering single color patterns 48 Embroidering a single color pattern when MULTI COLOR is displayed 49 Embroidering characters that extend beyond one frame 50 EMBROIDERY APPLICATIONS 51 Combining a frame pattern wit...

Страница 6: ...IPAL PARTS AND THEIR DESCRIPTION 1 Handle 2 Spool cap 3 Bobbin winding guide 4 Upper thread tension dial 5 Face plate 6 Presser foot lever 7 Needle threader 8 Presser foot 9 Bobbin cover 10 Needle plate 11 Bobbin winding device 12 Spool felt 13 Balance wheel 14 LCD Liquid Crystal Display 15 Hole for extra spool pin 16 Carriage Embroidery arm A MAIN POWER SWITCH AND CONNECTORS B SELECTION KEYS C ST...

Страница 7: ...ded the main switch of the machine must be switched off and the plug removed from the socket outlet When servicing the sewing machine or when removing covers or changing lamps the machine must have the plug removed from the socket outlet For U S A only This appliance has a polarized plug one blade wider than the other To reduce the risk of electric shock this plug is intended to fit in a polarized...

Страница 8: ...tern combinations in the machine 4 BASIC OPERATION KEY Use this key for more information on how to use this embroidery machine 5 MODIFY ADVISE KEY Use this key when you have problems with embroidering This is a useful key to remember START STOP BUTTON Press this button to start the machine and then press it once more to stop the machine The machine will operate at low speed while the button is bei...

Страница 9: ...IES When placing the machine cover on the machine while the embroidery frame is still attached touch CHARACTERS DESIGNS or CARD to return the embroidery arm to it s storage position An alternate method to return the embroidery arm to it s storage position would be to turn the machine off and then turn it on again allow the arm to re set itself and then turn off the machine A cover might not be pro...

Страница 10: ...9 Hobby Craft SA306 X59511 001 No 10 Monogram emblem SA307 X59567 001 8 No 11 Frame SA311 XA0257 001 No 12 Transportation SA312 XA0275 001 No 13 Sports Emblem SA313 XA0517 001 No 14 Large Floral SA314 XA1223 001 No 15 Cute Kids SA315 XA1325 001 No 16 Dogs Cats SA316 XA1406 001 No 17 Nintendo SA317 XA1434 001 No 19 Marine SA319 XA2452 001 No 20 Petite Designs SA320 XA2869 001 No 21 Needlework SA321...

Страница 11: ...ROIDERING USING A EXTRA SMALL FRAME OPTIONAL EMBROIDERING USING A LARGE FRAME OPTIONAL OPERATION SELECTION KEYS Most of the instructions are in the machine s memory Messages on the LCD screen guide you through each operation 1 BASIC OPERATION key 1 Press BASIC OPERATION 2 Touch NEXT 3 Touch SWITCH FUNCTION 4 Touch SELECTION KEY B A 1 A B ...

Страница 12: ...elect one of the five keys that explain the functions of the machine and press that key When you press the key the LCD at the left will change to display the information that you requested 1 CHARACTERS DESIGNS KEY 2 CARD KEY 3 MEMORY KEY 4 BASIC OPERATION KEY 5 MODIFY ADVISE KEY Operation using the screen B LCD screen A pattern or operation can be selected by gently touching the box on the screen ...

Страница 13: ...RAME OPTIONAL EMBROIDERING USING A LARGE FRAME OPTIONAL Example To find out how to wind a bobbin 1 Press BASIC OPERATION 2 Touch WINDING BOBBIN The operation procedure for winding a bobbin will be displayed 1 BASIC OPERATION key Example To find out the combination of fabric needle and thread 1 Press MODIFY ADVISE 2 Touch FABRIC AND THREAD AND NEEDLE 2 MODIFY ADVISE key ...

Страница 14: ... will then appear Touch the key which corresponds to the desired language You can move to the next screen by touching NEXT 1 BASIC OPERATION key Example To change the display language to Spanish 1 Touch LANGUAGE SELECTION 2 Touch NEXT 3 Touch ESPAÑOL SPANISH This will change the language setting to Spanish 4 The display will then return to the screen which was previously being displayed NOTE When ...

Страница 15: ...ection Example To change the display language from Spanish back to English 1 Press BASIC OPERATION 2 Touch SELECCION DE LENGUAJE 3 Touch ENGLISH This will cancel the Spanish language setting and return all screen displays and error messages to the English language 1 BASIC OPERATION key CAUTION This function can not be used as a translation function If the power supply is turned off the current lan...

Страница 16: ...the main power 1 ON 2 OFF 2 Set the thread spool The thread end should come from the bottom front of the spool The spool cap closest to the thread spool size should be used to hold the spool securely on the spool post The spool cap should be pushed on as far as it will go 1 Spool cap 2 Spool 3 Spool felt NOTE If using a fine thread such as cross wound thread remove the spool felt and slightly sepa...

Страница 17: ...ing on the shaft 2 Groove in the bobbin 5 Holding the thread end press the START STOP button Wind the thread a few times around the bobbin and press the START STOP button again Trim the excess thread from the top of the bobbin after the machine stops It is important to trim the thread close to the spoolend 6 Press the START STOP button The machine will stop automatically when the bobbin is full Pr...

Страница 18: ...obbin cover 2 Bobbin cover release button 2 Insert the bobbin into the shuttle following the thread direction as noted in the etching under the bobbin cover Use a plastic bobbin as shown on page 6 3 Guide the thread end around the finger through the channel toward the back pulling the thread toward you which will cut off any excess 2 1 4 Close the bobbin cover by placing the left end in place and ...

Страница 19: ...ull the lower thread up before you start embroidering CAUTION Always be sure to raise the presser foot before removing the upper thread to prevent damage to the thread tension system USING THE EXTRA SPOOL PIN AND NET Extra spool pin Use when embroidering with metallic thread 1 Insert the extra spool pin into the hole on the top of the machine 2 Install the spool felt and the thread spool in that o...

Страница 20: ...ader lever until it stops Hook the thread into the guide and pull it across to the right 1 Wire loop thread guide 2 Needle threader lever 3 Guide The needle threading device cannot be used while the needle is lowered 4 Push the needle threader lever toward the back Check to be sure that the hook has passed through the eye of the needle and route the thread under the metal guides and the hook Pull ...

Страница 21: ...t and stretch fabric which may move in the frame attach the fabric to a non woven stabilizer material before embroidering The stabilizer material should be framed along with the fabric for the best results There are many types of non woven stabilizers available on the market The goal of the stabilizer is to prevent stretch or movement of the fabric Best results for stretch knit or light weight fab...

Страница 22: ...eing embroidered We also recommend using a spray on stabilizer first allow it to dry or iron to dry then use a non woven stabilizer with it in the frame Stretchable fabrics such as jerseys Adhere a piece of iron on stabilizer material which is slightly larger than the frame onto the fabric to be embroidered and then stretch it over the frame area SA517 X80914 001 A stabilizer material that can be ...

Страница 23: ...into the outer frame to clamp the fabric Make sure that the Ä marks of the outer and inner frames are aligned 1 Fabric 2 Right side surface for embroidering 3 Adjusting screw 4 Inner frame 5 Outer frame 6 Loosen 3 Firmly tighten the adjusting screw and then temporarily remove the fabric and the inner frame from the outer frame 1 Tighten 4 Place the embroidery sheet on top of the inner frame so tha...

Страница 24: ...inner frame back into the outer frame while ensuring that the mark on the fabric does not slip out of position Correct setting Clamp securely so that the edges of the outer frame and inner frame are even 1 Outer frame 2 Inner frame 3 Fabric 6 Check to be sure that the center of the design is in the correct location based on the crosshairs of the embroidery sheet Remove the embroidery sheet using t...

Страница 25: ... the mounting pins on the right side and the fabric right side up 2 Align the two pins on the embroidery frame with the frame holder and then insert the frame into the frame holder until a click is heard Be sure to insert both pins If only the forward or the back pin is inserted the pattern may not turn out correctly 1 Frame holder 2 Pins 1 Frame holder 2 Pins Fitting the embroidery frame to the m...

Страница 26: ...need to be adjusted with the use of different thread fabric or stabilizer fabric A B Correct thread tension Adjust so that the lower thread stitch width on the reverse surface of the fabric is about one third of the total width Correct tension is important because too much or too little tension will cause poor quality embroidery or your fabric to pucker 1 Top surface of fabric 2 Reverse side of fa...

Страница 27: ...ater darker 3 Touch END to return to the screen which was previously being displayed If the contrast is adjusted too far the display screen becomes invisible Reset it by turning the power switch off and then on again 1 While touching the LCD anywhere is OK turn the power off and then back on again 2 Touch any one of the lower two selection keys BASIC OPERATION MODIFY ADVISE The LCD will become dar...

Страница 28: ... Needle plate glass ruler etc If the space is not parallel then the needle is bent and should be thrown away to prevent damage to your project or the machine 1 2 4 Insert the new needle into the needle shaft as far up as it will go with the flat side of the needle facing away from you Secure it by firmly tightening the screw with a screwdriver 5 Turn the power switch on 4 2 Loosen the needle screw...

Страница 29: ... SMALL FRAME OPTIONAL EMBROIDERING USING A LARGE FRAME OPTIONAL EMBROIDERING CHAPTER 2 EMBROIDERY 2 Thread the lower bobbin thread See page 15 1 Thread the upper thread following the solidline and numerical sequence marked on your machine Be sure to attach the spool felt as shown in the illustration 1 Spool felt See page 16 17 6 1 3 4 5 2 1 1 BASIC OPERATION key ...

Страница 30: ... then attach the frame to the machine See page 20 22 1 Carriage embroidery arm 2 Embroidery frame NOTE Do not push down the carriage too hard as you attach the hoop Use caution so as not to move the carriage sideways It is easier to move the embroidery frame under the presser foot if the presser foot lever is raised higher than its normal up position 1 Normal presser foot lever up position 2 Press...

Страница 31: ...e top to the bottom through the hole of the presser foot and gently pull the end of the thread 2 Lower the presser foot and press the START STOP button to start the machine After sewing 5 6 stitches stop the machine and raise the presser foot again Trim off any excess thread at the edge of the design After trimming lower the presser foot and press the START STOP button again to start the machine 3...

Страница 32: ...G A EXTRA SMALL FRAME OPTIONAL EMBROIDERING USING A LARGE FRAME OPTIONAL Embroidering advice The recommended lower bobbin thread is 60 90 synthetic thread For thin and stretch fabrics which are difficult to embroider attach the fabric to non woven stabilizer fabric before embroidering If embroidering on a thick fabric with stabilizer see page 18 it is recommended that a stronger 90 14 home sewing ...

Страница 33: ...n embroidery patterns HOW TO SELECT PATTERNS A Select the type of built in embroidery patterns you wish to embroider If the power is turned on without a memory card inserted the display shown at the left will appear B If the power is turned on with a memory card inserted the screen corresponding to the memory card will appear Example No 2 The Flower card To select built in patterns press the CHARA...

Страница 34: ...he characters to form the word BUS 1 Touch 2 Touch B 3 Touch NEXT 4 Touch U 5 Touch S 1 Screen A The operation of each key shown on this screen is described on the following page 31 CONTENTS MACHINE KNOWLEDGE EMBROIDERING MAINTENANCE ERROR MESSAGE TROUBLESHOOTING PATTERNS EMBROIDERING USING A SMALL FRAME OPTIONAL EMBROIDERING USING A EXTRA SMALL FRAME OPTIONAL EMBROIDERING USING A LARGE FRAME OPTI...

Страница 35: ...eck the character selected Refer to page 34 3 Touch this key to return to the previous screen character choices 4 Touch this key to display the next character screen in the sequence 5 Touch this key to switch between uppercase and lowercase Refer to page 32 6 Touch this key to change the character size to one of three different sizes Refer to page 33 7 Touch this key if you would like to change th...

Страница 36: ...C CHARACTERS Actual size 1 Large L 2 Medium M 3 Small S 33 CONTENTS MACHINE KNOWLEDGE EMBROIDERING MAINTENANCE ERROR MESSAGE TROUBLESHOOTING PATTERNS EMBROIDERING USING A SMALL FRAME OPTIONAL EMBROIDERING USING A EXTRA SMALL FRAME OPTIONAL EMBROIDERING USING A LARGE FRAME OPTIONAL Correcting characters One character can be cleared with a backspace each time CLEAR is touched Example If Giel has bee...

Страница 37: ... display appears as shown in the illustration at left after the k is touched The machine will not accept your next character if it exceeds the embroidery area To continue the word or phrase change to a smaller size character By touching CHECK the display will scroll through all the characters from the first character selected If all the characters selected appear on the display at once then the di...

Страница 38: ...erent frame shapes available 3 Select the desired type of stitch to form the frame 2 If you touch NEXT additional stitch types will be displayed There are a total of 12 different stitch types available 4 The combined pattern is then shown on the LCD screen 3 Screen A The operation of each key shown on this screen is described on the following page 35 CONTENTS MACHINE KNOWLEDGE EMBROIDERING MAINTEN...

Страница 39: ... you would like to change the pattern position pattern size and thread density or if you would like to use the Help function To change the pattern position Refer to page 43 To change the pattern size Refer to page 47 To change the thread density Refer to page 47 It may not be possible to change the thread density for some patterns To use the Help function Refer to page 54 2 Touch this key to retur...

Страница 40: ...terns Example 1 Touch 2 Select the desired pattern to be embroidered Example Touch the giraffe 1 Touch this key to display all available patterns on the screen You can then select the desired pattern by touching it 2 Touch this key to return to the previous pattern screen 3 Touch this key to move to the next pattern screen 3 The pattern is now selected 4 Screen A The operation of each key shown on...

Страница 41: ...r mode It is not possible to change between multi color mode and single color mode if MULTI COLOR is not displayed on the screen 4 Touch this key if you would like to change the pattern position or if you would like to use the Help function To change the pattern position Refer to page 43 To use the Help function Refer to page 54 5 Touch this key to change the size of the pattern It is not possible...

Страница 42: ... be shown on the display 3 Remaining time 4 Total required time 4 The time remaining will change at the end of each color embroidery Displaying the color names for one point patterns If you touch THREAD COLOR the color names reference of the different threads to be used will be displayed in order 1 After selecting the pattern touch THREAD COLOR 1 THREAD COLOR key 2 The color names will then be dis...

Страница 43: ...ard straight out from the slot Always keep the memory cards in their proper case when they are not in use Selecting patterns from a memory card Be sure to turn off the power switch before inserting or removing the memory cards 1 Turn the power switch off 2 Insert the memory card into the card slot according to the direction of the arrow mark on the memory card 1 Direction arrow on memory card 3 Tu...

Страница 44: ...ved they will be displayed on the screen Touch NEXT to look for an empty memory space if MEMORY 1 has been used If the new pattern is saved to a space where an old pattern has already been saved the old pattern will be deleted Do not turn off the power while a pattern is being saved while Saving is displayed 4 The pattern is now saved in memory 5 For the next example press CHARACTERS DESIGNS touch...

Страница 45: ...L Retrieving a pattern which has been saved Example To recall the Boy pattern saved in memory space 2 1 Touch MEMORY 1 MEMORY key 2 Touch NEXT 3 Touch RETRIEVE 2 4 The pattern retrieved will appear on the screen Press START STOP button to embroider the pattern Patterns which are saved from an embroidery card can only be retrieved if the memory card containing that pattern has been inserted into th...

Страница 46: ...l be returned to the center of the embroidery area 8 This moves the needle position to the middle of the pattern or to the sewing start position Use it when you would like to set the embroidering position Refer to page 45 9 If you touch this key the embroidery frame will move to trace the area required for the selected design so that you can check the embroidering position Refer to page 44 0 Touch...

Страница 47: ... the hole on the embroidery foot as a guide and never lower the needle while it is moving Checking the embroidery area If TRIAL is touched the embroidery frame will move and the presser foot will trace the embroidery area to be used for the currently selected pattern and size Do not lower the needle Use the hole of the presser foot as a guide instead Example To move the embroidery position to the ...

Страница 48: ...on on the fabric in the frame as shown in the illustration The mark cannot be too close to the edge of the frame as the presser foot prevents the needle from getting very close to the frame 2 Touch START CENTER to select START and then touch the arrow key to align the hole of the presser foot with the mark Changing the pattern direction ABC ABC ABC ABC ABC The pattern will be rotated clockwise in ...

Страница 49: ...IDERING USING A EXTRA SMALL FRAME OPTIONAL EMBROIDERING USING A LARGE FRAME OPTIONAL Mirror imazing patterns 1 Touch the key to reverse the pattern horizontally If the key appears on the display in reverse mode it indicates that the pattern has been reversed horizontally showing a mirror image The key will not be displayed for some patterns ...

Страница 50: ...DUCE key Characters can be enlarged and reduced to sizes ranging from L to S The enlargement sizes for frame patterns will vary according to the pattern Refer to page 43 for instructions on how to use other keys in this screen Changing thread density of the stitch on characters and some frame patterns The thread density adjustment is not available for all patterns Patterns other than the character...

Страница 51: ...hanging the thread When embroidering is completed for this color the screen display will automatically move to the left one position 2 Replace the upper thread with the next color and press the START STOP button The second part of the pattern 2 will be embroidered and the machine will then stop automatically 3 Replace the upper thread with the next color and press the START STOP button The third p...

Страница 52: ...then the machine will stop automatically It is not possible to change between multi color mode and single color mode if MULTI COLOR is not displayed on the screen 2 Trim any excess thread 49 CONTENTS MACHINE KNOWLEDGE EMBROIDERING MAINTENANCE ERROR MESSAGE TROUBLESHOOTING PATTERNS EMBROIDERING USING A SMALL FRAME OPTIONAL EMBROIDERING USING A EXTRA SMALL FRAME OPTIONAL EMBROIDERING USING A LARGE F...

Страница 53: ...witch to START 2 Press the START STOP button to start embroidering When embroidering has finished the machine will sew the finishing position automatically You can use the finishing position as the starting position for the characters to be embroidered next when the fabric is re framed with the finishing point and last character just inside the left edge of the frame 1 Finishing position 3 Input t...

Страница 54: ... a guide when embroidering characters or patterns to position them within the frame pattern 2 Using the mark inside the frame pattern as a guide align the needle using the center needle layout function Embroider the design Making badges or decorative patches 1 After embroidering a frame pattern and the combined design sew an extra frame pattern on the outside using the stitch slightly larger than ...

Страница 55: ...he frame Cut neatly around the outside of the shape made by the stitches 3 Attach a stabilizer material onto the back of the fabric on the project where the applique is to be placed Center the area where the applique is to be placed in the embroidery hoop Embroider it in the same way using the same frame pattern shape and stitch as in step 2 1 4 Apply a thin layer of fabric adhesive to the rear of...

Страница 56: ...TIONAL Embroidering onto small pieces of fabric or onto corners Use stabilizer material to provide extra support while embroidering After embroidering is completed remove the stabilizer material carefully Case A 1 Fabric 2 Secure with double faced tape or a basting stitch 3 Stabilizer Case B 1 Fabric 2 Secure with double faced tape or a basting stitch 3 Stabilizer Case C 1 Ribbon Secure with doubl...

Страница 57: ... to the start position for a pattern 2 Touch this key to move ahead to the start of the next color or character without embroidering 3 Touch this key to move back to the start of the current color or character without embroidering 4 Touch this key to move forward stitch by stitch without embroidering If touched continuously the stitch will be advanced in 9 stitch jumps starting from the 6th single...

Страница 58: ...ghtly before the position where the thread broke or the bobbin ran out of the thread If it is not possible to move back to the position where the thread broke touch REVERSE SEARCH to move back to the beginning of that color and then touch FORWARD to move forward to just before the position where the thread broke or the bobbin ran out of the thread 3 Lower the presser foot lever and press the START...

Страница 59: ...A SMALL FRAME OPTIONAL EMBROIDERING USING A EXTRA SMALL FRAME OPTIONAL EMBROIDERING USING A LARGE FRAME OPTIONAL Re embroidering from the beginning 1 Touch HOME to move back to the start position for a pattern 2 Lower the presser foot lever and press the START STOP button to start embroidering 1 START STOP button ...

Страница 60: ...E CHANGING THE LIGHT BULB 1 2 3 4 When replacing the light bulb 1 Turn the main power switch off 1 ON 2 OFF The power cord plug must be removed from the socket outlet prior to changing the bulb 2 Loosen the screw in the end cap at the left side of the machine 3 Remove the end cap 4 Replace the snap in light bulb with a new one of the same type Light bulbs are available through your dealer 8 V 2 4 ...

Страница 61: ...r 1 Use a screwdriver to loosen the screw to remove 2 3 2 Loosen the screws on the needle plate 3 Remove the needle plate O 5 4 4 Take out the inner rotary hook 5 Remove any accumulated lint and threads from the inner hook and race with a brush or a small vacuum cleaner attachment 1 Race 2 Inner rotary hook Lint and dust accumulated in the race can cause poor quality stitching 6 Put the inner rota...

Страница 62: ...s pressed or a correction in your operation is required machine will not start and will instruct you with an alarm and error number on the LCD This message is displayed when the START STOP button is pressed while the presser foot lever is raised This message is displayed when a pattern has not been selected and the START STOP button is pressed or SET is touched This message is displayed when the m...

Страница 63: ...ed when you are trying to save patterns that cannot be combined This message is displayed if CARD is touched while no memory card is inserted This message is displayed when the START STOP button is pressed but the presser foot has not been raised to change the thread color If you are not changing the thread color raise the presser foot lever lower it again and then press the START STOP button to s...

Страница 64: ...ers or patterns combined exceeds a maximum 35 This message is displayed if you touch the key while the machine is embroidering Instruction message displays Audio alarms This message is displayed during bobbin winding This message is displayed after a MEMORY space is touched to save a pattern to that space The power should not be turned off while this is on the display This message is displayed whi...

Страница 65: ...ng used 1 The needle is not correctly inserted 2 The correct needle is not used 3 The fabric has been placed in the embroidery frame incorrectly 4 The embroidery frame has been attached to the machine incorrectly 5 Thin or stretch fabric is being used with no stabilizer fabric attached 1 The upper thread tension is too strong 2 The upper or lower thread is not threaded correctly 3 Thin or stretch ...

Страница 66: ...c is being used with no stabilizer fabric attached 4 Threads other than the designated upper and lower embroidery thread are being used 5 The thread is tangled 1 The needle is installed incorrectly 2 The needle threader lever will not turn 1 Thread has accumulated around the thread cutting knife Remedy 1 Decrease the upper thread tension using the upper thread tension dial 2 Thread the upper and l...

Страница 67: ... foot 4 See ERROR MESSAGE on page 59 1 Remove the needle and reset a new needle properly 2 Change to the proper needle Caution This machine is equipped with a thread breakage sensor Accordingly if the upper thread is not threaded the machine will not operate even if the START STOP button is pressed In addition a loud noise which is different from the normal operation noise is generated by the need...

Страница 68: ...ERING USING A EXTRA SMALL FRAME OPTIONAL EMBROIDERING USING A LARGE FRAME OPTIONAL PATTERNS Character embroidering chart Sizes L 30 mm 1 3 16 M 15 mm 9 16 S 7 5 mm 1 4 Sizes L 30 mm 1 3 16 M 15 mm 9 16 S 10 mm 0 3 8 Frame pattern embroidering chart Sizes can be enlarged or reduced Frames Stitches Sizes L 30 mm 1 3 16 M 15 mm 9 16 S 9 mm 0 3 8 ...

Страница 69: ...00 3 019 1 001 2 800 3 900 1 800 2 507 3 900 1 800 2 900 1 205 2 800 3 900 1 800 2 900 1 800 2 001 3 900 1 800 2 005 3 900 1 001 2 800 3 019 1 800 2 205 3 900 1 019 2 205 3 900 1 001 2 205 3 900 1 800 2 205 3 900 1 001 2 019 3 900 1 205 2 001 3 339 1 005 2 800 3 900 1 001 2 800 3 900 1 019 2 800 3 900 1 323 2 085 3 001 4 058 1 086 2 058 3 707 1 070 2 085 3 086 4 323 1 513 2 001 3 208 4 058 1 001 2...

Страница 70: ...ling the small embroidery frame 2 If you do not change the position of the pattern on the LAYOUT screen check that the embroidering area for the pattern selected is within 70 mm 2 3 4 in height and width by touching the LAYOUT key If it is the pattern can be embroidered correctly 3 If you have changed the position of the pattern using the arrow keys in the LAYOUT screen use the TRIAL function to c...

Страница 71: ...ry frame 2 Using the arrow keys in the LAYOUT screen use the TRIAL function to check that the pattern does not extend past the edges of the frame before starting embroidering 3 Before touching TRIAL raise the needle and the presser foot lever to their highest positions The extra small frame can also be used horizontally by changing the position of attachment to the frame fixing plate Use a screwdr...

Страница 72: ...f the overall height is within 18 2 cm 7 3 16 you can embroider the respective patterns simply by changing the clamping position of the frame a b c 2 Once the pattern at the top has been embroidered move the clamp from position a to position b or position c 3 Embroider the pattern at the bottom 69 CONTENTS MACHINE KNOWLEDGE EMBROIDERING MAINTENANCE ERROR MESSAGE TROUBLESHOOTING PATTERNS EMBROIDERI...

Страница 73: ... the pattern touch LAYOUT to check the size of the pattern The size of the pattern is displayed on the left side on the screen 2 Draw a line on the fabric marking the place where the patterns will be embroidered Find the center line and then draw the line along the whole length of the pattern marking it off into two even lengths Mark the embroidery start position with a cross by drawing another li...

Страница 74: ... to the place indicated by c and clamp it again with the carriage 7 Embroider the next pattern If using the same pattern go straight ahead and start embroidering If using a different pattern select the new pattern After touching LAYOUT touch 90 clockwise to change the arrow in the display so that it points to the right Then touch START CENTER to set the current needle position as the embroidery st...

Страница 75: ...os Mantener los orificios de ventilación de la máquina de bordar y el pedal sin acumulación de povo Suciedad y restos de tejido 5 No introducir no insertar objetos en los orificios de ventilación 6 No usar al aire libre 7 No usar mientras se estén utilizando productos aerosoles spray o en lugares donde se esté administrando oxígeno 8 Para desconectar girar el interruptor hasta la posición del símb...

Страница 76: ...a de bordado insertada en la ranura de la tarjeta cuando la máquina de bordar está funcionando Para mayor duración 1 Guarde la máquina de bordar en un lugar protegido de los rayos solares y donde no haya humedad No guarde la máquina cerca de ningún aparato de calefacción plancha u otros objetos que emitan calor 2 Use únicamente jabón o detergente neutro para limpiar la máquina La bencina los disol...

Страница 77: ...arcos bordados 119 Cambio de la densidad de la puntada en caracteres y algunos marcos bordados 119 BORDADO DE UN PATRON DE BORDADO BASICO 120 Bordado patrones multicolores 120 Patrones de color sencillos para el bordado 120 Bordado de un patrón de un sólo color con la indicación MULTI COLOR en la pantalla 121 Bordado de más letras de las que entran en el área de bordado 122 BORDADO DE APLICACIONES...

Страница 78: ...S 1 Mango 2 Soporte de la bobina 3 Guiahilos para enrollar la bobina 4 Dial de tensión de hilo superior 5 Placa delantera 6 Palanca del prensatelas 7 Enhebrador de aguja 8 Prensatelas 9 Cubierta de la bobina 10 Placa de aguja 11 Dispositivo de bobinado 12 Fieltro de bobina 13 Polea 14 Pantalla de cristal líquido 15 Orificio para pasador de bobina extra 16 Carro Brazo de bordar A Interruptor princi...

Страница 79: ...DO UN MARCO GRANDE OPCIONAL INTERRUPTOR PRINCIPAL Y CONECTORES 1 2 1 Interruptor principal 1 ON 2 OFF 2 Ranura de tarjeta de memoria PRECAUCION Cuando no use la máquina de bordar el interruptor principal debe estar apagado o la máquina debe estar desenchufada del tomacorriente Cuando realice el mantenimiento retire una de las cubiertas o cambie una bombilla la máquina debe estar desenchufada del t...

Страница 80: ...rizar o recuperar patrones de la memoria 4 Tecla de funcionamiento básico Use esta tecla para más información a cerca de como usar la máquina de bordar 5 Tecla para modificar y consejos Use esta tecla cuando tenga problemas de bordado Es una tecla muy útil BOTON DE COMIENZO PARADA Presione este botón para comenzar a bordar y vuelva a presionarlo para parar de bordar La máquina funcionará lentament...

Страница 81: ...oque la cubierta de máquina en la máquina con el marco de bordado instalado presione la tecla de caracteres y diseños o la tecla de tarjeta para volver el brazo de bordar a su posición de almacenamiento Un método alternativo para volver el brazo de bordar a su posición de almacenamiento será desconectar la máquina y volverla a conectar dejando que el brazo se reponga y volver a desconectar la máqu...

Страница 82: ...01 No 9 Artesanías SA306 X59511 001 No 10 Monogramas SA307 X59567 001 No 11 Marco SA311 XA0257 001 8 No 12 Transportes SA312 XA0275 001 No 13 Emblemas deportivos SA313 XA0517 001 No 14 Flores grandes SA314 XA1223 001 No 15 Niños bonitos SA315 XA1325 001 No 16 Perros y gatos SA316 XA1406 001 No 17 Nintendo SA317 XA1434 001 No 19 Marine SA319 XA2452 001 No 20 Diseños pequeños SA320 XA2869 001 No 21 ...

Страница 83: ... OPCIONAL BORDADO USANDO UN MARCO GRANDE OPCIONAL FUNCIONAMIENTO TECLAS DE SELECCION La mayoría de las instrucciones se encuentran en la memoria de la máquina Los mensajes en la pantalla LCD lo guiarán en cada procedimiento 1 Tecla de funcionamiento básico 1 Presione la tecla de funcionamiento básico 2 Presione SIGUI 3 Presione FUNCION DEL INTERRUPTOR 4 Presione TECLA SELECCION B A 1 A B ...

Страница 84: ...clas que explican las funciones de la máquina y presione esa tecla Cuando presione la tecla la pantalla a la izquierda cambiará para exhibir la información que haya solicitado 1 TECLA DE CARACTERES Y DISEÑOS 2 TECLA DE TARJETA 3 TECLA DE MEMORIA 4 TECLA DE FUNCIONAMENTO BÁSICO 5 TECLA PARA MODIFICAR Y CONSEJOS Funcionamiento usando la pantalla B Pantalla LCD Se puede seleccionar un patrón o funcio...

Страница 85: ...NDO UN MARCO GRANDE OPCIONAL Ejemplo Para consultar cómo enrollar la bobina 1 Presione la tecla de funcionamiento básico 2 Presione HACER CANILLA Se exhibirá el procedimiento para enrollar la bobina 1 Tecla de funcionamiento básico Ejemplo Para consultar que combinación de tejido aguja e hilo usar 1 Presione la tecla para modificar y consejos 2 Presione TEJIDO E HILO Y AGUJA 2 Tecla para modificar...

Страница 86: ...lla de exhibición de lenguaje Presione el lenguaje deseado para seleccionarlo Puede cambiar a la siguiente pantalla presionando SIGUI 1 Tecla de funcionamiento básico Ejemplo Para cambiar el lenguaje de la pantalla a Español 1 Presione SELECCION DE LENGUAJE 2 Presione SIGUI 3 Presione ESPAÑOL El ajuste de lenguaje cambiará a Español 4 La exhibición volverá a la pantalla que se estaba exhibiendo an...

Страница 87: ...plo Para cambiar el lenguaje de Español nuevamente a Inglés 1 Presione la tecla de funcionamiento básico 2 Presione SELECCION DE LENGUAJE 3 Presione ENGLISH De esta forma se cancelará el ajuste del lenguaje Español y la pantalla y los mensajes de error volverán a aparecer en Inglés 1 Tecla de funcionamiento básico PRECAUCION Esta función no se debe usar como una función de traducción Si ocurre un ...

Страница 88: ... Encendido 2 Apagado 2 Arme el soporte de la bobina El extremo del hilo debe salir por la parte delantera e inferior de la bobina La tapa de al bobina debe usarse para mantener bien segura en su lugar la bobina La tapa de la bobina se debe colocar tan apretada como sea posible 1 Tapa de bobina 2 Bobina 3 Fieltro de la bobina NOTA Cuando usa un hilo bobinado cruzado retire el fieltro de bobina y se...

Страница 89: ...del hilo presione el botón de comienzo parada Enrolle el hilo unas vueltas alrededor de la bobina y presione otra vez el botón de comienzo parada Después que haya parado la máquina corte el sobrante de hilo por la parte de arriba de la bobina Es importante cortar el hilo cerca del final de la bobina 6 Presione el botón de comienzo parada La máquina parará automáticamente cuando la bobina esté llen...

Страница 90: ...de bobina 2 Seguro de la cubierta de bobina 2 Introduzca la bobina en el portabobina siguiendo la dirección del hilo indicada debajo de la cubierta de la bobina Use una bobina plástica tal como se indica en la página 78 3 Pase el hilo por el gancho y por el canal hacia atrás tirando del hilo hacia usted de forma de cortar el sobrante 2 1 4 Cierre la cubierta de la bobina colocando el extremo izqui...

Страница 91: ...r del hilo inferior antes de comenzar a coser PRECAUCION Antes de sacar el hilo superior asegúrese de levantar el prensatelas para evitar dañar el sistema de tensión del hilo USO DEL PASADOR DE BOBINA EXTRA Y DE LA REDECILLA Pasador de bobina extra Uselo cuando borde usando un hilo metálico 1 Inserte el pasador de bobina extra en el orficio en la parte de arriba de la máquina 2 Instale el fieltro ...

Страница 92: ...asta que haga tope Enganche el hilo en la guía y tírelo hacia la derecha 1 Gancho guiahilos 2 Palanca del enhebrador de aguja 3 Guía El dispositivo de enhebrado automático no se puede usar mientras la aguja está abajo 4 Empuje la palanca del enhebrador de aguja hacia atrás Verifique que el gancho haya pasado por el ojo de la aguja y pase el hilo por debajo de las guías metálicas y del gancho Tire ...

Страница 93: ...a tejidos finos de punto o elásticos que se pueden mover dentro del marco coloque un material estabilizador no tejido detrás del tejido antes de bordar Para obtener mejores resultados también se debe colocar la entretela en el bastidor Existen diferentes tipos estabilizadores no tejidos El objetivo del estabilizador es evitar que el tejido se estire o mueva Los mejores resultados en tejidos elásti...

Страница 94: ...l tejido a bordar que se encuentra en el marco También le recomendamos usar primero apresto dejarlo secar o secarlo con la plancha y luego usar un estabilizador no tejido en el bastidor Tejidos elásticos como jerseys Adhiera un pedazo de estabilizador un planchar un poco más grande que el marco donde va a bordar el tejido y luego estírelo sobre el marco X80914 001 Se recomienda usar un estabilizad...

Страница 95: ...rior para prensar el tejido Asegúrese que las marcas Ä en el exterior e interior de los marcos están alineadas 1 Tejido 2 Lado derecho para bordado 3 Tornillo de ajuste 4 Marco interior 5 Marco exterior 6 Para aflojar 3 Apriete firmemente el tornillo de ajuste y luego saque temporariamente el tejido y el marco interior de adentro del marco exterior 1 Para apretar 4 Coloque la hoja de bordado sobre...

Страница 96: ... del marco exterior asegurándose que la marca en el tejido no se salga de posición Instalación correcta Instálelos correctamente de forma que los bordes del marco exterior e interior queden parejos 1 Marco exterior 2 Marco interior 3 Tejido 6 Verifique que el centro del diseño se encuentra en la posición correcta de acuerdo con la marca de posicionamiento de la hoja de bordado Retire la hoja de bo...

Страница 97: ...recho y con el derecho del tejido hacia arriba 2 Alinee las dos salientes del marco de bordado con el soporte del marco y luego introduzca el marco en el soporte del marco hasta que escuche un chasquido Asegúrese que las dos salientes han quedado bien Si hubiera colocado sólo una de las salientes el diseño no quedará bien 1 Soporte del marco 2 Salientes Instalación del marco de bordado en la máqui...

Страница 98: ...justar la tensión del hilo puede ser necesario usar hilo tejido diferente o material estabilizador A B Tensión de hilo correcta Ajústela de forma que el ancho de puntada del hilo inferior del lado del revés del tejido sea un tercio del ancho total Es importante lograr la tensión correcta pues demasiada tensión o poca tensión hará que el bordado quede mal o que el tejido se arrolle 1 Derecho del te...

Страница 99: ...ione FIN para volver a la pantalla anterior Si ajusta el contraste demasiado no se podrá ver nada en la pantalla Reponga la pantalla apagando y encendiendo nuevamente el interruptor principal 1 A la misma vez que toca la pantalla LCD en cualquier lugar está bien apague y vuelva a encender la máquina nuevamente 2 Presione cualquiera de las dos teclas de selección inferiores tecla de funcionamiento ...

Страница 100: ... de agujas vidrio regla etc Si el espacio no es paralelo entonces el aguja está doblada y se debe dejar de usar para evitar que el trabajo quede mal o la máquina se rompa 1 2 4 Introduzca la aguja nueva en el portaaguja con el lado plano hacia atrás y empújela hacia arriba hasta que haga tope Atornillela atorníllela firmemente usando el destornillador 5 Apague el interruptor principal 4 2 Afloje e...

Страница 101: ...ÑO OPCIONAL BORDADO USANDO UN MARCO GRANDE OPCIONAL BORDADO CAPITULO 2 BORDADO 2 Enhebre el hilo inferior Consulte la página 87 1 Enhebre el hilo superior siguiendo la línea continua y la secuencia numérica en su máquina Asegúrese de colocar el fieltro de bobina tal como se indica en la figura 1 Fieltro de bobina Consulte la página 88 a 89 6 1 3 4 5 2 1 1 Tecla de funcionamiento básico ...

Страница 102: ...rdado y luego instale el marco en la máquina Consulte la página 92 94 1 Carro Brazo de bordar 2 Marco de bordado NOTA No empuje el carro demasiado hacia abajo al instalar el bastidor Tenga cuidado de no mover el carro hacia un costado Es más fácil mover el bastidor de bordado de abajo del prensatelas si la palanca del prensatelas se levanta más de la posición normal superior 1 Posición normal supe...

Страница 103: ... por el orificio desde arriba hacia abajo y tire suavemente del extremo del hilo 2 Baje el prensatelas y presione el botón de comienzo parada para comenzar a coser Después de coser 5 a 6 puntadas pare la máquina y levante de nuevo el prensatelas Corte el sobrante de hilo del borde del diseño Después de cortar el hilo baje el prensatelas y presione otra vez el botón de comienzo parada para continua...

Страница 104: ...BORDADO USANDO UN BASTIDOR EXTRA PEQUEÑO OPCIONAL BORDADO USANDO UN MARCO GRANDE OPCIONAL Consejos para el bordado El hilo inferior recomendado es un hilo sintético no 60 a 90 Para tejidos finos o elásticos difíciles de bordar use un estabilizador no tejido debajo del tejido a bordar Si borda un tejido grueso con estabilizador consulte la página 90 se recomienda que use una aguja de máquina de cos...

Страница 105: ... A Seleccione el tipo de patrones de bordado incorporados que desea bordar Si enciende el interruptor principal sin haber colocado una tarjeta de memoria la exhibición que se indica a la izquierda aparecerá en la pantalla B Si enciende el interruptor principal habiendo colocado una tarjeta de memoria la exhibición correspondiente a la tarjeta de memoria aparecerá en la pantalla Ejemplo No 2 Tarjet...

Страница 106: ...eres para la palabra BUS 1 Presione 2 Presione B 3 Presione SIGUI 4 Presione U 5 Presione S 1 Pantalla A El funcionamiento de cada tecla indicado en esta pantalla se describe en la siguiente página 103 CONTENIDO CONOCIENDO LA MAQUINA BORDADO MANTENIMIENTO MENSAJES DE ERROR LOCALIZACION DE AVERIAS PATRONES BORDADO USANDO UN MARCO PEQUEÑO OPCIONAL BORDADO USANDO UN BASTIDOR EXTRA PEQUEÑO OPCIONAL BO...

Страница 107: ...06 3 Presione esta tecla para volver a los caracteres elegidos en la pantalla anterior 4 Presione esta tecla para exhibir la siguiente pantalla de caracteres en la secuencia 5 Presione esta tecla para cambiar entre mayúsculas y minúsculas Consulte la página 104 6 Presione esta tecla para cambiar el tamaño de carácter a uno de los tamaños diferentes Consulte la página 104 7 Presione esta tecla si d...

Страница 108: ...maño normal 1 Grande G 2 Mediano M 3 Pequeño P 105 CONTENIDO CONOCIENDO LA MAQUINA BORDADO MANTENIMIENTO MENSAJES DE ERROR LOCALIZACION DE AVERIAS PATRONES BORDADO USANDO UN MARCO PEQUEÑO OPCIONAL BORDADO USANDO UN BASTIDOR EXTRA PEQUEÑO OPCIONAL BORDADO USANDO UN MARCO GRANDE OPCIONAL Corrección de caracteres Puede borrar un carácter a la vez presionando BORR Ejemplo Si por equivocación a introdu...

Страница 109: ...tal como se indica en la figura a la izquierda después de presionar k La máquina no aceptará el carácter siguiente por que excede el área de bordado Para continuar con la palabra o frase cambie a un tamaño de carácter menor Presionando COMP todos los caracteres desde el primero se desplazarán a lo largo de la pantalla Si todos los caracteres seleccionados pueden aparecer entonces no se desplazarán...

Страница 110: ...s disponibles 3 Seleccione el tipo de puntada que desea para el marco 2 Si presiona SIGUI se exhibirán otros tipos de puntadas Existen un total de 12 puntas diferentes disponibles 4 El patrón combinado se muestra en la pantalla LCD 3 Pantalla A El funcionamiento de cada tecla indicado en esta pantalla se describe en la siguiente página 107 CONTENIDO CONOCIENDO LA MAQUINA BORDADO MANTENIMIENTO MENS...

Страница 111: ...ar la posición del patrón el tamaño del patrón y la densidad del hilo o si desea usar la función de ayuda Para cambiar la posición del patrón Consulte la página 115 Para cambiar el tamaño del patrón Consulte la página 119 Para cambiar la densidad del hilo Consulte la página 119 No será posible cambiar la densidad del hilo de algunos patrones Para usar la función de ayuda Consulte la página 126 2 P...

Страница 112: ...Ejemplo 1 Presione 2 Seleccione que desea bordar Por ejemplo presione la girafa 1 Presione LISTA para exhibir en la pantalla todos los patrones disponibles Puede seleccionar el patrón deseado presionándolo 2 Presione PREV para volver a la pantalla de patrones anterior 3 Presione SIGUI para cambiar a la pantalla de patrones siguiente 3 El patrón queda seleccionado 4 Pantalla A El funcionamiento de ...

Страница 113: ...ocolor No será posible cambiar entre el modo multicolor y el modo de un sólo color si MULTICOLOR no aparece en la pantalla 4 Presione esta tecla si desea cambiar la posición del patrón o si desea usar la función de ayuda Para cambiar la posición del patrón Consulte la página 115 Para usar la función de ayuda Consulte la página 126 5 Presione G P para cambiar el tamaño del patrón No se puede cambia...

Страница 114: ...stante cambiará al finalizar de bordar cada color Si presiona COLOR DE HILO los nombres de los colores referencia de los hilos a usar diferentes se exhibirán en orden 1 Después de seleccionar el patrón presione COLOR DE HILO 1 Tecla COLOR DE HILO 2 Se exhibirán los nombres de los colores Si presiona otra vez la tecla COLOR DE HILO la exhibición volverá a la pantalla anterior No será posible exhibi...

Страница 115: ...nga siempre las tarjetas de memoria en su estuche Selección de patrones de una tarjeta de memoria Asegúrese de desconectar el interruptor principal antes de insertar o retirar una tarjeta de memoria 1 Desconecte el interruptor principal 2 Inserte la tarjeta de memoria en la ranura de acuerdo a la dirección indicada con la flecha en la tarjeta de memoria 1 Flecha en la tarjeta de memoria 3 Conecte ...

Страница 116: ... en la MEMORIA 1 se exhibirá en la pantalla Si estuviera ocupada presione la tecla SIGUI hasta encontrar un vacía Si almacena el patrón nuevo en una memoria que estaba ocupada se borrará el patrón viejo No corte la corriente mientras almacena un patrón mientras Grabando aparece en la pantalla 4 El patrón quedará almacenado en la memoria 5 Para el siguiente ejemplo presione CARACTERES Y DISEÑOS pre...

Страница 117: ...ando un patrón de la memoria Ejemplo Para recuperar el patrón Boy almacenado en la memoria 2 1 Presione MEMORIA 1 Tecla de memoria 2 Presione SIGUI 3 Presione REVISION 2 4 El dibujo recuperado aparecerá en la pantalla Presione el botón de comienzo parada para bordar el dibujo Los patrones almacenados en una tarjeta de bordado sólo pueden ser recuperados si la tarjeta de memoria conteniendo ese pat...

Страница 118: ...centro del dibujo o a la posición de comienzo de bordado etc Usarla cuando se quiera ajustar la posición de bordado Consulte la página 117 9 Si se presiona esta tecla el bastidor de bordado se moverá para trazar el área necesaria para el diseño seleccionado de manera que se pueda verificar la posición de bordado Consulte la página 116 0 Presione esta tecla para volver a la pantalla de selección an...

Страница 119: ... agujero en el prensatelas como una guía y nunca bajar la aguja mientras se encuentre en movimiento Verificación del área de bordado Si presiona PRUEBA el marco de bordado se moverá y el prensatelas se moverá por el área en que se va a bordar el patrón seleccionado No baje la aguja En cambio use el orificio en el prensatelas como guía Ejemplo Para mover la ubicación del bordado hacia la esquina su...

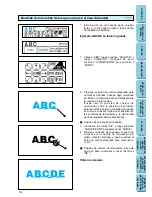
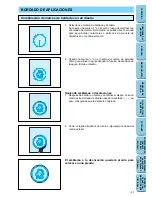
Страница 120: ...el punto de comienzo tal como se muestra en la figura La señal no debe estar muy cerca del borde del bastidor debido a que el prensatelas impide que la aguja se aproxime mucho al marco 2 Presione COMIE CENTR para seleccionar COMIE y luego presione la flecha la izquierda para alinear el orificio del prensatelas con la marca Cambio de la dirección del patrón ABC ABC ABC ABC ABC Cada vez que presione...

Страница 121: ...R EXTRA PEQUEÑO OPCIONAL BORDADO USANDO UN MARCO GRANDE OPCIONAL Patrones en forma de espejo 1 Presionar la tecla para invertir el dibujo horizontalmente y muestra una imagen en espejo Si la tecla aparece en la pantalla en modo invertido indica que el dibujo ha sido invertido horizontalmente mostrando una imagen en espejo En el caso de algunos dibujos no se exhibirá la tecla ...

Страница 122: ... Tecla REPONER 3 Tecla REDUCIR Los caracteres pueden ser reducidos o agrandados entre G o P Los tamaños para agrandar los marcos varían de acuerdo al patrón Consulte la página 115 por instrucciones sobre como usar otras teclas de este figura Cambio de la densidad de la puntada en caracteres y algunos marcos bordados La función de ajuste de densidad de puntada no se puede usar con todos los patrone...

Страница 123: ...Después de bordar este color la pantalla cambiará automáticamente a la posición de la izquierda 2 Cambie el hilo superior por el hilo del siguiente color y presione el botón de comienzo parada La segunda parte del patrón 2 se bordará automáticamente y la máquina parará automáticamente 3 Cambie el hilo superior por el hilo del siguiente color y presione el botón de comienzo parada La tercera parte ...

Страница 124: ... luego la máquina parará automáticamente No será posible cambiar entre el modo multicolor y el modo de un sólo color si MULTICOLOR no aparece en la pantalla 2 Corte el sobrante de hilo 121 CONTENIDO CONOCIENDO LA MAQUINA BORDADO MANTENIMIENTO MENSAJES DE ERROR LOCALIZACION DE AVERIAS PATRONES BORDADO USANDO UN MARCO PEQUEÑO OPCIONAL BORDADO USANDO UN BASTIDOR EXTRA PEQUEÑO OPCIONAL BORDADO USANDO ...

Страница 125: ...o parada para comenzar a bordar Cuando haya terminado de bordar la máquina hará automáticamente la costura de terminación Puede usar la posición de costura de terminación como la posición de comienzo para las letras a bordar a continuación cuando se vuelve a colocar el tejido en el bastidor con las puntadas de terminación y la ùltima letra del lado izquierdo interior del bastidor 1 Posición de cos...

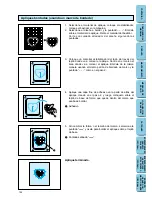
Страница 126: ...Esta marca se puede usar como una guía para bordar caracteres o patrones de manera de ubicarlos en el centro del marco 2 Usando la marca en el centro del marco de bordado como guía alinee la aguja usando la función de centrado de la aguja Borde el diseño Haciendo emblemas o decoraciones 1 Después de bordar un marco y combinar el diseño cosa un marco extra del lado de afuera usando la puntada un po...

Страница 127: ... bastidor Corte con cuidado alrededor del diseño siguiendo las puntadas 3 Coloque un material estabilizador del lado del revés del tejido donde va a colocar el aplique Centre en el marco el área donde va a colocar el aplique Bórdela de la misma manera usando el mismo patrón de bordado de marco y la puntada como en el paso 2 1 4 Aplique una capa fina de adhesivo en la parte de atrás del aplique cre...

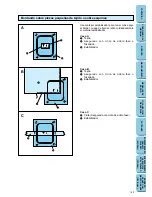
Страница 128: ...ARCO GRANDE OPCIONAL Bordando sobre piezas pequeñas de tejido o sobre esquinas Use material estabilizador para tener más apoyo al bordar Luego de bordar retire cuidadosamente el material estabilizador Caso A 1 Tejido 2 Asegurado con cinta de doble fase o hilvanado 3 Estabilizador Caso B 1 Tejido 2 Asegurado con cinta de doble fase o hilvanado 3 Estabilizador Caso C 1 Cinta Asegurada con cinta de d...

Страница 129: ...atrás a la posición de comienzo de un patrón 2 Presione aquí para moverse hacia adelante al siguiente color o caracter sin bordar 3 Presione aquí para moverse hacia atrás al comienzo del color que está bordando o caracter sin bordar 4 Presione aquí para moverse hacia adelante puntada a puntada sin bordar Si presiona continuamente la puntada avanzará a saltos de 9 puntadas comenzando desde la 6 pun...

Страница 130: ...ue el hilo se rompió o donde la bobina se haya quedado sin hilo Si no pudiera moverse hacia atrás a la posición deonde el hilo se rompió presione DIRECCION DE RETROCESO para moverse al comienzo del color y luego presione HACIA ADELANTE para moverse hacia adelante hasta un poco antes del lugar donde el hilo se rompió o donde la bobina se haya quedado sin hilo 3 Baje la palanca del prensatelas y pre...

Страница 131: ...O OPCIONAL BORDADO USANDO UN BASTIDOR EXTRA PEQUEÑO OPCIONAL BORDADO USANDO UN MARCO GRANDE OPCIONAL Volviendo a bordar desde el principio 1 Presione aquí para moverse hacia atrás a la posición de comienzo de un patrón 2 Baje la palanca del prensatelas y presione el botón de comienzo parada para comenzar a bordar 1 Botón de comienzo parada ...

Страница 132: ...ENIMIENTO CAMBIO DE LA BOMBILLA 1 2 3 4 Para cambiar la bombilla 1 Apague el interruptor principal 1 Apagado 2 Encendido Para cambiar la bombilla debe desenchufar el cable de alimentación del tomacorriente 2 Quite los tornillos del lado de atrás de la cabeza de la máquina 3 Desmonte el extremo de la cabeza 4 Cambie la bombilla por una nueva Las bombillas se encuentran a la venta en el distribuidor...

Страница 133: ...e la palanca del prensatelas 1 Use un destornillador para aflojar los tornillos 2 3 2 Afloje los tornillos de la placa de aguja 3 Desmonte la placa de aguja O 5 4 4 Retire la lanzadera 5 Quite la pelusa y los hilos acumulados en el gancho y lanzadera interior con un cepilla o con el accesorio de una aspiradora pequeña 1 Vía 2 Lanzadera La pelusa y el polvo acumulados en la vía pueden ocasionar cos...

Страница 134: ...ón de comienzo parada o es necesario hacer alguna corrección la máquina no comenzará a coser y sonará una alarma y aparecerá un mensaje en la pantalla indicándole el error Este mensaje aparecerá cuando presione el botón de comienzo parada y la palanca del prensatelas esté levantada Este mensaje aparecerá cuando no se haya seleccionado un dibujo y presione el botón de comienzo parada o presione AJU...

Страница 135: ... mensaje aparecerá cuando quiera almacenar patrones que no se pueden combinar Este mensaje aparecerá si presiona Tarjeta y no ha insertado una tarjeta Este mensaje aparecerá cuando presione el botón de comienzo parada pero no haya levantado el prensatelas para poder cambiar el color del hilo Si no quiere cambiar el color del hilo levante la palanca del prensatelas bájela nuevamente y luego presion...

Страница 136: ...téres o patrones combinados exceda el máximo de 35 Este mensaje aparecerá si presiona la tecla mientras la máquina está bordando Mensajes de instrucción Alarma Este mensaje aparecerá durante el enrrollado de la bobina Este mensaje aparecerá después que presione MEMORIA para almacenar un patrón No desconecte la alimentación mientras este mensaje aparezca en la pantalla Este mensaje aparecerá si la ...

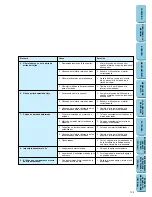
Страница 137: ...diferente del recomendado para el bordado 1 Aguja mal colocada 2 Aguja incorrecta 3 Tejido mal colocado en el marco de bordado 4 Marco de bordado mal colocado en la máquina 5 Tejido fino o elástico sin usar material estabilizador 1 Hilo superior demasiado tenso 2 Hilo superior o inferior mal enhebrado 3 Tejido fino o elástico sin usar material estabilizador 4 Tejido mal colocado en el marco de bor...

Страница 138: ...endados para el bordado 5 Hilo enredado 1 La aguja está mal colocada 2 La palanca del enhebrador de aguja no se mueve 1 Se ha acumulado hilo alrededor de la cuchilla de corte de hilo Solución 1 Afloje la tensión del hilo superior usando el dial de control de tensión del hilo superior 2 Enhebre el hilo superior e inferior correctamente 3 Quite la bobina vuelva a colocarla bien y pase el hilo de la ...

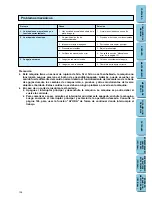
Страница 139: ...a sección Mensajes de error en la página 131 1 Coloque correctamente la aguja 2 Cámbiela por la aguja correcta Precaución Esta máquina tiene un sensor de ruptura de hilo Si el hilo no está enhebrado la máquina no funcionará aunque presione el botón de encendido apagado Además puede escuchar un sonido fuerte diferente del sonido normal debido al funcionamiento del mecanismo de la barra de agujas du...

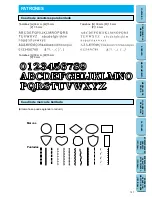
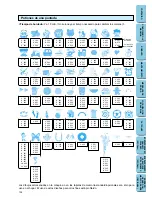
Страница 140: ...RCO PEQUEÑO OPCIONAL BORDADO USANDO UN BASTIDOR EXTRA PEQUEÑO OPCIONAL BORDADO USANDO UN MARCO GRANDE OPCIONAL PATRONES Cuadro de caractéres para bordado Tamaños G 30 mm M 15 mm P 7 5 mm Tamaños G 30 mm M 15 mm P 10 mm Cuadro de marco de bordado El tamaño se puede agrandar o reducir Marcos Puntadas Tamaños G 30 mm M 15 mm P 9 mm ...

Страница 141: ...800 3 900 1 001 2 800 3 019 1 001 2 800 3 900 1 800 2 507 3 900 1 800 2 900 1 205 2 800 3 900 1 800 2 900 1 800 2 001 3 900 1 800 2 005 3 900 1 001 2 800 3 019 1 800 2 205 3 900 1 019 2 205 3 900 1 001 2 205 3 900 1 800 2 205 3 900 1 001 2 019 3 900 1 205 2 001 3 339 1 005 2 800 3 900 1 001 2 800 3 900 1 019 2 800 3 900 1 323 2 085 3 001 4 058 1 086 2 058 3 707 1 070 2 085 3 086 4 323 1 513 2 001 ...

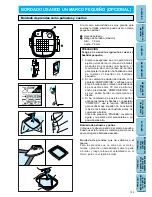
Страница 142: ...eño 2 Si no cambia la posición del diseño en la pantalla COMPOSICION verifique que el área a bordar para el diseño seleccionado se encuentre entre 70 mm de altura y ancho presionando COMPOSICION Si es así podrá bordar correctamente el diseño 3 Si ha cambiado de posición del patrón usando las teclas de flechas en la pantalla COMPOSI use la función PRUEBA para verificar que el patrón no se extiende ...

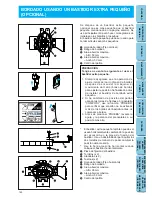
Страница 143: ... use la función PRUEBA para verificar que el patrón no se extiende más de los bordes del bastidor antes de comenzar a bordar 3 Antes de presionar PRUEBA levante la aguja y la palanca del prensatelas a su posición más alta El bastidor extra pequeño también puede ser usado horizontalmente cambiando la posición del accesorio en la placa de fijación del bastidor Use un destornillador para quitar los d...

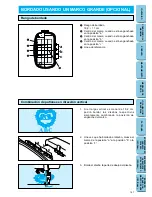
Страница 144: ... de 18 2 cm podrá bordar los diseños respectivos simplemente cambiando la posición de enganche del marco a b c 2 Una vez que ha bordado el diseño mueva el marco de la posición a a la posición b o la posición c 3 Borde el diseño la parte de abajo del diseño 141 CONTENIDO CONOCIENDO LA MAQUINA BORDADO MANTENIMIENTO MENSAJES DE ERROR LOCALIZACION DE AVERIAS PATRONES BORDADO USANDO UN MARCO PEQUEÑO OP...

Страница 145: ... diseño presione COMPOSI para verificar el tamaño del diseño El tamaño del dibujo se exhibe del lado izquierdo de la pantalla 2 Dibuje una línea en el tejido donde quiera bordar el diseño Ubique la línea central y luego dibuje una línea a lo largo de todo el diseño dividiéndola en dos secciones de igual medida Marque la posición de comienzo del bordado con una cruz dibujando una línea a través 1 P...

Страница 146: ...rco a la posición indicada con una c y enganche otra vez el marco en el carro 7 Borde el diseño siguiente Si usa el mismo patrón continúe directamente con el bordado Si usa un patrón nuevo seleccione el patrón nuevo Después de presionar COMPOSI presione 90 para cambiar la flecha en la pantalla para que apunte hacia la derecha Luego presione COMIE CENTR para ajustar la posición de la aguja a la pos...

Отзывы: