Brother MFC 230C - Color Inkjet - All-in-One Скачать руководство пользователя страница 117

Troubleshooting and Routine Maintenance

101

B

Checking the ink volume

B

You can check the ink that is left in the 
cartridge.

a

Press 

Ink

.

b

Press 

a

 or 

b

 to choose 

Ink Volume

.

Press 

OK

.

The LCD shows the ink volume.

c

Press 

a

 or 

b

 to choose the color you 

want to check.

d

Press 

Stop/Exit

.

Note

You can check the ink volume from your 
computer. (See 

Printing

 for Windows

®

 or 

Printing and Faxing

 for Macintosh

®

 in the 

Software User's Guide on the CD-ROM.)


Machine Information

B

Checking the serial number

B

You can see the machine’s serial number on 
the LCD.

a

Press 

Menu

6

1

.


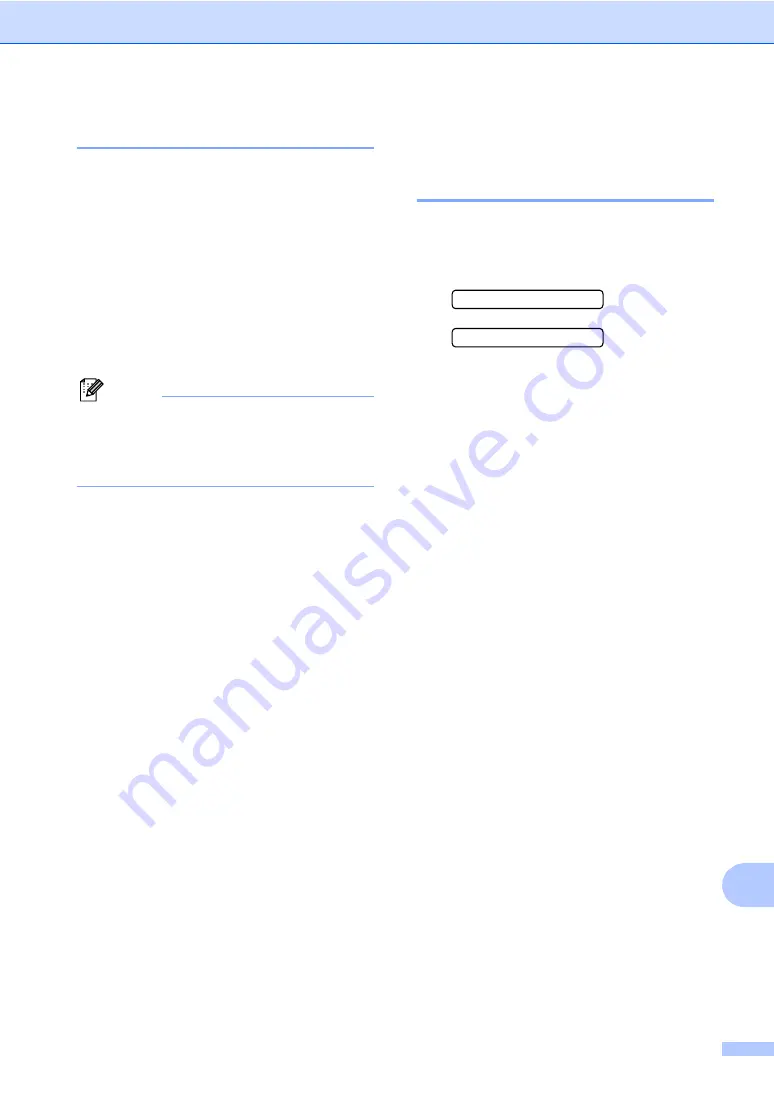
1.Serial No.


XXXXXXX

b

Press 

Stop/Exit

.

Содержание MFC 230C - Color Inkjet - All-in-One

Страница 1: ...USER S GUIDE MFC 230C ...

Страница 2: ... on line at http www brother com registration By registering your product with Brother you will be recorded as the original owner of the product Your registration with Brother may serve as confirmation of the purchase date of your product should you lose your receipt may support an insurance claim by you in the event of product loss covered by insurance and will help us notify you of enhancements ...

Страница 3: ... the Brother Warranty Registration And Test Sheet or for your convenience and most efficient way to register your new product register on line at http www brother com registration FAQs frequently asked questions The Brother Solutions Center is our one stop resource for all your Fax Machine Multi Function Center needs You can download the latest software documents and utilities read FAQs and troubl...

Страница 4: ...vice center call 1 877 BROTHER Brother fax back system USA only Brother has installed an easy to use fax back system so you can get instant answers to common technical questions and product information for all Brother products This system is available 24 hours a day 7 days a week You can use the system to receive faxed instructions and an Index of fax back subjects In USA only 1 800 521 2846 ...

Страница 5: ...LL 6255 1 800 947 1445 fax http www brothermall com In Canada 1 877 BROTHER http www brother ca Description Item Ink Cartridge Standard black LC51BK Prints approx 500 pages Ink Cartridge yellow LC51Y Prints approx 400 pages Ink Cartridge cyan blue LC51C Prints approx 400 pages Ink Cartridge magenta red LC51M Prints approx 400 pages Premium Glossy Photo Paper Letter size 20 sheets 4 6 size 20 sheet...

Страница 6: ... LIKE ARISING OUT OF THE USE OR INABILITY TO USE THE SOFTWARE EVEN IF BROTHER S LICENSOR HAS BEEN ADVISED OF THE POSSIBILITY OF SUCH DAMAGES BECAUSE SOME STATES IN THE USA AND SOME PROVINCES IN CANADA DO NOT ALLOW THE EXCLUSION OR LIMITATION OF LIABILITY FOR CONSEQUENTIAL OR INCIDENTAL DAMAGES THE ABOVE LIMITATIONS MAY NOT APPLY TO YOU IN ANY EVENT BROTHER S LICENSOR S LIABILITY TO YOU FOR ACTUAL ...

Страница 7: ...her device or software used with this Product including but not limited to damage resulting from use of non Brother brand parts and Consumable and Accessory Items 4 Consumable and Accessory Items that expired in accordance with a rated life and 5 Problems arising from other than defects in materials or workmanship 6 Normal Periodic Maintenance Items such as Paper Feeding Kit Fuser and Laser Units ...

Страница 8: ...your original Product to Brother within five 5 business days ii the problems with your original Product are not covered by the limited warranty iii the proper packaging instructions are not followed and has caused damage to the product or iv the warranty period on your original Product has expired or has not been sufficiently validated with a copy of the proof of purchase bill of sale The replacem...

Страница 9: ... Drum Unit waste toner packs or oil bottles on applicable models during shipping or transport will cause severe damage to the Laser MFC machine and will void the Warranty For inkjet units When shipping your Inkjet MFC machine remove the ink cartridges and replace them with the original protective parts If original protective parts are not available leave ink cartridges installed Please avoid shipp...

Страница 10: ...commended media 9 Handling and using media 10 Choosing the right media 11 Loading paper and other media 13 Loading envelopes and post cards 14 Removing small printouts from the machine 16 Printable area 16 3 General setup 17 On Off key 17 Turning the machine off 17 Turning the machine on 17 On Off setting 17 Mode Timer 18 Paper settings 18 Paper Type 18 Paper Size 18 Volume Settings 19 Ring Volume...

Страница 11: ...ng jobs 29 Sending a fax manually 29 Sending a fax at the end of a conversation 29 Out of Memory message 29 6 Receiving a Fax 30 Receive modes 30 Choosing the Receive Mode 30 Using receive modes 31 Fax only 31 Fax Tel 31 Manual 31 External TAD 31 Receive mode settings 32 Ring Delay 32 F T Ring Time Fax Tel mode only 32 Easy Receive 32 Additional receiving operations 33 Printing a reduced incoming ...

Страница 12: ...g 43 Search 43 Fax Redial 44 Storing numbers 44 Storing a pause 45 Storing Speed Dial numbers 45 Changing Speed Dial numbers 45 Setting up groups for broadcasting 45 Dialing access codes and credit card numbers 46 9 Printing Reports 47 Fax reports 47 Transmission Verification Report 47 Fax Journal activity report 47 Reports 48 How to print a report 48 Section III Copy 10 Making copies 50 How to co...

Страница 13: ...rint Index Thumbnails 60 Printing Images 61 DPOF printing 62 PhotoCapture Center print settings 63 Print quality 63 Paper Options 63 Adjusting Brightness and Contrast 63 Cropping 64 Borderless printing 64 Understanding the Error Messages 64 12 Printing photos from a camera 65 Printing photos directly from a PictBridge camera 65 PictBridge requirements 65 Setting your digital camera 65 Printing Ima...

Страница 14: ... difficulty with your machine 83 Error messages 88 Transferring your faxes or Fax Journal report 91 Printer jam or paper jam 92 Dial Tone 94 Telephone line interference 94 Routine maintenance 94 Replacing the ink cartridges 94 Cleaning the outside of the machine 96 Cleaning the scanner 97 Cleaning the machine printer platen 97 Cleaning the paper pick up roller 98 Cleaning the print head 98 Checkin...

Страница 15: ...cifications 113 General 113 Print media 115 Fax 116 Copy 117 PhotoCapture Center 118 PictBridge 119 Scanner 119 Printer 120 Interfaces 120 Computer requirements 121 Consumable items 122 E Glossary 123 F Index 127 ...

Страница 16: ...xiv ...

Страница 17: ...Section I General I General Information 2 Loading documents and paper 8 General setup 17 Security features 21 ...

Страница 18: ...ROM General Information 1 Bold Bold typeface identifies specific keys on the machine s control panel Italics Italicized typeface emphasizes an important point or refers you to a related topic Courier New Text in the Courier New font identifies messages on the LCD of the machine Warnings tell you what to do to prevent possible personal injury Electrical Hazard icons alert you to possible electrical...

Страница 19: ...name c If the language screen appears click your language The CD ROM main menu will appear Note If this window does not appear use Windows Explorer to run the setup exe program from the root directory of the Brother CD ROM d Click Documentation e Click the documentation you want to read HTML documents Software User s Guide in HTML format This format is recommended for viewing on your computer PDF ...

Страница 20: ...Macintosh 1 a Turn on your Macintosh Insert the Brother CD ROM into your CD ROM drive The following window will appear b Double click the Documentation icon c Double click your language folder d Double click the top page file to view the Software User s Guide in HTML format e Click the documentation you want to read Software User s Guide How to find Scanning instructions 1 There are several ways y...

Страница 21: ...stomer Service numbers for the USA and Canada click Support Information To access the USA Brother online shopping mall www brothermall com for additional product and services information click Brother Mall com To access Canada s Brother online shopping mall www brother ca for additional product and services information click Shop Online Canada For the latest news and product support information ht...

Страница 22: ...udo double ring 2 Dial Pad Use these keys to dial telephone and fax numbers and as a keyboard for entering information into the machine Canada only The key lets you temporarily switch the dialing mode during a telephone call from Pulse to Tone 3 Mode keys Fax Lets you access Fax mode Scan Lets you access Scan mode Copy Lets you access Copy mode PhotoCapture Lets you access PhotoCapture Center mode...

Страница 23: ...ops an operation or exits from a menu 8 Menu keys Menu Lets you access the main menu to program the machine a Speed Dial Lets you store look up and dial numbers in the memory Volume keys d c In Fax mode you can press these keys to adjust the ring volume d Press to scroll backward to a menu selection a or b Press to scroll through the menus and options Clear Back Press to cancel the current setting...

Страница 24: ...ck document DO NOT slam the cover or press on it Scannable area 2 The scannable area depends on the settings in the application you are using The figures below show the areas you cannot scan on Letter and A4 paper Loading documents and paper 2 Length Up to 11 7 in 297 mm Width Up to 8 5 in 215 9 mm Weight Up to 4 4 lb 2 kg Usage Document Size Top 1 Bottom 2 Left 3 Right 4 Fax Letter 0 12 in 3 mm 0...

Страница 25: ...ter driver or in the Paper Type setting of the menu See Paper Type on page 18 When you print on Brother photo paper load the instruction sheet included with the photo paper in the paper tray first and then put the photo paper on the instruction sheet When you use transparencies or photo paper remove each sheet at once to prevent smudging or paper jams Avoid touching the printed surface of the pape...

Страница 26: ...sparencies designed for laser printers copiers may stain your next document Use only transparencies recommended for inkjet printing Improper Setup DO NOT use the following kinds of paper Damaged curled wrinkled or irregularly shaped paper 1 0 08 in 2 mm or longer Extremely shiny or highly textured paper Paper already printed on by a printer Paper that cannot be arranged uniformly when stacked Pape...

Страница 27: ... 1 in 182 257 mm Yes A5 5 8 8 3 in 148 210 mm Yes Yes A6 4 1 5 8 in 105 148 mm Yes Cards Photo 4 6 in 10 15 cm Yes Yes Yes Photo 2L 5 7 in 13 18 cm Yes Yes Index Card 5 8 in 127 203 mm Yes Post Card 1 3 9 5 8 in 100 148 mm Yes Post Card 2 Double 5 8 7 9 in 148 200 mm Yes Envelopes C5 Envelope 6 4 9 in 162 229 mm Yes DL Envelope 4 3 8 7 in 110 220 mm Yes COM 10 4 1 8 9 1 2 in 105 241 mm Yes Monarch...

Страница 28: ...o 0 15 mm 100 1 Inkjet Paper 17 to 53 lb 64 to 200 g m2 0 003 to 0 01 in 0 08 to 0 25 mm 20 Glossy Paper Up to 58 lb Up to 220 g m2 Up to 0 01 in Up to 0 25 mm 20 Cards Photo 4 6 Up to 64 lb Up to 240 g m2 Up to 0 01 in Up to 0 28 mm 20 Index Card Up to 32 lb Up to 120 g m2 Up to 0 006 in Up to 0 15 mm 30 Post Card Up to 53 lb Up to 200 g m2 Up to 0 01 in Up to 0 23 mm 30 Envelopes 20 to 25 lb 75 ...

Страница 29: ...aper side guides 1 and paper length guide 2 to fit the paper size c Fan the stack of paper well to avoid paper jams and misfeeds Note Always make sure the paper is not curled d Gently put the paper into the paper tray print side down and top edge first Check that the paper is flat in the tray Note When you use Legal size paper press and hold the universal guide release button as you slide out the ...

Страница 30: ...e output paper tray cover g Slowly push the paper tray completely into the machine h While holding the paper tray in place pull out the paper support 1 until it clicks and unfold the paper support flap 2 Note Do not use the paper support flap for Legal paper Loading envelopes and post cards 2 Loading envelopes 2 Use envelopes that weigh from 20 to 25 lb 75 to 95 g m2 Some envelopes need margin set...

Страница 31: ...pes or post cards to make them as flat as possible Note If the envelopes or post cards are double feeding put one envelope or post card in the paper tray at a time b Put the envelopes or post cards into the paper tray with the address side down and the leading edge in first as shown in the illustration Slide the paper side guides 1 and paper length guide 2 to fit the size of the envelopes or post ...

Страница 32: ...he settings in the application you are using The figures below show the unprintable areas on cut sheet paper and envelopes The machine can only print in the shaded areas when the Borderless print feature is available and turned on Note The Borderless feature is not available for envelopes Cut Sheet Paper Envelopes Top 1 Bottom 2 Left 3 Right 4 Cut Sheet 0 12 in 3 mm 0 12 in 3 mm 0 12 in 3 mm 0 12 ...

Страница 33: ...tched off but it will clean the print head periodically The external TAD or telephone will always work If you turn this setting to Fax Receive On you can receive faxes or calls even when the machine is switched off See On Off key on page 17 a Press Menu 1 6 b Press a or b to choose Fax Receive On or Fax Receive Off Press OK c Press Stop Exit 1 You cannot receive a fax with Black Start or Color Sta...

Страница 34: ...b Press a or b to choose Plain Paper Inkjet Paper Brother Photo Other Photo or Transparency Press OK c Press Stop Exit Note The machine ejects paper with printed surfaces face up onto the paper tray in front of the machine When you use transparencies or glossy paper remove each sheet at once to prevent smudging or paper jams Paper Size 3 You can use five sizes of paper for printing copies Letter L...

Страница 35: ... Press a or b to choose Low Med High or Off Press OK c Press Stop Exit Beeper Volume 3 When the beeper is on the machine will beep when you press a key make a mistake or after you send or receive a fax You can choose a range of volume levels from High to Off a Press Menu 1 4 2 b Press a or b to choose Low Med High or Off Press OK c Press Stop Exit Speaker Volume 3 You can choose a range of speaker...

Страница 36: ...ke sure you have set the correct date and time in the Date Time setting a Press Menu 1 5 b Press a or b to choose On or Off Press OK c Press Stop Exit LCD display 3 LCD Contrast 3 You can adjust the LCD contrast for a sharper and more vivid display If you are having difficulty reading the LCD try changing the contrast setting a Press Menu 1 7 b Press a or b to choose Light or Dark Press OK c Press...

Страница 37: ...d changing the TX lock password 4 Note If you have already set the password you will not need to set it again Setting up the password 4 a Press Menu 2 0 1 b Enter a 4 digit number for the password Press OK c When the LCD shows Verify re enter the password Press OK d Press Stop Exit Changing the TX Lock password 4 a Press Menu 2 0 1 b Press a or b to choose Set Password Press OK c Enter a 4 digit n...

Страница 38: ...t password Press OK The machine goes offline and the LCD shows TX Lock Mode Turning TX Lock off 4 a Press Menu b Enter the registered 4 digit password Press OK TX lock is automatically turned off Note If you enter the wrong password the LCD shows Wrong Password and stays offline The machine will stay in TX Lock mode until the registered password is entered ...

Страница 39: ...Section II Fax II Sending a fax 24 Receiving a Fax 30 Telephone Services and External devices 34 Dialing and storing numbers 43 Printing Reports 47 ...

Страница 40: ...xes a Make sure you are in Fax mode b Load your document on the scanner glass c Dial the fax number d Press Black Start or Color Start If you press Black Start the machine starts scanning the first page Go to step e If you press Color Start the machine starts sending the document e Do one of the following To send a single page press 2 to choose No or press Black Start again The machine starts send...

Страница 41: ...sent to more than one fax number You can include Groups Speed Dial numbers and up to 50 manually dialed numbers in the same broadcast After the broadcast is finished a Broadcast Report will be printed a Make sure you are in Fax mode b Load your document c Enter a number Press OK You can use either a Speed Dial a Group or a manually entered number using the dial pad d Repeat c until you have entere...

Страница 42: ...ng operations 5 Sending faxes using multiple settings 5 When you send a fax you can choose any combination of these settings resolution contrast overseas mode and real time transmission a Make sure you are in Fax mode b Load your document c Choose a setting you want to change in the Setup Send menu Menu 2 2 Press OK d Choose the option you want for the setting Press OK e Do one of the following Ot...

Страница 43: ...ode b Load your document c Press Fax Resolution then a or b to choose the resolution Press OK To change the default fax resolution 5 a Make sure you are in Fax mode b Press Menu 2 2 2 c Press a or b to choose the resolution you want Press OK Note You can choose four different resolution settings for black white faxes and two for color If you choose S Fine or Photo and then use the Color Start key ...

Страница 44: ...y without waiting for memory transmission You can set Real Time TX to On for all documents or Next Fax Only for the next fax only Note In Real Time Transmission the automatic redial feature does not work when using the scanner glass Sending in real time for all faxes 5 a Make sure you are in Fax mode b Press Menu 2 2 3 3 Real Time TX Realtime TX On c Press a or b to choose Realtime TX On or Realti...

Страница 45: ...s press 1 to send the fax 1 Send 2 Receive f If you picked up the handset of an external telephone replace it Sending a fax at the end of a conversation 5 At the end of a conversation you can send a fax to the other party before you both hang up a Ask the other party to wait for fax tones beeps and then to press the Start or Send key before hanging up b Make sure you are in Fax mode c Load your do...

Страница 46: ...ow a Press Menu 0 1 b Press a or b to choose Fax Only Fax Tel External TAD or Manual Press OK c Press Stop Exit The LCD will display the current receive mode 1 Current receive mode Fax Fax Only Receiving a Fax 6 Do you use a Distinctive Ring subscriber service Yes Yes See Distinctive Ring Fax Only No Yes No No No Yes Manual Yes External TAD No Fax Tel Are you connecting an external telephone or ex...

Страница 47: ...lso see F T Ring Time Fax Tel mode only on page 32 and Ring Delay on page 32 Manual 6 Manual mode turns off all automatic answering functions unless you are using the Distinctive Ring Receive feature To receive a fax in manual mode lift the handset of an external telephone or press Hook When you hear fax tones short repeating beeps press Black Start or Color Start You can also use the Easy Receive...

Страница 48: ...ny telephone on the same line as the machine See Using external and extension telephones on page 41 a Press Menu 2 1 2 b Press a or b to choose how long the machine will ring to alert you that you have a voice call 20 30 40 or 70 seconds Press OK c Press Stop Exit Note Even if the caller hangs up during the pseudo double ringing the machine will continue to ring for the set time Easy Receive 6 If ...

Страница 49: ...1 3 a Make sure you are in Fax mode b Press Menu 2 1 5 5 Auto Reduction c Press a or b to choose On or Off Press OK d Press Stop Exit Receiving a fax at the end of a conversation 6 At the end of a conversation you can ask the other party to send you a fax before you both hang up a Ask the other party to place the document in their machine and to press Start or Send key b When you hear the CNG tone...

Страница 50: ...phone and then press Hook to answer If you are at an extension telephone you ll need to lift the handset during the F T Ring Time and then press 5 1 between the pseudo double rings If no one is on the line or if someone wants to send you a fax send the call back to the machine by pressing l 5 1 Fax Tel mode when the power key is off 7 You can change the default setting of the On Off key to Fax Rec...

Страница 51: ...call your telephone company for availability and rates What does Brother s Distinctive Ring do 7 The Brother machine has a Distinctive Ring feature that allows you to use your machine to take full advantage of the telephone company s Distinctive Ring service The new telephone number on your line can just receive faxes Note You must pay for your telephone company s Distinctive Ring service before y...

Страница 52: ...n the voice number is called the machine will not answer Registering the Distinctive Ring pattern 7 Very Important After you have set the Distinctive Ring feature to on the receive mode is set to Manual automatically You cannot change the receive mode to another mode while the Distinctive Ring is set to on a Press Menu 2 0 3 0 Miscellaneous 3 Distinctive b Press a or b to choose Set Press OK c Pre...

Страница 53: ... on page 37 Note Caller ID service varies with different carriers Call your local telephone company to find out about the kind of service available in your area Viewing Caller ID List 7 Your machine stores information for the last thirty calls in the Caller ID list You can view or print this list When the thirty first call comes in to the machine it replaces information about the first call a Pres...

Страница 54: ...e You may connect an external TAD to a separate wall jack only if you subscribe to your telephone company s Distinctive Ring service have registered the distinctive ring pattern on your machine and use that number as a fax number The recommended setting is at least four rings on the external TAD when you have the telephone company s Distinctive Ring Service You cannot use the Toll Saver setting If...

Страница 55: ...em as long as it is the last number in the sequence so the call cannot roll away Do not put the machine on any of the other numbers when the other lines are busy and a second fax call is received the fax call will be sent to a line that does not have a fax machine Your machine will work best on a dedicated line Two line telephone system 7 A two line telephone system is nothing more than two separa...

Страница 56: ... of the two line TAD d Plug one end of the second telephone line cord for your TAD into the L2 jack of the two line TAD Plug the other end into the EXT jack on the left side of the machine 1 Triplex Adapter 2 Two Line Telephone 3 External Two Line TAD 4 Machine You can keep two line telephones on other wall outlets as always There are two ways to add a two line telephone to the machine s wall outl...

Страница 57: ...the machine answers a voice call and pseudo double rings for you to take over use the Telephone Answer Code 5 1 to take the call at an extension telephone See F T Ring Time Fax Tel mode only on page 32 If you answer a call and no one is on the line 7 You should assume that you re receiving a manual fax Press l 5 1 and wait for the chirp or until the LCD shows Receiving and then hang up Note You ca...

Страница 58: ...all on an extension telephone you can turn the F T ring off by pressing 5 1 make sure you press this between the rings Changing the remote codes 7 The preset Fax Receive Code is l 5 1 The preset Telephone Answer Code is 5 1 If you want to you can replace them with your own codes a Press Menu 2 1 4 1 Setup Receive 4 Remote Codes b Press a or b to choose On or Off Press OK c Enter the new Fax Receiv...

Страница 59: ...ou enter a Speed Dial number a number has not been stored at this location Search 8 You can search for names you have stored in the Speed Dial memories Press Speed Dial Press OK and the menu keys to search numerically or use the dial pad to search alphabetically 1 To search numerically 2 To search alphabetically you can use the dial pad to enter the first letter of the name you are looking for Dia...

Страница 60: ...el If you are sending a fax automatically and the line is busy the machine will automatically redial one time after five minutes Note In Real Time Transmission the automatic redial feature does not work when using the scanner glass Storing numbers 8 You can set up your machine to do the following types of easy dialing Speed Dial and Groups for broadcasting faxes When you dial a Quick Dial number t...

Страница 61: ...If you try to store a Speed Dial number where a number has already been stored the LCD will show the name or number that has been stored there and will ask you to do one of the following Press 1 to change the stored number 05 MIKE 1 Change 2 Exit Press 2 to exit without making a change If you chose 1 you will be able to change the stored number and name or enter a new one Follow the instructions b...

Страница 62: ...l numbers Numbers that are part of a group will be marked in the GROUP column See How to print a report on page 48 Dialing access codes and credit card numbers 8 You can combine more than one Quick Dial number when you dial This feature may be useful if you need to dial an access code for a cheaper rate long distance carrier For example you might have stored 555 on Speed Dial 03 and 7000 on Speed ...

Страница 63: ...it Fax Journal activity report 9 You can set the machine to print a journal at specific intervals every 50 faxes 6 12 or 24 hours 2 or 7 days If you set the interval to Off you can still print the report by following the steps on the Reports on page 48 The default setting is Every 50 Faxes a Press Menu 2 3 2 b Press a or b to choose an interval Press OK If you choose 7 days the LCD will ask you to...

Страница 64: ...numbers stored in the Speed Dial memory in numerical order 4 Fax Journal Lists information about the last incoming and outgoing faxes TX Transmit RX Receive 5 User Settings Lists your settings How to print a report 9 a Press Menu 5 b Do one of the following Press a or b to choose the report you want Press OK Enter the number of the report you want to print For example press 2 to print the help lis...

Страница 65: ...Section III Copy III Making copies 50 ...

Страница 66: ...opy setting 1 Copy Ratio 2 Quality 3 No of Copies Making a single copy 10 a Make sure you are in Copy mode b Load your document c Press Black Start or Color Start Making multiple copies 10 You can make up to 99 copies a Make sure you are in Copy mode b Load your document c Use the dial pad to enter the number of copies up to 99 d Press Black Start or Color Start Stop copying 10 To stop copying pre...

Страница 67: ...ave the copy settings you use most often by setting them as default You can find instructions on how to do this in the section for each feature Press Menu selection Options Page Press Quality Normal Fast Best 52 Enlarge Reduce 50 69 78 83 93 97 100 104 142 186 198 200 Custom 25 400 52 Paper Type Plain Paper Inkjet Paper Brother Photo Other Photo Transparency 56 Paper Size Letter Legal A4 A5 4 W x ...

Страница 68: ...nlargement or reduction ratios Custom 25 400 allows you to enter a ratio from 25 to 400 Auto sets the machine to calculate the reduction ratio that best fits the size of paper To enlarge or reduce the next copy follow the instruction below a Make sure you are in Copy mode b Load your document c Use the dial pad to enter the number of copies up to 99 Press Normal Normal is the recommended mode for ...

Страница 69: ...inted page You can also produce a poster When you use the poster feature your machine divides your document into sections then enlarges the sections so you can assemble them into a poster Important 10 Please make sure paper size is set to Letter Legal or A4 You cannot use the Enlarge Reduce setting with the N in 1 and Poster features N in 1 color copies are not available P means Portrait and L mea...

Страница 70: ...the layout Set Next Page Then Press OK i After all the pages have been scanned press 2 in g to finish Note If photo paper is chosen as the paper type setting for N in 1 copies the images will be printed as if plain paper had been chosen Place your document face down in the direction shown below 2 in 1 P 2 in 1 L 4 in 1 P 4 in 1 L Poster 3x3 You can make a poster size copy of a photograph ...

Страница 71: ...elow a Press Menu 3 2 b Press a to make a lighter copy or press b to make a darker copy Press OK c Press Stop Exit Contrast 10 Adjust the contrast to help an image look sharper and more vivid The contrast can only be changed through the default setting a Press Menu 3 3 3 Contrast b Press a or b to change the contrast Press OK c Press Stop Exit Color saturation 10 The color saturation can only be c...

Страница 72: ...K f Press Black Start or Color Start Note To change the default paper type setting see Paper Type on page 18 Paper size 10 If copying on paper other than Letter size you will need to change the paper size setting You can copy on Letter Legal A4 A5 or Photo 4in W 6in H or 10cm W 15cm H paper a Make sure you are in Copy mode b Load your document c Use the dial pad to enter the number of copies up to...

Страница 73: ...Section IV Walk up Photo Printing IV PhotoCapture Center Printing photos from a USB Flash memory drive 58 Printing photos from a camera 65 ...

Страница 74: ...our digital camera at high resolution to get photo quality printing USB Flash memory drive folder structure 11 To avoid errors remember the following points The image file extension must be JPG Other image file extensions like JPEG TIF GIF and so on will not be recognized Walk up PhotoCapture Center printing must be performed separately from PhotoCapture Center operations using the PC Simultaneous...

Страница 75: ...ther USB devices are not supported The PhotoCapture key lights PhotoCapture light is on the USB Flash memory drive is properly inserted PhotoCapture light is off the USB Flash memory drive is not properly inserted PhotoCapture light is blinking the USB Flash memory drive is being read or written to CAUTION DO NOT unplug the power cord or remove the USB Flash memory drive from the USB direct interf...

Страница 76: ...hoose Print Images and then press OK See Printing Images on page 61 f Enter the image number and press OK g Press Color Start to start printing Print Index Thumbnails 11 The PhotoCapture Center assigns numbers for images such as No 1 No 2 No 3 and so on The PhotoCapture Center does not recognize any other numbers or file names that your digital camera or PC has used to identify the pictures You ca...

Страница 77: ...sed to print a range of numbers for example 1 5 would print all images from 1 to 5 e After you have chosen all the images you want to print press OK to choose your settings If you have already chosen your settings press Color Start f Press a or b to choose the type of paper you are using Plain Paper Inkjet Paper Brother Photo or Other Photo Press OK g Press a or b to choose the paper size you are ...

Страница 78: ...into the USB direct interface USB Mem Active Press PhotoCapture b Press a or b to choose Print Images Press OK c If there is a DPOF file on the USB Flash memory drive the LCD will show DPOF Print Yese d Press a or b to choose DPOF Print Yes Press OK e Press a or b to choose the type of paper you are using Plain Paper Inkjet Paper Brother Photo or Other Photo Press OK f Press a or b to choose the p...

Страница 79: ... choose the paper size you are using Letter A4 4 x 6 or 5 x 7 Press OK c Press Stop Exit Print Size 11 This setting is available only when you choose Letter or A4 in the paper size setting a Press Menu 4 4 b Press a or b to choose the print size you are using 4 x 3 5 x 3 5 6 x 4 7 x 5 or 8 x 6 Press OK c Press Stop Exit Adjusting Brightness and Contrast 11 Brightness 11 a Press Menu 4 5 b Press a ...

Страница 80: ... with the types of errors that can occur while you are using PhotoCapture Center you can easily identify and troubleshoot any problems Hub is Unusable This message will appear if a Hub or USB Flash memory drive with a Hub has been put into the USB direct interface No File This message will appear if you try to access a USB Flash memory drive in the USB direct interface that does not contain a JPG ...

Страница 81: ...ictBridge settings may be available from the LCD of your PictBridge compatible camera Depending on your camera some of these settings may not be available 1 See DPOF printing on page 66 for more details 2 If your camera is set to use the Printer Settings Default setting the machine will print your photo using the following settings When your camera does not have any menu selections this setting is...

Страница 82: ...camera When the machine starts printing a photo the LCD will show Printing WARNING To prevent damage to your machine do not connect any device other than a digital camera or USB Flash memory drive to the USB direct interface DPOF printing 12 DPOF stands for Digital Print Order Format Major digital camera manufacturers Canon Inc Eastman Kodak Company Fuji Photo Film Co Ltd Matsushita Electric Indus...

Страница 83: ...eras Please refer to the documentation supplied with your camera for detailed information such as how to switch from PictBridge mode to USB mass storage mode Printing Images 12 Note Remove a USB Flash memory drive from the machine before connecting a digital camera a Make sure that your camera is turned off Connect your camera to the USB direct interface 1 on the machine using the USB cable 1 USB ...

Страница 84: ... Out of Memory This message will appear if you are working with images that are too large for the machine s memory Unusable Device This message will appear if you connect a camera which is not in PictBridge mode nor using the USB Mass Storage standard This message will also appear if you connect a broken device to the USB direct interface For more detailed solutions see Error messages on page 88 ...

Страница 85: ...Section V Software V Software features 70 ...

Страница 86: ...ve not installed the software see Viewing Documentation on page 3 a From the Start menu point to Brother MFC XXXX where XXXX is your model number from the programs group then click User s Guides in HTML format b Click SOFTWARE USER S GUIDE from the top menu c Click the heading you would like to view from the list at the left of the window For Macintosh a Make sure your Macintosh is turned on Inser...

Страница 87: ...Section VI Appendixes VI Safety and Legal 72 Troubleshooting and Routine Maintenance 83 Menu and Features 104 Specifications 113 Glossary 123 ...

Страница 88: ...machine near heaters air conditioners refrigerators medical equipment chemicals or water DO NOT expose the machine to direct sunlight excessive heat moisture or dust DO NOT connect your machine to electrical outlets controlled by wall switches or automatic timers Disruption of power can wipe out information in the machine s memory Do not connect your machine to electrical outlets on the same circu...

Страница 89: ... Before you clean the inside of the machine make sure you have unplugged the telephone line cord first and then the power cord from the AC power outlet Doing this will prevent an electrical shock DO NOT handle the plug with wet hands Doing this might cause an electrical shock Always make sure the plug is fully inserted DO NOT pull in the middle of the AC power cord Doing this might cause an electr...

Страница 90: ...e under the document cover or the scanner cover Doing this may cause injury DO NOT put your hands on the edge of the paper tray under the output paper tray cover Doing this may cause injury DO NOT touch the paper feed roller Doing this may cause injury ...

Страница 91: ... spray to clean the inside or outside of the machine Doing this may cause a fire or electrical shock If the machine becomes hot releases smoke or generates any strong smells immediately turn off the power switch and unplug the machine from the AC power outlet Call Brother Customer Service See Brother numbers on page i If metal objects water or other liquids get inside the machine immediately turn ...

Страница 92: ...on line cord CAUTION Lightning and power surges can damage this product We recommend that you use a quality surge protection device on the AC power line and on the telephone line or unplug the cords during a lightning storm WARNING IMPORTANT SAFETY INSTRUCTIONS When using your telephone equipment basic safety precautions should always be followed to reduce the risk of fire electric shock and injur...

Страница 93: ...rest on the power cord Do not place this product where people can walk on the cord 11 If an extension cord is used with this product make sure that the total ampere ratings of the products plugged into the extension cord do not exceed the extension cord ampere rating Also make sure that the total of all products plugged into the AC power outlet does not exceed 15 amperes USA only 12 Do not place a...

Страница 94: ...ng up Perform these activities in the off peak hours such as early morning or late evening This equipment complies with Part 68 of the FCC rules and the requirements adopted by the ACTA On the backside of this equipment is a label that contains among other information a product identifier in the format US AAAEQ TXXXX If requested this number must be provided to the telephone company You may safely...

Страница 95: ...s resolved Connection to party line service is subject to state tariffs Contact the state public utility commission public service commission or corporation commission for information If your home has specially wired alarm equipment connected to the telephone line ensure the installation of this equipment does not disable your alarm equipment If you have questions about what will disable alarm equ...

Страница 96: ...antee that interference will not occur in a particular installation If this equipment does cause harmful interference to radio or television reception which can be determined by turning the equipment off and on the user is encouraged to try to correct the interference by one or more of the following measures Reorient or relocate the receiving antenna Increase the separation between the equipment a...

Страница 97: ...not be copied Money Bonds or other certificates of indebtedness Certificates of Deposit Internal Revenue Stamps canceled or uncanceled Selective Service or draft papers Passports United States Canadian Postage Stamps canceled or uncanceled Food Stamps Immigration Papers Checks or drafts drawn by Governmental agencies Identifying badges or insignias Copyrighted works cannot be copied Sections of a ...

Страница 98: ...PaperPort and ScanSoft are trademarks or registered trademarks of Nuance Communications Inc or its affiliates in the United States and or other countries Presto PageManager is a registered trademark of NewSoft Technology Corporation Microdrive is a trademark of International Business Machine Corporation PictBridge is a trademark FaceFilter Studio is a trademark of Reallusion Inc Each company whose...

Страница 99: ...essage See Error messages on page 88 Check that the correct printer driver has been installed and chosen Make sure the machine is online Click Start and then Printers and Faxes Right click and choose Brother MFC XXXX where XXXX is your model name and make sure that Use Printer Offline is unchecked Poor print quality Check the print quality See Checking the print quality on page 99 Make sure that t...

Страница 100: ...ctional Printing Cannot perform 2 in 1 or 4 in 1 printing Check that the paper size setting in the application and in the printer driver are the same Print speed is too slow Try changing the printer driver setting The highest resolution needs longer data processing sending and printing time Try the other quality settings in the printer driver Basic tab Also click the Settings tab and make sure you...

Страница 101: ...cartridges on page 94 Left and Right margins are cut off or a single page is printed on two pages Turn on Auto Reduction See Printing a reduced incoming fax on page 33 Telephone Line or Connections Difficulty Suggestions Dialing does not work No dial tone Check that the machine is plugged in and switched on Check all line cord connection Change Tone Pulse setting See Quick Setup Guide Send a fax m...

Страница 102: ...ne calling and respond with fax receiving tones Deactivate the machine by pressing Stop Exit Try avoiding this problem by turning Easy Receive to off See Easy Receive on page 32 Sending a Fax Call to the machine If you answered at the machine press Black Start and hang up at once If you answered on an external or extension telephone press your Fax Receive Code default setting is l51 When your mach...

Страница 103: ...nter Difficulties Difficulty Suggestions Removable Disk does not work properly 1 Have you installed the Windows 2000 update If not do the following 1 Unplug the USB cable 2 Install the Windows 2000 update using one of the following methods Install MFL Pro Suite from the CD ROM See the Quick Setup Guide Download the latest service pack from the Microsoft Web site 3 Wait about 1 minute after you res...

Страница 104: ...he problem continues call the telephone company and ask them to check your telephone line Cover is Open The scanner cover is not closed completely Lift the scanner cover and then close it again The ink cartridge cover is not completely closed Firmly close the ink cartridge cover until it clicks Data Remaining Print data is left in the machine s memory Re start printing from your computer Print dat...

Страница 105: ...idges are running out of ink If a sending machine has a color fax the machine s handshake will ask that the fax be sent as black and white If the sending machine has the ability to convert it the color fax will be received into memory as a black and white fax Order a new ink cartridge See Ordering accessories and supplies on page iii No Caller ID There is no incoming call history You did not recei...

Страница 106: ...f the error message continues see Transferring your faxes or Fax Journal report on page 91 before disconnecting the machine so you will not lose any important messages Then disconnect the machine from the power for several minutes and then reconnect it Scan Unable XX The machine has a mechanical problem OR A foreign object such as a clip or ripped paper is in the machine Open the scanner cover and...

Страница 107: ... you cannot enter fax transfer mode See Setting your station ID in the Quick Setup Guide a Press Menu 9 0 1 b Do one of the following If the LCD shows No Data there are no faxes left in the machine s memory Press Stop Exit If the LCD shows Enter Fax No enter the fax number to which faxes will be forwarded c Press Black Start Transferring Fax Journal report to another fax machine B If you have not ...

Страница 108: ...ou cannot remove the jammed paper from the front of the machine or the error message still appears on the LCD after you have removed the jammed paper please go to the next step d Remove the Jam Clear Cover 1 from the back of the machine Pull the jammed paper out of the machine CAUTION DO NOT place the jam clear cover face down as shown in the illustration You may damage the cover and cause paper j...

Страница 109: ...er the print head unplug the machine from the power source and then move the print head to take out the paper g Lift the scanner cover to release the lock 1 Gently push the scanner cover support down 2 and close the scanner cover 3 h Push the paper tray firmly back into the machine While holding the paper tray in place pull out the paper support until it clicks and unfold the paper support flap No...

Страница 110: ... only available for color fax sending Routine maintenance B Replacing the ink cartridges B Your machine is equipped with an ink dot counter The ink dot counter automatically monitors the level of ink in each of the 4 cartridges When the machine detects an ink cartridge is running out of ink the machine will tell you with a message on the LCD The LCD will tell you which ink cartridge is low or need...

Страница 111: ...til it clicks and then close the ink cartridge cover g The machine will automatically reset the ink dot counter Note If you replaced an ink cartridge before the LCD shows Near Empty or Ink Empty the LCD will ask you to verify that it was a brand new one For example Did You Change Blck For each new cartridge you installed press 1 Yes to automatically reset the ink dot counter for that color If the ...

Страница 112: ... recommend that you continue to use only Genuine Brother Brand replacement ink cartridges Use or attempted use of potentially incompatible ink and or cartridges in the Brother machine may cause damage to the machine and or may result in unsatisfactory print quality Our warranty coverage does not apply to any problem that is caused by the use of unauthorized third party ink and or cartridges To pro...

Страница 113: ...white plastic 3 with a soft lint free cloth moistened with a non flammable glass cleaner Cleaning the machine printer platen B WARNING Unplug the machine from the AC power outlet before cleaning the printer platen 1 If ink is scattered on or around the printer platen wipe it off with a soft dry lint free cloth a Using both hands use the plastic tabs on both sides of the machine to lift the scanner...

Страница 114: ...mly back in the machine f Re connect the power cord Cleaning the print head B To maintian print quality the machine will automatically clean the print head You can start the cleaning process manually if there is a print quality problem Clean the print head and ink cartridges if you get a horizontal line in the text or graphics on your printed pages You can clean Black only three colors at a time Y...

Страница 115: ...a Press Ink b Press a or b to choose Test Print Press OK c Press a or b to choose Print Quality Press OK d Press Color Start The machine begins printing the Print Quality Check Sheet e Check the quality of the four color blocks on the sheet Is Quality OK 1 Yes 2 No f Do one of the following If all lines are clear and visible press 1 to choose Yes and go to step j If you can see missing short lines...

Страница 116: ...hoose Test Print Press OK c Press a or b to choose Alignment Press OK d Press Black Start or Color Start The machine starts printing the Alignment Check Sheet Is Alignment OK 1 Yes 2 No e Check the 600 dpi and 1200 dpi test prints to see if number 5 most closely matches number 0 If the number 5 sample of both the 600 dpi and 1200 dpi test prints are the best matches press 1 Yes to finish the Align...

Страница 117: ...e ink volume c Press a or b to choose the color you want to check d Press Stop Exit Note You can check the ink volume from your computer See Printing for Windows or Printing and Faxing for Macintosh in the Software User s Guide on the CD ROM Machine Information B Checking the serial number B You can see the machine s serial number on the LCD a Press Menu 6 1 1 Serial No XXXXXXX b Press Stop Exit ...

Страница 118: ...k cartridges on page 94 c Install the yellow protective part lift each lock release lever and push it until it clicks and then close the ink cartridge cover CAUTION If you are not able to find the yellow protective parts DO NOT remove the ink cartridges before shipping It is essential that the machine be shipped with either the yellow protective parts or the ink cartridges in position Shipping wit...

Страница 119: ... put it in the original carton with the original packing material i Pack the printed materials in the original carton as shown below Do not pack the used ink cartridges in the carton Note If you are returning your machine to Brother as part of the Exchange Service pack only the machine Keep all separate parts and printed materials to use with your Exchange machine j Close the carton and tape it sh...

Страница 120: ...achine For example to set beeper volume to Low a Press Menu 1 4 2 b Press a or b to choose Low c Press OK d Press Stop Exit Memory storage C Even if there is a power failure you will not lose your menu settings because they are stored permanently Temporary settings such as Contrast Overseas mode and so on will be lost You may have to reset the date and time Menu keys C To access the menu mode a Pr...

Страница 121: ... Press OK when that option appears on the LCD The LCD will then show the next menu level d Press a or b to scroll to your next menu selection e Press OK When you finish setting an option the LCD shows Accepted f Press Stop Exit ...

Страница 122: ...ain Menu Submenu Menu Selections Options Descriptions Page 1 General Setup 1 Mode Timer 0 Sec 30 Secs 1 Min 2 Mins 5 Mins Off Sets the time to return to Fax mode 18 2 Paper Type Plain Paper Inkjet Paper Brother Photo Other Photo Transparency Sets the type of paper in the paper tray 18 3 Paper Size Letter Legal A4 A5 4 x 6 Sets the size of the paper in the paper tray 18 The factory settings are sho...

Страница 123: ...CD 20 2 Fax 1 Setup Receive In Fax mode only 1 Ring Delay 00 01 02 03 04 Sets the number of rings before the machine answers in Fax Only or Fax Tel mode 32 2 F T Ring Time 20 Sec 30 Sec 40 Sec 70 Sec Sets the F T pseudo double ring time in Fax Tel mode 32 3 Easy Receive On Off Receives fax messages without pressing Start 32 4 Remote Codes On l51 51 Off Allows you to answer all calls at an extensio...

Страница 124: ... to the size of the document 25 3 Report Setting 1 Transmission On On Image Off Off Image Sets initial setup for Transmission Verification Report and Fax Journal 47 2 Journal Period Off Every 50 Faxes Every 6 Hours Every 12 Hours Every 24 Hours Every 2 Days Every 7 Days 47 4 Remaining Jobs Checks which jobs are in the memory and lets you cancel chosen jobs 26 0 Miscellaneous 1 TX Lock Stops unauth...

Страница 125: ... for your type of document 52 2 Brightness nnnno nnnon nnonn nonnn onnnn Adjusts the brightness for copies 55 3 Contrast nnnno nnnon nnonn nonnn onnnn Adjusts the contrast for copies 55 4 Color Adjust 1 Red R nnnno R nnnon R nnonn R nonnn R onnnn Adjusts the amount of Red in copies 55 2 Green G nnnno G nnnon G nnonn G nonnn G onnnn Adjusts the amount of Green in copies 3 Blue B nnnno B nnnon B nno...

Страница 126: ...sen in the Paper Size menu 63 5 Brightness nnnno nnnon nnonn nonnn onnnn Adjusts the brightness 63 6 Contrast nnnno nnnon nnonn nonnn onnnn Adjusts the contrast 63 7 Cropping On Off Crops the image around the margin to fit the paper size or print size Turn this feature off if you want to print whole images or prevent unwanted cropping 64 8 Borderless On Off Expands the printable area to fit the ed...

Страница 127: ... of your machine 101 0 Initial Setup 1 Receive Mode Fax Only Fax Tel External TAD Manual Choose the receive mode that best suits your needs 30 2 Date Time Puts the date and time on the LCD and in headings of faxes you send See Quick Setup Guide 3 Station ID Fax Name Set your name and fax number to appear on each page you fax 4 Tone Pulse Canada only Tone Pulse Choose the dialing mode See Quick Set...

Страница 128: ...ns If you entered an incorrect letter and want to change it press d to move the cursor under the incorrect character Then press Clear Back Re enter the correct character You can also back up and insert letters Repeating letters If you need to enter a letter that is on the same key as the letter before press c to move the cursor to the right before you press the key again Special characters and sym...

Страница 129: ...eets 20 lb 80 g m2 Printer Type Ink Jet Print Method Black Color Piezo with 94 1 nozzle Piezo with 94 3 nozzles LCD liquid crystal display 16 characters 1line Power Source AC 100 to 120V 50 60Hz Power Consumption Off Mode Average 4 W Standby Average 5 W Operating Average 20 W ...

Страница 130: ...erating 50 dB or less 1 Temperature Operating Best Print Quality 50 F to 95 F 10 to 35 C 68 F to 91 F 20 to 33 C Humidity Operating Best Print Quality 20 to 80 without condensation 20 to 80 without condensation 15 7 in 398 mm 5 9 in 150 mm 360 mm 14 2 in 351 mm 13 8 in 443 mm 17 4 in ...

Страница 131: ...type Plain paper inkjet paper coated paper glossy paper 2 transparencies 1 2 and envelopes Paper size Letter Legal Executive A4 A5 A6 JIS_B5 envelopes commercial No 10 DL C5 Monarch JE4 Photo 4 6 Index card and Post card 3 Width 3 5 in 89mm 8 5 in 216mm Height 5 0 in 127mm 14 0 in 356mm For more details see Paper weight thickness and capacity on page 12 Maximum paper tray capacity Approx 100 sheet...

Страница 132: ...Width Max 8 5 in 215 9 mm Scanner Glass Height Max 11 7 in 297 mm Scanning Width 8 2 in 208 mm Printing Width 8 03 in 204 mm Gray scale 256 levels Contrast Control Automatic Light Dark manual setting Resolution Horizontal 203 dot in 8 dot mm Vertical Standard 98 line in 3 85 line mm Black 196 line in 7 7 line mm Color Fine 196 line in 7 7 line mm Black Color Photo 196 line in 7 7 line mm Black Sup...

Страница 133: ... in 215 9 mm Scanner Glass Height Max 11 7 in 297 mm Copy Width Max 8 26 in 210 mm Letter paper Copy Speed Black Up to 18 pages minute Letter paper 1 Color Up to 16 pages minute Letter paper 1 Multiple Copies Stacks up to 99 pages Enlarge Reduce 25 to 400 in increments of 1 Resolution Black Scans up to 600 1200 dpi Prints up to 1200 1200 dpi Color Scans up to 600 1200 dpi Prints up to 600 1200 dpi...

Страница 134: ...See Paper type and size for each operation on page 11 Available Media 1 USB flash memory drive 2 Resolution Up to 1200 2400 dpi File Extension Media Format DPOF EXIF DCF Image Format Photo Print JPEG 3 Number of Files Up to 999 files The folder inside a USB Flash memory drive is also counted Folder File must be in the 4th folder level of the USB Flash memory drive Borderless Letter A4 Photo 4 6 Ph...

Страница 135: ...more information Interface PictBridge USB Port Color Black Yes Yes TWAIN Compliant Yes Windows 2000 Professional XP XP Professional x64 Edition Windows Vista Windows Vista x64 Edition Mac OS X 10 2 4 or greater WIA Compliant Yes Windows XP 1 Windows Vista Color Depth 36 bit color Processing Input 24 bit color Processing Output Actual Input 30 bit color Actual Output 24 bit color Resolution Up to 1...

Страница 136: ... party USB ports are not supported for Macintosh Printer Driver Windows 2000 Professional XP XP Professional x64 Edition Windows Vista Windows Vista x64 Edition driver supporting Brother Native Compression mode Mac OS X 10 2 4 or greater Brother Ink Driver Resolution Up to 1200 6000 dpi 1200 2400 dpi 1200 1200 dpi 600 600 dpi 600 300 dpi 600 150 dpi Print Speed Black Up to 25 pages minute 1 Color ...

Страница 137: ...S X 10 2 4 or greater Printing PC FAX Send 4 Scanning Removable Disk 3 USB 2 PowerPC G4 G5 Intel Core Solo Duo PowerPC G3 350MHz 256MB 480MB Conditions 1 Microsoft Internet Explorer 5 5 or greater 2 Third party USB ports are not supported 3 Removable disk is a function of PhotoCapture Center 4 PC Fax supports black and white faxing only 5 PaperPort 11SE supports Microsoft SP4 or higher for Windows...

Страница 138: ...dge The printing frequency The number of pages printed Periodic automatic print head assembly cleaning Your machine will clean the print head assembly periodically This process will use a small amount of ink and Ink remaining in cartridge identified as empty It is necessary to leave a small amount of ink in the ink cartridge to prevent air from drying out and damaging the print head assembly Repla...

Страница 139: ...iving machine that a fax machine is calling Coding method Method of coding the information contained in the document All fax machines must use a minimum standard of Modified Huffman MH Your machine is capable of greater compression methods Modified Read MR Modified Modified Read MMR and JPEG if the receiving machine has the same capability Communication error Comm Error An error during fax sending...

Страница 140: ...rs that are stored in a Speed Dial location for Broadcasting Help list A printout of the complete Menu table that you can use to program your machine when you do not have the User s Guide with you Innobella Innobella is a range of genuine consumables offered by Brother For best quality results Brother recommends Innobella Ink and Paper Journal Period The pre programmed time period between automati...

Страница 141: ...ss of sending an electronic image of a paper document into your computer Search An electronic numerical or alphabetical listing of stored Speed Dial and Group numbers Speed Dial A pre programmed number for easy dialing You must press the Speed Dial and the two digit code and Black Start or Color Start to start the dialing process Standard resolution 203 97 dpi It is used for regular size text and ...

Страница 142: ...126 User Settings A printed report that shows the current settings of the machine ...

Страница 143: ...n 97 scanner 97 Connecting external TAD 38 external telephone 41 two line external TAD or telephone 40 Consumable items 122 Control panel overview 6 ControlCenter See Software User s Guide on the CD ROM Copy color adjustment 55 Enlarge Reduce 52 enter Copy mode 50 key 51 multiple 50 paper 56 single 50 temporary settings 51 using scanner glass 8 Copy Options key copying paper size 56 paper type 56 ...

Страница 144: ...ce 94 sending 24 at end of conversation 29 Broadcasting 25 canceling from memory 29 color fax 25 contrast 27 enter Fax mode 24 from memory Dual Access 28 from scanner glass 24 manual 29 overseas 28 Real Time Transmission 28 Resolution 27 telephone line interference 94 Fax Tel mode answering at extension telephones 41 42 double ringing voice calls 32 F T Ring Time 32 Fax Receive Code 41 42 Ring Del...

Страница 145: ...F printing 62 from PC See Software User s Guide on the CD ROM Print settings Brightness 63 Paper type size 63 specifications 118 PictBridge DPOF Printing 66 Power failure 104 Print area 16 difficulties 83 85 drivers 120 images 61 improving quality 98 99 paper jams 92 reports 48 resolution 120 specifications 120 Printing images 61 on small paper 16 See Software User s Guide on the CD ROM Programmin...

Страница 146: ...eceive mode 30 recording OGM 39 with two line jack 40 Teen Ring 35 Telephone line connections 38 difficulties 85 interference 94 multi line PBX 40 roll over lines 39 two line telephone system 39 Temporary copy settings 51 Text entering 112 special characters 112 Transparencies 9 10 12 115 Troubleshooting 83 checking ink volume 101 error messages on LCD 88 if you are having difficulty copying 87 in...

Страница 147: ...ifications NOTICE The Ringer Equivalence Number is an indication of the maximum number of devices allowed to be connected to a telephone interface The termination on an interface may consist of any combination of devices subject only to the requirement that the sum of the RENs of all the devices does not exceed five ...

Страница 148: ... us on the World Wide Web http www brother com These machines are made for use in the USA and Canada only We cannot recommend using them overseas because it may violate the Telecommunications Regulations of that country and the power requirements of your machine may not be compatible with the power available in foreign countries Using USA or Canada models overseas is at your own risk and may void ...

Отзывы: