Prepare Your Network
48
4
NOTE
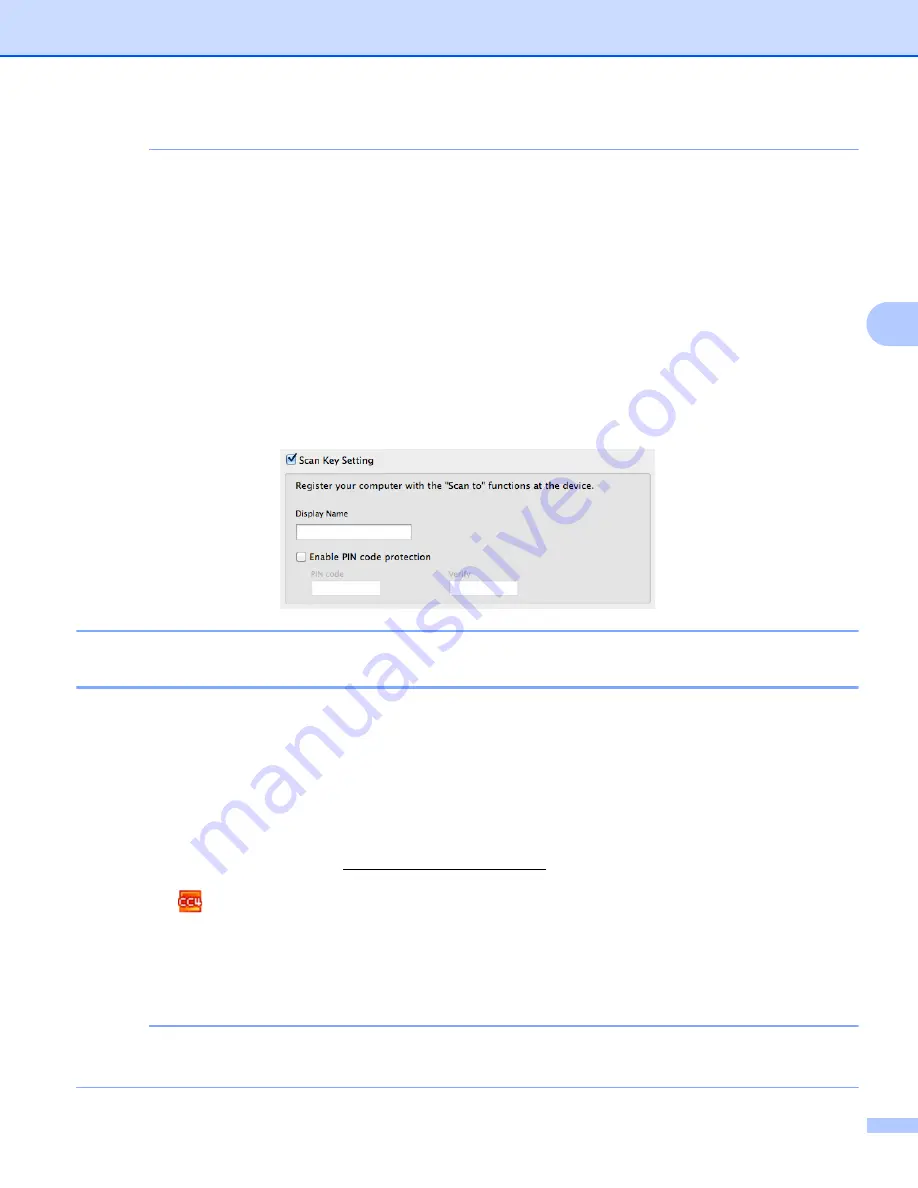
Click the check box for
Scan Key Setting
and then configure the following:
• For Scan to PC (Network Connect) (ADS-1000W only) or scanning from the Control Panel of the machine
(ADS-1500W only), click the check box for
Register your computer with the "Scan To" functions at the device
. Then enter the name you want
to be displayed in the
Destination
drop-down list in
Scan to Network Device
from the
Scan
tab in Web
Base Management (ADS-1000W only) (see
Save Scanned Documents on Your Computer
or on the LCD of the machine (ADS-1500W only). You can use up to 15 characters.
• You can avoid receiving unwanted documents by setting a 4-digit PIN number. Enter your PIN code in the
PIN code
and
Verify
field.
(ADS-1500W only)
To send data to a computer protected by a PIN code, the LCD prompts you to enter the PIN code before
the document can be scanned and sent to the machines.
Launch the BRAdmin Utility (Windows
®
)
4
If you have installed BRAdmin Light or BRAdmin Professional 3, the
BRAdmin
button lets you open the
BRAdmin Light or BRAdmin Professional 3 utility.
The BRAdmin Light utility is designed for initial setup of the Brother network connected devices. It can also
search for Brother products in a TCP/IP environment, view the status and configure basic network settings,
such as the IP address. For information about installing BRAdmin Light from the supplied DVD-ROM, see the
Network User’s Guide.
If you require more advanced machine management, use the latest version of BRAdmin Professional 3 utility
that is available as a download from http://solutions.brother.com/
1
Click the
(ControlCenter4) icon in the task tray and then select
Open
from the menu.
The
ControlCenter4
window will appear.
2
Select the
Device Settings
tab.
3
Click
BRAdmin
. The BRAdmin Light or BRAdmin Professional 3 utility dialog box will appear.
NOTE
If you have installed both BRAdmin Light and BRAdmin Professional, ControlCenter4 will launch BRAdmin
Professional 3.


