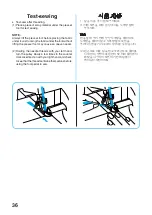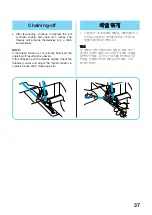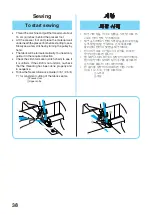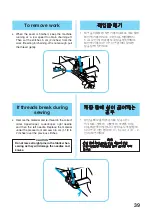
46
6
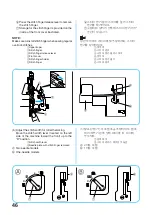
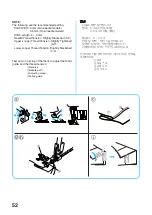
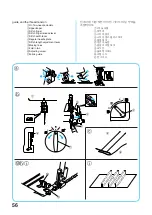
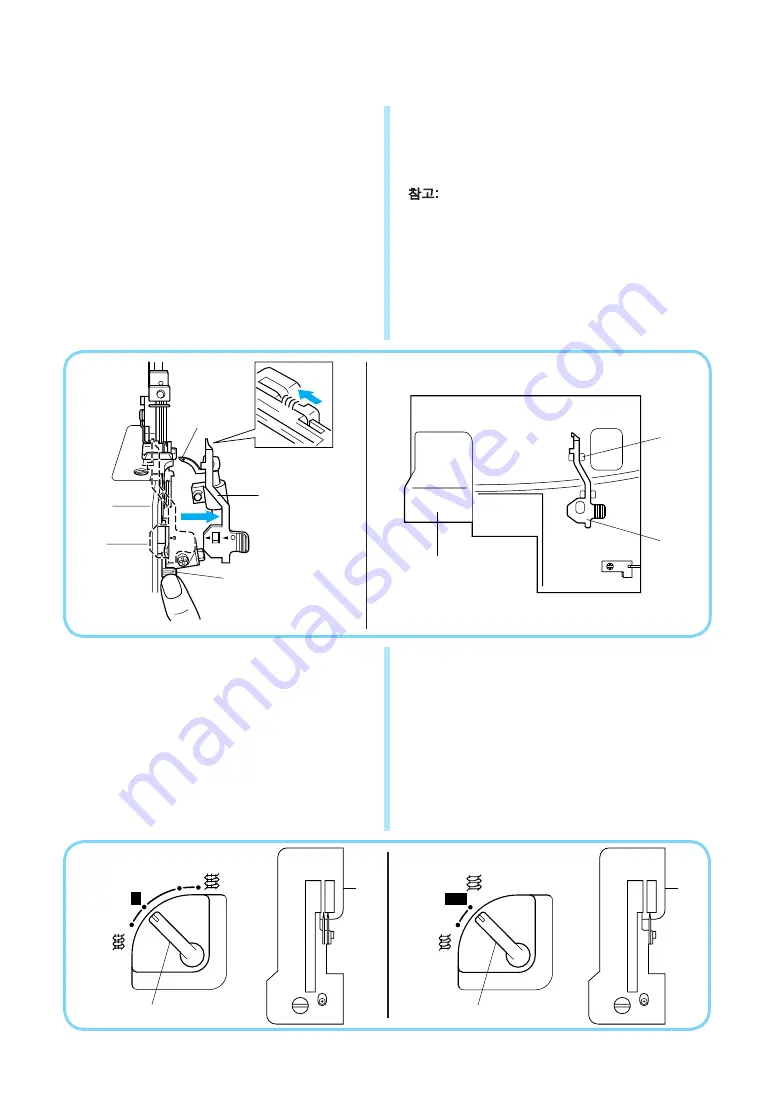
Press the stitch finger release lever to remove
the stitch finger.
7
Storage for the stitch finger is provided on the
inside of the front cover illustrated.
NOTE:
Make sure to install stitch finger when sewing regular
overlock stitches.
1
Upperlooper
2
Stitch finger
3
Stitch finger release lever
4
Front cover
5
Stitch finger holder
6
Stitch finger
6
스티치 핑거 릴리스 레버를 눌러 스티치
핑거를 제거하세요.
7
그림처럼 앞커버 안쪽에 스티치 핑거 저장
공간이 있습니다.
참고:
일반 오버로크 스티치를 재봉할 때에는 스티치
핑거를 설치하세요.
1
윗루퍼
2
스티치 핑거
3
스티치 핑거 릴리스 레버
4
앞커버
5
스티치 핑거 홀더
6
스티치 핑거
B
(5) Adjust the stitch width for rolled hemming.
Move the stitch width lever (located on the left
side of the machine toward the front) up to the
“R” position.
7
Stitch width lever
8
Needle plate with stitch finger removed
A
Two-needle models
B
One-needle models
(5) 말은 단접기용으로 땀폭을 조절하세요. 땀폭
레버(재봉기 왼쪽 앞에 위치)를 ‘R’ 위치에
놓으세요.
7
땀폭 레버
8
스티치 핑거가 제거된 바늘판
A
2바늘 모델
B
1바늘 모델
A
2
3
1
8
7
R
7
6
5
8
R
3.5
7
5
6
4
Содержание 2034D
Страница 2: ......
Страница 11: ...3 ...
Страница 33: ...25 2 3 4 5 6 7 2 1 2 3 6 7 6 4 5 ...
Страница 35: ...27 2 3 5 6 4 7 2 1 2 3 4 3 6 7 6 7 6 4 5 ...
Страница 72: ...English Korean 2034D XB2073 001 Printed in Taiwan ...

