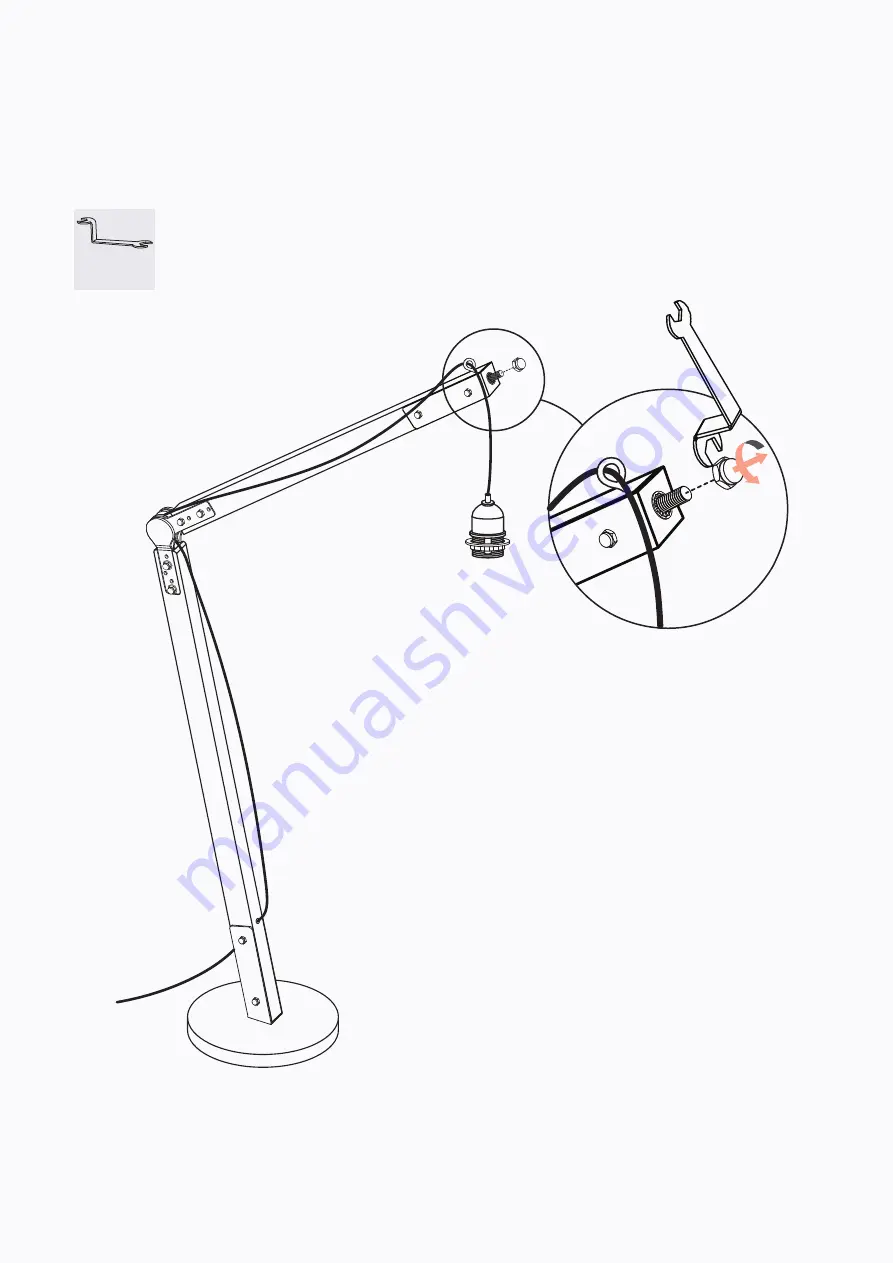
Step 5
Unscrew the nut from the top of the stand using the spanner
B
.
x 1
Страница 1: ...Orion Floor Lamp A S S E M B LY G U I D E V3...
Страница 2: ...duct Avoid loose screws Tighten xtures every few months Assembly requires 2 people It s always easier with a friend Contact our support online or call 1300 027 672 Check the assembly guide for require...
Страница 3: ...r wattage than recommended 5 To replace the bulb unplug the lamp from its power source and allow it to cool rst Then change the bulb plug it in and switch it on 6 This product is not suitable for chil...
Страница 4: ...ou get started check you have all of the pieces below If anything s missing we ll sort it out right away Simply visit www brosa com au pages product return and parts request A x 1 B x 1 Stand x 1 Shad...
Страница 5: ...Step 1 Unscrew the bolts and nuts with the spanner B and remove them from the joint along with the at washers Keep the removed parts for the following assembly B x 1 B...
Страница 6: ...p 2 Re arrange the cable as shown in the diagram below Fit the lower part of stand into the joint Fit the parts removed in Step 1 back to the joint again and then tighten them with the spanner B B x 1...
Страница 7: ...Step 3 Unscrew the nut from the bottom of the stand with the spanner B Remove the nut along with the spring washer and at washer Keep the removed parts for the following assembly B x 1 B...
Страница 8: ...the bottom of the stand followed by the base weight and make sure the long rod protrudes from the bottom of the base weight Fit the at washer onto the rod followed by the spring washer and then the nu...
Страница 9: ...Step 5 Unscrew the nut from the top of the stand using the spanner B B x 1 B...
Страница 10: ...Step 6 Attach the shade to the top of the stand and make sure the rod protrude from the brace Fit the nut removed in Step 5 to the rod and tighten it with the spanner B B B x 1...
Страница 11: ...shade ring and remove it from the bulb holder Unscrew the bolts that fasten the bottom shade panel with the Allen key A Remove the bottom shade panel and the bolts and place them aside for the followi...
Страница 12: ...Step 8 Lead the bulb holder through the hole on the top of the shade and make sure it ts into the bracket inside the shade...
Страница 13: ...Step 9 Attach the shade ring to the bulb holder again and screw it until the bulb holder is tight and secure Gently screw the correct bulb not included into the bulb holder...
Страница 14: ...Step 10 Align the bottom shade panel with the bottom of the shade again and x it in place with the bolts removed in Step 7 and Allen key A A x 1 A...
Страница 15: ...Step 11 Direct the light where you want it as the light arm and shade are adjustable Enjoy We hope your new Orion Floor Lamp lights up your life...