Briteq LED UV-GUN 60W Скачать руководство пользователя страница 8

ENGLISH 

USER MANUAL 


BRITEQ

®


6/34 

LED UV-GUN 60W 

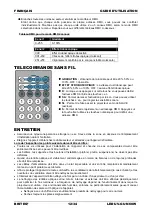
WIRELESS REMOTE CONTROLLER 


  DIMMING:

  You  can  set  the  light  output  at  20%,  50%  or  100%.  

OFF = Blackout. 

  STROBE:

  You  can  set  the  strobe  speed  at  20%,  50%  or  100%. 

OFF = No strobe effect. 

  D: 

When  you  have  pressed  this  button,  you  can  set  the  DMX 

address by usting the + and 

– buttons. 

  SA: 

Used  to  start  the  sound  activation.  You  can  use  the

  + 

and


– 

buttons to set the sound sensitivity.


  SL: 

Used to set the projector in SLAVE mode. 

  S: 

used for fast DMX addressing. Press the

 S 

button and use the 

numeric buttons to set the desired DMX address.


MAINTENANCE


  Make sure the area below the installation place is free from unwanted persons during servicing. 

  Switch off the unit, unplug the mains cable and wait until the unit has been cooled down. 

During inspection the following points should be checked: 

  All  screws  used  for  installing  the  device  and  any  of  its  parts  should  be  tightly  fastened  and  may  not  be 

corroded. 

  Housings,  fixations  and  installations  spots  (ceiling,  truss,  suspensions)  should  be  totally  free  from  any 

deformation. 

  When an optical lens is visibly damaged due to cracks or deep scratches, it must be replaced. 

  The  mains  cables  must  be  in  impeccable  condition  and  should  be  replaced  immediately  when  even  a 

small problem is detected. 

  In order  to  protect  the  device  from  overheat the  cooling  fans  (if  any)  and  ventilation  openings  should  be 

cleaned monthly. 

  The interior of the device should be cleaned annually using a vacuum cleaner or air-jet. 

  The  cleaning  of  internal  and  external  optical  lenses  and/or  mirrors  must  be  carried  out  periodically  to 

optimize light output. Cleaning frequency depends on the environment in which the fixture operates: damp, 
smoky or particularly dirty surroundings can cause greater accumulation of dirt on the unit’s optics. 

  Clean with a soft cloth using normal glass cleaning products. 

  Always dry the parts carefully. 

Attention: We strongly recommend internal cleaning to be carried out by qualified personnel! 
 

SPECIFICATIONS 

Mains Input: 

110-240Vac, 50/60Hz 

Power consumption:


80 Watt 

Fuse: 

250V 2A slow blow (20mm glass) 

Sound Control: 

Internal microphone 

DMX connections: 

XLR 3pin  

LEDs:


60W COB UV-LED  

Beam angle: 

45° 

Size:


340x130x350mm  

Weight:


3,4 kg 


Every information is subject to change without prior notice 

You can download the latest version of this user manual on our website: www.briteq-lighting.com 

Содержание LED UV-GUN 60W

Страница 1: ......

Страница 2: ......

Страница 3: ...t your dealer first Important This device left our factory in perfect condition and well packaged It is absolutely necessary for the user to strictly follow the safety instructions and warnings in thi...

Страница 4: ...s for electrical and mechanical safety in your country Check that the available voltage is not higher than the one stated on the unit The power cord should always be in perfect condition Switch the un...

Страница 5: ...age to property Overhead rigging requires extensive experience Working load limits should be respected certified installation materials should be used the installed device should be inspected regularl...

Страница 6: ...cal installation for two or more units in DMX mode The DMX protocol is a widely used high speed signal to control intelligent light equipment You need to daisy chain your DMX controller and all the co...

Страница 7: ...as the first master projector To put a projector in SLAVE mode just press the MODE button until SLA is shown on the display OPERATING INSTRUCTIONS A Standalone 1unit Just connect the projector to the...

Страница 8: ...aged due to cracks or deep scratches it must be replaced The mains cables must be in impeccable condition and should be replaced immediately when even a small problem is detected In order to protect t...

Страница 9: ...ez pas l appareil et consultez imm diatement votre revendeur Important Cet appareil est exp di de notre usine en parfait tat et bien emball Il est absolument n cessaire que l utilisateur suive stricte...

Страница 10: ...tation en mati re de s curit lectrique et m canique dans votre pays V rifiez que la tension secteur n est pas sup rieure celle indiqu e sur l appareil Le cordon d alimentation doit toujours tre en par...

Страница 11: ...e grande exp rience Les limites de charge de fonctionnement doivent tre respect es des mat riels d installation certifi s doivent tre utilis s l appareil install doit tre inspect r guli rement pour v...

Страница 12: ...IGURER pour plus d informations C est fait Installation lectrique de deux ou plusieurs unit s en mode DMX Le protocole DMX est largement utilis pour contr ler des quipements lumineux intelligents au m...

Страница 13: ...he l cran Utilisez les touches Haut Bas pour modifier la sensibilit du microphone int gr 0 sensibilit minimale 9 sensibilit maximale MODE SLAVE Lorsque qu un projecteur fonctionne en mode autonome san...

Страница 14: ...ns la zone en dessous de l emplacement d installation durant l entretien Eteignez l appareil d branchez le c ble secteur et attendez que l appareil refroidisse Lors de l inspection les points suivants...

Страница 15: ...e 110 240Vac 50 60Hz Consommation 80 Watts Fusible 250V 2A action retard e verre 20 mm R glage du son Microphone interne Connexions DMX XLR 3 broches T moins LED UV 60W COB Angle de faisceau 45 Dimen...

Страница 16: ...Belangrijk Dit apparaat verliet de fabriek in perfecte staat en goed verpakt Het is absoluut noodzakelijk voor de gebruiker om de veiligheidsinstructies en waarschuwingen in deze handleiding strikt op...

Страница 17: ...or elektrische en mechanische veiligheid in uw land Controleer of de beschikbare spanning niet hoger is dan aangegeven op het apparaat Het netsnoer moet altijd in perfecte staat zijn Schakel het appar...

Страница 18: ...ereist veel ervaring Werklastgrenzen moeten in acht worden genomen gecertificeerde installatiematerialen moeten worden gebruikt het ge nstalleerde apparaat moet regelmatig worden gecontroleerd op veil...

Страница 19: ...ngesloten Zie het hoofdstuk HOE IN TE STELLEN voor meer informatie Klaar Elektrische installatie voor twee of meer eenheden in de DMX modus De DMX protocol is een veel gebruikte hoge snelheidssignaal...

Страница 20: ...kt totdat S op de display wordt weergegeven OMLAAG en OMHOOG knoppen om de gevoeligheid in te stellen van de ingebouwde microfoon 0 lage gevoeligheid 9 hoge gevoeligheid SLAVE MODUS Wanneer u n projec...

Страница 21: ...takelen en onderhoud vrij is van ongewenste personen Schakel het apparaat uit ontkoppel het netsnoer en wacht totdat het apparaat is afgekoeld Tijdens de inspectie moeten de volgende punten worden gec...

Страница 22: ...ng 110 240 Vac 50 60 Hz Energieverbruik 80 Watt Zekering 250 V 2A traag 20 mm glas Geluidbesturing Ingebouwde microfoon DMX aansluitingen XLR 3 pins LED s 60W COB UV LED Straalhoek 45 Afmetingen 340x1...

Страница 23: ...tzen Sie es nicht sondern wenden Sie sich unverz glich an Ihren H ndler Wichtiger Hinweis Dieses Ger t hat das Werk unbesch digt und gut verpackt verlassen Es ist wichtig dass der Benutzer sich streng...

Страница 24: ...den Stellen Sie sicher dass Netzspannung mit Ger teaufkleber bereinstimmt Das Ger t nicht mit einem besch digten Netzkabel in Betrieb nehmen Wenn das Netzkabel gequetscht oder besch digt wurde schalte...

Страница 25: ...ursachen Die berkopf Montage setzt die entsprechende Erfahrung voraus Die Belastungsgrenzen m ssen beachtet geeignetes Installationsmaterial muss verwendet und das installierte Ger t muss in regelm ig...

Страница 26: ...NGSANLEITUNG f r weitere Informationen nach Fertig Elektrische Installation von zwei oder weiteren Einheiten im DMX Modus Das DMX Protokoll ist ein g ngiges Hochgeschwindigkeitssignal um intelligente...

Страница 27: ...Tasten ABW RTS und AUFW RTS die Intensit t die Lichtleistung 0 Blackout 9 Max Ausgangsleistung ein 2 STROBOSKOPGESCHWINDIGKEIT F Dr cken Sie die Taste MODE bis F auf dem Display angezeigt wird Stelle...

Страница 28: ...eren Anschlie end schlie en Sie alle Ger te an die Stromversorgung an und schalten Sie den DMX Controller ein Da jedes Ger t eine eigene DMX Adresse besitzt k nnen Sie die Ger te einzeln steuern Denke...

Страница 29: ...teinnere mindestens einmal pro Jahr mit einem Staubsauger oder einer Luftd se reinigen Die Reinigung der inneren und u eren optischen Linsen und oder Spiegel muss in regelm igen Abst nden zur Beibehal...

Страница 30: ...ero con su distribuidor Importante Este dispositivo sali de nuestra f brica en perfectas condiciones y bien embalado Es absolutamente necesario que se obedezcan al pie de la letra las instrucciones y...

Страница 31: ...alizarla solamente personal cualificado de acuerdo con las regulaciones para la seguridad el ctrica y mec nica de su pa s Compruebe que la tensi n disponible sea la indicada en la unidad El cable de a...

Страница 32: ...como resultado lesiones serias y o da os a la propiedad La elevaci n sobre cabeza requiere una experiencia extensa Deben respetarse los l mites de carga de trabajo deben utilizarse materiales de inst...

Страница 33: ...LO para m s informaci n Hecho Instalaci n el ctrica para dos o m s unidades en modo DMX El protocolo DMX es una se al de alta velocidad ampliamente utilizada para controlar equipamiento de iluminaci n...

Страница 34: ...ENU hasta que se muestre en la pantalla S Utilice los botones ABAJO y ARRIBA para cambiar la sensibilidad del micr fono integrado 0 sensibilidad baja 9 sensibilidad alta MODO SLAVE Cuando tenga un pro...

Страница 35: ...t libre de personas no autorizadas durante el mantenimiento Apague la unidad desenchufe el cable de alimentaci n y espere hasta que se enfr e Durante la inspecci n deben revisarse los puntos siguiente...

Страница 36: ...0 240Vac 50 60Hz Consumo de potencia 80 Vatios Fusible 250V 2A retardado cristal 20mm Control por Sonido Micr fono interno Conexiones DMX XLR de 3 pines LED LED UV COB de 60W ngulo del haz 45 Tama o 3...

Страница 37: ......

Страница 38: ......

Страница 39: ......

Страница 40: ......

Отзывы: