background image

ENGLISH 


OPERATION MANUAL 


BRITEQ

®


5/73 

BT-W19L10 ZOOM 

No: output stays on during pan/tilt movements. 
Yes: output shuts off during pan/tilt movements. 

  S

elect “

Bl.O. P/T Moving

” and press ENTER 

  Use DOWN / UP buttons to select Yes or No. 

  Press the ENTER button to save. 

To return without any change or go to a previous menu, press the MENU button.


White balance 

Allows the user to fine tune the three colors to achieve the perfect white 

  S

elect “

White balance

” and press ENTER: the head will be positioned to light up the ceiling in white color. 

  The display shows the actual values for RED, GREEN and BLUE. (by default all values are set to 255) 

  Use DOWN / UP buttons to select a color and press ENTER. 

  Use DOWN / UP buttons to adapt the values. 

  Press the ENTER button to save. 

  When all values are set, press MENU to return to the previous menu. 


Cooling Mode 

By  default  this  option  is  set  to  “auto”  but  in  some  cases  (like  theater)  the  projector  should  be  as  quite  as 
possible. In those cases you can set cooling mode to “low” to reduce fan noise. In that case, when the unit 
becomes  too  hot,  the  fan  speed  will  not  increase  but  the  light  output  will  be  reduces  to  protect  the  LEDs 
against excessive temperatures.   

Auto: Fan is temperature controlled, speed increases with higher temperatures. 
Low: Fan turns at low speed, output decreases with higher temperatures. 

  S

elect “

Cooling Mode

” and press ENTER 

  Use DOWN / UP buttons to select Auto or Low. 

  Press the ENTER button to save. 

To return without any change or go to a previous menu, press the MENU button.


Dimmer Curve 

This function provides four dimming options to choose from: 


Mode 1

 (LINEAR): light output varies linearly with the DMX value  

Mode 2 

(SQUARE LAW ): light output can be adjusted more accurately for low DMX values 

Mode 3 

(INVERSE SQUARE LAW):  light output can be adjusted more accurately for high DMX values. 

Mode 4 

(S-CURVE): light output can be adjusted more accurately for both high and low DMX values. 

  S

elect “

Dimmer Curve

” and press ENTER 

  Use DOWN / UP buttons to select one of the dimmer curves. 

  Press the ENTER button to save. 

To return without any change or go to a previous menu, press the MENU button.


Blackout Mode


Determines how the projector should behave when the DMX-signal is lost. 


Blackout mode: 

when no DMX-signal is detected, the unit goes in blackout and waits for the DMX-signal. 


Freeze mode: 

when no DMX-signal is detected, the unit freezes with the latest dmx values received and 

waits for the DMX-signal.  

  S

elect “

Blackout Mode

” and press ENTER 

  Use DOWN / UP buttons to select Freeze or Blackout. 

  Press the ENTER button to save. 

To return without any change or go to a previous menu, press the MENU button.


Содержание BT-W19L10 ZOOM

Страница 1: ......

Страница 2: ......

Страница 3: ... modes for maximum flexibility Automatic X Y re positioning Neutrik PowerCON in outputs easy daisy chaining of several units up to 16A Neutrik 3pin 5pin in outputs for maximum flexibility in a professional environment Easy firmware updates keep your machine up to date at all times optional firmware updater needed The LCD display assures easy navigation in the different setup menus High efficiency ...

Страница 4: ...diately off when the power cord is squashed or damaged It must be replaced by the manufacturer its service agent or similarly qualified persons in order to avoid a hazard Never let the power cord come into contact with other cables This fixture must be earthed in order to comply with safety regulations Don t connect the unit to any dimmer pack Always use an appropriate and certified safety cable w...

Страница 5: ...king you can use good quality balanced signal cables with 3pin or 5pin XLR connectors 7 MAINS INPUT OUTPUT with PowerCON sockets connect the supplied mains cable here you can daisy chain several units up to max 16A Input and output are connected to each other without any fuse 8 MAINS FUSE this fuse only protects the electronics of the projector Hint Please check our website for special cable assem...

Страница 6: ...WN UP buttons to select Yes or No Press the ENTER button to save To return without any change or go to a previous menu press the MENU button Tilt Inverse No Tilt movement is not inverted Yes Tilt movement is inverted Select Tilt Inverse and press ENTER Use DOWN UP buttons to select Yes or No Press the ENTER button to save To return without any change or go to a previous menu press the MENU button ...

Страница 7: ...led speed increases with higher temperatures Low Fan turns at low speed output decreases with higher temperatures Select Cooling Mode and press ENTER Use DOWN UP buttons to select Auto or Low Press the ENTER button to save To return without any change or go to a previous menu press the MENU button Dimmer Curve This function provides four dimming options to choose from Mode 1 LINEAR light output va...

Страница 8: ...s ENTER Use DOWN UP buttons to change the intensity between 1 and 10 Press the ENTER button to save To return without any change or go to a previous menu press the MENU button Temperature Unit The display can show temperature either in C Celcius or F Fahrenheit C Temperature is shown in Celcius F Temperature is shown in Fahrenheit Select Temperature Unit and press ENTER Use DOWN UP buttons to sele...

Страница 9: ...l Use DOWN UP buttons to browse the list and press ENTER to select a function Use DOWN UP buttons to confirm your choice Yes or No Press MENU to return to the list and choose another function To return press the MENU button until you re in the main menu Notice an alternative shortcut for this function press the MENU ENTER buttons together for 3seconds Special Functions This submenu contains some u...

Страница 10: ...es the device s weight Always use a certified safety cable number 3 on the picture that can hold 12 times the weight of the device when installing the unit This secondary safety attachment should be installed in a way that no part of the installation can drop more than 20cm if the main attachment fails The device should be well fixed a free swinging mounting is dangerous and may not be considered ...

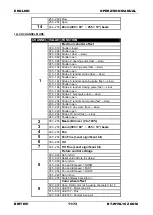
Страница 11: ...NNEL VALUE FUNCTION 1 000 255 Pan 2 000 255 Pan Fine Least significant bit 3 000 255 Tilt 4 000 255 Tilt Fine Least significant bit 5 000 255 Pan Tilt Speed 000 fast 255 slow 6 Fixture control settings 000 009 No function 010 014 Reset all after 2 seconds 015 039 No function 040 044 Pan and tilt speed NORM 045 049 Pan and tilt speed FAST 050 054 Pan and tilt speed SLOW 055 255 No function 7 000 25...

Страница 12: ...ouble CT Blue 070 074 LEE 161 Slate Blue 075 079 LEE 201 Full CT Blue 080 084 LEE 202 Half CT Blue 085 089 LEE 117 Steel Blue 090 094 LEE 353 Lighter Blue 095 099 LEE 118 Light Blue 100 104 LEE 116 Medium Blue Green 105 109 LEE 124 Dark Green 110 114 LEE 139 Primary Green 115 119 LEE 089 Moss Green 120 124 LEE 122 Fern Green 125 129 LEE 738 JAS Green 130 134 LEE 088 Lime Green 135 139 LEE 100 Spri...

Страница 13: ... burst pulse fast slow 185 189 Shutter open 190 204 Strobe 8 random burst pulse fast slow 205 209 Shutter open 210 224 Strobe 9 sine wave fast slow 225 229 Shutter open 230 244 Strobe 10 burst fast slow 245 255 Shutter open 2 000 255 Master Dimmer 0 to 100 3 000 255 Zoom 000 60 255 10 beam 4 000 255 Pan 5 000 255 Pan Fine Least significant bit 6 000 255 Tilt 7 000 255 Tilt Fine Least significant b...

Страница 14: ... 119 LEE 089 Moss Green 120 124 LEE 122 Fern Green 125 129 LEE 738 JAS Green 130 134 LEE 088 Lime Green 135 139 LEE 100 Spring Yellow 140 144 LEE 104 Deep Amber 145 149 LEE 179 Chrome Orange 150 154 LEE 105 Orange 155 159 LEE 021 Gold Amber 160 164 LEE 778 Millennium Gold 165 169 LEE 135 Deep Golden Amber 170 174 LEE 164 Flame Red 175 179 Open Color wheel rotation effect 180 201 Clockwise fast slo...

Страница 15: ...l lenses and or mirrors must be carried out periodically to optimize light output Cleaning frequency depends on the environment in which the fixture operates damp smoky or particularly dirty surroundings can cause greater accumulation of dirt on the unit s optics Clean with a soft cloth using normal glass cleaning products Always dry the parts carefully Attention We strongly recommend internal cle...

Страница 16: ...ité optimale Repositionnement X Y automatique Entrées sorties Neutrik PowerCon chaînage facile de plusieurs unités jusqu à 16 A Entrées sorties Neutrik 3 et 5 broches pour un maximum de flexibilité dans un environnement professionnel Les mises à jour faciles du micrologiciel permettent de maintenir votre appareil à jour en permanence un module de mise à jour optionnel est nécessaire L écran LCD as...

Страница 17: ...ifié conformément à la réglementation en matière de sécurité électrique et mécanique dans votre pays Vérifiez que la tension secteur n est pas supérieure à celle indiquée sur l appareil Le cordon d alimentation doit toujours être en parfait état Éteignez immédiatement l appareil dès que le cordon d alimentation est écrasé ou endommagé Il doit être remplacé par le fabricant son agent de service ou ...

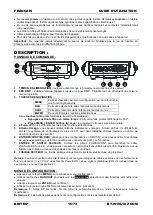
Страница 18: ...ess MENU ENTER buttons for 3sec le projecteur retrouve sa position initiale 4 L écran affiche les différents menus et les fonctions sélectionnés 5 Attache Omega vous pouvez utiliser l attache instantanée oméga incluse en bas Il suffit de faire pivoter le système de verrouillage de plus de 90 pour fixer l attache Utilisez toujours un câble de sécurité pour plus de sécurité 6 ENTRÉES SORTIES DMX uti...

Страница 19: ...ur sélectionner un mode canal DMX Appuyez sur la touche ENTER pour enregistrer Pour effectuer un retour sans aucune modification ou aller au menu précédent appuyez sur la touche MENU Afficher la valeur DMX Sélectionnez View DMX Value et appuyez sur ENTER L écran affiche alors les valeurs DMX des différents canaux Pour retourner au menu précédent appuyez sur la touche MENU ou après 60 secondes l éc...

Страница 20: ...ctionnez Bl O P T Moving et appuyez sur ENTER Utilisez les touches BAS HAUT pour sélectionner Yes ou No Appuyez sur la touche ENTER pour enregistrer Pour effectuer un retour sans aucune modification ou aller au menu précédent appuyez sur la touche MENU Balance des blancs cela permet d affiner les trois couleurs pour obtenir le blanc parfait Sélectionnez White balance et appuyez sur ENTER la tête s...

Страница 21: ... aucun signal DMX n est détecté l appareil passe en mode blackout d attente de signal DMX Mode arrêt lorsqu aucun signal DMX n est détecté l appareil se bloque avec les dernières valeurs DMX reçues et se met en attente du signal DMX Sélectionnez Blackout Mode et appuyez sur ENTER Utilisez les touches BAS HAUT pour sélectionner Arrêt ou Obscurcissement Appuyez sur la touche ENTER pour enregistrer P...

Страница 22: ...re doit vous avertir lorsqu une erreur se produit No l écran affiche l erreur discrètement Yes l écran se met à clignoter alors que l erreur est affichée à l écran Sélectionnez Display Warning et appuyez sur ENTER Utilisez les touches BAS HAUT pour sélectionner Yes ou No Appuyez sur la touche ENTER pour enregistrer Pour effectuer un retour sans aucune modification ou aller au menu précédent appuye...

Страница 23: ...le sous menu Special Functions Fixture Maintenance Sert à régler réinitialiser l intervalle de temps entre les opérations de maintenance successives Sélectionnez Fixture Maintenance et appuyez sur ENTER Deux options sont disponibles Interval ici vous pouvez régler l heure souhaitée entre 2 opérations de maintenance Utilisez les touches BAS HAUT pour modifier l intervalle entre 10 et 300 heures App...

Страница 24: ...nsion de sécurité secondaire doit être installé de manière à ce qu aucune partie de l installation ne puisse tomber de plus de 20 cm si le support principal lâche L appareil doit être bien fixé un montage balançant est dangereux et ne doit pas être envisagé Ne couvrez pas les ouvertures de ventilation cela pourrait entraîner une surchauffe L opérateur doit s assurer que la sécurité relative à l in...

Страница 25: ... le bit le moins significatif 5 000 255 Vitesse du panoramique horizontal vertical 000 rapide 255 lente 6 Canal de réinitialisation 000 009 Aucun rôle 010 014 Réinitialisation après 2 secondes 015 255 Aucun rôle 040 044 Vitesse du pan et tilt NORM 045 049 Vitesse du pan et tilt RAPIDE 050 054 Vitesse du pan et tilt LENTE 055 255 Aucun rôle 7 000 255 Gradateur maître 0 à 100 8 Effet électronique 00...

Страница 26: ...eu double CT 070 074 LEE 161 bleu ardoise 075 079 LEE 201 bleu CT complet 080 084 LEE 202 bleu demi CT 085 089 LEE 117 bleu acier 090 094 LEE 353 bleu très clair 095 099 LEE 118 bleu clair 100 104 LEE 116 bleu vert moyen 105 109 LEE 124 vert foncé 110 114 LEE 139 vert primaire 115 119 LEE 089 vert mousse 120 124 LEE 122 vert de fougère 125 129 LEE 738 vert jaunâtre 130 134 LEE 088 vert citron 135 ...

Страница 27: ... aléatoire rapide lent 165 169 Obturateur ouvert 170 184 Lumière stroboscopique 7 impulsion rafale rapide lent 185 189 Obturateur ouvert 190 204 Lumière stroboscopique 8 impulsion rafale aléatoire rapide lent 205 209 Obturateur ouvert 210 224 Lumière stroboscopique 9 onde sinusoïdale rapide lent 225 229 Obturateur ouvert 230 244 Lumière stroboscopique 10 rafale rapide lent 245 255 Obturateur ouver...

Страница 28: ...très clair 095 099 LEE 118 bleu clair 100 104 LEE 116 bleu vert moyen 105 109 LEE 124 vert foncé 110 114 LEE 139 vert primaire 115 119 LEE 089 vert mousse 120 124 LEE 122 vert de fougère 125 129 LEE 738 vert jaunâtre 130 134 LEE 088 vert citron 135 139 LEE 100 jaune printemps 140 144 LEE 104 ambre foncé 145 149 LEE 179 orange chrome 150 154 LEE 105 Orange 155 159 LEE 021 or ambre 160 164 LEE 778 o...

Страница 29: ...le doit être remplacée Les câbles d alimentation doivent être dans un état impeccable et doivent être remplacés immédiatement même si un petit problème est détecté Afin de protéger l appareil de toute surchauffe les ventilateurs de rafraîchissement le cas échéant et les ouvertures de ventilation doivent être nettoyés mensuellement L intérieur de l appareil doit être nettoyé une fois par an à l aid...

Страница 30: ...VBB Osram OSTAR Portée du zoom 10 60 Dimensions voir dessin ci dessous Poids 9 2 kg Faisceau LUX m R V B B Complet 10 1 m 12310 32750 1233 37910 81360 2m 4800 12900 470 15200 32000 3m 2100 5800 230 6700 14000 4m 1200 3200 140 3700 7800 5m 800 2000 97 2300 5100 60 1 m 1287 3424 144 3932 8435 2m 380 987 144 3932 8435 3m 176 430 30 490 1000 4m 100 260 25 290 630 5m 76 170 22 195 400 Les informations ...

Страница 31: ...alstanden voor maximale flexibiliteit Automatische X Y herpositionering Neutrik PowerCON in uitgangen eenvoudig doorkoppelen van meerdere apparaten tot 16 A Neutrik 3 pins 5 pins in uitgangen voor maximale flexibiliteit in een professionele omgeving Gemakkelijke firmware updates houden uw apparaat te allen tijde bijgewerkt optionele firmware updater nodig De LCD display zorgt voor eenvoudige navig...

Страница 32: ...e dient alleen door gekwalificeerd personeel en in overeenstemming met de voorschriften voor elektrische en mechanische veiligheid in uw land te worden uitgevoerd Controleer of de beschikbare spanning niet hoger is dan op het apparaat is aangegeven Het netsnoer moet altijd in perfecte staat zijn Schakel het apparaat onmiddellijk uit als het netsnoer is geplet of beschadigd Het moet door de fabrika...

Страница 33: ...n in de menustructuur ENTER Om de geselecteerde functie te bevestigen Twee sneltoetsen vereenvoudigen het leven van de installateur Druk gelijkertijd op de toetsen OMHOOG OMLAAG Display draait 180 Houd de toetsen MENU ENTER gedurende 3 seconden ingedrukt de projector wordt teruggesteld 4 DISPLAYtoont de verschillende menu s en de geselecteerde functies 5 OMEGAKLEM u kunt de meegeleverde omega snel...

Страница 34: ...ingen terug te keren of om naar een eerder menu te gaan DMX Kanaalmodus Wordt gebruikt om de gewenste kanaalmodus te selecteren Selecteer DMX Channel Mode en druk op ENTER Gebruik de toetsen OMLAAG OMHOOG om de gewenste DMX kanaalmodus te selecteren Druk op de toets ENTER om de instellingen op te slaan Druk de MENU toets om zonder wijzigingen terug te keren of om naar een eerder menu te gaan Bekij...

Страница 35: ...uk op ENTER Gebruik de toetsen OMLAAG OMHOOG om Yes of No te selecteren Druk op de toets ENTER om de instellingen op te slaan Druk de MENU toets om zonder wijzigingen terug te keren of om naar een eerder menu te gaan Witbalans Het stelt de gebruiker in staat om de drie kleuren fijn af te stemmen om perfect wit te bereiken Selecteer White balance en druk ENTER de kop wordt zodanig gepositioneerd da...

Страница 36: ...en OMLAAG OMHOOG om Bevriezen of Black out te selecteren Druk op de toets ENTER om de instellingen op te slaan Druk de MENU toets om zonder wijzigingen terug te keren of om naar een eerder menu te gaan Display instellingen Dit submenu bevat alle aan het scherm gerelateerde instellingen Druk op de toets MENU en selecteer het submenu Display Settings Display Omgekeerd De projector kan vast worden ge...

Страница 37: ... Armatuurtest Dit submenu bevat bepaalde functies om de eenheid snel te testen zonder behoefte aan een controller Druk op de toets MENU en selecteer het submenu Fixture Test Automatische test De eenheid voert een automatische test uit waarbij alle eigenschappen worden weergegeven Selecteer Auto Test en druk op ENTER De projector start de automatische testfunctie en keert na de test terug naar de n...

Страница 38: ...or de volgende onderhoudsbeurt Gebruik de toetsen OMLAAG OMHOOG knoppen om de timer op nul te stellen als het onderhoud is uitgevoerd Druk op ENTER om dit te bevestigen Druk om terug te keren net zo lang op de toets MENU totdat u weer in het hoofdmenu bent Fabrieksinstellingen Dit is een noodoplossing als u de instellingen echt hebt verknoeid gewoon terugkeren naar de fabrieksinstellingen No veran...

Страница 39: ...e is gevaarlijk en mag niet worden overwogen Bedek geen ventilatieopeningen omdat dit tot oververhitting kan leiden De exploitant moet ervoor zorgen dat de veiligheidgerelateerde en machinetechnische installaties door een deskundige zijn goedgekeurd voordat deze voor de eerste keer in gebruik worden genomen De installaties moeten ieder jaar door een vakman worden geïnspecteerd om er zeker van te z...

Страница 40: ...eid 000 snel 255 traag 6 Herinstellen kanaal 000 009 Geen functie 010 014 Alles na 2 seconden opnieuw instellen 015 039 Geen functie 040 044 Pan en Tilt snelheid NORM 045 049 Pan en Tilt snelheid SNEL 050 054 Pan en Tilt snelheid LANGZAAM 055 255 Geen functie 7 000 255 Master Dimmer 0 tot 100 8 Elektronisch sluitereffect 000 019 Sluiter gesloten 020 024 Shutter geopend 025 064 Strobe 1 snel langza...

Страница 41: ... CT blauw 080 084 LEE 202 Half CT blauw 085 089 LEE 117 Staalblauw 090 094 LEE 353 Lichterblauw 095 099 LEE 118 Lichtblauw 100 104 LEE 116 Middelblauw groen 105 109 LEE 124 Donkergroen 110 114 LEE 139 Primair groen 115 119 LEE 089 Mosgroen 120 124 LEE 122 Varengroen 125 129 LEE 738 JAS groen 130 134 LEE 088 Limoengroen 135 139 LEE 100 Lentegeel 140 144 LEE 104 Diepamber 145 149 LEE 179 Chroomoranj...

Страница 42: ...Shutter geopend 210 224 Strobe 9 sinusgolf snel langzaam 225 229 Shutter geopend 230 244 Strobe 10 burst snel langzaam 245 255 Shutter geopend 2 000 255 Master Dimmer 0 tot 100 3 000 255 Zoom 000 60 255 10 bundel 4 000 255 Pan 5 000 255 Pan fijn minst significante bit 6 000 255 Tilt 7 000 255 Tilt fijn minst significante bit 8 Armatuur besturingsinstellingen 000 009 Geen functie 010 014 Herinstell...

Страница 43: ... 129 LEE 738 JAS groen 130 134 LEE 088 Limoengroen 135 139 LEE 100 Lentegeel 140 144 LEE 104 Diepamber 145 149 LEE 179 Chroomoranje 150 154 LEE 105 Oranje 155 159 LEE 021 Goudamber 160 164 LEE 778 Millenniumgoud 165 169 LEE 135 Diepgoud amber 170 174 LEE 164 Vlamrood 175 179 Openen Kleurenwiel rotatie effect 180 201 Rechtsom snel langzaam 202 207 Stop dit zal stoppen waar de kleur op het moment is...

Страница 44: ...en De netsnoeren moeten in perfecte conditie zijn en onmiddellijk worden vervangen wanneer ook maar een klein probleem wordt ontdekt Om het apparaat tegen oververhitting te beschermen moeten de ventilatoren indien aanwezig en ventilatieopeningen maandelijks worden gereinigd Het interieur van het apparaat moeten jaarlijks met een stofzuiger of luchtspuit worden gereinigd Het reinigen van de interne...

Страница 45: ...W Osram OSTAR Zoombereik 10 60 Afmetingen zie onderstaande tekening Gewicht 9 2 kg Bundel LUX m R G B w Volledig aan 10 1m 12310 32750 1233 37910 81360 2m 4800 12900 470 15200 32000 3m 2100 5800 230 6700 14000 4m 1200 3200 140 3700 7800 5m 800 2000 97 2300 5100 60 1m 1287 3424 144 3932 8435 2m 380 987 144 3932 8435 3m 176 430 30 490 1000 4m 100 260 25 290 630 5m 76 170 22 195 400 De informatie kan...

Страница 46: ...Y Positionskorrektur Neutrik Powercon Ein Ausgänge Einfache Verkettung von mehreren Geräten bis zu 16 A Neutrik 3 polige u 5 polige Ein Ausgänge für maximale Flexibilität in einer professionellen Umgebung Einfache Firmware Updates halten Ihr Gerät immer auf dem neuesten Stand optionaler Firmware Updater erforderlich Das LCD Display sorgt für eine einfache Navigation in den unterschiedlichen Menüs ...

Страница 47: ...alifiziertem Personal unter Beachtung der Vorschriften zur elektrischen und mechanischen Sicherheit in Ihrem Land durchgeführt werden Stellen Sie sicher dass Netzspannung mit Geräteaufkleber übereinstimmt Das Gerät nicht mit einem beschädigten Netzkabel in Betrieb nehmen Wenn das Netzkabel gequetscht oder beschädigt wurde schalten Sie das Gerät sofort aus Im Falle von Beschädigungen muss das Netzk...

Страница 48: ...im Menübaum weiter PFEIL AUFWÄRTS Geht im Menübaum zurück ENTER Bestätigt die ausgewählte Funktion Zweitasten Shortcuts machen das Leben für den Installateur einfacher Drücken Sie gleichzeitig PFEIL AUFWÄRTS und PFEIL ABWÄRTS Das Display wird um 180 gedreht Halten Sie MENU und ENTER für 3 Sekunden gedrückt Der Scheinwerfer wird zurückgesetzt 4 DISPLAY zeigt die Menüs und gewählte Funktionen an 5 O...

Страница 49: ...hern die Taste ENTER Kehren Sie mit MENU zum vorhergehenden Menü zurück oder verlassen Sie die Option ohne Änderungen DMX Kanalmodus Wählt den gewünschten Kanalmodus Wählen Sie DMX Channel Mode und drücken Sie die Taste ENTER Wählen Sie mit PFEIL AUFWÄRTS PFEIL ABWÄRTS den gewünschten DMX Kanalmodus Drücken Sie zum Speichern die Taste ENTER Kehren Sie mit MENU zum vorhergehenden Menü zurück oder v...

Страница 50: ...eschaltet Yes Der Ausgang wird bei Pan Tilt Bewegungen ausgeschaltet Wählen Sie Bl O P T Moving und drücken Sie die Taste ENTER Wählen Sie mit PFEIL AUFWÄRTS PFEIL ABWÄRTS die Option Yes oder No Drücken Sie zum Speichern die Taste ENTER Kehren Sie mit MENU zum vorhergehenden Menü zurück oder verlassen Sie die Option ohne Änderungen Weißabgleich Ermöglicht dem Benutzer die Feinabstimmung der drei F...

Страница 51: ...Drücken Sie zum Speichern die Taste ENTER Kehren Sie mit MENU zum vorhergehenden Menü zurück oder verlassen Sie die Option ohne Änderungen Display Einstellungen Dieses Untermenü enthält die Display Einstellungen Drücken Sie die Taste MENU und wählen Sie das Untermenü Display Settings Display invertiert Der Scheinwerfer kann aufrecht befestigt oder kopfüber aufgehängt verwendet werden Um das Ablese...

Страница 52: ... das Gerät schnell zu prüfen ohne dass ein Controller vorhanden sein muss Drücken Sie MENU und wählen Sie das Untermenü Fixture Test Selbsttest Das Gerät führt einen Selbsttest durch bei dem alle Funktionen angezeigt werden Wählen Sie Auto Test und drücken Sie die Taste ENTER Der Scheinwerfer startet die automatische Selbsttestfunktion und kehrt nach dem Test zum normalen Betrieb zurück Drücken Si...

Страница 53: ...Stunden bis zur nächsten Wartung verbleiben Wenn die Wartung durchgeführt wurde setzen Sie den Timer mit PFEIL AUFWÄRTS PFEIL ABWÄRTS zurück Bestätigen Sie mit ENTER Drücken Sie zur Rückkehr die Taste MENU bis Sie sich im Hauptmenü befinden Werkseinstellungen Dies ist Ihr Notausgang wenn Sie die Einstellungen so richtig durcheinander gebracht haben Kehren Sie einfach wieder zu den Werkseinstellung...

Страница 54: ...uf gar keinen Fall in Betracht gezogen werden Die Ventilationsöffnungen nicht abdecken Überhitzungsgefahr Der Betreiber muss sicherstellen dass die sicherheitsrelevanten und technischen Installationen vor Erstbetrieb fachmännisch vorgenommen worden sind Installationen sollten jährlich durch qualifiziertes Fachpersonal überprüft werden um jederzeit einen sicheren Betrieb zu gewährleisten ELEKTROINS...

Страница 55: ...m 6 Kanal zurücksetzen 000 009 Keine Funktion 010 014 Alle nach 2 Sekunden zurücksetzen 015 039 Keine Funktion 040 044 Schwenk und Neigegeschwindigkeit NORMAL 045 049 Schwenk und Neigegeschwindigkeit SCHNELL 050 054 Schwenk und Neigegeschwindigkeit LANGSAM 055 255 Keine Funktion 7 000 255 Master Dimmer 0 bis 100 8 Elektronischer Jalousieneffekt 000 019 Jalousie geschlossen 020 024 Shutter offen 02...

Страница 56: ...Halbes CT Blau 085 089 LEE 117 Stahlblau 090 094 LEE 353 Helleres Blau 095 099 LEE 118 Hellblau 100 104 LEE 116 Mittleres Türkis 105 109 LEE 124 Dunkelgrün 110 114 LEE 139 Grundfarbe Grün 115 119 LEE 089 Moosgrün 120 124 LEE 122 Farnkrautgrün 125 129 LEE 738 JAS Grün 130 134 LEE 088 Pastellgrün 135 139 LEE 100 Frühlingsgelb 140 144 LEE 104 Tief Bernsteingelb 145 149 LEE 179 Chromorange 150 154 LEE...

Страница 57: ...gsam 225 229 Shutter offen 230 244 Strobe 10 Berstimpuls schnell langsam 245 255 Shutter offen 2 000 255 Master Dimmer 0 bis 100 3 000 255 Strahl zoomen 000 60 bis 255 10 4 000 255 Pan 5 000 255 Leichter Pan niederwertigstes Bit 6 000 255 Tilt 7 000 255 Leichter Tilt niederwertigstes Bit 8 Beleuchtungskörper Steuereinstellungen 000 009 Keine Funktion 010 014 Gesamten Scheinwerfer zurücksetzen 3 Se...

Страница 58: ...0 134 LEE 088 Pastellgrün 135 139 LEE 100 Frühlingsgelb 140 144 LEE 104 Tief Bernsteingelb 145 149 LEE 179 Chromorange 150 154 LEE 105 Orange 155 159 LEE 021 Gold Bernsteingelb 160 164 LEE 778 Millennium Gold 165 169 LEE 135 Tiefgoldenes Bernsteingelb 170 174 LEE 164 Flammenrot 175 179 Offen Farbrad Rotationseffekt 180 201 Uhrzeigersinn schnell langsam 202 207 Stopp stoppt die Farbe zum gegenwärti...

Страница 59: ...abel muss stets in einwandfreiem Zustand sein und selbst bei kleinsten Beschädigungen erneuert werden Zur Vermeidung von Überhitzung müssen die Ventilatoren sofern vorhanden und Lüftungsschlitze monatlich gereinigt werden Das Geräteinnere mindestens einmal pro Jahr mit einem Staubsauger oder einer Luftdüse reinigen Die Reinigung der inneren und äußeren optischen Linsen und oder Spiegel muss in reg...

Страница 60: ...bereich 10 bis 60 Abmessungen Siehe Abbildung unten Gewicht 9 2 kg Strahl LUX m R G B W Vollständig eingeschaltet 10 1 m 12310 32750 1233 37910 81360 2 m 4800 12900 470 15200 32000 3 m 2100 5800 230 6700 14000 4 m 1200 3200 140 3700 7800 5 m 800 2000 97 2300 5100 60 1 m 1287 3424 144 3932 8435 2 m 380 987 144 3932 8435 3 m 176 430 30 490 1000 4 m 100 260 25 290 630 5 m 76 170 22 195 400 Technische...

Страница 61: ...dad Reposicionamiento automático de X Y Salidas entradas Neutrik PowerCon para encadenar fácilmente varias unidades hasta 16 A Salidas Neutrik de 3 y 5 pines para la máxima flexibilidad en un entorno profesional La fácil actualización del firmware mantiene su máquina al día en todo momento se requiere un actualizador de firmware opcional La pantalla LCD garantiza una navegación sencilla por los di...

Страница 62: ...debe realizarla solamente personal cualificado de acuerdo con la normativa sobre seguridad eléctrica y mecánica de su país Compruebe que la tensión disponible sea la indicada en la unidad El cable de alimentación debe estar siempre en perfectas condiciones Apague de inmediato la unidad cuando el cable de alimentación esté aplastado o dañado Si el cable de alimentación está dañado debe ser sustitui...

Страница 63: ...ilitan la labor del instalador Pulse al mismo tiempo los botones ARRIBA y ABAJO la pantalla gira 180 Pulse los botones MENU ENTER durante 3 segundos resetea el proyector 4 PANTALLA muestra los diversos MENUs y las funciones seleccionadas 5 Abrazadera tipo Omega en la parte inferior puede insertar la abrazadera de anclaje rápido omega incluida Simplemente gire 90 el sistema de bloqueo para asegurar...

Страница 64: ...ER Utilice los botones ARRIBA ABAJO para seleccionar el modo de canal DMX deseado Pulse el botón ENTER para guardar Para retroceder sin realizar cambios o regresar al menú previo pulse el botón MENU Ver el valor DMX Seleccione View DMX Value y pulse ENTER La pantalla indicará los valores DMX para los distintos canales Para volver a un menú anterior pulse el botón MENU o tras 60 segundos la pantall...

Страница 65: ...otones ABAJO ARRIBA para seleccionar Yes o No Pulse el botón ENTER para guardar Para retroceder sin realizar cambios o regresar al menú previo pulse el botón MENU Equilibrio de blancos Permite al usuario sintonizar los tres colores para conseguir el blanco perfecto Seleccione White balance y pulse ENTER el cabezal se posiciona iluminando el techo en color blanco La pantalla muestra los valores act...

Страница 66: ... Mode y pulse ENTER Use los botones ARRIBA ABAJO para seleccionar Freeze Paralizado o Blackout Apagado Pulse el botón ENTER para guardar Para retroceder sin realizar cambios o regresar al menú previo pulse el botón MENU Ajustes de Pantalla Este submenú contiene los ajustes relativos a la pantalla Pulse el botón MENU y seleccione el submenú Display Settings Invertir pantalla El proyector puede fija...

Страница 67: ...rápida de la unidad sin necesidad de un controlador Pulse el botón MENU y seleccione el submenú Fixture Test Prueba automática La unidad realiza una prueba automática en la que aparecen todas las funciones Seleccione Auto Test y pulse ENTER El proyector comienza la prueba automática y al terminar vuelve al funcionamiento normal Para volver a un menú anterior o detener la prueba pulse el botón MENU...

Страница 68: ...antenimiento Cuando se realice el mantenimiento use los botones ABAJO ARRIBA para poner a cero el contador Pulse ENTER para confirmar Para volver pulse el botón MENU hasta que se encuentre en el menú principal Configuración de Fábrica Esta es su salida de emergencia si ha encontrado verdaderos problemas con los ajustes simplemente restaura los valores de fábrica No mantiene los ajustes actuales si...

Страница 69: ... El operador tiene que estar seguro de que las instalaciones técnicas de la máquina y las relacionadas con la seguridad son aprobadas por un experto antes de utilizarlas por primera vez Las instalaciones deben inspeccionarse anualmente por una persona con experiencia para asegurarse de que la seguridad es óptima INSTALACIÓN ELÉCTRICA DIRECCIONAMIENTO Importante La instalación eléctrica debe realiz...

Страница 70: ...a y de inclinación LENTA 055 255 Sin función 7 000 255 Atenuador maestro 0 a 100 8 Efecto de obturador electrónico 000 019 Obturador cerrado 020 024 Obturador abierto 025 064 Luz estroboscópica 1 rápida lento 065 069 Obturador abierto 070 084 Luz estroboscópica 2 abriendo pulso rápido lento 085 089 Obturador abierto 090 104 Luz estroboscópica 3 cerrando pulso rápido lento 105 109 Obturador abierto...

Страница 71: ... medio 085 089 LEE 117 Azul acero 090 094 LEE 353 Azul más claro 095 099 LEE 118 Azul claro 100 104 LEE 116 Verde azulado medio 105 109 LEE 124 Verde oscuro 110 114 LEE 139 Verde primario 115 119 LEE 089 Verde musgo 120 124 LEE 122 Verde helecho 125 129 LEE 738 Verde JAS 130 134 LEE 088 Verde lima 135 139 LEE 100 Amarillo primavera 140 144 LEE 104 Ámbar oscuro 145 149 LEE 179 Naranja cromado 150 1...

Страница 72: ... 205 209 Obturador abierto 210 224 Luz estroboscópica 9 sin onda rápido lento 225 229 Obturador abierto 230 244 Luz estroboscópica 10 arranque rápido lento 245 255 Obturador abierto 2 000 255 Atenuador maestro 0 a 100 3 000 255 Zoom 000 60 255 10 ancho de haz 4 000 255 Pan 5 000 255 Ajustar orientación Bit menos importante 6 000 255 Elevación 7 000 255 Ajustar inclinación Bit menos importante 8 Co...

Страница 73: ...129 LEE 738 Verde JAS 130 134 LEE 088 Verde lima 135 139 LEE 100 Amarillo primavera 140 144 LEE 104 Ámbar oscuro 145 149 LEE 179 Naranja cromado 150 154 LEE 105 Naranja 155 159 LEE 021 Ámbar dorado 160 164 LEE 778 Oro milenio 165 169 LEE 135 Ámbar dorado oscuro 170 174 LEE 164 Rojo llama 175 179 Abierto Efecto de rotación de rueda de colores 180 201 Horario rápido lento 202 207 Parar se detendrá e...

Страница 74: ...e alimentación deben estar en condiciones impecables y deben sustituirse inmediatamente incluso si se detecta un problema pequeño Para proteger el dispositivo contra el sobrecalentamiento los ventiladores de enfriamiento si hay alguno y las aberturas de ventilación deben limpiarse mensualmente El interior del dispositivo debe limpiarse anualmente utilizando una aspiradora o chorro de aire La limpi...

Страница 75: ... 10W OSTAR de Osram Alcance del zoom 10 60 Tamaño ver la siguiente imagen Peso 9 2 kg Haz de luz LUX m Rojo Verde Azul Blanco Todas encendidas 10 1m 12310 32750 1233 37910 81360 2m 4800 12900 470 15200 32000 3m 2100 5800 230 6700 14000 4m 1200 3200 140 3700 7800 5m 800 2000 97 2300 5100 60 1m 1287 3424 144 3932 8435 2m 380 987 144 3932 8435 3m 176 430 30 490 1000 4m 100 260 25 290 630 5m 76 170 22...

Страница 76: ...BRITEQ LIGHTING COM Copyright 2014 by BEGLEC NV t Hofveld 2C B1702 Groot Bijgaarden Belgium Reproduction or publication of the content in any manner without express permission of the publisher is prohibited ...

Отзывы: