background image

ENGLISH

OPERATION MANUAL

BRITEQ

®

3/65

BT-36L1

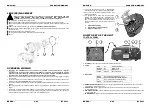
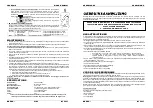
LENS (RE)PLACEMENT

Always unplug the unit before you replace the lenses! DO NOT TOUCH THE LED
LAMPS!

HIGH

POWER

LEDs

ARE

VERY

SENSITIVE

FOR

ELECTROSTATIC

ELECTRICITY!!! You can easily destroy the LEDs by simply touching them!

Switch off the main supply and unplug the unit.

Remove the 4 screws to open the lens compartment and protective glass( A on the picture below)

Remove the 4 screws that keep the black lens cover plate in place and remove the metal plate. (B on the
picture)

GENTLY remove the original lens (C on the picture)

DO NOT TOUCH THE LEDs

!!!

Put the lens with different beam angle gently in place. Please note that the beam angle is indicated in the
center of the lens.

Fasten the metal lens cover with the 4 screws.

Put the protective glass back in place and fix it with the 4 screws.

Done!

OVERHEAD RIGGING

Important: The installation must be carried out by qualified service personal only. Improper
installation can result in serious injuries and/or damage to property. Overhead rigging requires
extensive experience! Working load limits should be respected, certified installation materials
should be used, the installed device should be inspected regularly for safety.

Make sure the area below the installation place is free from unwanted persons during rigging, de-rigging
and servicing.

Locate the fixture in a well ventilated spot, far away from any flammable materials and/or liquids. The
fixture must be fixed

at least 50cm

from surrounding walls.

The device should be installed out of reach of people and outside areas where persons may walk by or be
seated.

Before rigging make sure that the installation area can hold a minimum point load of 10times the device’s
weight.

Always use a certified safety cable (number 3 on the picture) that can hold 12 times the weight of the
device when installing the unit. This secondary safety attachment should be installed in a way that no part
of the installation can drop more than 20cm if the main attachment fails.

ENGLISH

OPERATION MANUAL

BRITEQ

®

4/65

BT-36L1

The device should be well fixed; a free-swinging
mounting is dangerous and may not be considered!

Don’t cover any ventilation openings as this may
result in overheating.

The operator has to make sure that the safety-
relating and machine-technical installations are
approved by an expert before using them for the first
time. The installations should be inspected every
year by a skilled person to be sure that safety is still
optimal.

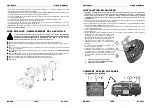
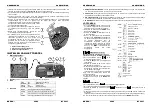
1. Optional Quick Clamp
2. Special omega clamp (included)
3. Optional safety cable

HOW TO SET UP THE UNIT

CONTROL PANEL:

1. DISPLAY

shows the various menus and the selected functions.

2. LEDS

DMX

On

DMX input present

MASTER

On

Master mode

SLAVE

On

Slave mode

SOUND

Flashing

Sound activation

3. BUTTONS

MENU

To select the programming functions

DOWN

To go backward in the selected functions

UP

To go forward in the selected functions

ENTER

To confirm the selected functions

4. REMOTE CONTROL INPUT:

Used to connect a simple CA-8 hand controller while the unit is used in

standalone or master/slave mode.

5. SENSITIVITY:

Used to adjust the sensitivity of the micro when the unit is used in standalone or

master/slave mode.

6. DMX INPUT/OUTPUT:

used for DMX512 linking. Use good quality 3pin XLR M/F balanced cable to link

the units together.

7. MAINS INPUT:

with IEC socket and integrated fuse holder, connect the supplied mains cable here.

Содержание BT-36LI

Страница 1: ...Reproduction or publication of the content in any manner without express permission of the publisher is prohibited BT 36L1 Operation Manual Mode d emploi Gebruiksaanwijzing Bedienungsanleitung Manual...

Страница 2: ...t toestel en de gebruikte batterijen op een milieuvriendelijke manier conform de in uw land geldende voorschriften DU ENTSORGUNG DES GER TS Entsorgen Sie das Ger t und die Batterien auf umweltfreundli...

Страница 3: ...t place metal objects or spill liquid inside the unit Electric shock or malfunction may result If a foreign object enters the unit immediately disconnect the mains power Locate the fixture in a well v...

Страница 4: ...eated Before rigging make sure that the installation area can hold a minimum point load of 10times the device s weight Always use a certified safety cable number 3 on the picture that can hold 12 time...

Страница 5: ...nt of the stage Pan movement angle left to right to left 160 Tilt movement angle 90 vertically front 75 back 15 Slave Mode Used to make the slave unit work in opposite to the master or to work in comp...

Страница 6: ...functions press the MENU button Reset Used to force a reset of the unit Press the MENU button until is blinking on the display Press the ENTER to reset all channels to their standard position To go ba...

Страница 7: ...t Function 1 Sync Strobe 2 Two light strobe 3 Sound Strobe Select Show 1 4 Fade speed fast Fade speed middle Fade speed slow Mode Sound LED OFF Show LED Strobe LED ON MAINTENANCE Make sure the area be...

Страница 8: ...eil patientez quelques minutes pour laisser l appareil s adapter la temp rature ambiante lorsqu il arrive dans une pi ce chauff e apr s le transport La condensation emp che l appareil de fonctionner m...

Страница 9: ...entille Remettez en place le couvercle m tallique de la lentille au moyen des 4 vis Ensuite remettez en place le verre de protection et fixez le au moyen des 4 vis C est termin FRAN AIS MODE D EMPLOI...

Страница 10: ...de est s lectionn appuyez sur le bouton ENTER pour confirmer ou vous retournerez vers les fonctions principales si aucune activit n est d tect e par l appareil pendant 8 secondes Pour retourner vers l...

Страница 11: ...l appareil Appuyez sur la touche MENU jusqu ce que At50 At51 ou At52 s affiche l cran At50 est un programme de test tout fait automatique FRAN AIS MODE D EMPLOI BRITEQ 18 65 BT 36L1 At51 et At52 sont...

Страница 12: ...veuillez donc vous r f rer au mode d emploi de votre contr leur DMX pour savoir quelle adresse vous devez utiliser CONFIGURATION DMX DU BT 36L1 Mode 8 canaux FRAN AIS MODE D EMPLOI BRITEQ 20 65 BT 36...

Страница 13: ...Tilt 540 220 Angle du faisceau 25 lentilles 15 et 45 disponibles en option Connexions DMX connecteur XLR m le femelle 3 broches Led 36 x LUMILED 1Watt Taille 266 x 276 x 302mm Poids 9 kg Chacune de ce...

Страница 14: ...izing verwijderen Er bevinden zich geen onderdelen in het toestel die u zelf kan herstellen Laat de herstellingen enkel uitvoeren door een bevoegde technicus De bliksempijl die zich in een gelijkbenig...

Страница 15: ...et toestel te controleren voor stand by functie en modus 5 SENSITIVITY wordt gebruikt om de gevoeligheid van de microfoon in te stellen wanneer het toestel gebruikt wordt in standalone of master slave...

Страница 16: ...nste modus op de display wordt weergegeven druk dan op de ENTER toets om uw keuze te bevestigen anders keert hij na 8 seconden automatisch weer naar de hoofdfuncties zonder iets gewijzigd te hebben Om...

Страница 17: ...UP toetsen om de nul positie te regelen Druk op de ENTER toets om uw keuze te bevestigen anders keert hij na 8 seconden automatisch weer naar de hoofdfuncties zonder iets gewijzigd te hebben Om naar...

Страница 18: ...ED knippert LED aan NEDERLANDS HANDLEIDING BRITEQ 32 65 BT 36L1 ONDERHOUD Overtuig U ervan dat het gebied onder de installatieplaats vrij is van ongewenste personen tijdens het onderhoud Zet het toest...

Страница 19: ...ort in eine warme Umgebung einige Zeit zum Temperaturausgleich bringen Kondensation kann zu Leistungsverlust des Ger tes oder gar Besch digung f hren Ger t nicht im Freien und in feuchten R umen und U...

Страница 20: ...n Sitzgelegenheiten installieren Vor Montage sicherstellen dass die gew hlte Position wenigstens das 10 fache Ger tegewicht aufnehmen kann Benutzen Sie stets ein zul ssiges Sicherheitskabel Nummer 3 a...

Страница 21: ...vertikal vorn 75 hinten 15 Reihenbetrieb Unterger t arbeitet entgegengesetzt oder synchron mit dem Hauptger t MEN Taste dr cken bis im Display angezeigt wird Dann EINGABE ENTER dr cken und Display be...

Страница 22: ...cken Sie die MENU Taste Zur ckstellung Zur erzwungenen R ckstellung des Ger ts MEN Taste dr cken bis im display blinkt Mit EINGABE ENTER alle Einstellungen in die Standardeinstellungen zur cksetzen Z...

Страница 23: ...rger t LED ist st ndig an Um eine gro artige Lightshow zu kreieren k nnen Sie Kontrastbewegungen einf hren Schwenk Neigung des Unterger ts ist umgekehrt im Men der Unterger te zu Option gehen und ausw...

Страница 24: ...salidas de luz extremadamente altas 1600 lux 5 m Colores infinitos gracias a la tecnolog a de mezcla de color RGB de 400 Hz de alta potencia lo cual hace de este equipo la soluci n ideal para los estu...

Страница 25: ...contacte con su vendedor inmediatamente La carcasa y las lentes deben ser cambiadas si hay da o visible CAUTION PRECAUCI N Para reducir el riesgo de electrocuci n no quite la cubierta superior Ningun...

Страница 26: ...ne la funci n con el bot n ENTER La pantalla parpadear Utilice los botones DOWN y UP para cambiar la modalidad Una vez que haya seleccionado la modalidad necesaria pulse el bot n ENTER para selecciona...

Страница 27: ...nado la modalidad pulse el bot n ENTER para guardarla o volver autom ticamente a las funciones principales sin hacer ning n cambio tras 8 segundos Para volver a las funciones sin hacer cambios pulse e...

Страница 28: ...cambios durante 8 segundos Para volver a las funciones sin cambios presionar el bot n de MEN otra vez CONEXI N DE LA UNIDAD MEDIANTE DMX El protocolo DMX es una se al de alta velocidad muy utilizada...

Страница 29: ...strobe 3 Sound Strobe Selecci n de Espect culo 1 4 Graduaci n de velocidad rapida Graduaci n de velocidad mediana Graduaci n de velocidad lenta Mode Sonido LED apagado Show LED parpadeando LED ON MANT...

Страница 30: ...unidade ao transport la para ambiente quente aguarde algum tempo de modo a que haja uma ambienta o temperatura A condensa o poder afectar o desempenho da unidade ou at danific la Esta unidade destina...

Страница 31: ...arejado afastada de materiais inflam veis e ou l quidos Esta unidade dever ser instalada a pelos menos 50cm de dist ncia de paredes circundantes A unidade deve ser instalada fora do alcance das pesso...

Страница 32: ...o de 90 Modo Show 3 Unidade colocada numa coluna Ex na frente do palco Movimento Pan da esquerda para a direita para esquerda ngulo de 160 Movimento Tilt ngulo de 90 60 acima do horizonte 30 abaixo do...

Страница 33: ...bot o MENU novamente Vers o do Software Usado para mostrar a vers o do software que est instalada na unidade Pressione o bot o MENU at que comece a piscar no visor Pressione o bot o ENTER para mostra...

Страница 34: ...SLAVE sempre ligado Para criar um bom espect culo de luz pode introduzir movimentos contr rios pan tilt das unidades Slave invertido No menu das unidades Slave pode ir op o e escolher o Slave normal...

Страница 35: ...l na limpeza da unidade Seque sempre as pe as cuidadosamente Limpe as pticas externas pelo menos uma vez em cada 30 dias Limpe as pticas internas pelo menos uma vez em cada 90 dias Aten o Recomendamos...

Отзывы: