background image

48

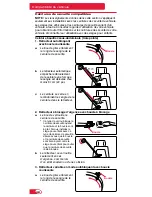
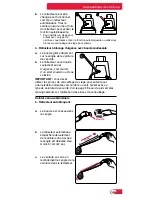
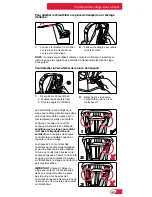
3.  Rétracteur variable en mode autobloquant avec boucle 

coulissante

Ceintures de sécurité compatibles

NOTE :

 Les renseignements donnés dans cette section s’appliquent 

seulement aux installations avec les ceintures de sécurité du véhicule. 

Les sièges des véhicules et les ceintures de sécurité varient d’un 

véhicule à l’autre. Consultez le guide d’utilisation de votre véhicule 

pour obtenir toute l’information sur les ceintures de sécurité de votre 

véhicule et connaître leur utilisation avec des sièges pour enfants. 

Ceinture baudrier/sous-abdominale (trois points)

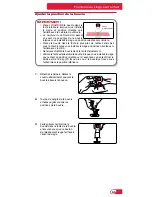
1. Rétracteur autobloquant 

avec boucle coulissante 

La boucle glisse librement 
le long de la sangle de la 
ceinture de sécurité.

Le rétracteur automatique 
empêche le déroulement 
de la ceinture une fois que 
la sangle est déroulée d’au 
moins 61 cm (24 po). 

La ceinture se serre en 
rembobinant la sangle de la 
ceinture dans le rétracteur. 

Boucle

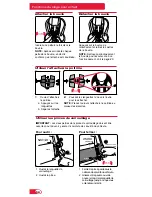
2.  Rétracteur à blocage d’urgence avec boucle à blocage

La boucle verrouille la 
ceinture de sécurité.

*  Ce type de verrou bloque la 

ceinture de sécurité quand 

la ceinture et la boucle sont 

à plat. Si vous installez le 

siège pour enfant avec ce 

type de ceinture de sécurité, 

assurez-vous que la boucle 

et la ceinture de sécurité 

sont bien à plat contre le 

siège pour enfant pour éviter 

que la ceinture de sécurité 

reste bloquée.

Le rétracteur se verrouille 
seulement en cas 
d’urgence, comme lors 
d’un arrêt soudain ou d’une collision. 

Boucle

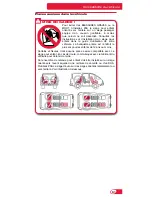
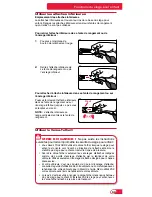
Compatibilité du véhicule

Boucle

La boucle glisse librement 
le long de la sangle de la 

ceinture de sécurité. 
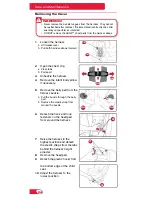
Содержание BOULEVARD 65

Страница 1: ...arder ce guide dans la pochette sous la housse Voir les pages des caractéristiques pour référence IMPORTANT Thoroughly read and follow all instructions before installing this child seat Store this user guide in the pocket behind the cover See features pages for reference Canadian User Guide Guide d utilisation canadien ...

Страница 2: ......

Страница 3: ... the Harness Height 12 Adjusting the Buckle Position 13 Fastening the Buckle 14 Releasing the Buckle 14 Using the Chest Clip 14 Using the Lock Offs 14 Infant Body Pillow 15 Recline Positions 15 Using the Lower Universal Anchorage System LUAS 16 Using the Lower Connectors 17 Using the Versa Tether 17 Rear Facing Installation 20 LUAS Installation 20 Lap Shoulder Belt Installation 22 Lap Belt Install...

Страница 4: ...hicle seat belt Use the outer buckle slot when installing the child seat forward facing with a child weighing 13 6 kg 30 lbs and above or if the buckle is under the child in the inner position This child seat cannot be used in position 3 when installed forward facing see page 15 HUGS chest pads must be used in forward facing mode Removal of HUGS is optional only for rear facing mode To prevent inj...

Страница 5: ...e door nearest the child seat was not damaged and No vehicle occupants were injured and There is no visible damage to the child seat and The airbags if present did not deploy Adjust the harness to fit the clothes the child is wearing Remove bulky coats and or jackets before putting the child in child seat Cover the child seat when the vehicle is parked in direct sunlight Metal parts of child seat ...

Страница 6: ...___________________________________ Batch Number ___________________________________________________ Date of Manufacture ______________________________________________ Important Child Seat Usage Information Rear Facing 2 3 18 1 kg 5 40 lbs American Academy of Pediatrics recommends All infants and toddlers should ride in a Rear Facing Car Seat until they are 2 years of age or until they reach the h...

Страница 7: ... booster may be required If the child cannot be secured within these requirements because the child is too small review the rear facing information above Forward Facing 10 29 5 kg 22 65 lbs and are able to walk unassisted Britax strongly recommends that children should be secured with a harness system until they exceed the weight or height limits specified Use forward facing only with children who...

Страница 8: ...has been pulled out at least 61 cm 24 in c Tightens by feeding the belt webbing back into the retractor 2 ELR Emergency Locking Retractor with Locking Latch Plate a Has a latch plate that locks the vehicle belt This type of latch plate locks the vehicle belt when the vehicle belt and latch plate lie flat When using this type of vehicle belt with a child seat ensure the latch plate and vehicle belt...

Страница 9: ...t belt webbing b Has a retractor that locks only in an emergency situation such as sudden stop or crash IMPORTANT This belt type requires the use of the lock offs built into the seat for rear and forward facing installations See page 14 for information on using the lock offs Lap Belt 5 ALR Automatic Locking Retractor a Has a latch plate that is sewn into the webbing b Has a retractor that stops th...

Страница 10: ...le seating position or check your vehicle owner s manual for information on installing a car seat in your vehicle 1 Lap shoulder belts with top or bottom anchor points on the vehicle door 2 Motorized automatic vehicle seat belts 3 Lap shoulder belts that have a separate retractor each for the lap section and shoulder section 4 Inflatable lap shoulder belts 5 Lap belts forward of the vehicle seat b...

Страница 11: ...afest place for children 12 and under Some vehicles have no seating positions which are compatible with this child seat If in doubt contact the vehicle manufacturer for assistance This child restraint system must be used only in a forward facing seating position equipped with a vehicle seat belt or a lower universal anchorage system Side facing or rear facing seats CANNOT be used See the diagram b...

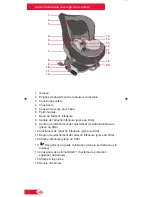
Страница 12: ...UAS component 9 Lower Connector Adjuster Release Button LUAS component 10 Lower Connector Adjuster LUAS component 11 Lower Connector Release Button LUAS component 12 Lower Connector LUAS component 13 User Guide Storage in pocket behind cover 14 HUGS Harness Ultra Guard System Chest Pads 15 Chest Clip 16 Harness Buckle 13 14 15 16 17 18 19 20 1 2 3 5 4 6 7 8 9 10 11 12 ...

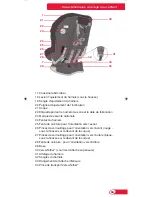
Страница 13: ...tional Safety Mark 24 Harness Slots 25 Forward Facing Belt Slot 26 Forward Facing Lock Offs Red under cover on front of shell 27 Rear Facing Lock Offs Blue under cover on front of shell 28 Rear Facing Belt Slot 29 Base 30 Versa Tether Top Tether Strap 31 Harness Yoke 32 Harness Straps 33 Lower Connector Storage 34 Versa Tether Carry Clip 30 32 31 33 34 1 22 23 21 25 26 27 24 28 7 29 ...

Страница 14: ...ways position the harness straps at or below your child s shoulders See page 5 In forward facing mode always position the harness straps at or above your child s shoulders See page 5 2 Squeeze the harness height adjuster slide the harness into the desired position and release Ensure the harness has locked into position Child Seat Functions 1b 1a ...

Страница 15: ... but not under the child for rear facing use when using the LUAS installation NEVER leave the buckle in the adjustment slot Use the outer buckle slot when installing the child seat forward facing with a child weighing 13 6 kg 30 lbs and above or if the buckle is under the child in the inner position ADJUSTMENT SLOT Adjusting the Buckle Position 2 Turn the buckle webbing and slide it between buckle...

Страница 16: ...pull the tongues from the buckle NOTE Periodically clean the buckle to ensure proper operation See page 38 Using the Chest Clip 1 Open the chest clip a Press tabs b Pull apart 2 Push together to fasten NOTE Always position the chest clip at armpit level 1 Open the locking tab 2 Open the clamp To Open 1 Close the clamp over the vehicle belt 2 Slide your palm or thumb along the locking tab until a c...

Страница 17: ...DQWV XQDEOH to maintain head and neck control not to exceed Ý ZKHQ WKH FDU LV SDUNHG RQ D OHYHO VXUIDFH KHQ installing the seat in rear facing mode recline the seat to position 3 and use the guide line on the child seat to help achieve an acceptable recline angle for rear facing installations Forward Facing IMPORTANT In forward facing installations it is important that the base of the child seat r...

Страница 18: ...ing between LUAS anchors is 27 9 cm 11 in This child seat can be used in a seating position with up to 50 8 cm 20 in of space between the LUAS anchors if the vehicle manufacturer allows Child Seat Functions WARNING In some cases the vehicle head restraint can prevent the child seat head pad from being raised high enough to properly adjust the harness for the fit of your child when using a forward ...

Страница 19: ...ilure to follow the guidelines below may cause the child seat not to perform as intended You MUST always use the Versa Tether when using the child seat forward facing Using the tether will improve the stability of your child seat and reduce the risk of injury Attach the Versa Tether only to tether anchors identified by your vehicle manufacturer as tether anchorage points Only use the designated te...

Страница 20: ...ing OR Forward Facing IMPORTANT The Versa Tether carry clip is only for use when you wish to carry the child seat between locations Do not install the child seat with the Versa Tether attached to the carry clip Secure the excess Versa Tether webbing in the elastic strap during use Store the Versa Tether in the storage pouch when not in use Always ensure any excess webbing is contained within your ...

Страница 21: ... ripped the child seat is no longer acceptable for use IMPORTANT Discontinue use of child seat if it has been involved in a moderate or severe crash regardless of whether the loops have pulled through the back side of the shell and the colored stitching has been ripped 1 2 3 Child Seat Functions To attach the Versa Tether to the carry clip or tether anchor 1 Firmly press the hook over the carry cl...

Страница 22: ... see page 15 When properly installed in the rear facing position the back angle of the child seat VKRXOG EH DW OHDVW Ý IRU FKLOGUHQ DQG XS WR Ý IURP YHUWLFDO IRU LQIDQWV XQDEOH WR maintain head and neck control not to H FHHG Ý ZKHQ WKH FDU LV SDUNHG RQ D level surface Use the blue line as a guide to achieve the proper recline angle for rear facing installations The blue line will be parallel to th...

Страница 23: ...er connector strap to tighten 3 Rear facing installations can be improved by the use of the Versa Tether see pages 17 19 Checklist 9 Check that all connections are secure 9 Check that the lower connector straps are not twisted 9 Check that the child seat cannot be moved front to back or side to side more than 2 5 cm 1 in at the belt path If the child seat is not secure repeat installation or use a...

Страница 24: ...the back angle of the child seat VKRXOG EH DW OHDVW Ý IRU FKLOGUHQ DQG XS WR Ý IURP YHUWLFDO IRU LQIDQWV XQDEOH WR maintain head and neck control not to H FHHG Ý ZKHQ WKH FDU LV SDUNHG RQ D level surface Use the blue line as a guide to achieve the proper recline angle for rear facing installations The blue line will be parallel to the ground when the child seat angle is at the center RI WKH DQJOH ...

Страница 25: ... page 14 IMPORTANT Both the vehicle lap and shoulder belts must be routed through the lock off 7 Push down into the middle of the child seating area with moderate force while pulling the top shoulder part of the belt between the belt slots to remove any remaining slack through the lock off see pages 6 and 7 8 Rear facing installations can be improved by the use of the Versa Tether see pages 17 19 ...

Страница 26: ...RP YHUWLFDO IRU LQIDQWV XQDEOH WR maintain head and neck control not to H FHHG Ý ZKHQ WKH FDU LV SDUNHG RQ D level surface Use the blue line as a guide to achieve the proper recline angle for rear facing installations The blue line will be parallel to the ground when the child seat angle is at the center of the angle range 30 Ý I QHFHVVDU WKH SURSHU UHFOLQH DQJOH FDQ EH DFKLHYHG E placing a rolled...

Страница 27: ...acing installations can be improved by the use of the Versa Tether see pages 17 19 7 Pull the buckle up through its appropriate slot in the cover 8 Replace the cover and belly pad Checklist 9 Check that the vehicle belt is securely fastened 9 Check that the child seat cannot be moved front to back or side to side more than 2 5 cm 1 in at the belt path If the child seat is not secure repeat install...

Страница 28: ...must be used at all times Using the tether will improve the stability of the child seat and reduce the risk of injury Check your vehicle owner s manual for tether anchor locations Only attach the Versa Tether to anchor points designated to the chosen seating position as indicated by your vehicle owner s manual Adjust this child seat to position 1 or 2 and place forward facing on the vehicle seat s...

Страница 29: ...ower connector strap to tighten 3 Attach the Versa Tether to a designated anchor see vehicle owner s manual and remove slack see pages 17 19 4 Store excess webbing in the elastic strap Checklist 9 Check that all connections are secure 9 Check that the lower connector straps are not twisted 9 Check that no more than 20 or 7 6 cm 3 inches of the base hangs over the edge of the vehicle seat 9 Check t...

Страница 30: ...reduce the risk of injury Check your vehicle owner s manual for tether anchor locations Only attach the Versa Tether to anchor points designated to the chosen seating position as indicated by your vehicle owner s manual Adjust this child seat to position 1 or 2 and place forward facing on the vehicle seat see page 15 Ensure that no more than 20 or 7 6 cm 3 inches of the base hangs over the edge of...

Страница 31: ...nd shoulder belts must be routed through the lock off 7 Push down into the middle of the child seating area with moderate force while pulling the top shoulder part of the belt between the belt slots to remove any remaining slack through the lock off see pages 6 and 7 8 Attach the Versa Tether to a designated anchor see vehicle owner s manual and remove all slack see pages 17 19 9 Store the excess ...

Страница 32: ...on as indicated by your vehicle owner s manual Adjust this child seat to position 1 or 2 and place forward facing on the vehicle seat see page 15 Ensure that no more than 20 or 7 6 cm 3 inches of the base hangs over the edge of the vehicle seat WARNING Your child seat may not perform as intended if the base of the child seat is not flat on the vehicle seat Some vehicle head restraints may obstruct...

Страница 33: ... webbing in the elastic strap 8 Replace the cover 4 Route the vehicle seat belt through the forward facing belt slots then buckle Ensure the vehicle belt is not twisted 1b 1a 4 5 Checklist 9 Check that the vehicle belt is securely fastened 9 Check that no more than 20 or 7 6 cm 3 inches of the base hangs over the edge of the vehicle seat 9 Check that the child seat cannot be moved front to back or...

Страница 34: ...rt ask a flight attendant for a belt extender NOTE Your child may experience discomfort if the buckle is located in the seating area of the child seat after installation Aircraft Installation WARNING Adjust the belts provided with this child seat so they fit snugly around your child A snug strap should not allow any slack It lies in a relatively straight line without sagging It does not press on t...

Страница 35: ... buckle 8 Pull the harness adjuster strap up and away from the child seat to tighten the harness The harness should have a comfortable but snug fit around the child A snug strap should not allow any slack It lies in a relatively straight line without sagging It does not press on the child s flesh or push the child s body into an unnatural position You should not be able to pinch excess 9 Fasten th...

Страница 36: ...NING Never remove the buckle tongues from the harness They cannot be reattached after removal If reassembled incorrectly the child seat may not perform as intended DO NOT remove the HUGS chest pads from the harness straps 7 Raise the harness to the highest position and detach the elastic straps from the tabs behind the harness height adjuster 8 Remove the head pad 9 Detach the plastic hooks from t...

Страница 37: ... WASH the cover using cold water and mild soap LINE DRY to prevent the cover from shrinking DO NOT Bleach Machine wash Machine dry Iron Cleaning the Harness SPONGE CLEAN the harness using warm water and mild soap TOWEL DRY DO NOT Disassemble the harness Bleach Machine wash Machine dry Iron Cleaning the Shell SPONGE CLEAN the shell using warm water and mild soap TOWEL DRY DO NOT use abrasive cleane...

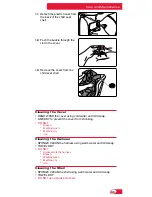
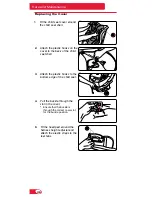
Страница 38: ...ar tabs 2 Attach the plastic hooks on the cover to the back of the child seat shell 3 Attach the plastic hooks to the bottom edge of the child seat 4 Pull the buckle through the slot in the cover Ensure that the buckle is through the correct cover slot for the buckle position 5 1 3 2 1 Fit the child seat cover around the child seat shell ...

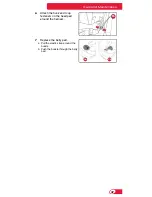
Страница 39: ...are and Maintenance 6 Attach the hook and loop fasteners on the head pad around the harness 7 Replace the belly pad a Pull the elastic strap around the buckle b Push the buckle through the belly pad 6 7a 7b ...

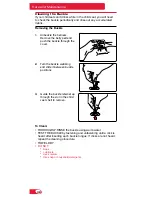
Страница 40: ...hild seat shell to remove 2 Turn the buckle webbing and slide it between buckle positions To Clean THOROUGHLY RINSE the buckle using warm water TEST THE BUCKLE by fastening and unfastening until a click is heard after inserting each buckle tongue If clicks are not heard repeat the cleaning procedure TOWEL DRY DO NOT Soak Lubricate Use solvents Use soap or household detergents 1 Unbuckle the harnes...

Страница 41: ...ton faces out IMPORTANT ALWAYS position the buckle in the inner slot for rear facing use when using a vehicle seat belt installation The vehicle belt must pass in front of the buckle strap for rear facing use Position the buckle in the slot closest to but not under the child for rear facing use when using the LUAS installation NEVER leave the buckle in the adjustment slot Use the outer buckle slot...

Страница 42: ...19 Possible Solution The vehicle seat back may hinder harness adjustment Ensure the child seat base is flat on the vehicle seat Possible Solution The harness may be at maximum or minimum height the harness may be too tight to adjust or the child s weight may be pressing against the head pad Check for and correct all of the above where necessary and try adjusting the harness again Problem The adjus...

Страница 43: ... tightening devices is not approved by Britax Their use could cause this child seat to fail Federal Motor Vehicle Safety Standards or not perform as intended in a crash Their use automatically voids the Britax warranty LIMITATION OF DAMAGES The warranty and remedies as set forth above are exclusive and in lieu of all others oral or written express or implied In no event will Britax or the retailer...

Страница 44: ......

Страница 45: ...cle 55 Attacher la boucle 56 Détacher la boucle 56 Utiliser l attache à la poitrine 56 Utiliser les pinces de verrouillage 56 Coussin de corps pour bébés 57 Positions inclinées 57 Utiliser le dispositif universel d ancrages d attaches inférieurs DUA 58 Utiliser les attaches inférieures 59 Utiliser le Versa Tether 59 Installation orientée vers l arrière 62 Installation avec le DUA 62 Installation a...

Страница 46: ...eure de la boucle lorsque le siège est installé en position orientée vers l arrière avec la ceinture de sécuriteé du véhicule Utilisez la fente extérieure de la boucle lorsque vous installez le siège pour enfant en position orientée vers l avant pour un enfant dont le poids est de 13 6 kg 30 lb ou plus ou si la boucle se trouve sous l enfant dans la position intérieure Ce siège pour enfant ne peut...

Страница 47: ... que le définit le National Highway Traffic Safety Administration NHTSA des États Unis Le véhicule est utilisable après l accident et La porte du véhicule le plus près du siège pour enfant n a pas été endommagée et Aucun passager n a été blessé et Le siège pour enfant ne présente aucun dommage apparent et Les coussins gonflables s il y en a ne se sont pas déployés Ajustez le harnais selon les vête...

Страница 48: ..._________ Numéro de lot ______________________________________________________ Date de fabrication __________________________________________________ Renseignements importants sur l utilisation du siège pour enfant Orientation vers l arrière enfants de 2 3 à 18 1 kg 5 40 lb L académie américaine de pédiatrie recommande que tous les bébés et tout petits soient dans un siège pour enfant orienté vers...

Страница 49: ...es enfants soient sécurisés avec le système d harnais jusqu au maximum de poids ou de grandeur spécifié pour ce modèle de siège Utilisez l orientation vers l avant dans les conditions suivantes il pèse de 10 et 29 5 kg 22 65 lb et il peut marcher sans assistance et il mesure 124 5 cm 49 po ou moins et le haut de ses oreilles arrive plus bas que le haut de la coque du siège pour enfant et les sangl...

Страница 50: ...ure de sécurité b Le rétracteur automatique empêche le déroulement de la ceinture une fois que la sangle est déroulée d au moins 61 cm 24 po c La ceinture se serre en rembobinant la sangle de la ceinture dans le rétracteur Boucle 2 Rétracteur à blocage d urgence avec boucle à blocage a La boucle verrouille la ceinture de sécurité Ce type de verrou bloque la ceinture de sécurité quand la ceinture e...

Страница 51: ... verrouille seulement en cas d urgence comme lors d un arrêt soudain ou d une collision IMPORTANT Vous devez utiliser les pinces de verrouillage du siège pour enfant pour une installation orientée vers l arrière ou vers l avant avec ce type de ceinture de sécurité Voir la page 56 pour de plus amples renseignements sur l utilisation des pinces de verrouillage Ceinture sous abdominale 5 Rétracteur a...

Страница 52: ...tilisation de votre véhicule pour l installation d un siège pour enfant dans votre véhicule 1 Ceinture baudrier sous abdominale avec un point d ancrage supérieur ou inférieur sur la porte du véhicule 2 Ceinture de sécurité avec baudrier automatique 3 Ceinture de sécurité dont la section baudrier et la section sous abdominale ont chacune son rétracteur 4 Ceinture baudrier sous abdominale gonflable ...

Страница 53: ...arrière est l endroit le plus sûr pour les enfants de 12 ans ou moins Certains véhicules n ont aucune place assise compatible avec ce siège pour enfant En cas de doute communiquez avec le fabricant du véhicule pour obtenir de l aide Cet ensemble de retenue pour enfant doit être installé sur un siège orienté vers l avant équipé d une ceinture de sécurité ou d un DUA N utilisez PAS ce siège d auto s...

Страница 54: ...e l attache inférieure pièce du DUA 10 Ajustement de l attache inférieure pièce du DUA 11 Bouton de relâchement de l attache inférieure pièce du DUA 12 Attache inférieure pièce du DUA 13 Rangement du guide d utilisation dans la pochette sous la housse 14 Coussinets de poitrine HUGS Système de protection supérieur du harnais 15 Attache à la poitrine 16 Boucle du harnais 13 14 15 16 17 18 19 20 1 2 ...

Страница 55: ...avant 26 Pinces de verrouillage pour l orientation vers l avant rouge sous la housse sur le devant de la coque 27 Pinces de verrouillage pour l orientation vers l arrière bleue sous la housse sur le devant de la coque 28 Fente de ceinture pour l orientation vers l arrière 29 Base 30 Versa Tether courroie d attache supérieure 31 Attelage du harnais 32 Sangles du harnais 33 Rangement de l attache in...

Страница 56: ...auteur désirée puis relâchez la poignée Assurez vous que le harnais est bien verrouillé en place NOTE Pour l orientation vers l arrière assurez vous que les sangles du harnais arrivent au niveau des épaules de votre enfant ou plus bas Voir la page 46 Pour l orientation vers l avant assurez vous que les sangles du harnais arrivent au niveau des épaules de votre enfant ou plus haut Voir la page 47 F...

Страница 57: ...sition orientée vers l arrière avec la ceinture du véhicule La ceinture du véhicule doit passer en avant de la sangle de la boucle lorsque vous installez le siège en position orientée vers l arrière Placez la boucle dans la fente le plus près de l enfant mais pas sous l enfant lorsque vous installez le siège en position orientée vers l arrière avec le DUA Ne laissez JAMAIS la boucle dans la fente ...

Страница 58: ...ur les attacher NOTE Placez toujours l attache à la poitrine au niveau des aisselles Fonctions du siège pour enfant 1a 1b Utiliser les pinces de verrouillage IMPORTANT Les deux parties de la pince de verrouillage doivent être ouvertes pour pouvoir y ancrer la ceinture de sécurité du véhicule 1 Ouvrez la languette de verrouillage 2 Ouvrez la pince Pour ouvrir 1 Fermez la pince par dessus la ceintur...

Страница 59: ...contrôle pas les mouvements de sa tête ni de son cou sans dépasser 45 degrés lorsque le véhicule est garé sur une surface plane Pour une installation orientée vers l arrière inclinez le siège en position 3 et servez vous de la ligne guide sur le siège pour enfant pour trouver un angle d inclinaison convenable Position 1 Position 2 Position 3 90 0 90 0 90 0 Orientation vers l avant IMPORTANT Pour u...

Страница 60: ...tallation avec la ceinture de sécurité du véhicule Voir les pages 52 et 53 pour les pièces du DUA du siège pour enfant L illustration ci dessus indique les emplacements courants des ancrages inférieurs et des ancrages d attaches dans un véhicule Consultez le guide d utilisation de votre véhicule pour savoir s il est équipé du DUA pour connaître la limite de poids pour les ancrages inférieurs et l ...

Страница 61: ... le Versa Tether lorsque le siège pour enfant est orienté vers l avant L utilisation de l attache améliore la stabilité du siège pour enfant et réduit le risque de blessure Ancrez le Versa Tether seulement aux ancrages d attaches indiqués comme des points d ancrage d attache par le fabricant de votre véhicule Utilisez seulement l ancrage d attache désigné pour chaque place assise Si votre véhicule...

Страница 62: ...oint d ancrage communiquez avec le fabricant de votre véhicule pour obtenir de l aide pour trouver un point d ancrage 2 Passez la sangle à travers le point d ancrage 3 Passez l anneau en métal en forme de D à l extrémité de la sangle 4 Tirer l anneau en métal en forme de D jusqu à ce que la sangle soit tendue 5 Utiliser l anneau en métal en forme de D comme point d ancrage pour l attache NOTE Rang...

Страница 63: ...siège pour enfant a été impliqué dans un accident modéré ou grave et s il faut remplacer le siège pour enfant La figure 1 montre une courroie qui peut continuer à être utilisée à condition que le siège pour enfant n ait pas été impliqué dans un accident Les coutures de couleur sont intactes et invisibles quand on regarde le dos du siège Les figures 2 et 3 montrent des courroies qui ont été endomma...

Страница 64: ...ir la page 57 Si le siège pour enfant est correctement installé en position orientée vers l arrière le dossier du siège pour enfant devrait être incliné d au moins 30 degrés pour un enfant et jusqu à 45 degrés pour un bébé qui ne contrôle pas les mouvements de sa tête ni de son cou sans dépasser 45 degrés quand le véhicule est garé sur une surface plane Utilisez la ligne bleue comme guide pour obt...

Страница 65: ...pour la serrer 3 L utilisation du Versa Tether améliore la sécurité d une installation orientée vers l arrière voir pages 59 à 61 Vérifications 9 Assurez vous que toutes les attaches sont bien fixées 9 Assurez vous que les sangles des attaches inférieures ne sont pas entortillées 9 Le siège pour enfant est sécuritaire lorsqu il ne peut être déplacé de plus de 2 5 cm 1 po de l avant vers l arrière ...

Страница 66: ... arrière sur le siège du véhicule voir la page 57 Si le siège pour enfant est correctement installé en position orientée vers l arrière le dossier du siège pour enfant devrait être incliné d au moins 30 degrés pour un enfant et jusqu à 45 degrés pour un bébé qui ne contrôle pas les mouvements de sa tête ni de son cou sans dépasser 45 degrés quand le véhicule est garé sur une surface plane Utilisez...

Страница 67: ...voir page 56 IMPORTANT La ceinture baudrier ET la ceinture sous abdominale doit être enfiler aux travers la pince de verrouillage 7 Poussez modérément dans le centre du siège pour enfant tout en tirant la partie du haut de la ceinture la ceinture baudrier entre les fentes pour enlever le mou qui reste à travers la pince de verrouillage voir les pages 48 et 49 8 Il est possible d améliorer les inst...

Страница 68: ...le dossier du siège pour enfant devrait être incliné d au moins 30 degrés pour un enfant et jusqu à 45 degrés pour un bébé qui ne contrôle pas les mouvements de sa tête ni de son cou sans dépasser 45 degrés quand le véhicule est garé sur une surface plane Utilisez la ligne bleue comme guide pour obtenir un angle d inclinaison convenable pour une installation orientée vers l arrière La ligne bleue ...

Страница 69: ...rer les installations orientées vers l arrière en utilisant le Versa Tether voir les pages 59 à 61 7 Tirez la boucle vers le haut à travers la fente appropriée de la housse 8 Replacez la housse et le coussinet abdominal Installation orientée vers l arrière 1b 1a 4 5 Vérifications 9 Assurez vous que la ceinture de sécurité du véhicule est ancrée solidement 9 Le siège pour enfant est sécuritaire lor...

Страница 70: ...ilité du siège pour enfant et réduit le risque de blessure Consultez le guide d utilisation de votre véhicule pour connaître l emplacement des ancrages d attaches Ancrez le Versa Tether seulement aux points d ancrage désignés pour la place assise choisie tel qu il est indiqué dans le guide d utilisation de votre véhicule Ajustez le siège pour enfant en position 1 ou 2 et orientez vers l avant sur ...

Страница 71: ... tirant sur chaque sangle d attache inférieure pour la serrer 3 Ancrez le Versa Tether à un ancrage désigné consultez le guide d utilisation de votre véhicule et tendez bien la sangle voir les pages 59 à 61 4 Attachez le surplus de sangle avec la courroie élastique 1 2 3 4 Vérifications 9 Assurez vous que toutes les attaches sont bien fixées 9 Assurez vous que les sangles des attaches inférieures ...

Страница 72: ...t des ancrages d attaches Ancrez le Versa Tether seulement aux points d ancrage désignés pour la place assise choisie tel qu il est indiqué dans le guide d utilisation de votre véhicule Ajustez le siège pour enfant en position 1 ou 2 et orientez vers l avant sur le siège du véhicule voir la page 57 Assurez vous que pas plus de 20 ou 7 6 cm 3 po de la base du siège pour enfants dépasse du bord du s...

Страница 73: ...ous entendiez un déclic voir la page 56 IMPORTANT La ceinture baudrier ET la ceinture sous abdominale doit être enfiler aux travers la pince de verrouillage 7 Poussez modérément dans le centre du siège pour enfant tout en tirant la partie du haut de la ceinture la ceinture baudrier entre les fentes pour enlever le mou qui reste à travers la pince de verrouillage voir les pages 48 et 49 8 Ancrez le...

Страница 74: ...véhicule et le siège pour enfants sont compatibles Voir les pages 48 à 50 pour de plus amples renseignements Sortez le Versa Tether de la pochette et placez le par dessus le dossier du siège pour enfant Vous devez toujours utiliser le Versa Tether Son utilisation améliore la stabilité du siège pour enfant et réduit le risque de blessure Consultez le guide d utilisation de votre véhicule pour conna...

Страница 75: ...ir les pages 59 à 61 7 Attachez le surplus de sangle avec la courroie élastique 8 Replacez la housse 4 Enfilez la ceinture de sécurité du véhicule à travers les fentes pour l orientation vers l avant puis attachez la boucle Assurez vous que la ceinture de sécurité n est pas entortillée 1b 1a 4 5 Vérifications 9 Assurez vous que la ceinture de sécurité du véhicule est bien ancrée 9 Assurez vous que...

Страница 76: ...ture sous abdominale aux pages 72 et 73 Si la ceinture sous abdominale de l aéronef est trop courte demandez une rallonge de ceinture à une agente ou à un agent de bord NOTE Votre enfant pourrait ne pas être à l aise si l attache se trouve sous la place assise du siège pour enfant après l installation Avant de commencer Suivez les instructions aux pages 54 et 55 pour ajuster correctement le harnai...

Страница 77: ...posée au siège pour enfant pour serrer le harnais Le harnais devrait être bien ajusté autour de l enfant tout en étant confortable Une sangle bien ajustée ne devrait pas avoir de jeu elle forme une ligne assez droite sans mou Le harnais ne s enfonce pas dans la chair de l enfant et ne met pas le corps de l enfant dans une posture anormale Vous devriez être incapable de pincer de mou dans la sangle...

Страница 78: ...itrine a Appuyez sur les languettes b Séparez l attache 3 Débouclez le harnais 4 Enlevez le coussin de corps pour bébés au besoin 5 Retirez le coussinet abdominal de la boucle du harnais a Tirez la boucle à travers le coussinet abdominal b Enlevez la courroie élastique d autour de la boucle 7 Ajustez le harnais à sa position la plus haute et détachez de la poignée d ajustement de la hauteur du har...

Страница 79: ...ement À NE PAS FAIRE N utilisez pas d eau de javel Ne la lavez pas à la machine Ne la séchez pas à la machine Ne la repassez pas Nettoyer le harnais ESSUYEZ LE HARNAIS À L ÉPONGE à l eau tiède avec du savon doux SÉCHEZ LE À L AIDE D UNE SERVIETTE À NE PAS FAIRE Ne désassemblez pas le harnais N utilisez pas d eau de javel Ne le lavez pas à la machine Ne le séchez pas à la machine Ne le repassez pas...

Страница 80: ...que du siège pour enfant 3 Attachez les crochets de plastique au rebord du dessous du siège pour enfant 4 Tirez la boucle à travers la fente de la housse Assurez vous que la boucle est bien enfilée à travers la bonne fente pour la position de la boucle 1 Placez la housse du siège pour enfant sur la coque Soin et entretien ...

Страница 81: ...attachez les bandes élastiques aux attaches derrière la poignée d ajustement de la hauteur du harnais 6 6 Attachez les bandes à crochet et boucle du coussin appui tête autour du harnais 7 Replacez le coussinet abdominal a Tirez les bandes élastiques autour de la boucle b Poussez la boucle à travers le coussinet abdominal Soin et entretien ...

Страница 82: ...utre Pour nettoyer RINCEZ ABONDAMMENT la boucle à l eau tiède TESTEZ LA BOUCLE en la bouclant et en la débouclant jusqu à ce que vous entendiez un déclic après avoir inséré chaque patte de la boucle Si vous n entendez pas les déclics répétez la procédure de nettoyage SÉCHEZ LA À L AIDE D UNE SERVIETTE À NE PAS FAIRE Ne la laissez pas tremper Ne la lubrifiez pas N utilisez pas de solvants N utilise...

Страница 83: ...e dans la fente d ajustement Utilisez la fente extérieure de la boucle lorsque vous installez le siège pour enfant en position orientée vers l avant avec un enfant dont le poids est de 13 6 kg 30 lb ou plus ou si la boucle se trouve sous l enfant dans la position intérieure ADJUSTMENT SLOT FENTE D AJUSTEMENT 1 Insérez l arrêtoir de la boucle dans la fente située dans la coque du siège pour enfant ...

Страница 84: ...sangle d ajustement du harnais Assurez vous que le siège pour enfant repose bien à plat sur le siège du véhicule Solution possible Assurez vous que le harnais n est pas ajusté à la hauteur la plus haute ou la plus basse que le harnais n est pas trop serré pour être ajusté ou que le poids de l enfant ne porte pas contre le coussin appui tête Corrigez toutes ces situations s il y a lieu puis réessay...

Страница 85: ...ués par Britax Child Safety Ltd Leur utilisation peut contrevenir aux normes fédérales sur la sécurité des véhicules automobiles et compromettre la sécurité du siège pour enfant lors d un accident Leur utilisation annule automatiquement la garantie Britax LIMITATION DES DOMMAGES INTÉRÊTS La présente garantie et les recours énoncés ci dessus sont exclusifs et viennent en lieu et place de toutes les...

Страница 86: ...Britax Child Safety Ltd P O Box 7289 RPO Brunswick Square Saint John NB E2L 4S6 A Britax Childcare Group Limited company Une société de Britax Childcare Group Limited Tel 1 888 427 4829 www Britax ca ...

Отзывы: