background image

11

Step 5

With coals burning well, carefully add wood chunks using long cook-
ing tongs (see “Flavoring Wood” and “Adding Charcoal/Wood During
Cooking” sections of this manual.)

Step 6

Place cooking grill on grill support lips. Use charcoal tray adjusters to
position charcoal tray to lowest level.

WARNING:

Always wear oven mitts/gloves when adjusting cooking levels
to protect your hands from burns. 

Step 7

Place food on right side of cooking grill and close lid. Adjust the side
air vents to regulate cooking temperature.

NOTE:

Do not fully close side air vents and lid unless trying to cool the
grill down or suffocate a flame.

Step 8

By closing the side air vents more, the burning intensity is slowed and
smoke is contained within the grill, imparting more smoke flavor to
food. The ideal smoking temperature is between 175°F and 250°F or
“IDEAL” reading on the heat gauge.

Step 9

For large cuts of meat, allow approximately one hour of cooking time
per pound of meat. Always use a meat thermometer to ensure food
is fully cooked before removing from grill.

Step 10

Allow grill to cool completely, then follow instructions in the 
“After-Use Safety” and “Proper Care & Maintenance” sections of this
manual.

During the smoking process, avoid the temptation to open lid to check
food. Opening the lid allows heat and smoke to escape, making addi-
tional cooking time necessary.

Food closest to the charcoal will cook and brown faster. Rotate food
midway through the cooking cycle. If food is excessively browned or
flavored with smoke, wrap food in aluminum foil after the first few
hours of smoking. This will allow food to continue cooking without
further browning or smoke flavoring.

When cooking fish or extra lean cuts of meat, you may want to try
water smoking to keep the food moist. Before starting a fire, place
charcoal tray to lowest level. Use a flat bottom metal pan shallow
enough to fit between charcoal grate and cooking grill as a water pan.
Set the metal pan on charcoal grate under food and cooking grill. Fill
with water or marinade until 

q

full. Build your fire on the opposite

side of water pan.

CAUTION:

Always use oven mitts/gloves to protect your hands. Liquid
in water pan will be extremely hot and can scald or burn.
Always allow liquid to cool completely before handling. Do
not allow liquid to completely evaporate from water pan.

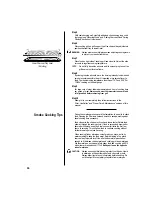
Lower Charcoal Tray Level

(Smoking)

Smoke Cooking Tips

Содержание 812-3450-0 (Hickory)

Страница 1: ...avy Duty Outdoor Charcoal Grills Smokers OWNER S MANUAL ASSEMBLY AND OPERATING INSTRUCTIONS WARNING READ AND FOLLOW ALL WARNINGS AND INSTRUCTIONS IN THIS MANUAL TO AVOID PERSONAL INJURY OR PROPERTY DAMAGE ...

Страница 2: ...charcoal lighting fluid safely away from grill When using charcoal lighting fluid allow charcoal to burn with grill lid and dampers open until covered with a light ash approximately 20 minutes This will allow charcoal lighting fluid to burn off Failure to do this could trap fumes from charcoal lighting fluid in grill and may result in a flash fire or explosion when lid is opened Never use charcoal...

Страница 3: ...s and ashes should be placed a safe distance from all structures and combustible materials With a garden hose completely wet the surface beneath and around grill to extinguish any ashes coals or embers which may have fallen during the cooking or cleaning process After each use clean the grill thoroughly and reapply a light coat of oil to interior to prevent rusting Cover the grill to protect it fr...

Страница 4: ... Flathead Screwdrivers Adjustable Wrench Parts Bag Contains 1 Heat indicator 2 Hinges 2 Hood stops 2 Plastic wheel push caps 4 6 x 5 mm hexagonal nuts 2 5 x 4 mm hexagonal nuts 2 5 x 75 mm Phillips head bolts 2 spring washers 20 6 x 3 5 mm hexagonal nuts 8 6 x 36 mm Phillips head bolts 16 6 x 12 mm Phillips hex head bolts 12 6 x 50 mm Phillips head bolts 2 Flat washers 12 6 x 3 5 mm hex nuts Dampe...

Страница 5: ...site side Align the bolt holes in the short legs to bolt holes in the body Insert two 6 x 50mm screws through each leg and secure with nut hand tighten only at this point Step 3 Insert wire wood rack curved ends pointed down into holes on bracket near bottom of legs then tighten all bolts and nuts until secure Step 4 Insert axle through axle holes in short legs Place wheels on axles with recessed ...

Страница 6: ...dy using 6 x 12 mm Phillips hex head screws Thread screws into welded nuts but do not tighten at this point Place lid over the body and attach hinges to the outside back of the lid using 6 x 12 mm Phillips hex head screws Thread screws into welded nuts Tighten all hinge screws on lid and body until secure Step 8 Attach handle to the lid using 5 x 75mm screws flat washers spacers spring washers and...

Страница 7: ...make the vent difficult to open and close Step 9 Attach three wooden slats to each set of side shelf supports using 6 x 50mm bolts and 6 x 3 5mm nuts Step 10 Install heat indicator in lid by aligning tabs on heat indicator with slots in the opening on front of lid Insert and turn 4 revolution until the word IDEAL on heat indicator is at top of dial BRINKMANN DALLAS TX 75244 BRINKMANN DALLAS TX 752...

Страница 8: ... with adjustment hooks facing inward Place charcoal grate on top of charcoal tray and lower inside cooking chamber Step 12 Place cooking grill on top of grill supports lips with curved ends inserted through holes in rear grill support lip Position charcoal tray adjusters to desired height Grill Support Lips ...

Страница 9: ...as fuel in the Grill King see Adding Charcoal Wood During Cooking section of this manual WARNING Never use charcoal that has been pre treated with lighter fluid Use only a high grade plain charcoal or charcoal wood mixture If using a Charcoal Chimney Starter follow all manufacturer s warnings and instructions regarding the use of their product Start with 8 to 10 pounds of charcoal for Grill King D...

Страница 10: ...rong close the lid Allow the temperature to reach the IDEAL range on the heat indicator Maintain this temperature for 2 hours Step 6 Increase the temperature to the lower portion of the HOT range on the heat indicator This can be achieved by opening the side air vents and adding more charcoal and or wood see Adding Charcoal Wood During Cooking section of this manual Maintain this temperature for 1...

Страница 11: ...Do not use gasoline kerosene alcohol or other flammable material for lighting charcoal Follow all manufacturer s warnings and instructions regarding the use of their product Place 5 to 6 pounds of charcoal for Grill King Deluxe 2 to 3 pounds for Grill King on left side of charcoal grate Step 3 Saturate charcoal with lighting fluid With lid open wait 2 to 3 minutes to allow lighting fluid to soak i...

Страница 12: ...hen follow instructions in the After Use Safety and Proper Care Maintenance sections of this manual During the smoking process avoid the temptation to open lid to check food Opening the lid allows heat and smoke to escape making addi tional cooking time necessary Food closest to the charcoal will cook and brown faster Rotate food midway through the cooking cycle If food is excessively browned or f...

Страница 13: ...f cooking chamber under charcoal tray IF USING CHARCOAL CHIMNEY STARTER PROCEED TO STEP 5 If you choose to use charcoal lighting fluid ONLY use charcoal lighting fluid approved for lighting charcoal Do not use gasoline kerosene alcohol or other flammable material for lighting charcoal Follow all manufacturer s warnings and instructions regarding the use of their product Start with 8 to 10 pounds o...

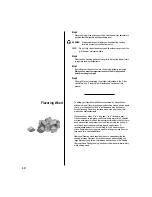
Страница 14: ... not have to be added during the cooking process However it may be necessary when cooking very large pieces of food Follow instructions and cautions in the Adding Charcoal Wood During Cooking section of this manual to avoid injury while adding wood Flavoring Wood 13 Step 5 Place cooking grill on grill support lips Use charcoal tray adjusters to position charcoal grate to desired cooking level WARN...

Страница 15: ...severe burns Step 5 When charcoal is burning strong again wear oven mitts gloves and carefully place cooking grill on top of grill support brackets Use charcoal tray adjusters to position cooking grill to desired cooking level and replace food Step 6 Close the grill lid open the lower side air vents and allow food to continue cooking Adding Charcoal Wood During Cooking Regulating Heat To increase ...

Страница 16: ...way from children and pets Cure your grill periodically throughout the year to protect against excessive rust To protect your grill from excessive rust the unit must be properly cured and covered at all times when not in use A smoker cover may be ordered directly from Brinkmann by calling 1 800 468 5252 Wash cooking grill and charcoal grate with hot soapy water rinse well and dry Lightly coat gril...

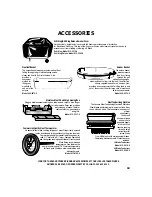
Страница 17: ...lable in red and white meat varieties in a money saving 2 pack Model 812 3322 0 The Art of Smoke Cooking Cookbook Contains 40 exciting yet simple recipes using the delicious technique of smoke cooking Beautifully photographed full color sixty six page hardback cookbook presents old favorites as well as new recipes such as smoked meatballs spaghetti smoked pizza smoked tomato soup and smoked peach ...

Страница 18: ...elease hot coals through the bottom of starter into your smoker or grill Model 812 4080 0 LOOK FOR THESE AND OTHER BRINKMANN ACCESSORIES AT YOUR LOCAL RETAILER WHERE SMOKERS ARE SOLD OR ORDER DIRECT BY CALLING 1 800 468 5252 The Ultimate 5 Piece BBQ Tool Set You ll be the envy of your fellow outdoor chefs with this ultimate BBQ tool set It s sleek ergonomic design combined with durable heavy gauge...

Страница 19: ...MB BEEFWELL PORK VEAL HAM BEEFMED BEEFRARE COOKEDHAM 2 0 0 180 160 140 120 85 80 77 70 60 LOOK FOR THESE AND OTHER BRINKMANN ACCESSORIES AT YOUR LOCAL RETAILER WHERE SMOKERS ARE SOLD OR ORDER DIRECT BY CALLING 1 800 468 5252 Smoker Basket The unique basket weave prevents food from falling through the grill while allowing smoke steam and heat to flow into the food Great for fish shrimp vegetables a...

Страница 20: ...of this warranty please call Customer Service Department at 1 800 527 0717 A receipt will be required The Brinkmann Corporation will not be responsible for any cookers forwarded to us without prior authorization Grill King Grill King Deluxe must be returned to the original place of purchase for replacement of the unit EXCEPT AS ABOVE STATED THE BRINKMANN CORPORATION MAKES NO OTHER EXPRESS WARRANTY...

Отзывы: