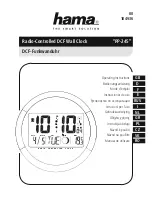
Part A- LCD
A1: Real Time
A2: Temperature display
A3: Date and Day of week display
Part B Buttons
B1: “SNOOZE/LIGHT” button
B2: “MODE” button
B3: “
” button
B4: “
”button
B5: “C/F” button
B6: “projection stand by/on” slide swith
B7: Alarm ON/OFF slide switch
Part C- Structure
C1: Projection
C2: DC adaptor jack
C3: Battery Compartment
Start-up
Insert batteries.
Time Setting:
Hold “MODE/SET” button (B2) for 3 seconds to enter Clock/Calendar setting Mode.
Press “
” (B4) or “
” (B3) buttons to adjust the setting and press “MODE/SET” button (B2) to
confirm each setting.
The setting sequence is shown as follow: Hour, Minutes, Second, Year, Month/Day sequence,
Month, Day, Time Zone, Day-of-week language.
5 languages can be selected in Day-of-week, they are: German, English, Spanish, Italian and
French. The languages and their selected abbreviations for each day of the week are shown in
the following table.
Language
Sunday
Monday Tuesday Wednesda
y
Thursday Friday Saturday
German, GE
SO
MO
DI
MI
DO
FR
SA
Great Britain, GB SU
MO
TU
WE
TH
FR
SA
Spanish, ES
DO
LU
MA
MI
JU
VI
SA
Italian, IT
DO
LU
MA
ME
GI
VE
SA
French, FR
DI
LU
MA
ME
JE
VE
SA
The timer zone:
When you travel other city with different time zone, you can use this function to regulate the
time. If the time of the city is faster than your city for 1 hour, the time zone should set to +1.
Then the clock will set 1 hour fast automatically.


