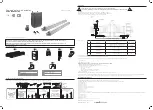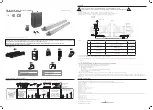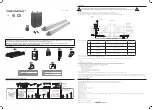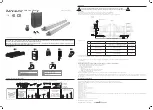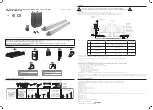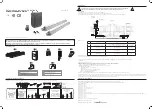
1
Actuator
2
Control unit
3
Flashing light
4
Remote control
5
Gate mounting bracket
6
Pillar mounting bracket
7
Label for the override device
EQUIPMENT REQUIRED (NOT SUPPLIED)
The tools and screws required for the installation must be in good condition and compliant with applicable safety standards.
¡
¡
¡
[
[
¡
¡
¡[
¡
[
[
¡[
IL[DWLRQGHVSDWWHV
VXUOHSRUWDLO
&KRLVLUXQV\VWqPH
YLVpFURXVDGDSWpj
O¶pSDLVVHXUGXSRUWDLO
,O\DSRLQWVGHIL[DWLRQ
¡
drilling the
pillar
cylinders
attachment to the
pillar:
- electronic panel
attachment of the
brackets
onto the pillars:
10m cable
2 x 1.5mm2
drilling into
the gate
INSTALLATION
Safety guidelines: please refer to the installation manual for all safety instructions.
To perform the installation, please download the installation manual at the following address: www.avidsen.com
Overview:
The cables used must be appropriate for outdoor use (such as H07RN-F for example).
The cable run between the two pillars must comply with applicable standards (NFC 15-100).
The geared motor power cable must run 80cm deep with red warning mesh.
cylinders
Inner side of the property
Control
unit
1
3
2
4
flashing light
List of cables:
Connection
Cable
Max length
1
230Vac power line
Cable 3 x 2.5mm2 (more than 30m long)
Cable 3 x 1.5mm2 (less than 30m long)
Unlimited
2
Left motor
Cable 2 x 1.5mm²
10m
3
Right motor
Cable 2 x 1.5mm²
10m
4
Flashing light
Cable 2 x 0.5mm²
3m
The installation is a 4-step process:
1. Installation of the actuators on the pillars and gate, and of the electronic panel.
2. Electrical connection of the motors and electronic panel to the mains. This connection must be performed by qualified personnel
(electrician, etc.).
3. Adjustments and operation:
Warning: Only switch on the electronic panel once all connections have been made.
- Read the installation manual chapter on simple adjustments.
- Launch the movement self-learning programme (press "+" for 3 seconds)
- Programme the remote controls:
- Press "-" for 3 seconds
- Press "OK"
- Press the remote control button to be memorised
- Repeat the operation for each remote control
- Choice of operating mode:
By default, automatic closing is deactivated. To activate it, you must install a pair of photocells (optional)
4. Operational testing: To familiarise yourself with the automatism and ensure its proper operation, read the chapter on usage and conduct operational tests (opening/closing, initiate
obstacle detection, cut the photocell beam (optional)). Upon completion of these tests, you may have to modify certain settings (e.g. motor power).
DECLARATION OF CONFORMITY
With the RED directive Avidsen declares that the following equipment: Powered swing gates reference 654105
Complies with the RED 2014/53/EU directive. Its conformity has been assessed pursuant to the applicable standards in force:
• EN 301489-3 V1.6.1
• EN 301489-1 V1.9.2
• EN 300220-1 V2.4.1
• EN 300220-2 V2.4.1
• EN 55014-2 :1997+A1 :2001+A2 :2008
• EN 55014-1 :2005+A1 :2009+A2 :2011
• EN 61000-3-2 :2014
• EN 61000-3-3 :2013
• EN 60335-1 :2012
• EN 60335-2-103 :2003 + A11 :2009
The remote control included with the abovementioned product complies with the RED 2014/53/EU directive. Its conformity has been assessed pursuant to the applicable standards in
force:
• EN 301489-3 V1.6.1
• EN 301489-1 V1.9.2
• EN 300220-1 V2.4.1
• EN 300220-2 V2.4.1
• EN 60950-1 :2006 + A11 :2009+A1 :2010+A2 :2013
Chambray les Tours, date: 26/09/2017
Alexandre Chaverot, CEO
2
x 1
Thank you for purchasing an automatic gate opener.
This document is a quick start guide detailing the main installation steps as well as the equipment required. To perform the installation,
please download the installation manual at the following address: www.avidsen.com
Warning: The safety instructions and installation instructions can be found in the installation manual. Follow all these instructions, as an
incorrect installation can cause serious injuries.
CONTENTS OF THE KIT
150kg
1,75m
150kg
1,75m
24V
OPTION
SOLAIRE
150kg
1,75m
150kg
1,75m
24V
OPTION
SOLAIRE
150kg
1,75m
150kg
1,75m
24V
OPTION
SOLAIRE
7
x 2
6
x 2
5
x 2
1
x 1
4
x 2
V1
3
x 1
Powered gates with actuator
Reference: 654105
QUICK START GUIDE
[
[
¡
¡
¡[
¡
[
[
¡[
¡
IL[DWLRQGHVSDWWHV
VXUOHSRUWDLO
&KRLVLUXQV\VWqPH
YLVpFURXVDGDSWpj
O¶pSDLVVHXUGXSRUWDLO
,O\DSRLQWVGH
IL[DWLRQ
attachment of the
flashing light onto the
pillar
[
[
¡
¡
¡[
¡
[
[
¡[
¡
IL[DWLRQGHVSDWWHV
VXUOHSRUWDLO
&KRLVLUXQV\VWqPH
YLVpFURXVDGDSWpj
O¶pSDLVVHXUGXSRUWDLO
,O\DSRLQWVGH
IL[DWLRQ
flashing light
3m cable
2 x 0.5mm2


