background image

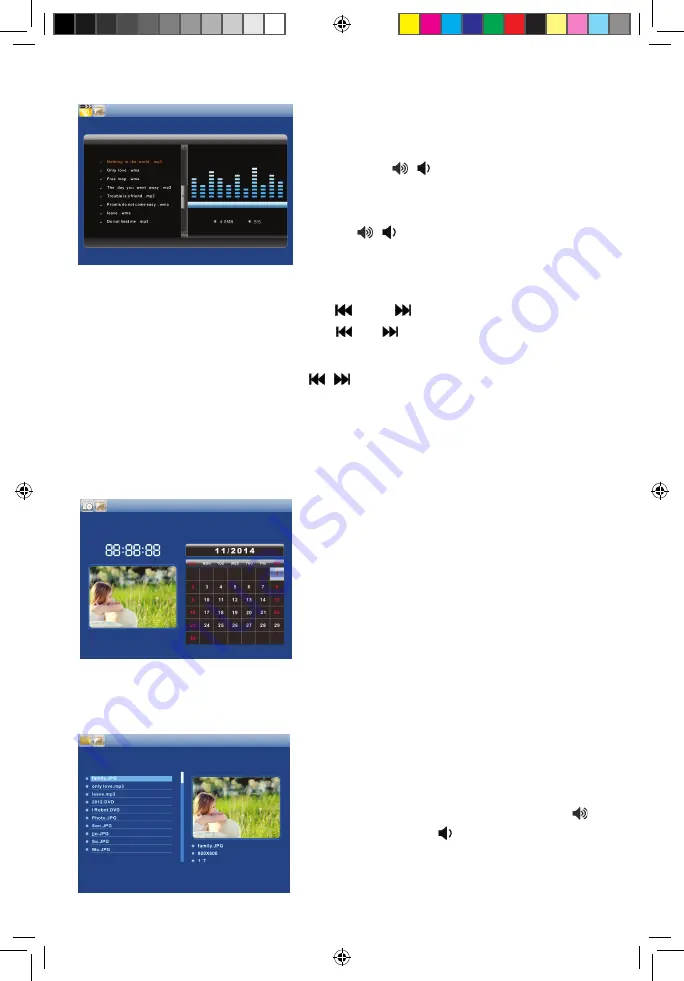
4.4  Music Mode 

Choose 

Music 

and press 

OK

 to enter, 

press 

UP/DOWN 

on the frame, or 

press  

  on the remote control to 

select the music in the playlist, then 
press 

OK 

to Play/Pause. Long press 

to turn up/down the volume. 

In the music playing mode, press 

OK

 to pause and play. You can play the previous 

or next music file by pressing 

  or 

  on the frame. You can 

fast-forward/rewind music by pressing 

  or 

  on the remote control. 

Press 

Setup

. You can choose different settings in 

Music Setup

; press 

OK

  to 

enter the sub-menu items. Press 


  on the remote control to set the value 

and press 

OK

 to confirm. 

Calendar

5.

Choose 

Calendar

 in the main menu, 

press 

OK 

to enter. A calendar with a 

window on the left will be shown with 
the slideshow. 

File

6.

Choose 

File

 in the main menu and 

press 

OK

 to enter, you can browse 

through all the files in your selected 
storage device. You can press 

UP


and 

DOWN


to choose a file then 

press 

OK

 to confirm. 

BRAUN-DigiFrame1220-Manual-140x210mm-Vector.indd   29

16.03.2017   13:16:45

Содержание DigFrame 1220

Страница 1: ...anual 140x210mm Vector indd 1 16 03 2017 13 16 42 Questo manuale d istruzione è fornito da trovaprezzi it Scopri tutte le offerte per Braun DigiFrame 1220 o cerca il tuo prodotto tra le migliori offerte di Cornici Digitali ...

Страница 2: ...BRAUN DigiFrame1220 Manual 140x210mm Vector indd 2 16 03 2017 13 16 42 ...

Страница 3: ...des digitalen Bilderrahmens besteht aus Glas Er ist daher zerbrechlich oder kann zerkratzt werden Wenn sich Fingerabdrücke oder Staub auf dem LCD Bildschirm angesammelt haben empfehlen wir für seine Reinigung ein weiches nicht scheuerndes Tuch wie es für die Reinigung eines Kameraobjektivs verwendet wird Feuchten Sie das Reinigungstuch mit der Reinigungsflüssigkeit an und wischen Sie damit den Bil...

Страница 4: ...r eine schnelle und einfache Anzeige von Fotos von Ihrer Digitalkamera Ihrem Mobiltelefon oder von einer Speicherkarte konzipiert Bitte lesen Sie die Bedienungsanleitung aufmerksam durch um den digitalen Bilderrahmen ordnungsgemäß nutzen zu können BRAUN DigiFrame1220 Manual 140x210mm Vector indd 5 16 03 2017 13 16 42 ...

Страница 5: ...utomatisch ein aus 10 Bildanzeigemodi Diashow Vorschau Vergrößerung Bilddrehung 11 Einstellbare Diashow Geschwindigkeit und mehr als 10 verschiedene Diashow Übergangseffekte 12 Helligkeit Kontrast Farbsättigung einstellbar 13 Kopieren und Löschen von Dateien im integrierten Speicher und auf der Speicherkarte 14 Integrierte Stereo Lautsprecher und Kopfhörerbuchse 15 OSD Sprachen Englisch und weiter...

Страница 6: ...etzen 6 2 Erste Schritte 6 3 Bedienungshinweise 7 4 4 1 Speicherkarte und USB 7 4 2 Fotomodus 8 4 3 Videomodus 9 4 4 Musikmodus 9 Kalender 10 5 Datei 10 6 Einstellungen 11 7 Montageanweisung für den Aufsteller 11 8 Technische Daten 12 9 PC Anschluss 12 10 Problembehebung 13 11 BRAUN DigiFrame1220 Manual 140x210mm Vector indd 7 16 03 2017 13 16 42 ...

Страница 7: ...bschalten des Tons 3 Funktionswahltaste nach links Zurück zur vorigen Musik oder Videodatei 4 Funktionswahltaste nach rechts Weiter zur nächsten Musik oder Videodatei 5 Funktionswahltaste aufwärts Lautstärke erhöhen 6 Funktionswahltaste abwärts Lautstärke verringern BRAUN DigiFrame1220 Manual 140x210mm Vector indd 8 16 03 2017 13 16 43 ...

Страница 8: ...Bildern im Diashowmodus mit Hintergrundmusik 11 Den Setup Modus direkt aufrufen 1 2 Tasten auf der Rückseite 1 Ein Aus 2 Aufwärts Zurück 3 Lautstärke erhöhen Nach rechts 4 Wiedergabe Pause OK 5 Lautstärke verringern Nach links 6 Abwärts Weiter 7 Menü Verlassen Return 1 3 Linke Seite des Rahmens 1 SD MMC SDHC CARD Karte 2 Ohrhörerbuchse 3 USB 4 Mini USB Buchse 5 Stromversorgungseingang DC IN BRAUN ...

Страница 9: ...etzteils in eine standardmäßige 110 240 V Netzsteckdose und das andere Ende in die DC IN Buchse auf der linken Seite des Bilderrahmens 3 2 Ziehen Sie den Schutzfilm des Displays langsam ab 3 3 Entfernen Sie den Kunststoff Abstandshalter aus dem Batteriefach und vergewissern Sie sich dass eine Batterie in der Fernbedienung eingesetzt ist Siehe Batterien einsetzen und ersetzen wenn eine neue Batteri...

Страница 10: ...atisch die Wiedergabe der Diashow Rufen Sie mit der Taste die Menüoptionen Foto Video Musik Kalender Datei oder Einstellungsmenüs auf Wählen Sie mit den Tasten auf der Fernbedienung die gewünschte Option aus und bestätigen Sie mit der Taste OK Rufen Sie das Hauptmenü mit der Taste MENU am Bilderrahmen oder auf der Fernbedienung auf Drücken Sie erneut die Taste MENU am Bilderrahmen oder auf der Fer...

Страница 11: ...aus und zeigen Sie es mit OK an Wenn die Music Option auf On eingestellt wurde wird die Diashow mit Hintergrundmusik abgespielt Die Musikdateien müssen sich auf dem gleichen Speichermedium befinden Sie können mit den Lautstärketasten die Lautstärke anpassen Sie können mit den Tasten auch zum vorigen oder nächsten Hintergrund Musiktitel gehen Drücken Sie Setup Sie können im Photo Setup Menü verschi...

Страница 12: ... den Tasten auf der Fernbedienung ein und bestätigen Sie mit OK 4 4 Musikmodus Wählen Sie den Music Modus und rufen Sie ihn mit OK auf Wählen Sie die Musik in der Wiedergabeliste mit UP DOWN am Bilderrahmen oder mit auf der Fernbedienung aus Starten Sie die Wiedergabe anschließend mit OK oder halten Sie sie vorübergehend an Ein langer Tastendruck auf erhöht oder verringert die Lautstärke Halten Si...

Страница 13: ...ster auf der linken Seite angezeigt Datei 6 Wählen Sie im Hauptmenü File und im Anschluss OK aus um das Menü aufzurufen Sie können in allen Dateien auf dem ausgewählten Speichermedium scrollen Mit UP und DOWN können Sie eine Datei auswählen und anschließend mit OK bestätigen Rufen Sie im Hauptmenü File auf und drücken Sie dann Foto Musik Video um den Unterordner aufzurufen Wählen Sie eine Datei au...

Страница 14: ...s bzw werden die Daten automatisch gespeichert Hinweis Zeigen Sie im Pausemodus der Diashow Musik oder Videowiedergabe mit einem langen Tastendruck auf Setup die Bedienungsoptionen für Foto Musik Video auf der rechten Seite an Montageanweisung für den Aufsteller 8 Stecken Sie den Aufsteller in den Steckplatz des digitalen Bilderrahmens und drehen Sie ihn im Uhrzeigersinn Achten Sie darauf dass der...

Страница 15: ...ie können das Gerät mit einem USB Kabel zum Kopieren Löschen und Bearbeiten von Dateien an einen PC anschließen A Schalten Sie den digitalen Bilderrahmen ein und verbinden Sie ihn dann mit dem USB Kabel mit Ihrem PC Der Bilderrahmen unterstützt Windows 2000 XP Vista 7 8 B Das Gerät wird automatisch erkannt und auf dem Bildschirm wird die Meldung PC Connecting Verbinde mit PC angezeigt Sie können D...

Страница 16: ...Stecker korrekt eingesteckt ist Fernbedienung funktioniert nicht Vergewissern Sie sich dass die Batterien noch genug Kapazität haben unter normalen Bedingungen hat die Batterie eine Lebenserwartung von einem halben Jahr Tauschen Sie die Batterie ggf aus Die Speicherkarte oder das USB Speichermedium kann nicht gelesen werden Bitte kontrollieren Sie ob sich auf der Speicherkarte oder dem USB Speiche...

Страница 17: ...enü ein Die Farbe ist zu kräftig oder es wird nur Schwarz Weiß angezeigt Bitte stellen Sie die Farbe und den Kontrast im Setupmenü ein Kein Ton Vergewissern Sie sich dass die Lautstärke korrekt eingestellt und nicht stummgeschaltet ist BRAUN DigiFrame1220 Manual 140x210mm Vector indd 18 16 03 2017 13 16 43 ...

Страница 18: ...re The screen of the digital photo frame is made of glass and is easily broken or scratched If fingerprints or dust accumulate on the LCD screen we recommend using a soft non abrasive cloth such as a camera lens cloth to clean the LCD screen Moisten the cleaning cloth with the cleaning solution and apply the cloth to the screen WARNING Please power off the unit before inserting or removing a card ...

Страница 19: ...ned to allow quick and easy viewing of photos taken from your digital camera mobile phone or from a memory storage card Please read this user manual carefully to learn the correct way to use the digital photo frame BRAUN DigiFrame1220 Manual 140x210mm Vector indd 21 16 03 2017 13 16 44 ...

Страница 20: ...dule auto on off 10 Image display modes slideshow preview zoom rotate function 11 Adjustable slideshow speed and about 10 types of slideshow transitions 12 Adjustable brightness contrast saturation 13 Copy and delete files in the in built memory memory card 14 Built in stereo speaker and earphone jack 15 OSD languages English and other languages selectable Packaging Check List 1 12 1 inch 30 7 cm ...

Страница 21: ...tery 6 2 Getting Started 6 3 Operating Instruction 7 4 4 1 Card and USB 7 4 2 Photo Mode 8 4 3 Video Mode 8 4 4 Music Mode 9 Calendar 9 5 File 9 6 Setup 10 7 Stand Instructions 10 8 Technical Specifications 11 9 PC connection 11 10 Troubleshooting Guide 12 11 BRAUN DigiFrame1220 Manual 140x210mm Vector indd 23 16 03 2017 13 16 44 ...

Страница 22: ...eft function selection button Move back to previous music or video file 4 Right function selection button Move forward to next music or video file 5 Up function selection button Turn up the volume 6 Down function selection button Turn down the volume BRAUN DigiFrame1220 Manual 140x210mm Vector indd 24 16 03 2017 13 16 44 ...

Страница 23: ...u interface 10 View pictures in slideshow mode with background music 11 Go directly to Setup mode 1 2 Buttons at the back 1 Power on off 2 Up Previous 3 Vol Right 4 Play Pause OK 5 Vol Left 6 Down Next 7 Menu Exit Return 1 3 Left of the frame 1 SD MMC SDHC CARD card 2 Earphone Jack 3 USB 4 Mini USB 5 DC IN BRAUN DigiFrame1220 Manual 140x210mm Vector indd 25 16 03 2017 13 16 44 ...

Страница 24: ...apter into a standard 110 240V AC electrical outlet and the other end into the DC IN slot on the left side of the frame 3 2 Slowly remove the protective film covering on the screen 3 3 Remove the plastic battery insulator from the battery compartment and make sure the remote control has a battery inside Please refer to Installing Replacing Battery if you need a new battery 3 4 It will start up aut...

Страница 25: ... control to choose what you want enter and press OK to confirm Press MENU on the frame or on the remote control to enter the main menu Press MENU on the frame or on the remote control again to choose Storage Device and press OK to confirm Note 1 Make sure there are supported Picture Music and Video files in the Card or USB device 2 If there are supported picture and music files in the memory card ...

Страница 26: ...o Setup menu Press OK to enter the sub menu items Press on the remote control to set the Value and press OK to confirm 4 3 Video Mode Choose Video and press OK to enter Press UP and DOWN on the remote control to select the video from the playlist then press OK to Play Press to turn up down the volume In the video playing mode press OK to pause and press again to continue playback Press to play the...

Страница 27: ... on the remote control Press Setup You can choose different settings in Music Setup press OK to enter the sub menu items Press on the remote control to set the value and press OK to confirm Calendar 5 Choose Calendar in the main menu press OK to enter A calendar with a window on the left will be shown with the slideshow File 6 Choose File in the main menu and press OK to enter you can browse throu...

Страница 28: ...te After you make a setting for an item and enter into the next item the mode data will be saved automatically Note In the pause mode for photo slideshow music play video play long press Setup to see the operation options for photo music video on the right Stand Instructions 8 Insert the bracket into the slot of the digital photo frame and rotate the bracket clockwise Please make sure the stand is...

Страница 29: ... humidity 10 85 PC connection 10 You can connect the unit to external equipment using USB Cable for file copying deleting and editing operations A Please turn on the digital photo frame then connect it with the USB cable to your PC The frame supports Windows 2000 XP Vista 7 8 B The unit will be automatically detected and it will display PC Connecting on the screen You can edit or delete files in t...

Страница 30: ...nserted correctly Remote control not functioning Please check whether the battery has power the battery can be used for half a year under normal conditions Replace with new battery if necessary Cannot read the CARD or USB Please confirm whether there is storage in the card or USB device Empty devices cannot be read Cannot play the file Please confirm if the file format is compatible with the playe...

Страница 31: ...or there is no color Please adjust the color and contrast setup No sound Please check whether the volume is correct and that the player is not in Mute mode BRAUN DigiFrame1220 Manual 140x210mm Vector indd 33 16 03 2017 13 16 45 ...

Страница 32: ...rique est en verre Il peut donc se casser ou s égratigner facilement Si des traces de doigt ou de la poussière s accumulent sur l écran LCD nous conseillons d utiliser un chiffon doux et non abrasif tel qu un chiffon pour objectif d appareil photo afin de nettoyer l écran LCD Humidifiez le chiffon avec le produit de nettoyage et nettoyez l écran AVERTISSEMENT Veuillez éteindre l appareil avant d i...

Страница 33: ...ualisation simple et rapide des photos prises à partir de votre appareil photo numérique de votre téléphone portable ou d une carte mémoire Veuillez lire attentivement ce manuel de l utilisateur pour maîtriser ce cadre photo numérique BRAUN DigiFrame1220 Manual 140x210mm Vector indd 36 16 03 2017 13 16 45 ...

Страница 34: ...ammable 10 Modes d affichage des images diaporama prévisualisation zoom pivotement 11 Vitesse du diaporama réglable et une dizaine d options de transitions de diaporama disponibles 12 Réglage de la luminosité du contraste et de la saturation 13 Copie et suppression de fichiers dans la mémoire intégrée ou la carte mémoire 14 Haut parleur stéréo intégré et prise casque 15 Langues OSD anglais et d au...

Страница 35: ...se en route 6 3 Consignes d utilisation 7 4 4 1 Carte et USB 7 4 2 Mode photo 8 4 3 Mode vidéo 9 4 4 Mode musique 9 Calendrier 10 5 Fichier 10 6 Réglages 11 7 Instructions concernant le support 11 8 Spécifications techniques 12 9 Connexion à l ordinateur 12 10 Guide de dépannage 13 11 BRAUN DigiFrame1220 Manual 140x210mm Vector indd 38 16 03 2017 13 16 45 ...

Страница 36: ...lection de fonction Aller à la chanson ou au fichier vidéo précédent 4 Touche droite de sélection de fonction Aller à la chanson ou au fichier vidéo suivant 5 Touche haute de sélection de fonction Augmenter le volume 6 Touche basse de sélection de fonction Baisser le volume BRAUN DigiFrame1220 Manual 140x210mm Vector indd 39 16 03 2017 13 16 45 ...

Страница 37: ...rme de diaporama accompagné de musique 11 Aller directement au mode réglage 1 2 Touches à l arrière 1 Allumer éteindre 2 Haut précédent 3 Vol déplacer le curseur à droite 4 Lecture pause OK 5 Vol déplacer le curseur à gauche 6 Bas suivant 7 Menu quitter retour 1 3 Vue gauche du cadre photo 1 Fente pour carte SD MMC SDHC CARD 2 Prise pour écouteurs 3 USB 4 Mini USB 5 ENTRÉE CC BRAUN DigiFrame1220 M...

Страница 38: ...prise électrique CA standard de 110 à 240 V et l autre dans le port d entrée CC situé à gauche du cadre 3 2 Enlevez délicatement le film protecteur recouvrant l écran 3 3 Retirez l isolateur plastique du compartiment de la pile et vérifiez d avoir inséré une pile à l intérieur de la télécommande Veuillez consulter la section Installation et remplacement de la pile si une nouvelle pile est nécessai...

Страница 39: ...automatiquement Appuyez sur pour accéder dans Photos Vidéo Musique Calendrier Fichier Configuration Appuyez sur la touche de la télécommande pour vous déplacer puis sur OK pour confirmer votre sélection Appuyez sur la touche MENU de l appareil ou de la télécommande pour aller à l accueil Appuyez sur la touche MENU de l appareil ou de la télécommande pour sélectionner le périphérique de stockage pu...

Страница 40: ...sur OK pour l afficher Si la musique est activée dans les réglages photo le diaporama s accompagnera de musique Des fichiers musicaux doivent être présents sur le même dispositif de stockage Vous pouvez utiliser les touches VOL VOL pour augmenter baisser le volume de la musique et les touches pour aller à la musique précédente suivante Appuyez sur Setup Vous pouvez configurer plusieurs paramètres ...

Страница 41: ...mande pour définir la valeur de chaque élément du sous menu puis sur OK pour confirmer votre sélection 4 4 Mode musique Sélectionnez Music et appuyez sur OK pour accéder au menu Appuyez sur UP DOWN sur l appareil ou sur la télécommande pour sélectionner une chanson dans la liste de lecture puis sur OK pour la lire faire une pause Maintenez enfoncée la touche pour augmenter ou baisser le volume En ...

Страница 42: ...fenêtre à sa gauche s affiche dans le diaporama Fichier 6 Sélectionnez File dans le menu principal et appuyez sur OK pour l ouvrir Vous pouvez ainsi parcourir tous les fichiers contenus dans la mémoire de stockage sélectionnée Appuyez sur UP ou DOWN pour sélectionner un fichier puis sur OK pour l ouvrir Ouvrez File dans le menu principal puis appuyez sur photo musique vidéo pour ouvrir un sous dos...

Страница 43: ...onnées sont automatiquement sauvegardées Remarque En mode pause de lecture diaporama musicale vidéo maintenez appuyée la touche Setup pour afficher les options de fonctionnalités photo musique vidéo à droite Instructions concernant le support 8 Insérez l anneau de fixation dans le trou dédié du cadre photo numérique et tournez dans le sens horaire pour le fixer correctement Assurez vous que le sup...

Страница 44: ... 85 Connexion à l ordinateur 10 Le câble USB permet de connecter l appareil à un périphérique externe en vue de copier supprimer ou modifier des fichiers A Allumez l appareil et branchez le à l ordinateur à l aide du câble USB L appareil supporte les systèmes d exploitation Windows 2000 XP Vista 7 8 B L appareil est détecté automatiquement et affiche PC connecting connexion à l ordinateur en cours...

Страница 45: ...cune alimentation Veuillez vérifier que la prise est bien insérée Télécommande inopérante Assurez vous que la pile n est pas à plat vous pouvez utiliser la pile pendant six mois dans des conditions normales d utilisation Remplacez la pile par une pile neuve le cas échéant Impossible de lire la carte ou le périphérique USB Veuillez confirmer la présence de fichiers sur la carte ou le périphérique U...

Страница 46: ...onfiguration Les couleurs sont trop vives ou il n y a aucune couleur Veuillez régler les couleurs et le contraste dans le menu de configuration Aucun son Vérifiez que le volume fonctionne et que l appareil n est pas mis en sourdine BRAUN DigiFrame1220 Manual 140x210mm Vector indd 49 16 03 2017 13 16 46 ...

Страница 47: ... la pantalla con cuidado La pantalla del marco de fotos digital es de vidrio por lo que puede romperse o rayarse fácilmente Si la pantalla LCD tiene marcas de dedos o polvo le recomendamos usar una gamuza suave no abrasiva como la usada con las cámaras de fotos para limpiarla Humedezca ligeramente la gamuza con solución limpiadora y limpie la pantalla ADVERTENCIA Apague la unidad antes de introduc...

Страница 48: ...ilmente las fotos capturadas con su cámara de fotos digital o su smartphone o que tenga almacenadas en una tarjeta de memoria Por favor lea detenidamente este manual de usuario para aprender cómo usar correctamente el marco de fotos digital BRAUN DigiFrame1220 Manual 140x210mm Vector indd 52 16 03 2017 13 16 46 ...

Страница 49: ... de visualización de imágenes presentación vista previa zoom función rotar 11 Velocidad de presentación de imágenes ajustable y 10 tipos de transiciones entre imágenes 12 Brillo contraste y saturación ajustables 13 Copia y eliminación de archivos en la memoria interna y en la tarjeta de memoria 14 Altavoces estéreo incorporados y toma para auriculares 15 Idiomas visualizados en pantalla Inglés y o...

Страница 50: ...2 Primeros pasos 6 3 Manual de instrucciones 7 4 4 1 Tarjeta y USB 7 4 2 Modo Foto 8 4 3 Modo Vídeo 8 4 4 Modo Música 9 Calendario 9 5 Archivo 10 6 Configuración 10 7 Instrucciones de colocación 11 8 Especificaciones técnicas 11 9 Conexión a un PC 12 10 Guía de resolución de problemas 12 11 BRAUN DigiFrame1220 Manual 140x210mm Vector indd 54 16 03 2017 13 16 46 ...

Страница 51: ...quierdo de selección de función Retroceder al archivo anterior de música o vídeo 4 Botón derecho de selección de función Adelantar al archivo siguiente de música o vídeo 5 Botón arriba de selección de función Subir volumen 6 Botón abajo de selección de función Bajar volumen BRAUN DigiFrame1220 Manual 140x210mm Vector indd 55 16 03 2017 13 16 46 ...

Страница 52: ... modo presentación con música de fondo 11 Ir directamente al modo configuración 1 2 Botones de la parte posterior 1 Encendido apagado 2 Arriba Anterior 3 Vol Derecha 4 Reproducir Pausa Aceptar 5 Vol Izquierda 6 Abajo Siguiente 7 Menú Salir Retorno 1 3 Izquierda del marco 1 Tarjeta SD MMC SDHC CARD 2 Conector para auriculares 3 USB 4 Mini USB 5 Conector de alimentación eléctrica BRAUN DigiFrame1220...

Страница 53: ...tador de CA en una toma estándar 110 240V CA y el otro extremo en la toma de entrada DC IN en el lado izquierdo del marco 3 2 Quite con cuidado la película protectora que cubre la pantalla 3 3 Quite el aislante de plástico de las pilas del interior del compartimento de la pila y compruebe que el mando a distancia tiene una pila instalada Por favor consulte el punto Instalar y reemplazar la pila si...

Страница 54: ...as vídeo música calendario archivo o configuración Pulse en el mando a distancia para seleccionar a la que desea acceder y a continuación OK para confirmar Pulse MENU en el marco o en el mando a distancia para acceder al menú principal Pulse nuevamente MENU en el marco o en el mando a distancia para seleccionar el dispositivo de almacenamiento y OK para confirmar Nota 1 Asegúrese de que en la tarj...

Страница 55: ...deben de estar almacenados en el mismo dispositivo Puede utilizar VOL VOL para subir bajar el volumen también puede utilizar para ir a la música de fondo anterior siguiente Pulse Setup Puede establecer diferentes configuraciones en el menú Photo Setup Pulse OK para acceder a los elementos del submenú Pulse en el mando a distancia para establecer el valor y a continuación OK para confirmar 4 3 Modo...

Страница 56: ...a continuación OK para reproducir pausar Pulse para subir bajar el volumen En el modo reproducción de música pulse OK para pausar y reproducir Puede reproducir el archivo de música anterior o siguiente pulsando o en el marco Puede avanzar o retroceder rápidamente pulsando o en el mando a distancia Pulse Setup Puede seleccionar diferentes ajustes en Music Setup pulse OK para acceder a los elementos...

Страница 57: ...enú principal pulse OK para acceder a la pantalla de configuración y pulse UP y DOWN para resaltar el elemento principal y OK para acceder a los elementos del submenú Pulse para ajustar los valores OK para confirmar Nota Una vez que haya realizado la configuración de un elemento y pase al elemento siguiente se guardará automáticamente el modo de configuración Nota En el modo pausa para la presenta...

Страница 58: ...C 9V 1 5A Formatos de imagen JPEG Formato de audio MP3 WMA Formatos de vídeo MPEG1 MPEG2 MPEG4 AVI M JPEG y H 264 Tarjetas de memoria SD MMC SDHC CARD USB USB Host y MINI USB Parámetros de la pantalla Tamaño de pantalla 12 1 pulgadas 30 7 cm TFT Resolución 1024 768 píxeles Contraste 300 1 Proporción de imagen 4 3 Brillo 250 cd m2 Tiempo de respuesta 20 ms Ángulo de visión 60 izquierda derecha vert...

Страница 59: ...ene que reiniciar el marco de fotos digital NOTA No desconecte nunca el cable durante ninguna operación Si lo hace podría dañar su marco de fotos digital Pulse el icono de extraer con seguridad en el ordenador para desconectarlo del ordenador Guía de resolución de problemas 11 Si tiene algún problema con la unidad consulte esta guía y el manual Si todavía necesita asistencia contacte con equipo de...

Страница 60: ...l formato es compatible con el reproductor Presentación con demasiada intensidad o muy oscura Ajuste el brillo o el contraste en el menú de configuración El color es demasiado intenso o no hay color Ajuste la configuración del color y del contraste No hay sonido Compruebe si el volumen es correcto y que el reproductor no esté en modo silencio BRAUN DigiFrame1220 Manual 140x210mm Vector indd 64 16 ...

Страница 61: ...ermo della cornice fotografica digitale è in vetro e può rompersi o graffiarsi facilmente Se impronte o polvere si accumula sullo schermo LCD si raccomanda di utilizzare un panno morbido non abrasivo come quello usato per gli obiettivi della fotocamera per pulire lo schermo LCD Inumidire il panno pulente con la soluzione pulente e applicare il panno sullo schermo ATTENZIONE Spegnere l unità prima ...

Страница 62: ...sentire la visione rapida e facile delle fotografie scattate con una fotocamera digitale telefono cellulare o archiviate su una scheda di memoria Leggere attentamente il presente manuale per imparare il corretto uso della cornice digitale BRAUN DigiFrame1220 Manual 140x210mm Vector indd 67 16 03 2017 13 16 47 ...

Страница 63: ...vazione programmazione automatica 10 Modalità visualizzazione immagine presentazione anteprima zoom rotazione 11 Velocità presentazione regolabile e circa 10 tipi di effetti di transizione 12 Luminosità contrasto e saturazione regolabili 13 Copiare ed eliminare file nella memoria integrata e sulla scheda di memoria 14 Altoparlanti stereo integrati e jack cuffie 15 Lingue OSD inglese e altre lingue...

Страница 64: ...ioni preliminari 6 3 Istruzioni d uso 7 4 4 1 Scheda e USB 7 4 2 Modalità Foto 8 4 3 Modalità Video 8 4 4 Modalità Musica 9 Calendario 9 5 File 10 6 Configurazione 10 7 Istruzioni per il supporto 11 8 Specifiche tecniche 11 9 Connessione PC 12 10 Guida alla risoluzione dei problemi 12 11 BRAUN DigiFrame1220 Manual 140x210mm Vector indd 69 16 03 2017 13 16 47 ...

Страница 65: ...ulsante selezione funzione sinistra Per ritornare al file musicale o video precedente 4 Pulsante selezione funzione destra Per avanzare al file musicale o video successivo 5 Pulsante selezione funzione su Per alzare il volume 6 Pulsante selezione funzione giù Per abbassare il volume BRAUN DigiFrame1220 Manual 140x210mm Vector indd 70 16 03 2017 13 16 47 ...

Страница 66: ... principale 10 Per visualizzare le immagini in modalità presentazione con musica di sottofondo 11 Per andare direttamente alla modalità Configurazione 1 2 Pulsanti sul retro 1 Accensione spegnimento 2 Su Precedente 3 Vol Destra 4 Riproduci Pausa OK 5 Vol Sinistra 6 Giù Successivo 7 Menu Esci Indietro 1 3 Sinistra della cornice 1 Scheda SD MMC SDHC CARD 2 Presa cuffie 3 USB 4 Mini USB 5 Ingresso CC...

Страница 67: ...ità dell adattatore CA in una presa elettrica CA 110 240V standard e l altra estremità nello slot CC IN sul lato sinistro della cornice 3 2 Rimuovere lentamente la pellicola protettiva che ricopre lo schermo 3 3 Rimuovere la linguetta di plastica isolante dal vano batteria e accertarsi che una batteria sia stata inserita nel vano Consultare Installazione e sostituzione della batteria se è necessar...

Страница 68: ... vuole accedere e premere OK per confermare Premere MENU sulla cornice o sul telecomando per accedere al menu principale Premere nuovamente MENU sulla cornice o sul telecomando per scegliere il dispositivo di archiviazione e premere OK per confermare Nota 1 assicurarsi che ci siano file immagine musicali e video supportati sulla scheda di memoria o dispositivo USB 2 Se ci sono file immagine e musi...

Страница 69: ... successiva Premere Setup È possibile impostare diverse impostazioni nel menu Photo Setup Premere OK per accedere alle voci del sottomenu Premere sul telecomando per impostare il Valore e premere OK per confermare 4 3 Modalità Video Scegliere Video e premere OK per accedere Premere UP e DOWN sul telecomando per selezionare il video dall elenco di riproduzione quindi premere OK per riprodurre Preme...

Страница 70: ... modalità di riproduzione musica premere OK per mettere in pausa e riprodurre È possibile riprodurre il file musicale precedente o successivo premendo o sulla cornice È possibile avanzare tornare indietro rapidamente premendo o sul telecomando Premere Setup È possibile scegliere diverse impostazioni in Music Setup premere OK per accedere alle voci del sottomenu Premere sul telecomando per impostar...

Страница 71: ...etup nel menu principale premere OK per accedere all interfaccia di configurazione e premere UP e DOWN per evidenziare la voce principale e premere OK per accedere alle voci del sottomenu Premere per impostare il Valore e premere OK per confermare Nota Dopo aver effettuato un impostazione di una voce e passato alla voce successiva modalità dati saranno salvati automaticamente Nota In modalità paus...

Страница 72: ...Hz Uscita CC 9V 1 5A Formati immagine JPEG Formati audio MP3 WMA Formati video MPEG1 MPEG2 MPEG4 AVI M JPEG e H 264 Schede di memoria SD MMC SDHC CARD USB Host USB MINI USB Parametri schermo Dimensioni schermo 12 1 30 7 cm TFT Risoluzione 1024 768 Pixel Contrasto 300 1 Proporzioni immagine 4 3 Luminosità 250cd m2 Tempo di risposta 20ms Angolo di visione 60 sinistra destra verticale 40 orizzontale ...

Страница 73: ...gitale dopo aver terminato l operazione NOTA Non scollegare mai il cavo USB durante il funzionamento Ciò può danneggiare il proprio DPF Premere l icona Safely Remove Hardware sul computer per scollegare la connessione PC Guida alla risoluzione dei problemi 11 In caso di problemi con il proprio dispositivo consultare questa guida e il manuale In caso di assistenza contattare la nostra assistenza te...

Страница 74: ...el file è compatibile con il dispositivo Display troppo chiaro o troppo scuro Regolare la luminosità o il contrasto nel menu di configurazione Il colore è troppo chiaro o non c è colore Regolare la configurazione del colore e del contrasto Nessun suono Verificare se il volume è corretto e che il lettore non sia in modalità Silenziamento BRAUN DigiFrame1220 Manual 140x210mm Vector indd 79 16 03 201...

Страница 75: ...erm van de digitale fotolijst is gemaakt van glas en kan dus eenvoudig breken of bekrast raken Als er vingerafdrukken of stofdeeltjes op het LCD scherm zitten raden wij u aan een zacht niet schurend doekje te gebruiken zoals een cameralensdoekje om het LCD scherm te schoon te vegen Maak het schoonmaakdoekje ietwat nat met het reinigingsmiddel en pas vervolgens toe op het scherm WAARSCHUWING Schake...

Страница 76: ...m foto s genomen met uw digitale camera of mobiele telefoon of opgeslagen op een geheugenkaart snel en eenvoudig weer te geven Lees deze gebruikshandleiding a u b zorgvuldig door zodat u de digitale fotolijst correct weet te gebruiken BRAUN DigiFrame1220 Manual 140x210mm Vector indd 82 16 03 2017 13 16 49 ...

Страница 77: ...atisch in uitschakelschema 10 Weergavemodi voor foto s diashow voorbeschouwing zoom draaifunctie 11 Instelbare diashowsnelheid met ongeveer 10 soorten overgangseffect 12 Afstelbare helderheid contrast verzadiging 13 Bestanden kopiëren en wissen in het ingebouwde geheugen en de geheugenkaart 14 Ingebouwde stereo luidspreker en oortelefoonuitgang 15 OSD talen Engels en andere selecteerbare talen Lev...

Страница 78: ...vangen 6 2 Aan de slag 6 3 Gebruiksaanwijzingen 7 4 4 1 Kaart en USB 7 4 2 Fotomodus 8 4 3 Videomodus 8 4 4 Muziekmodus 9 Kalender 9 5 Bestand 10 6 Instelling 10 7 Instructies voor de steun 11 8 Technische specificaties 11 9 Aansluiting op pc 12 10 Probleemoplossing 13 11 BRAUN DigiFrame1220 Manual 140x210mm Vector indd 84 16 03 2017 13 16 49 ...

Страница 79: ...unctieselectie naar links Terugkeren naar het vorige muziek of videobestand 4 Toets functieselectie naar rechts Het volgende muziek of videobestand selecteren 5 Toets functieselectie omhoog Het volume verhogen 6 Toets functieselectie omlaag Het volume verlagen BRAUN DigiFrame1220 Manual 140x210mm Vector indd 85 16 03 2017 13 16 49 ...

Страница 80: ...10 Foto s weergeven in diashowmodus met achtergrondmuziek 11 Direct de instellingsmodus openen 1 2 Toetsen op de achterzijde 1 In uitschakelen 2 Omhoog Vorige 3 Vol Rechts 4 Start Pauze OK 5 VOL Links 6 Omlaag Volgende 7 Menu Verlaten Terug 1 3 Links op het frame 1 SD MMC SDHC CARD kaart 2 Hoofdtelefoonuitgang 3 USB 4 Mini USB 5 DC IN BRAUN DigiFrame1220 Manual 140x210mm Vector indd 86 16 03 2017 ...

Страница 81: ...an de AC adapter in een standaard 110 240V AC elektrisch stopcontact en het andere uiteinde in de DC IN ingang links op het frame 3 2 Verwijder geleidelijk aan het beschermlaagje op het scherm 3 3 Verwijder de plastic batterijisolatie uit de batterijhouder en zorg ervoor dat de afstandsbediening een batterij bevat Lees a u b De batterij installeren vervangen als er een nieuwe batterij is vereist 3...

Страница 82: ...alender Bestand of Instellingen te openen Druk op op de afstandsbediening om de gewenste optie te selecteren en druk op OK om te openen Druk op MENU op het frame of op op de afstandsbediening om het hoofdmenu te openen Druk nogmaals op MENU op het frame of op op de afstandsbediening om het geheugenapparaat te selecteren en druk ter bevestiging op OK Opmerking 1 Zorg ervoor dat de kaart of het USB ...

Страница 83: ...eheugenapparaat U kunt VOL VOL gebruiken om het volume te verhogen verlagen u kunt ook gebruiken om de vorige volgende achtergrondmuziek te selecteren Druk op Setup U kunt verschillende instellingen aanpassen in het menu Photo Setup Druk op OK om de submenu s te openen Druk op op de afstandsbediening om de waarde in te stellen en druk ter bevestiging op OK 4 3 Videomodus Selecteer Video en druk op...

Страница 84: ...delijk op OK om af te spelen te pauzeren Druk lang op om het volume te verhogen verlagen Druk tijdens de muziekweergave op OK om te pauzeren en af te spelen Druk op of op het frame om het vorige of volgende muziekbestand af te spelen Druk op of op de afstandsbediening om de muziek vooruit of terug te spoelen Druk op Setup U kunt verschillende instellingen kiezen in Music Setup druk op OK om de sub...

Страница 85: ...en bestand en druk vervolgens op op de afstandsbediening om te kopiëren wissen Instelling 7 Selecteer Setup in het hoofdmenu druk op OK om het instellingsmenu te openen druk op UP en DOWN om een hoofdonderwerp te markeren en druk vervolgens op OK om het submenu te openen Druk op om de waarde in te stellen en druk ter bevestiging op OK Opmerking Nadat u een onderwerp hebt ingesteld en het volgende ...

Страница 86: ...dat u deze stabiel op een tafel plaatst Zie a u b de afbeelding hieronder Technische specificaties 9 Adapter Ingang AC 100 240V 50 60HZ uitgang DC 9V 1 5A Fotoformaten JPEG Audioformaat MP3 WMA Videoformaten MPEG1 MPEG2 MPEG4 AVI M JPEG en H 264 Geheugenkaarten SD MMC SDHC CARD USB USB Host MINI USB Schermparameters Schermafmeting 12 1 inch 30 7 cm TFT Resolutie 1024 768 pixels Contrast 300 1 Aspe...

Страница 87: ...rden herkend en PC Connecting zal op het scherm verschijnen U kunt bestanden in het interne geheugen of op de geheugenkaart aangesloten op de fotolijst bewerken wissen en naar en vanuit de computer kopiëren U dient de digitale fotolijst opnieuw te starten nadat u de gewenste acties hebt uitgevoerd OPMERKING Koppel de USB kabel nooit los terwijl gegevens worden verwerkt Uw digitale fotolijst kan hi...

Страница 88: ...en nieuwe batterij indien noodzakelijk De kaart of USB is niet leesbaar Controleer a u b of de kaart of het USB apparaat inderdaad bestanden bevat Lege apparaten kunnen niet worden gelezen Het bestand speelt niet af Controleer a u b of het bestandsformaat compatibel is met de speler De display is te helder of te donker Pas a u b de helderheid of het contrast aan in het instellingsmenu De kleur is ...

Страница 89: ...ran należy czyścić delikatnie Ekran cyfrowej ramki zdjęciowej jest wykonany ze szkła i łatwo może pęknąć lub zarysować się Jeżeli na ekranie LCD nagromadzą się odciski palców lub kurz do jego czyszczenia zalecamy użycie miękkiej nietrącej ściereczki np ściereczki do obiektywów aparatów Zwilżyć ściereczkę do czyszczenia w roztworze czyszczącym i wytrzeć ściereczką ekran OSTRZEŻENIE Przed włożeniem ...

Страница 90: ... przeglądania zdjęć wykonanych aparatem cyfrowym telefonem komórkowym lub z karty pamięci Należy przeczytać dokładnie niniejszą instrukcję obsługi aby nauczyć się prawidłowego korzystania z cyfrowej ramki zdjęciowej BRAUN DigiFrame1220 Manual 140x210mm Vector indd 97 16 03 2017 13 16 50 ...

Страница 91: ... czasu włączenia wyłączenia 10 Tryby wyświetlania obrazów pokaz slajdów podgląd zoom funkcja obrotu 11 Regulowana prędkość pokazu slajdów i około 10 typów przejść pokazu slajdów 12 Regulowana jasność kontrast nasycenie 13 Kopiowanie i kasowanie plików we wbudowanej pamięci i na karcie pamięci 14 Wbudowany głośnik stereo i gniazdo słuchawek 15 Języki wyświetlacza ekranowego angielski oraz inne wybi...

Страница 92: ...Instrukcja eksploatacji 7 4 4 1 Karta i USB 7 4 2 Tryb zdjęć 8 4 3 Tryb wideo 8 4 4 Tryb muzyki 9 Kalendarz 9 5 Plik 10 6 Konfiguracja 10 7 Instrukcja dotycząca stojaka 11 8 Specyfikacja techniczna 11 9 Połączenie z komputerem 12 10 Instrukcja rozwiązywania problemów 13 11 BRAUN DigiFrame1220 Manual 140x210mm Vector indd 99 16 03 2017 13 16 50 ...

Страница 93: ... przycisk wyboru funkcji Cofnięcie do poprzedniego pliku muzycznego lub wideo 4 Prawy przycisk wyboru funkcji Przejście do następnego pliku muzycznego lub wideo 5 Górny przycisk wyboru funkcji Zwiększenie głośności 6 Dolny przycisk wyboru funkcji Zmniejszenie głośności BRAUN DigiFrame1220 Manual 140x210mm Vector indd 100 16 03 2017 13 16 50 ...

Страница 94: ...nu 10 Przeglądanie zdjęć w trybie pokazu slajdów z muzyką w tle 11 Bezpośrednie przejście do trybu konfiguracji 1 2 Przyciski z tyłu 1 włącznik wyłącznik 2 w górę poprzedni 3 głośność w prawo 4 odtwarzanie pauza OK 5 głośność w lewo 6 w dół następny 7 menu wyjście powrót 1 3 Lewa strona ramki 1 karta SD MMC SDHC CARD 2 gniazdo słuchawek 3 USB 4 mini USB 5 DC IN BRAUN DigiFrame1220 Manual 140x210mm...

Страница 95: ... do standardowego gniazdka elektrycznego 110 240V AC a drugi do gniazda DC IN z lewej strony ramki 3 2 Powoli zdjąć folię ochronną zasłaniającą ekran 3 3 Zdjąć plastikowy izolator baterii z komory baterii i upewnić się że w pilocie jest bateria Jeżeli potrzebna jest nowa bateria należy sprawdzić punkt Wkładanie i wymiana baterii 3 4 Po podłączeniu zasilania ramka uruchomi się automatycznie Nacisną...

Страница 96: ...y wybrać potrzebną opcję oraz nacisnąć OK w celu potwierdzenia Nacisnąć MENU na ramce lub na pilocie aby przejść do menu głównego Nacisnąć MENU na ramce lub na pilocie ponownie aby wybrać urządzenie do zapisu i nacisnąć OK w celu potwierdzenia Uwaga 1 upewnić się że na karcie lub na urządzeniu USB znajdują się obsługiwane pliki obrazów muzyki i filmów 2 Jeżeli na karcie pamięci lub na urządzeniu U...

Страница 97: ...le Nacisnąć Setup Można wprowadzić różne ustawienia w menu Photo Setup Nacisnąć OK aby przejść do elementów podmenu Nacisnąć na pilocie aby ustawić wartość oraz nacisnąć OK w celu potwierdzenia 4 3 Tryb wideo Wybrać Video i nacisnąć OK aby przejść Nacisnąć UP i DOWN na pilocie aby wybrać film z listy odtwarzania a następnie nacisnąć OK aby odtworzyć Nacisnąć aby zwiększyć zmniejszyć głośność W try...

Страница 98: ... głośność W trybie odtwarzania muzyki należy nacisnąć OK aby przerwać i odtworzyć Poprzedni lub następny plik muzyczny można odtwarzać po naciśnięciu lub na ramce Muzykę można przewijać do przodu do tyłu po naciśnięciu lub na pilocie Nacisnąć Setup W Music Setup można wybrać różne ustawienia należy nacisnąć OK aby przejść do elementów podmenu Nacisnąć na pilocie aby ustawić wartość oraz nacisnąć O...

Страница 99: ... menu głównym nacisnąć OK aby przejść do interfejsu konfiguracji a następnie nacisnąć UP i DOWN aby podświetlić główny element oraz nacisnąć OK aby przejść do elementów podmenu Nacisnąć aby ustawić wartość oraz nacisnąć OK w celu potwierdzenia Uwaga po wprowadzeniu ustawień dla elementu i przejściu do następnego elementu tryb dane zostaną zapisane automatycznie Uwaga w trybie pauzy pokazu slajdów ...

Страница 100: ... 240V 50 60HZ wyjście DC 9V 1 5A Formaty obrazów JPEG Format audio MP3 WMA Formaty wideo MPEG1 MPEG2 MPEG4 AVI M JPEG i H 264 Karty pamięci SD MMC SDHC CARD USB host USB i MINI USB Parametry ekranu rozmiar ekranu 12 1 cali 30 7 cm TFT rozdzielczość 1024 768 pikseli kontrast 300 1 format 4 3 jasność 250 cd m2 czas odpowiedzi 20 ms kąt patrzenia 60 z lewej z prawej pionowo 40 poziomo temperatura rob...

Страница 101: ...ng Połączenie z komputerem Pliki można edytować lub kasować w pamięci wewnętrznej lub w urządzeniu pamięci włożonym do ramki zdjęciowej a ponadto można kopiować pliki na i z komputera Po zakończeniu działania należy ponownie uruchomić cyfrową ramkę zdjęciową UWAGA nigdy nie odłączać kabla USB w trakcie działania Może to uszkodzić cyfrową ramkę zdjęciową Nacisnąć ikonę bezpiecznego usuwania sprzętu...

Страница 102: ...ię w razie potrzeby Nie można odczytywać KARTY ani USB potwierdzić że na karcie lub urządzeniu USB jest wolne miejsce do zapisu Pustych urządzeń nie można odczytywać Nie można odtworzyć pliku potwierdzić że format pliku jest kompatybilny z odtwarzaczem Wyświetlacz jest za jasny lub za ciemny wyregulować jasność lub kontrast w menu konfiguracji Kolor jest za ostry lub nie ma kolorów wyregulować kon...

Страница 103: ...bricat din sticlă și se poate sparge sau poate fi zgâriat ușor În cazul în care amprentele sau praful se acumulează pe ecranul LCD vă recomandăm să utilizați o cârpă moale neabrazivă cum ar fi cele utilizate pentru obiectivele camerei pentru a curăța ecranul LCD Udați cârpa de curățare cu soluție de curățat și aplicați cârpa pe ecran AVERTISMENT Opriți unitatea înainte de a introduce sau a scoate ...

Страница 104: ...nceput pentru a permite vizualizarea rapidă și ușoară a fotografiilor făcute cu camera digitală telefonul mobil sau de pe un card de memorie Citiți acest manual cu atenție pentru a afla cum să utilizați corect rama foto digitală BRAUN DigiFrame1220 Manual 140x210mm Vector indd 112 16 03 2017 13 16 51 ...

Страница 105: ...oduri de afișare imagine prezentare previzualizare zoom funcție de rotire 11 Prezentare cu viteză reglabilă și peste 10 tipuri de tranziții 12 Reglare a intensității luminozității a contrastului a saturației 13 Copiați și ștergeți fișierele din memoria internă și cardul de memorie 14 Difuzoare stereo integrate și mufă jack pentru căști 15 Limbi interfață ecran OSD limba engleză și alte limbi selec...

Страница 106: ...bază 6 3 Instrucțiuni de utilizare 7 4 4 1 Card și USB 7 4 2 Modul pentru fotografii 8 4 3 Modul video 8 4 4 Modul pentru muzică 9 Calendar 9 5 Fișier 10 6 Setarea 10 7 Instrucțiuni pentru bază 11 8 Specificații tehnice 11 9 Conexiune PC 12 10 Ghid de depanare 12 11 BRAUN DigiFrame1220 Manual 140x210mm Vector indd 114 16 03 2017 13 16 51 ...

Страница 107: ...de selectare funcție la stânga Înapoi la fișierul de muzică sau video anterior 4 Buton de selectare funcție la dreapta Înainte la fișierul de muzică sau video următor 5 Buton de selectare funcție în sus Mărire volum 6 Buton de selectare funcție în jos Micșorare volum BRAUN DigiFrame1220 Manual 140x210mm Vector indd 115 16 03 2017 13 16 51 ...

Страница 108: ...a meniului principal 10 Vizualizare imagini în mod prezentare cu muzică de fundal 11 Accesare mod Setup 1 2 Butoane din spate 1 Pornire oprire 2 Sus Anterior 3 Vol Dreapta 4 Redare Pauză OK 5 Vol Stânga 6 Jos Următor 7 Meniu Ieșire Revenire 1 3 Stânga ramei 1 Card SD MMC SDHC CARD 2 Mufă căști 3 USB 4 Mini USB 5 DC IN Intrare alimentare CC BRAUN DigiFrame1220 Manual 140x210mm Vector indd 116 16 03...

Страница 109: ...rică de 110 240 V c a și celălalt capăt fanta DC IN de pe partea stângă a ramei 3 2 Scoateți cu atenție pelicula de protecție care acoperă ecranul 3 3 Scoateți izolatorul din plastic al bateriei din compartimentul bateriei și asigurați vă că în telecomandă există o baterie Consultați Montarea și înlocuirea bateriei dacă aveți nevoie de o baterie nouă 3 4 Aceasta pornește automat când alimentarea e...

Страница 110: ...entru a alege ce doriți să introduceți și apăsați OK pentru a confirma Apăsați MENU pe ramă sau pe telecomandă pentru a deschide meniul principal Apăsați MENU pe ramă sau pe telecomandă din nou pentru a selecta Storage Device și apăsați OK pentru a confirma Observații 1 Asigurați vă că există fișiere foto de muzică și video acceptate pe card sau dispozitivul USB 2 Dacă există fișiere foto și de mu...

Страница 111: ...dal anterioară următoare Apăsați Setup Puteți seta diferite setări în meniul Photo Setup Apăsați OK pentru a deschide submeniurile Apăsați de pe telecomandă pentru a seta valoarea și apăsați OK pentru a confirma 4 3 Modul video Alegeți Video și apăsați OK pentru a intra Apăsați UP și DOWN pe telecomandă pentru a selecta fișierul video din lista de redare apoi apăsați OK pentru redare Apăsați pentr...

Страница 112: ...volumul În modul de redare a muzicii apăsați OK pentru pauză și redare Puteți reda fișierul de muzică anterior sau următor apăsând sau pe ramă Puteți derula rapid înainte înapoi muzica apăsând sau pe telecomandă Apăsați Setup Puteți alege diferite setări în Music Setup apăsați OK pentru a deschide submeniurile Apăsați de pe telecomandă pentru a seta valoarea și apăsați OK pentru a confirma Calenda...

Страница 113: ...ți Setup din meniul principal apăsați OK pentru a deschide interfața de configurare și apăsați UP și DOWN pentru a evidenția elementul principal și apăsați OK pentru a deschide submeniurile Apăsați pentru a seta valoarea și apăsați OK pentru a confirma Observații După ce efectuați o setare pentru un articol și accesați articolul următor modul data va fi salvată automat Observații În modul pauză pe...

Страница 114: ... imagine JPEG Formate audio MP3 WMA Formate video MPEG1 MPEG2 MPEG4 AVI M JPEG și H 264 Carduri de memorie SD MMC SDHC CARD USB Gazdă USB și MINI USB Parametri ecran dimensiune ecran 12 1 inchi 30 7 cm TFT rezoluție 1024 768 Pixeli contrast 300 1 raport de aspect 4 3 Luminozitate 250 cd m2 timp de răspuns 20 ms unghi de vizualizare 60 stânga dreapta vertical 40 orizontal temperatură de funcționare...

Страница 115: ...iunea OBSERVAȚII Nu deconectați niciodată cablul USB în timpul operațiunilor Aceasta poate deteriora rama foto digitală Apăsați pictograma Safely Remove Hardware Eliminare în siguranță echipament de pe computer pentru a deconecta de la PC Ghid de depanare 11 Dacă întâmpinați probleme cu playerul consultați acest ghid și manualul Dacă aveți nevoie de asistență suplimentară contactați asistența tehn...

Страница 116: ...BRAUN DigiFrame1220 Manual 140x210mm Vector indd 124 16 03 2017 13 16 52 ...

Отзывы: