2
2
3
D
3
1
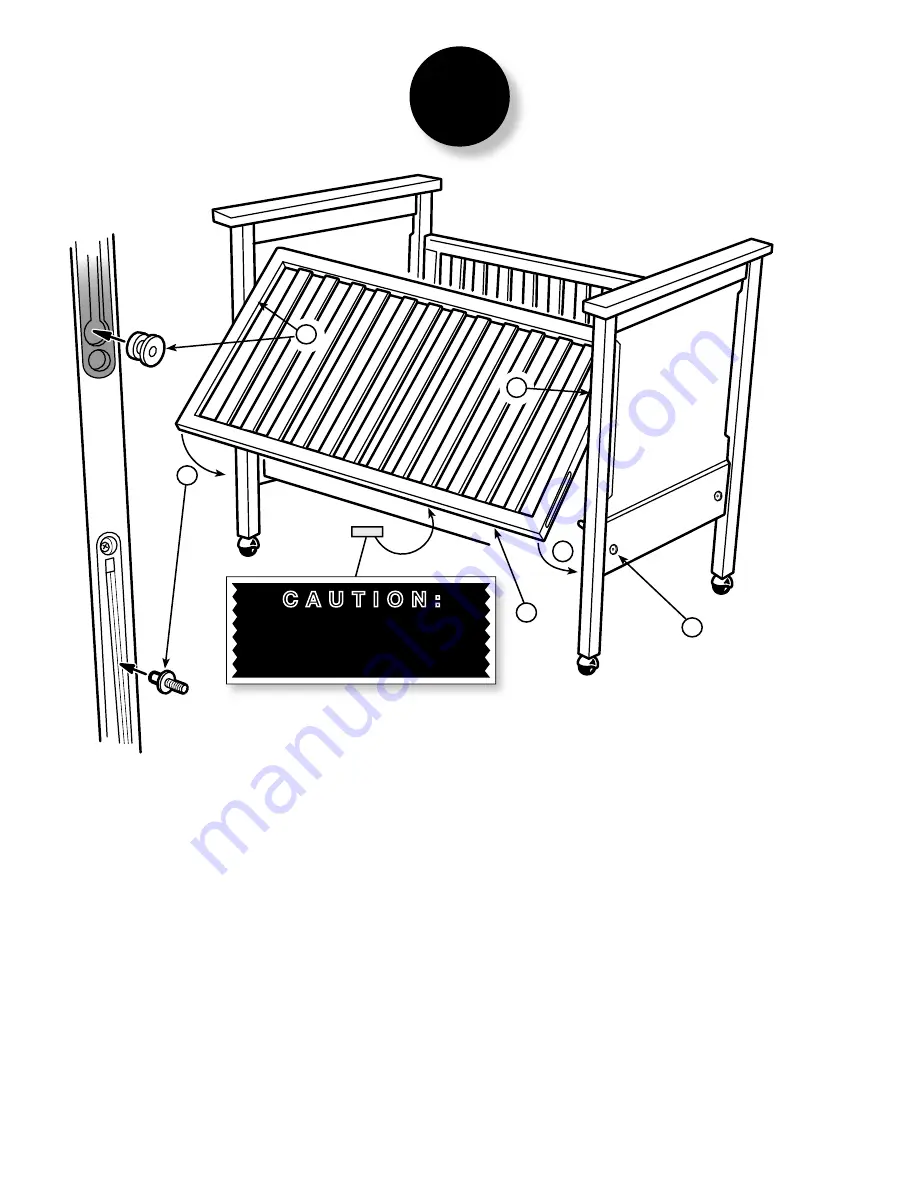
This sticker should not be removed.
If the gate is installed correctly, this
sticker should not be visible from
outside the crib.
C A U T I O N :
6
Install the Front Gate (D) as shown.
Step 1:
Using the Hex Tool, loosen the screw shown as (1) and separate the Head Board from the Stabilizer Bar about 1/4”
(only on one side).
Step 2:
Place the Front Gate (D) at an angle as shown (making sure the sticker is on the underside of the gate as indicated).
On one side at a time, insert the Plastic Bushing (M) into the black plastic channel on the side of the Front Gate (D). Repeat
on the other side.
Step 3:
Swing the bottom of the gate down and fit the Metal Guide pins (N) into the Plastic Slots on the side of the Front Gate
(D).
Step 4:
Using the Hex Tool, tighten the screw (1) again.
Installez la barrière avant (D) comme montré.
Etape 1:
En utilisant la clef allen, désserrez la vis montrée en (1) et séparez la partie du chevet du lit des barres
de stablisateur, environ 1cm. (seulement d’un côté).
Etape 2:
Placez la barrière avant (D) dans un angle comme montré (en s’assurant que l’autocollant se trouve dessous
la barrière comme indiqué). Inserrez d’un côté à la fois, la douille en plastique (M) dans le canal en plastique noir du côté de
la barrière avant (D).Répétez de l’autre côté.
Etape 3:
Balancez le fond de la barrière avant vers le bas et adaptez les goupilles de guide en métal dans les fentes
en plastique du côté de la barrière avant (D).
Etape 4:
En utilisant la clef allen serrez encore la vis.


