background image

EN

3/USING YOUR APPLIANCE

Affichage

Press the

 key until you reach the

chosen programme (i.e A8).

A8

Turn the function selector to adjust the weight (except for A8).

Press the

 to start the pre heating. A 

is reached.

Insert the food inside the cavity an press on

Affichage

Press the

Turn the function selector to choose 150g. 

Press the

 to start cooking.

Please kindly refers to the next page for menu chart. 

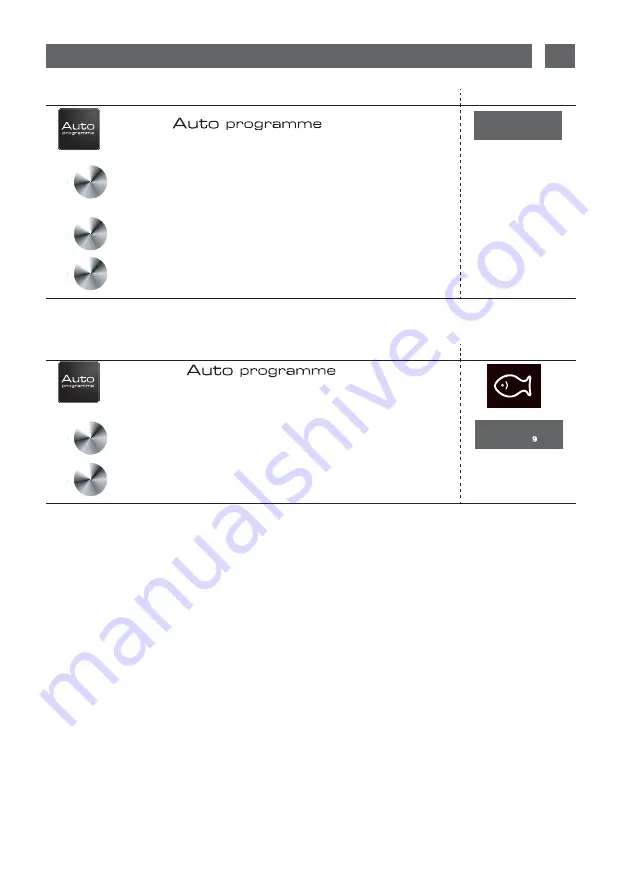
Example:

  If you want to use auto menu to cook 150g of fish. 

choose “A3”. The fish indicator lights up.

key three times to

150

r.

double beep will sound to confirm when the right temperature 

Turn and press knob

Turn and press 

knob to start the cooking.The cooking time starts to deduct.

Turn and press knob

46

Содержание CE3282

Страница 1: ...FR MANUEL D UTILISATION EN INSTRUCTION MANUAL Four à micro ondes Microwave oven CE3282 ...

Страница 2: ...tendu dans un souci permanent de satisfaire le mieux possible vos exigences vis à vis de nos produits notre service consommateurs est à votre disposition et à votre écoute pour répondre à toutes vos questions ou suggestions coordonnées à la fin de ce livret Et connectez vous aussi sur notre site www brandt com où vous trouverez tous nos produits ainsi que des informations utiles et complémentaires...

Страница 3: ... appareil 9 3 UTILISATION DE VOTRE APPAREIL Instructions de fonctionnement 12 Tableau des menus pour les programmes automatiques 19 Interventions EN INSTRUCTION MANUAL SOMMAIRE 10 8 Descriptif du bandeau de commande 6 SERVICE APRES VENTE ET RELATIONS CONSOMMATEURS 3 27 Relations consommateurs 27 7 RECOMMANDATIONS POUR MESURE DE LA PERFORMANCE 29 28 5 EN CAS D ANOMALIES DE FONCTIONNEMENT 26 4 ENTRE...

Страница 4: ...contenu des biberons et des pots d ali ments pour bébés doit être remué ou agité et la température doit être vérifiée avant consommation afin d éviter les brûlures Ne chauffez jamais un biberon avec sa tétine risque d explosion Ne laissez pas les enfants utiliser le four sans surveillance sauf si des instructions appro priées ont été données afin que l enfant puisse utiliser le four de façon sûre ...

Страница 5: ...ppareil Ce four est spé cifiquement conçu pour réchauffer Il n est pas destiné à un usage industriel ou en laboratoire Si le cordon d alimentation est endommagé il doit être remplacé par le fabricant son représentant ou toute autre personne quali fiée afin d éviter tous dangers Ne rangez pas et n utilisez pas cet appareil à l extérieur N utilisez pas ce four près d une source d eau sur un sol humi...

Страница 6: ... les micro ondes provoquent à l intérieur de l aliment un simple phénomène thermique et qu elles ne sont pas nocives pour la santé Les matériaux d emballage de cet appareil sont recyclables Participez à leur recyclage et contribuez ainsi à la protection de l environnement en les dépo sant dans les conteneurs muni cipaux prévus à cet effet Votre appareil contient également de nom breux matériaux re...

Страница 7: ...ble d alimentation normalisé à 3 conducteurs de 1 5 mm2 1 ph 1N terre qui doivent être raccordés sur le réseau 220 240 V monophasé par l intermédiaire d une prise de courant 1 ph 1N terre normalisée CEI 60083 ou conformément aux règles d instal lation Le fil de protection vert jaune est relié à la borne de l appareil et doit être relié à la terre de l installation Dans le cas d un branchement avec...

Страница 8: ...siettes et verres en papier A n utiliser que pour une cuisson un réchauffement très court Ne vous éloignez pas du four pendant la cuisson Serviettes en papier Utilisez les pour couvrir vos aliments lors du réchauffage et pour absorber les graisses Utilisez les sous surveillance pour une cuisson très courte uniquement Papier sulfurisé Utilisez le en couverture pour éviter les éclaboussures ou en pa...

Страница 9: ...voquer un incendie dans le four Mousse plastique La mousse plastique peut fondre ou contaminer le liquide à l intérieur lorsqu elle subit de fortes températures Bois Le bois sèche s il est placé dans un four à micro ondes et peut se fendre ou se craqueler 2 INSTALLATION DE VOTRE APPAREIL Cartons alimentaires avec poignée métallique DESCRIPTION DE VOTRE APPAREIL Noms des pièces et accessoires de vo...

Страница 10: ...t de sélectionner la fonction machine à pain et les programmes associés permet de choisir la puissance micro ondes ou gril appropriée F La touche chaleur tournante permet de sélectionner la fonction chaleur H Le sélecteur TURN PRESS permet de choisir le temps le poids et de I La touche STOP Annulation permet d interrompre ou d effacer un D La touche décongélation permet de programmer la décongélat...

Страница 11: ...dement électrique Votre installation doit être équipée d une protection thermique de 16 Ampères Utilisez impérativement une prise de courant comportant une borne de mise à la terre et raccordée conformément aux normes de sécurité en vigueur Prévoyez dans votre installation électrique un dispositif accessible par l utilisateur qui doit être en mesure de séparer l appareil du secteur et dont l ouver...

Страница 12: ...rise entre 0 et 23 24 heures chiffres des minutes les clignotent 12 00 Tournez le sélecteur pour régler les minutes les minutes réglées devront être comprises entre 0 et 59 12 35 Micro gril Micro gril 900 affichera 900 pour achever le l heure s allume réglage de l heure clignote et sélecteur Turn Press Lorsque le four à micro ondes est sous tension le four affichera 0 00 et la sonnerie Appuyez sim...

Страница 13: ...ce que G 1 G 2 ou G 3 s affiche G 1 Tournez le sélecteur pour régler la durée de cuisson La durée de cuisson maximum est de 95 minutes Exemple 8 minutes 30 secondes 8 30 Appuyez surle pour lancer la cuisson Remarque A mi cuisson le four émet deux bips pour vous indiquer qu il faut retourner l aliment si besoin 3 UTILISATION DE VOTRE APPAREIL Micro gril sélecteur plusieurs fois sélecteur Turn Press...

Страница 14: ...urrait endommager l appareil En cas d utilisation du four en position de cuisson combinée par chaleur tournante micro ondes n utilisez pas de récipient en métal 3 UTILISATION DE VOTRE APPAREIL Chaleur tournante rature tempé La température peut être réglée entre 140 et 230 degrés chauffage Lorsque la atteinte la sonnerie rappeler de placer de préchauffage sélecteur Turn Press sur le sélecteur Turn ...

Страница 15: ...tes Exemple 45 minutes 45 00 Appuyez pour lancer la cuisson 3 UTILISATION DE VOTRE APPAREIL Chaleur tournante 200 La température peut être réglée entre 140 et 230 degrés choix L écran micro ondes sans préchauffage Programmation de la fonction chaleur tournante chaleur tournante Appuyez sur le sélecteur Turn Press pour confirmer votre sur le sélecteur Turn Press Attention en cas d utilisation du fo...

Страница 16: ... à 700 W pen dant 3 minutes et 20 secondes Affichage appuyez sur la touche 2 s affiche Continuez à appuyer sur la touche jusqu à Tournez le sélecteur pour sélectionner 3 minutes et 20 secondes 3 20 s affiche 3 20 Appuyez sur la touche pour sauvegarder le programme de cuisson 1 2 ou 3 deux fois l écran affiche 2 sauvegarder le réglage en même temps le réglage Ou appuyez pour lancer Micro gril Micro...

Страница 17: ...li ments Simultanément les témoins micro ondes et décongélation s allumeront Le poids des aliments 400 Appuyez pour lancer la décongélation Programmation du Menu Auto Affichage Appuyezsurla touche poursélec A1 Tournez le sélecteur pour choisir le poids par défaut comme indiqué dans le tableau des menus Appuyez pour lancer la cuisson A la fin de la cuisson la sonnerie retentira cinq fois Recommanda...

Страница 18: ...fichage Appuyez sur la touche pour sélectionner A3 Le témoin poisson s al lume Tourner le sélecteur pour sélectionner 150 g 150 Appuyez pour lancer la cuisson Veuillez vous reporter en page suivante pour consulter le tableau des menus 3 UTILISATION DE VOTRE APPAREIL faire apparaître le programme choisi par exemple A8 chauffage Lorsque sur le sélecteur Turn Press sur le sélecteur Turn Press la temp...

Страница 19: ... d eau de jus de citron ou de vin blanc sur le plateau tournant Couvrez avec un couvercle adapté ou un film alimentaire et posez 150g 2 min 30 250g 4 min 300g 4 min 35 400 g 5 min 48 600 g 7 min 48 A 4 VOLAILLES e poulet entier ou morceaux Piquez la peau pour éviter les projections 500 g 25 min En fin de cuisson laissez reposer la volaille 5 min dans le four 750 g 30 min 1000 g 35 min 1200 g 45 mi...

Страница 20: ... la fin de la cuisson la sonnerie retentira cinq fois Une fois le programme de cuisson sélectionné si vous n appuyez pas sur la touche dans les cinq minutes la sélection sera annulée SECU Si vous ouvrez la porte pendant la cuisson il vous faudra la refermer et appuyer sur la touche pour poursuivre la cuisson 20 Fonction avec préchauffage Mettre la tarte moule posé sur la grille position basse aprè...

Страница 21: ...celui ci corresponde avec la flèche placée sur la sole du four dessin n 1 2 Plaquez le bol de façon à ce qu il soit bien en contact avec la sole du four dessin n 2 3 Tournez le bol dans le sens inverse des aiguilles d une montre afin de bien le fixer dans les ergots dessin n 3 Assurez vous que le bol ne bouge plus et est bien à plat Votre appareil est maintenant prêt pour la réalisation du pain 1 ...

Страница 22: ...n blanc standard de 3h35 min à 3h45 min b 2 Pain blanc rapide b 3 Pain complet de 3h55 à 4h05 b 4 Brioche de 3h45 à 3h55 b 5 Pain français de 3h55 à 4h05 b 6 Pâte levée 1h40 NB en b 6 pas de cuisson pas de possibilité de régler la coloration et pas de maintien au chaud en fin de programme RQFWLRQQHU 22 de 1h25 à 1h35 FR sélecteur Turn Press L appareil se met en route sélecteur Turn Press pourchois...

Страница 23: ... ª 6L XQH FRXSXUH G pOHFWULFLWp D OLHX SHQGDQW OD UpDOLVDWLRQ GX 23 PO G HDX 3RXU XQ SDLQ GH J PHWWH GDQV O RUGUH GDQV OD FXYH GH VXFUH HQ SRXGUH SHWLWH FXLOOqUH GH SRXGUH GH ODLW J GH IDULQH SHWLWH 80 GH VXFUH HQ SRXGUH SHWLWHV FXLOOqUHV GH SRXGUH GH ODLW J GH IDULQH JUDQGH FXLOOqUH G KXLOH GH WRXUQHVRO SHWLWH FXLOOqUH ô GH VHO SHWLWH FXLOOqUH JUDQGHV FXLOOqUHV G KXLOH GH WRXUQHVRO SHWLWH FXLOOqU...

Страница 24: ...WLWHV FXLOOqUHV G KXLOH G ROLYH SHWLWHV FXLOOqUHV ô GH VHO J GH IDULQH SHWLWHV FXLOOqUHV GH OHYXUH ERXODQJqUH 24 3RXU XQ SDLQ GH J PHWWH GDQV O RUGUH GDQV OD FXYH PO G HDX WLqGH JUDQGHV FXLOOqUHV G KXLOH GHWRXUQHVRO SHWLWH FXLOOqUH WRXUQHVRO SHWLWHV FXLOOqUHV GH VHO SHWLWH FXLOOqUH SHWLWHV FXLOOqUHV GH VHO GH VXFUH HQ SRXGUH J GH IDULQH FRPSOqWH SHWLWH 3RXU XQ SDLQ GH J PHWWH GDQV O RUGUH GDQV OD ...

Страница 25: ... ou de four encrassé faites bouillir de l eau additionnée de jus de citron ou de vinaigre dans une tasse pendant 2 minutes et nettoyez les parois avec un peu de liquide vaisselle Le plateau peut être retiré pour faciliter le nettoyage Pour ce faire prenez le par les zones d accès prévues à cet effet Si vous enlevez l entraîneur évitez de faire pénétrer de l eau dans le trou de l axe moteur N oubli...

Страница 26: ...r si les roulettes sont bien positionnées Vous constatez de la buée sur la vitre Essuyez l eau de condensation à l aide d un chiffon L aliment n est pas chauffé en programme micro ondes Vérifiez que les ustensiles conviennent aux fours à micro ondes et que le niveau de puissance soit bien adapté L appareil produit des étincelles Bien nettoyer l appareil retirez graisses particules de cuisson Eloig...

Страница 27: ...ommes à l écoute de toutes vos remarques suggestions propositions auxquelles nous vous répondrons personnelle ment 0892 02 88 01 0 337 TTC min à partir d un poste fixe Tarif en vigueur au 1er avril 2004 PIÈCES D ORIGINE Lors d une intervention d entretien demandez l utilisation exclusive de pièces détachées certifiées d origine 7 rue Henri Becquerel 92500 RUEIL MALMAISON 230 240V 50Hz Max 2500W 20...

Страница 28: ...50 g 13 15 min plat Pyrex réf 220 Sur le plateau tournant Gâteau de Savoie 475g 7 min 700W plat pyrex rond réf 828 12 3 2 sur le plateau tournant Pain de viande 900g 14 min 700 W plat cake Pyrex réf 838 12 3 3 sur plateau tournant Couvrir d un film alimentaire Décongélation de la viande 500 g 10 min50 speed defrost sur plateau tournant 5 minrepos 13 3 Décongélationdes 250 g 6 7 min 200 W assiette ...

Страница 29: ......

Страница 30: ...EN INSTRUCTION MANUAL Microwave oven CE3282 ...

Страница 31: ...d to our products as best as possible our after sales service department is at your disposal and ready to listen in order to respond to all of your questions and suggestions contact information at the end of this booklet You can also log on to our web site at www brandt com where you will find all our products as well as additional useful information BRANDT As part of our commitment to constantly ...

Страница 32: ...f your appliance 3 USING YOUR APPLIANCE Operation instruction Menu chart for automatic programs 5 TROUBLESHOOTING 6 AFTER SALES SERVICE AND CUSTOMER RELATIONS Service calls Customer relations The control panel 55 55 31 32 34 Protecting the environment 34 35 35 Utensils 36 37 38 40 47 4 CARING FOR AND CLEANING YOUR APPLIANCE 53 54 7 OPERATING PROFICIENCY TESTING 56 ...

Страница 33: ...al staples or fasteners for frozen foods is not recommended 1 NOTICES TO THE USER The contents of baby bottles and baby food jars should be shaken or stirred and their temperature checked before consumption to avoid burns Never heat a baby bottle with the nipple on risk of explosion Do not allow children to use the micro wave oven without supervision unless appropriate instructions have been given...

Страница 34: ...e If the supply cord is damaged it must be replaced by the manufacturer its service agent or similarly qualified persons in order to avoid a hazard Do not store or use this appliance outdoors Do not use this oven near water in a wet basement or near a swimming pool The temperature of accessible surfaces may be high when the appliance is operating Keep cord away from heated surface and do not cover...

Страница 35: ...NT It is valuable to note that the micro waves trigger within the food cause a simple thermalphenomenon and that they are not harmful to one s health This appliance s packing mate rials are recyclable Recycle them and play a role in pro tecting the environment by disposing of them in municipal containers provided for this purpose Your appliance also contains various recy clable materials Thus it i...

Страница 36: ...ed with a power cable standardized with three 1 5 mm2 conductors 1 ph 1 N ground that must be connected to a monophase 220 240 V network via a CEI 60083 standardised recep tacle 1 ph 1 N ground lead or in accor dance with installation rules The safety wire green yellow is connected to the appliance s terminal and must be connected to the ground lead of the electrical set up In the case of connecti...

Страница 37: ...lose with metal tie Make slits to allow steam to escape Paper plates and cups Use for short term cooking warming only Do not leave oven unattended while cooking Paper towels Use to cover food for reheating and absorbing fat Use with supervision for a short term cooking only Parchment paper Use as a cover to prevent splattering or a wrap for steaming Plastic Microwave safe only Follow the manufactu...

Страница 38: ...c foam Plastic foam may melt or contaminate the liquid inside when exposed to high temperature Wood Wood will dry out when used in the microwave oven and may split or crack 2 INSTALLING YOUR APPLIANCE DESCRIPTION OF YOUR APPLIANCE Names of Oven Parts and Accessories Remove the oven and all materials from the carton and oven cavity Your oven comes with the following accessories A Control panel B Tu...

Страница 39: ...weight C Bread Maker key to select bread maker function and associated programs G Microwave grill key to set the microwaves or grill s power level F Convection key to select convection function H TURN PRESS knob To choose the time or the weight and to I STOP Annulation key To interrupt or to erase a current program D Defrost key to defrost according to the weight of food to reach quickly 3 preset ...

Страница 40: ...in A minimum clearance of 3 0 inches 7 5cm is required between the oven and any adjacent walls One side must be open 1 Leave a minimum clearance of 12 inches 30cm above the oven 2 Do not remove the legs from the bottom of the oven 3 Blocking the intake and or outlet openings can damage the oven 7 5 cm 7 5 cm 30 cm OPEN 2 Electrical connection Your installation must be protected by a 16 Amp thermal...

Страница 41: ...IANCE Clock Setting Display flash Turn the function selector to adjust the hour figures the input time should be within 0 23 Press the minute figures will flash 12 00 Turn the function selector to adjust the minute figures the input time should be within 0 59 Press the ting will flash and the time will light 12 35 Micro gril Micro gril Micro gril Press the Micro gril and Chaleur keys simultaneousl...

Страница 42: ...the key several times until G 1 G 2 or G 3 displays G 1 Turn the function selector to adjust the cooking time The maximum cooking time is 95 minutes Example 8 minutes 30 seconds 8 30 Press the to start cooking Note Halfway through the grilling time the oven will beep twice This indicates that the food should be turned over 3 USING YOUR APPLIANCE Micro gril Turn and press knob Turn and press knob G...

Страница 43: ...en from 140 degrees to 230 degrees Programming the FAN HEAT function With pre heating function will display C 1 Turn and press knob Press the to start preheating preheated temperature is displayed and flash Turn and press knob heating temperature arrives the buzzer will sound twice When the pre to remind you to put the food into the oven And the Press the to start cooking Turn and press knob Funct...

Страница 44: ...NG YOUR APPLIANCE 200 Press the Chaleur tournante key once twice or three times the oven will display C 1 C 2 or C 3 without pre heating function Convection Convection microwave cooking Press the to start cooking Turn and press knob Turn and press knob Press the to confirm The temperature can be chosen from 140 degrees to 230 degrees he oven in the combined not use metal cookware circulating heat ...

Страница 45: ...power for 3 minutes and 20 seconds Display In waiting states press the key twice 2 Press the Keep pressing the plays Turn the function selector to select 3 minutes and 20 seconds 3 20 displays 3 20 3 USING YOUR APPLIANCE Micro gril Micro gril Micro gril LED displays 2 900 900 700 key once 900 displays key until 700 dis Micro gril Turn and press knob Press the key to save the setting Or you can pre...

Страница 46: ...ve times Recommendation display light The weight should be 100 1500g the menu from A1 A2 A9 The Auto programmes A7 A8 and A9 need a preheat phase r r r In waiting state press the to start added press will increase 30 seconds cooking time up to 95 minutes In microwave grill and convection cooking states each press of the can increase 30 seconds During auto menu and weight defrost cooking time canno...

Страница 47: ...ss on Affichage Press the Turn the function selector to choose 150g Press the to start cooking Please kindly refers to the next page for menu chart Example If you want to use auto menu to cook 150g of fish choose A3 The fish indicator lights up key three times to 150 r double beep will sound to confirm when the right temperature Turn and press knob Turn and press knob to start the cooking The cook...

Страница 48: ...ve grill To warm and brown deep frozen prepared dishes use a dish adapted to microwaves and high temperatures Do not cover 300g 450g 600g 750g 1000g 25 30 35 45 A 6 VEGETABLES microwave To cook fresh vegetables add in the adequate dish 2 tablespoonful of water for 200 grams dl beyond 200g 300g 400g 500g 600g 10 A 7 PIZZA Convection To warm cook or gild deep frozen pizzas Program with a preheating ...

Страница 49: ...KH RQH RQ WKH VROH GUDZLQJ 3XVK WKH ERZO GRZQZDUGV VR WKDW WKH QRWFKHV RQ LWV EDVH IDVWHQ RQWR WKH DWWDFKPHQW FOLSV LQVLGH WKH PLFURZDYH GUDZLQJ 7XUQ WKH ERZO LQ DQ DQWLFORFNZLVH GLUHFWLRQ XQWLO WKH DWWDFKPHQW FOLS UHDFKHV WKH VWRS RI WKH QRWFK RQ WKH EDVH GUDZLQJ 7KH ERZO LV WKHQ FRUUHFWO ORFNHG LQWR SRVLWLRQ 7KH ERZO KDV WR EH FRUUHFWO IL HG DQG VWD IODW RQ WKH ERWWRP RI WKH RYHQ RX FDQ QRZ VWDU...

Страница 50: ...f bread Time of cooking according to the weight b 1 Basic bread from 3h35 min to 3h45 min b 2 Turbo bread from 1h25 to 1h35 b 3 Whole wheat bread from 3h55 to 4h05 b 4 Sweet bread from 3h45 to 3h55 b 5 French bread from 3h55 to 4h05 b 6 Dough bread 1h40 b For menu b 6 no keep warm function 49 want selector to oven press the Turn when it is right time at 9a m g turn the selector Ex If it is 8p m an...

Страница 51: ...1 5 tsp salt 1 0 tsp sugar 1 5 tbsp powder milk 480g flour 1 5 tsp yeast 350 ml water 2 0 tbsp sunflower oil 1 5 tsp salt 1 0 tsp sugar 2 0 tbsp powder milk 615g flour 1 5 tsp yeast 395 ml water 2 5 tbsp sunflower oil 2 0 tsp salt 1 5 tsp sugar 2 5 tbsp powder milk 740g flour 2 0 tsp yeast 300 ml lukewarm water 1 0 tbsp sunflower oil 1 0 tsp salt 1 5 tsp sugar 1 5 tbsp powder milk 450g flour 4 0 t...

Страница 52: ...ive oil 2 0 tsp salt 640 flour 1 5 tsp yeast 390 ml water 2 0 tbsp olive oil 2 5 tsp salt 790 flour 2 0 tsp yeast 600 flour 3 5 tsp yeast B Ingredients and seasoning for 1000g whole wheat bread C Ingredients and seasoning for 1200g whole wheat bread 450 ml lukewarm water 2 0 tsp sunflower oil 2 5 tsp salt 2 0 tsp sugar 3 USING YOUR APPLIANCE 51 380 ml lukewarm water 2 0 tsp sunflower oil 2 0 tsp s...

Страница 53: ...e a long beep denoting that the lock is released Notes Buzzer will sound five times when cooking finished must be pressed to continue cooking SECU 3 USING YOUR APPLIANCE children lock state the oven will display During cooking if the door is opened and after closing the door the Turn and press knob Once the cooking program has been set if the is not pressed in five Turn and press knob minutes the ...

Страница 54: ...may damage the appliance In the event of odour or caked on dirt boil water with lemon juice and vinegar in a cup for two minutes and clean the insides with a bit of dishwashing liquid The table can be removed to facilitate clea ning To do this handle it by the access zones provided for this purpose If you remove the turning gear do not let water penetrate into the the motor axle hole Don t forget ...

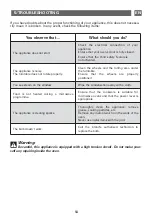
Страница 55: ...rntable Ensure that the wheels are properly positioned You see steam on the window Wipe the condensation away with a cloth Food is not heated during a microwave programme Ensure that the cookware is suitable for microwave ovens and that the power level is appropriate The appliance is creating sparks Thoroughly clean the appliance remove grease cooking particles etc Remove any metal items from the ...

Страница 56: ...ts after sales specialists To communicate we will personally res pond to all your com ments suggestions and proposals 0892 02 88 01 0 337 TTC min à partir d un poste fixe Rate valid as of 1 April 2004 ORIGINAL PARTS During maintenance work request the exclusive use of certified original replace ment parts 7 rue Henri Becquerel 92500 RUEIL MALMAISON 230 240V 50Hz Max 2500W 20A o N FAGORBRANDT SAS T...

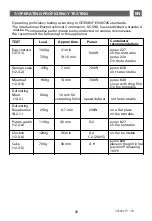
Страница 57: ... the turntable Meatloaf 900g 14 min 700W pyrex 838 12 3 3 cover with cling film On the turntable Defrosting Meat 500g 10 min 50 13 3 standing 5 min speed defrost on the turntable Defrosting Raspberries 250g 6 7 min 200W on a flat plate B 2 1 on the tu rntable Potato gratin 1100g 35 min G2 pyrex 827 12 3 4 on the turntable Chicken 1200g 45 min A 4 on the turntable 12 3 6 C 2 200 C Cake 700 g 30 min...

Отзывы: