Installation
10 MimioDisplay 3 Installation and User Guide
Step 4
–
lift Interactive Touchscreen and rest blades onto the base plate so that the device is centrally aligned.
Warning: the device is very heavy and requires multiple people to lift the device, it is recommended
that these people have been instructed in lifting heavy items with a technique that is safe and healthy.
Step 5
–
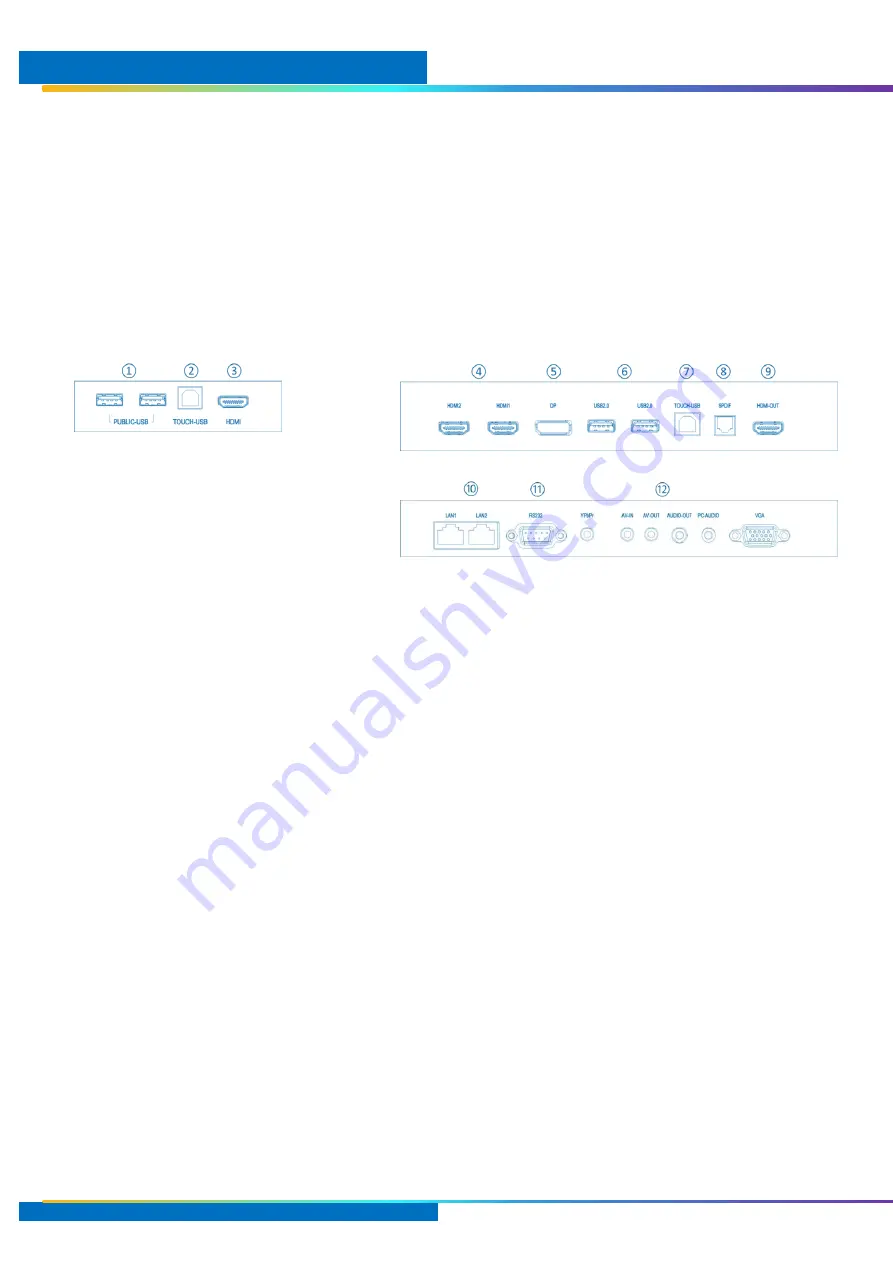
connect power and AV/USB cabling to the respective video sources per below. The front bezel is for
end user, the other ports are to be connected at installation.
Step 6
–
if you chose, stick the Boxlight logo to the device below the display.
Step 7
–
power up the Touchscreen and configure the device following the Settings guide on page 25.
Ports Input / Output
①
USB 2.0 (Hub)
Passes through to the source, ideal for keyboards etc.
②
Touch USB-B
Touch for
③
. Connectivity to devices plugged into
①
③
HDMI 2.0
Can be renamed or hidden in the user interface. Set source priority for
automatic switching when using HDMI-CEC. Live source indicated. UHD
60Hz.
④
HDMI 2.0
⑤
Display Port 1.2
⑥
USB 2.0 (Android)
For flash drives. Prioritized over SSD for screenshots etc
⑦
Touch USB-B
Touch for
④⑤⑫
. Connectivity to devices plugged into
①
⑧
S/PDIF Optical
Digital audio output of the current source.
⑨
HDMI 2.0 Out
HD or UHD output of the current source.
⑩
RJ-45
For LAN 10/100Mbps and room control commands
⑪
RS232
For room control commands.
⑫
Legacy
Not recommended but support for VGA to Composite
Guest Access on Front Bezel
Left Side Back Facia
Left Bottom Back Facia


