

SEVENTH STAGE
TENTH STAGE
Istruzioni di montaggio
ELEVENTH STAGE
TWELFTH STAGE
THIRTEENTH STAGE
FOURTEENTH STAGE
7.2
7.1
8.1
8.2
6mm
EIGHTH STAGE
NINTH STAGE
Incoming profile
for door section
Incoming profile
for door section
x1
x2
x2
x1
x2
x2
x1
x2
x2
x1
x2
x2
n.1
n.2
n.2
n.1
n.2
n.2
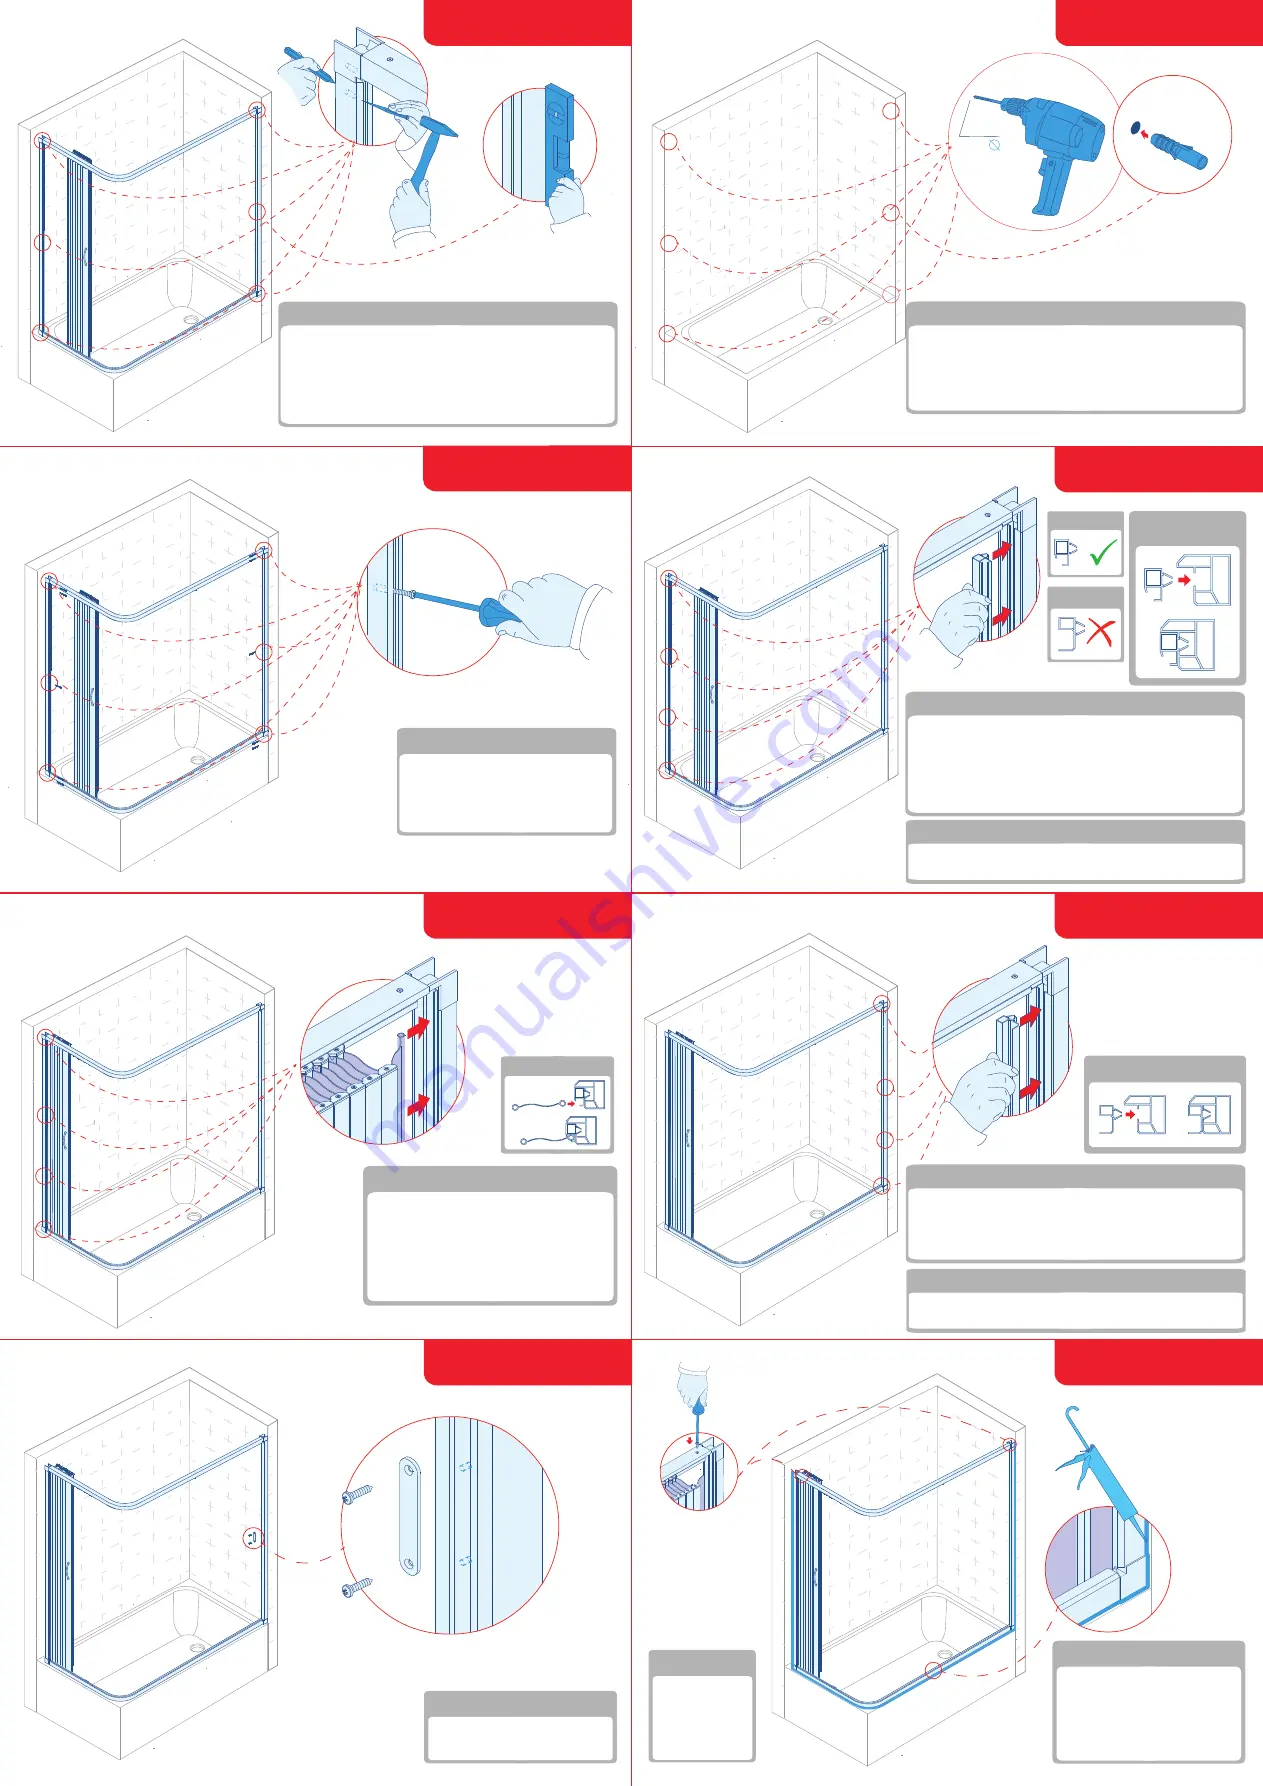
Assembly instructions
Take the assembled enclosure and put it into the enclosure
compartment. Mark on the walls, with an awl, the ten holes on
the profiles (Fig. 7.1).
IMPORTANT: The profile must be perfectly plumb (Fig. 7.2).
NOTICE: Ensure that in the wall there are no power or telephone
lines, water pipes or gas.
Move the enclosure away from the wall and with a drill pierce
the ten holes where the marks were drawn up (Fig. 8.1).
Insert anchors into the holes (Fig. 8.2).
NOTICE: Ensure that in the wall there are no power or
telephone lines, water pipes or gas.
10.1
10.2
Assembly instructions
Take the assembled shower enclosure
and add it in the shower compartment.
Secure the enclosure to the walls with
screws, being careful not to use
excessive force.
Assembly instructions.
From inside the shower compartment, insert, interlocking,
the attachment door profile (Fig. 10.2) in the left side profile
(Fig. 10.1). Exercise, top to bottom, the pressure needed to
hear the insert click. Proceed, then, for the entire length of the
side profile. NOTICE: Careful not to mistake the attachment
door profile (Fig. 10.2) with the incoming door profile (Fig. 10.3)
Reversible enclosure
Reversible enclosure
Assembly instructions
From inside the shower compartment, insert, interlocking,
the incoming profile for door in the right side profile.
Exercise, top to bottom, the pressure needed to hear the insert
click. Proceed, then, for the entire length of the side profile.
Istruzioni di montaggio
From inside the shower compartment insert,
interlocking, the last semitransparent
component of the folding doors in the
attachment door profile, previously installed.
Exercise, top to bottom, the pressure needed
to hear the insert click. Proceed, then, for the
entire length of the side profile.
Assembly instructions
Screw the magnetic plate to
incoming profile for door.
Assembly instructions.
Assembly instructions
Apply silicone on the outside of
the enclosure and let it dry for at
least 24 hours.
Lubricate the rail profiles using
liquid soap or liquid cream,
to facilitate doors sliding.
Instructions
To prevent fraying,
if necessary, secure
the rail profiles with
the screws,
as shown.
10.3
Profiles Section
If you wish the opening to the left, just enter the
attachment door profile in the right side profile.
Profiles Section
Profiles Section
If you wish the opening to the left, just enter the incoming
profile for door in the left side profile.