background image

2

Connect the Equipment

Getting Ready

MAIN OUTPUT jacks/SUB OUTPUT jacks

Connect these jacks to your guitar amp, headphones (sold separately), or to PA (LINE).

*  Connect your headphones to the MAIN OUTPUT L/PHONES jack.
*  If your system is monaural, use only the R/MONO jack.
*  If you’re using headphones, don’t connect anything to R/MONO.

DC IN jack

Connect the included AC 

adaptor here.

*  Use only the included 

AC adaptor. Using any 

other adaptor may cause 

overheating and malfunction.

INPUT jack

Connect your guitar/bass here.

Turning the Power On/Off

This turns the power on/off.

*  After you’ve made connections correctly, be sure to 

turn 

on the power in the order of the SY-300 first, and then 

the connected system

. Powering-on in the incorrect 

order may cause malfunctions or damage. When turning 

the power off, 

power-off the connected system first, and 

then the SY-300

.

*  This unit is equipped with a protection circuit. A brief 

interval (a few seconds) after turning the unit on is 

required before it will operate normally.

*  Before turning the unit on/off, always be sure to turn 

the volume down. Even with the volume turned down, 

you might hear some sound when switching the unit 

on/off. However, this is normal and does not indicate a 

malfunction.

Auto Off function

The power to this unit will be turned off automatically after 

a predetermined amount of time has passed since it was 

last used for playing music, or its buttons or controls were 

operated (Auto Off function).
If you do not want the power to be turned off automatically, 

disengage the Auto Off function (p. 8).

*  Any settings that you are in the process of editing will be 

lost when the power is turned off. If you have any settings 

that you want to keep, you should save them beforehand.

*  To restore power, turn the power on again.

*  To prevent malfunction and equipment failure, always turn down the volume, and turn off all the units before making any connections.

USB (

O

) port

Use a commercially available USB 2.0 cable to connect this port to your 

computer. It can be used to transfer USB MIDI and USB audio data (p. 10).

THRU/RETURN jacks

Connect an external 

effect processor here.

[LIFT/GND] switch

Normally, you can leave this set 

to the GND position.

If you’ve connected the THRU/

RETURN jacks to an effect processor 

or an amp, a ground loop may occur, 

producing noise. If this occurs, you 

may be able to eliminate the noise 

by moving this switch to the LIFT 

position.

MIDI IN, MIDI OUT/THRU connectors

Connect an external MIDI device here.

&

“Connecting the SY-300 with an External MIDI Device” 

(p. 9)

EXP /CTL 4, 5 jack 

(Connecting to External Pedals)

You can control various parameters by connecting an expression pedal (Roland EV-5: sold separately) or a footswitch (FS-5U, FS-6, FS-7: sold separately) to the EXP/CTL 4, 5 

jack.

 For details on the settings, refer to “Editing: Assigning Favorite Parameters to the Switches and External Pedals” (p. 9).

POLARITY switch

When Connecting an FS-5U

When Connecting Two FS-5Us

When Connecting an FS-7

When Connecting an FS-6

When connecting EV-5

MODE/POLARITY switch

Cable:
1/4” phone type

 ,

1/4” phone type

CTL 4

CTL 5

CTL 4

CTL 5

CTL 4

EXP

Cable:
Stereo 1/4” phone type

 ,

Stereo 1/4” phone type

*  Use only the specified 

expression pedal (Roland 

EV-5: sold separately). 

By connecting any other 

expression pedals, you risk 

causing malfunction and/or 

damage to the unit.

Cable:
Stereo 1/4” phone type

 ,

1/4” phone type x 2

MODE/POLARITY switch

Cable:
Stereo 1/4” phone type

 ,

1/4” phone type x 2

Содержание SY-300

Страница 1: ...ted software You can control the SY 300 edit tones and manage patches using dedicated software You can also download a wide variety of patches from BOSS TONE CENTRAL our dedicated patch download website p 10 Getting Ready 2 Connect the Equipment 2 Basic Operation Guide 3 Switching the Display 3 Playing 4 Playing a Patch 4 Selecting a Patch 4 Editing Basic Operation 5 Select the Effect That You Wan...

Страница 2: ... lost when the power is turned off If you have any settings that you want to keep you should save them beforehand To restore power turn the power on again To prevent malfunction and equipment failure always turn down the volume and turn off all the units before making any connections USB O port Use a commercially available USB 2 0 cable to connect this port to your computer It can be used to trans...

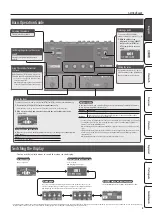
Страница 3: ...ing Favorite Parameters to the Switches and External Pedals p 9 Switching the guitar synthesizer on and off Switches the guitar synthesizer on and off Adjusting the volume This adjusts the volume Using theTuner To enter the tuner screen press the I CTL2 H CTL3 switches simultaneously 1 Press the I CTL2 H CTL3 switches simultaneously From the play screen p 4 you can also enter the tuner screen by p...

Страница 4: ...s of patches preset patches and user patches Preset patches cannot be overwritten About the Play screen The screen that appears after you turn on the power is called the Play screen MASTER BPM PATCH EXTENT Patch number Patch name Display Explanation PATCH EXTENT This lets you restrict the range of patches that can be selected from the Play screen You can use this to prevent unwanted patches from b...

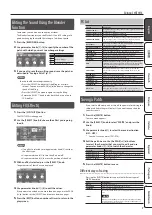
Страница 5: ...ursor and choose an item SELECT knob 2 After you ve chosen an item press the SELECT knob Pressing the SELECT knob makes it function as the ENTER button Edit theValue 1 Change the displayed value with parameter knobs 1 4 Parameter knobs 1 4 If the parameters extend across more than one page use the PAGE K J buttons or the SELECT knob to move between pages 2 Press the EXIT button a number of times Y...

Страница 6: ... function The SY 300 lets you individually specify the range of pitches in which OSC1 3 produce sound As on a keyboard synthesizer you can play different sounds in different pitch ranges or layer different combinations of sounds 1 Choose SYNTH FX 0 OSC1 0 LAYER The edit screen appears 2 Use parameter knobs 1 4 to edit the values Knob Parameter Value Explanation 1 L FADE 1 60 Specifies the area ove...

Страница 7: ...acter to the sound ISOLATOR ISO An effect that cuts the sound of the specified region LIMITER LIM Attenuates loud input levels to prevent distortion LO FI LF An effect that produces a lo fi sound OD DS OD Distorts the sound to create long sustain PAN With the volume level of the left and right sides alternately changing when playing sound in stereo you can get an effect that makes the guitar sound...

Страница 8: ...rightness of the display 1 Choose MENU 0 SYSTEM 0 LCD 2 Adjust the value with the parameter knob 1 Raising the value 1 16 increases the brightness Turning Off the Auto Off Function The SY 300 can turn off its power automatically The power will turn off automatically when 10 hours have passed since you last played or operated the unit The display will show a message approximately 15 minutes before ...

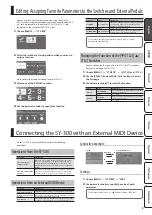
Страница 9: ...atch number decrements by one each time you step on the switch CTL2 Use as CTL2 H CTL3 PATCH UP The patch number increments by one each time you step on the switch CTL3 Use as CTL3 Connecting the SY 300 with an External MIDI Device On the SY 300 you can use MIDI to perform the following operations Operations from the SY 300 Operation Explanation Transmit program change messages When you select a p...

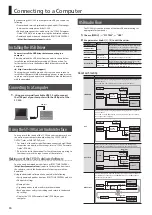
Страница 10: ...e 5 5 Edit patch settings 5 5 Name patches 5 5 Organize patches in order and switch them around 5 5 Back up patches and system settings and return to the backed up settings 5 5 Display the SY 300 Parameter Guide PDF file on your computer USB Audio Flow The SY 300 lets you choose one of the four USB audio routings as appropriate for your needs 1 Choose MENU 0 SYSTEM 0 USB 2 Use parameter knobs 1 4 ...

Страница 11: ...ymbols ALWAYS OBSERVE THE FOLLOWING Repairs and Data Before sending the unit away for repairs be sure to make a backup of the data stored within it or you may prefer to write down the needed information Although we will do our utmost to preserve the data stored in your unit when we carry out repairs in some cases such as when the memory section is physically damaged restoration of the stored conte...

Страница 12: ...OUTPUT 10 dBu Output Impedance MAIN OUTPUT 2 k ohms SUB OUTPUT 2 k ohms LCD Graphic LCD 132 x 64 dots backlit LCD Connectors INPUT jack 1 4 inch phone type THRU jack 1 4 inch phone type RETURN jack 1 4 inch phone type MAIN OUTPUT R MONO jack 1 4 inch phone type MAIN OUTPUT L PHONES jack 1 4 inch phone type SUB OUTPUT R MONO jack 1 4 inch phone type SUB OUTPUT L jack 1 4 inch phone type MIDI IN OUT...

Отзывы: