background image

INSTRUCTIONS

INSTRUCTIONS

VIDEO SETUP

EXIT SETUP

BRIGHTNESS

CONTRAST

HUE

SATURATION

SHARPNESS

EXIT SETUP

BRIGHTNESS

CONTRAST

HUE

SATURATION

SHARPNESS

EXIT SETUP

BRIGHTNESS

CONTRAST

HUE

SATURATION

SHARPNESS

EXIT SETUP

BRIGHTNESS

CONTRAST

HUE

SATURATION

SHARPNESS

EXIT SETUP

BRIGHTNESS

CONTRAST

HUE

SATURATION

SHARPNESS

EXIT SETUP

BRIGHTNESS

CONTRAST

HUE

SATURATION

SHARPNESS

VIDEO SETUP

VIDEO SETUP

VIDEO SETUP

VIDEO SETUP

VIDEO SETUP

VIDEO SETUP

12
10

8
6
4
2
0

12
10

8
6
4
2
0

+ 6

+ 4
+ 2

 0

- 4
- 6

- 2

1. Press     or     button

2. Press     /    /    /    button, then to enter.

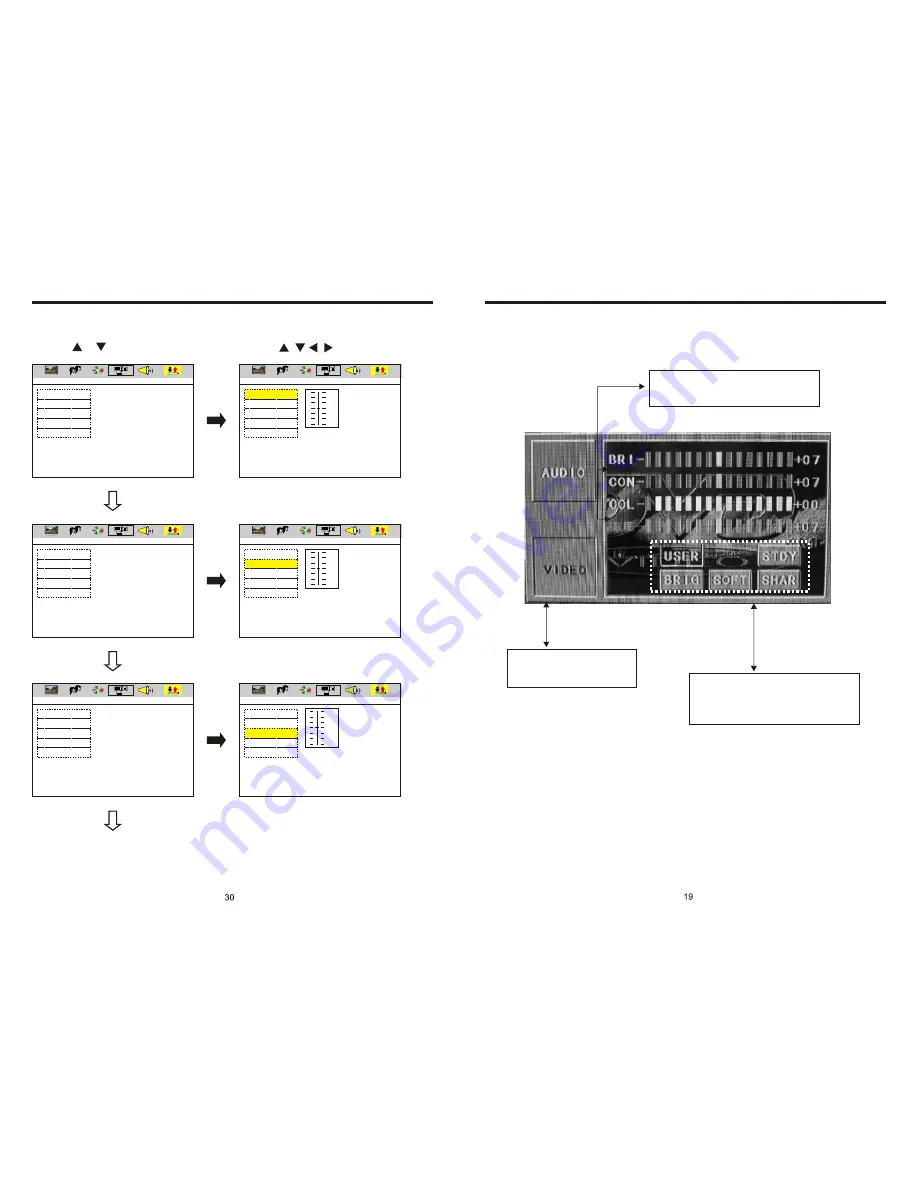
VIDEO SETTING ON TOUCH SCREEN

Image mode: You can choose the area in the
broken line on the panel, standard, defined, 
soft, according what you need to choose,
the blue back light will disappear.

You can choose: Brightness, Contrast, Color, 
Hue, adjust the image effect according to 
your sight. The blue bar will show your level. 

Video mode: When using this
function, the position will be darker 
on the screen.

Содержание BV9972

Страница 1: ......

Страница 2: ...sic Function Main Menu Touch Operation OSD Setup Adjust Mode Remote Control Function Loading Touchscreen Display For Disc Playback DVD Mode RDS User Operation Radio Operation DVD Basic Operation VCD B...

Страница 3: ...the laser 2 Playing the radio at higher volumes for a long period of time may cause hearing issues You should play this unit at a moderate listen level 3 This unit is set up by precision parts If you...

Страница 4: ...the disc and show corresponding word When appears on the display that means that there is no function please choose another mode MODE DVD VCD MP3 CD ICON CONTENT DISC SIZE Sound image Sound image Sou...

Страница 5: ...1 7 16 9 TFT LCD Display 2 Touchscreen Power supply Power range Max operate current Dimensions Ground system FM tuner European frequency range Signal Noisse ratio Stereo separation Search station vol...

Страница 6: ...button The mode will automatically take you back to status before adjustment 5 RESET 1 If unit is not working correctly you should press the RES button This will reset the radio and should start work...

Страница 7: ...guage subtitle in disc Video line between unit and TV is not properly connected SOLUTION Change fuse same as the old one Press RESET button on the panel by pen point then power on Check whether antenn...

Страница 8: ...een 19 DN Adjustment TFT Screen 20 MENU button 21 TFT Display Screen Extend Retreat 22 MUTE TFT on off button OTHER PLAY MODE AUX IN AUX IN OPERATION 1 Press Source button on remote control or touch A...

Страница 9: ...5 Radio station selection Previous song At radio state short press this button to manual seek radio frequency to forward direction long press this button to automatically seek radio frequency to forwa...

Страница 10: ...become normal in 3 seconds 20 MENU button Press this button in any mode to go back to the main menu 19 DN Adjustment TFT Screen After the display screen is extended press this button to adjust the do...

Страница 11: ...is used with the remote control in CD MP3 USB SD mode Once you have one of these settings on You will no longer have Bass Treble adjustments until this feature is set to off MAIN MENU TOUCH OPERATION...

Страница 12: ...ction can only be worked by the remote control PROG TC 3 _ _ _ _ 4 _ _ _ _ TC 7 _ _ _ _ 8 _ _ _ _ 5 _ _ _ _ 6 _ _ _ _ TC 11 _ _ _ _ 12 _ _ _ _ 9 _ _ _ _ 10 _ _ _ _ TC 15 _ _ _ _ 16 _ _ _ _ 13 _ _ _ _...

Страница 13: ...ode here press button on remote control or touch button on display unit will play from the first song 6 OSD In playing mode short press OSD on remote control to show all information of present disc 7...

Страница 14: ...ong press number button 8 on the remote control Press button to program play Back to the normal mode press the ST PROG button then press button Note This function can only be worked by the remote cont...

Страница 15: ...mbers for example the 19th song press 1 9 button Centesimal numbers for example the 120th song press 1 2 0 button 16 AMS RPT Button In radio mode press this button to browse stored stations In audio m...

Страница 16: ...tton a bit longer to operate 4 Previous Next Song Play In playing mode press SEEK SEEK on remote control or touch button on display to choose previous next song 5 Switch System In playing mode short p...

Страница 17: ...ETUP FULL 6 8 4 8 2 8 OFF 1 Press or button 2 Press button then to enter Touch this area to enter exit main menu TOUCHSCREEN DISPLAY FOR DISC PLAYBACK PIC4 Touch option next song previous songs adjust...

Страница 18: ...2 0 8 6 4 2 0 DVD MODE PIC 5 AUDIO SETTING ON TOUCH SCREEN Bass choosing when touched the button will be yellow touch this button to exit touch it again to resume Loud choosing this function is define...

Страница 19: ...ARPNESS VIDEO SETUP VIDEO SETUP VIDEO SETUP VIDEO SETUP VIDEO SETUP VIDEO SETUP 12 10 8 6 4 2 0 12 10 8 6 4 2 0 6 4 2 0 4 6 2 1 Press or button 2 Press button then to enter VIDEO SETTING ON TOUCH SCRE...

Страница 20: ...Y is on it means there is strong RDS signals output Short press on this button to decrease radio frequency longer press on this button to seek radio channels frequency decreased direction Short press...

Страница 21: ...reo playing mode 5 POP M RDS Channel Mark Indicate RDS channel name 1 RDS Tracking System Press AF button in FM mode and then press last 2 minutes RDS will auto search channel up and down it will stop...

Страница 22: ...equency Search Station Press SEEK SEEK button on remote control or touch button on display shortly every time to search station in up down direction When get one station it will auto stop searching 3...

Страница 23: ...control or touch button on display unit will play from the first song 3 Fast Forward Fast Backward Play In playing mode press SEEK button on remote control or touch button on display to speed play Whe...

Страница 24: ...in the disc then unit will show the appointed language 4 About the SETUP please read the follow Press SETUP on the remote control it will appear the following touch menu PROG TC 1 0 1 0 3 2 0 1 0 6 3...

Отзывы: