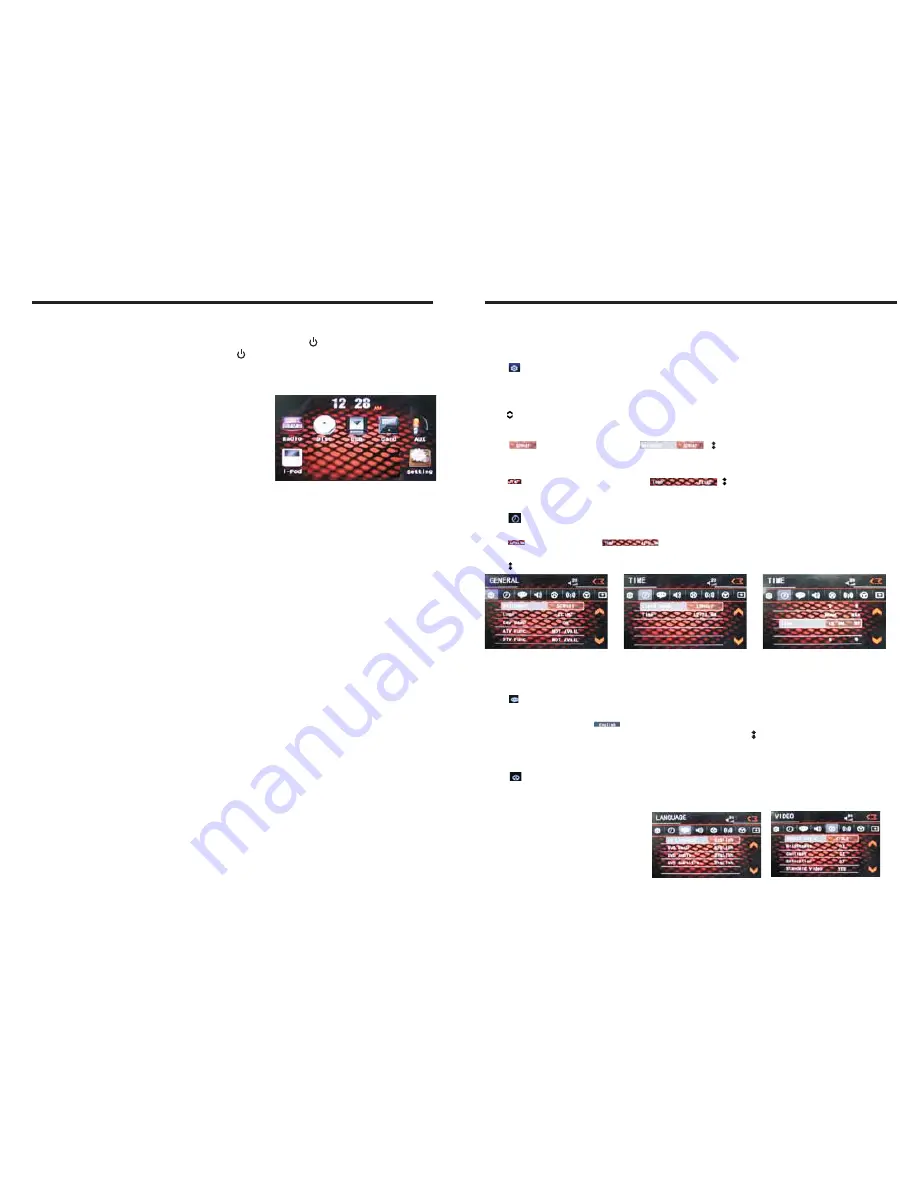
Touch the function icons so as to access the
corresponding function operations.
INSTRUCTIONS
INSTRUCTIONS
07
Turn on/off Host
Access main interface
Insert/Eject USB storage device
1. Connect a USB recorded with media information to the unit by a USB connecting cable.
2. When there is a need to eject the USB device, exit the USB device playback screen
first, and then take out the device.
Insert/eject SD card
1. Insert a SD card recorded with media information into the SD card slot in the unit
correctly until it is locked.
2. When pulling out the SD card, exit SD card playing state first, then press the SD card
and it shall pop up after unlocking.
Enter/exit
Insert a USB storage device or SD card to automatically play data contained in it. If the
unit has connected with a USB device or SD card, touch[ USB ]icon in the main interface
to enter into the external storage playback interface; Touch[ SD ]icon to enter into the SD
card playback interface. During playback, touch the top center area of the screen to pop
up the touch menu, operate touch menu to perform various playback controls.
When there is a USB device/SD card connected,
the unit can conduct the playback of audio/video/
image files in the USB device/SD card.
USB/SD Card function operation
Play
After SD card/USB removable device being read out, the operation methods are similar
to disk operation methods.
When the ignition switch is put in ACC or ON position,Press[ ] button on the front panel
to turn on the unit.After the host starts, hold [ ]button for 3 seconds , the host will turn off.
1
2
Access setup interface
Click [Setup] icon on main interface to access setup interface.
General setting
Click icon on setup interface to access general setting interface, as shown in below
PIC 1 diagram:
In general setting interface, you can select to turn on or turn off the existing functions.
You can set wallpaper and opening picture you like and check version number of DV/DC,
click icon to browse up/down.
PIC 3
PIC 2
PIC 1
Wallpaper selection
Click icon on wallpaper bar , direction icon shall pop up, click it to
select wallpaper.
Opening picture
Click icon on opening picture bar , direction icon shall pop up, click it
to select opening picture.
Time setting
Click
PIC 2diagram:
icon on setup interface to access time setting interface, as shown in below
Click icon on time bar
time setting interface shall display, as shown in
below PIC 3 diagram:
Click icon beside hour and minute to separately set hour and minute.
Video setting
Click
(PIC 5) diagram:
icon on setup interface to access video setting interface, as shown in right
At video setting interface, you can adjust brightness, contrast, saturation and hue of the video.
Language Setup
During use, you can select your familiar language to display menu by language setup.
Click icon on setup interface to access language setting interface, as shown in right
(PIC 4) diagram:
Click the corresponding icon on the language bar desired to be set so as to switch
the language type, when there are more than 3 languages, direction icon shall pop up,
click it to select your familiar language.
PIC 4
PIC 5
In the other mode, click on the interface to return the icon will switch to the main interface.


