background image

Press this button to search for radio stations. 

BAND BUTTON

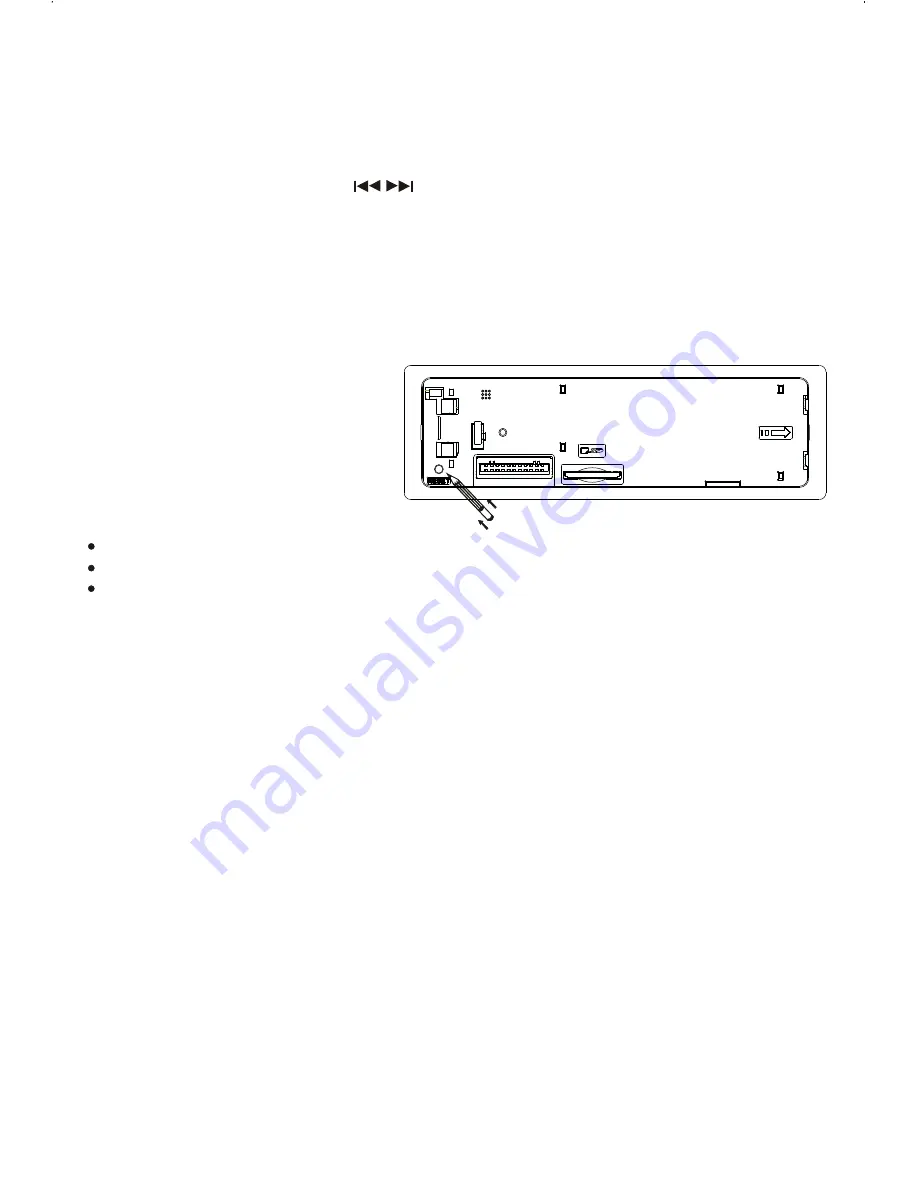
The RESET button is located on the front panel (as shown on the diagram). To press it vertically 
with a ballpoint pen or metal object will activate it. The reset button is to be activated for the 
following reasons:

RESET BUTTON

LIQUID CRYSTAL DISPLAY PANEL (LCD)

The LCD panel display the frequency, time and activated functions.

NOTE:

It is a characteristic of LCD panel that if subjected to cold temperatures for an extended period 
of time, they will take longer time to illuminate than under normal conditions, in addition, the 
visibility of the numbers on the LCD may slightly decrease. The LCD read-out will return to 
normal when temperatures increase to a normal range.

STATION PRESET BUTTONS (M1-M6)

You can store & recall six preset radio stations by pressing M1-M6 buttons

TO STORE A STATION: 1) select a band (if needed)
                                       2) select a station by tuning up / down button
                                       3) hold a preset button which you want store the station for at least 2 

seconds. The preset number will appear on the display 
accompanied by a beeps sound.

TO RECALL A STATION: 1) select a band (if needed)
                                         2) press a preset button briefly to recall the stored station.

Initial installation of the unit when all wiring is completed.
All the function buttons do not operate.
Error symbol on the display.

Note:

 If the unit cannot function normally after reseting,  please use a cotton swab soaked in 

isopropyl alcohol to clean the socket on the back of the control panel.

E - 6

TUNING UP / DOWN BUTTON (              )

Press this button to change between bands FM1,FM2,FM3,


MW1

,

MW2(AM).

AUTO MEMORY STORE/PRESET SCAN BUTTON (AMS)

1.PRESET SCAN: Press AMS button briefly enter Preset Scan mode, it will scan all the preset 

stations in the memories, you can hear that will stay on each station for about 10  seconds.

2.AUTO MEMORY STORE: Press AMS button long to enter Auto Store mode, this feature will 

automatically scan the current band and enter up to 6 strongest stations into the 6 preset 
memories. To stop Auto Store & Scan, press the AMS button again.

Содержание 624B

Страница 1: ...4...

Страница 2: ...NU BUTTON INFO BUTTON BAND BUTTON LCD DISPLAY PLAY PAUSE BUTTON INTRO SCAN BUTTON REPEAT BUTTON RANDOM BUTTON ENCODER VOLUME KNOB MUTE BUTTON EQ BUTTON POWER BUTTON PRESET MEMORY STATION BUTTONS M1 M6...

Страница 3: ...before installing the unit DIN FRONT REAR MOUNT This unit can be property installed either from Front conventional DIN Front mount or Rear DIN Rear mount installation utilizing threaded screw holes at...

Страница 4: ...st with point B on the main unit touching point A on the D C P As shown on the diagram 2 Then press the left side of D C P onto the main unit until a click sound is heard DO NOT insert the D C P from...

Страница 5: ...he rear connector that connects the main unit and the D C P is an extremely important part Be careful not to damage it by pressing on it with fingernails pens screwdrivers etc Attaching the Detachable...

Страница 6: ...t of the radio to turn the unit on Press POWER button again to turn the unit off MUTE BUTTON Press the mute button momentarily to mute the audio volume and Mute will in the display Press the mute butt...

Страница 7: ...utomatically switch to radio mode FRONT AUX INPUT INFO BUTTON At Radio mode Press this button to view frequency of the station in listening and clock time At DSP off mode preset equalizer will be cont...

Страница 8: ...tton 3 hold a preset button which you want store the station for at least 2 seconds The preset number will appear on the display accompanied by a beeps sound TO RECALL A STATION 1 select a band if nee...

Страница 9: ...s the Track Up Button for less than 1 second to skip the playback to the next track or press the Track Down Button for less than 1 seconds to return to the beginning of the current track press this bu...

Страница 10: ...witch to other mode 2 User can use the SRC button to choose USB mode only if USB drive device is inserted in the unit or any other modes when they are in any mode CAUTION COMPATIBILITY Due to the fast...

Страница 11: ...SD MMC mode 5 All the SD MMC files playback function is same as normal MP3 files playback 2 Please make sure to insert the SD or MMC card in the correct direction orientation as indicated in picture...

Страница 12: ...3 Artist Name ARTIST E 10 2 10 Track Up Down Button 3 Folder UP Down Press Folder up M6 F or Folder down Button M5 F for more than 1seconds skip10 tracks Press Folder up M6 F or Folder down Button M5...

Страница 13: ...AIRING Before you use your Car HANDSFREE System you need to pair it with your mobile phone 1 The Bluetooth set system on the head unit will automatically go into pairing mode when the POWER turned on...

Страница 14: ...he connected symbol on the mobile phone will be different from one to another Please refer lo the corresponding specification When you hang up the phone the main unit will return to previous mode radi...

Страница 15: ...ecifications even with phones of which the actual Bluetooth specifications and used profiles apply to our Bluetooth Handsfree System specifications Please check the compatibility list or try it out in...

Страница 16: ...utput REMARK Specifications subject to change without notice Frequency Range Usable Sensitivity Stereo Separation S N Ratio RADIO SECTION FM 522 1620 KHz EURO 530 1710 KHz USA Better than 45dB 40 dB D...

Отзывы: