background image

  E N G L I S H   -   3

R E G U L AT O R Y   I N F O R M AT I O N

NOTE: 

This equipment has been tested and found to comply with the limits for a Class B digital device, pursuant to Part 15 of the FCC 

Rules. These limits are designed to provide reasonable protection against harmful interference in a residential installation. This equipment 

generates, uses, and can radiate radio frequency energy and, if not installed and used in accordance with the instructions, may cause 

harmful interference to radio communications. However, there is no guarantee that interference will not occur in a particular installation. 

If this equipment does cause harmful interference to radio or television reception, which can be determined by turning the equipment off 

and on, the user is encouraged to try to correct the interference by one or more of the following measures:
•  Reorient or relocate the receiving antenna.
•  Increase the separation between the equipment and receiver.
•  Connect the equipment into an outlet on a circuit different from that to which the receiver is connected.
•  Consult the dealer or an experienced radio/TV technician for help.
Changes or modifications not expressly approved by Bose Corporation could void the user’s authority to operate this equipment.
This device complies with part 15 of the FCC Rules and with Industry Canada license-exempt RSS standard(s). Operation is subject to the 

following two conditions: (1) This device may not cause harmful interference, and (2) this device must accept any interference received, 

including interference that may cause undesired operation.
This device for operation in the 5150 - 5250 MHz is only for indoor use to reduce the potential for harmful interference to co-channel 

mobile satellite systems.
W52/W53 for Indoor Use Only.
This device complies with FCC and Industry Canada radiation exposure limits set forth for general population. 
This equipment should be installed and operated with a minimum distance of 20 cm between radiator and your body.
This transmitter must not be co-located or operating in conjunction with any other antenna or transmitter.

Management Regulation for Low-power Radio-frequency Devices

Article XII

According to “Management Regulation for Low-power Radio-frequency Devices” without permission granted by the NCC, any company, 

enterprise, or user is not allowed to change frequency, enhance transmitting power or alter original characteristic as well as performance 

to an approved low power radio-frequency devices.

Article XIV

The low power radio-frequency devices shall not influence aircraft security and interfere legal communications; If found, the user shall 

cease operating immediately until no interference is achieved. The said legal communications means radio communications operated in 

compliance with the Telecommunications Act.
The low power radio-frequency devices must be susceptible with the interference from legal communications or ISM radio wave radiated 

devices.

Bose Corporation hereby declares that this product is in compliance with the essential requirements and other relevant 

provisions of Directive 1999/5/EC and all other EU directive requirements. The complete declaration of conformity can be found 

at: www.Bose.com/compliance

This symbol means the product must not be discarded as household waste, and should be delivered to an appropriate collection 

facility for recycling. Proper disposal and recycling helps protect natural resources, human health and the environment. For more 

information on disposal and recycling of this product, contact your local municipality, disposal service, or the shop where you 

bought this product.

Names and Contents of Toxic or Hazardous Substances or Elements

Toxic or Hazardous Substances and Elements

Part Name

Lead 

(Pb)

Mercury 

(Hg)

Cadmium 

(Cd)

Hexavalent 

(CR(VI))

Polybrominated 

Biphenyl 

(PBB)

Polybrominated 

diphenylether 

(PBDE)

PCBs

X

O

O

O

O

O

Metal Parts

X

O

O

O

O

O

Plastic Parts

O

O

O

O

O

O

Speakers

X

O

O

O

O

O

Cables

X

O

O

O

O

O

This table is prepared in accordance with the provisions of SJ/T 11364.
O:  Indicates that this toxic or hazardous substance contained in all of the  homogeneous materials for this part is below the limit 

requirement of GB/T 26572.

X:  Indicates that this toxic or hazardous substance contained in at least one of the homogeneous materials used for this part is 

above the limit requirement of GB/T 26572.

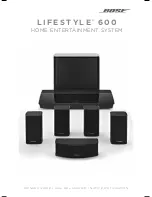
Содержание LIFESTYLE 600

Страница 1: ...L I F E S T Y L E 6 0 0 HOME ENTERTAINMENT SYSTEM OWN ER S GUIDE GU A DEL USUARIO NOTI CE D UTIL ISATION...

Страница 2: ...ing hazard Not suitable for children under age 3 This product contains magnetic material Consult your physician on whether this might affect your implantable medical device This product contains a tem...

Страница 3: ...r transmitter Management Regulation for Low power Radio frequency Devices Article XII According to Management Regulation for Low power Radio frequency Devices without permission granted by the NCC any...

Страница 4: ...the Symbol and DTS Digital Surround are registered trademarks or trademarks of DTS Inc in the United States and or other countries DTS Inc All Rights Reserved The terms HDMI and HDMI High Definition...

Страница 5: ...button 16 Function buttons 16 Adjusting volume 16 Using the MORE button 16 The AV OUTPUT menu 16 The AV SETTINGS menu 17 Remote glow button 17 SoundTouch App Setup Download and install the SoundTouch...

Страница 6: ...a device 23 Clear the system s Bluetooth pairing list 23 Advanced Features Disabling Wi Fi capability 24 Re enabling Wi Fi capability 24 Updating the system software 24 Getting System Information Syst...

Страница 7: ...to the console 36 Installing the rear speakers 37 Identifying switch settings on wireless receivers 38 Connecting the rear speakers 38 Connecting the rear speakers to power 39 Mounting your speakers...

Страница 8: ...layers some of which contain multiple boxes of components Each box is marked by icons to indicate its contents Note If part of the system is damaged or the glass on your console or Acoustimass wirele...

Страница 9: ...T E D Layer 1 From box Console 1 HDMI cable 1 Universal remote control 1 AA batteries 4 Layer 2 From box From box Console power supply 1 Power cords 4 Owner s guide 1 May ship with multiple power cord...

Страница 10: ...Jewel Cube speakers 4 Jewel Cube center speaker 1 Front speaker cable 1 Rear speaker cables 2 AC 2 adapters 5 From box ADAPTiQ headset 1 Screwdriver 1 IR emitter 1 Optical cable 1 Layer 4 From box Fro...

Страница 11: ...cularly on smooth surfaces like marble glass or highly polished wood Keep the front side of the bass module at least 3 in 8 cm from any other surface Blocking the port on the bottom of this side can a...

Страница 12: ...1 2 E N G L I S H G E T T I N G S TA R T E D Sample system placement...

Страница 13: ...a system software update Front Connector Input Set the default usage of your front headphones AUX input see page 33 CEC Settings Adjust the CEC functionality of your console Default On CEC is enabled...

Страница 14: ...kers Connect the front speakers to the console Wireless speakers Connect the rear speakers and Acoustimass wireless bass module to the console TV remote Set up the system s remote control to control y...

Страница 15: ...ngs Note The Bose remote control does not control functions specific to devices that are connected to the front HDMI input Provides access to connected sources Powers on off your Bose system Display P...

Страница 16: ...o see your volume level refer to your remote control s display Press to increase the volume Press to decrease the volume Press to mute or unmute the audio Note If you still hear audio from your TV s s...

Страница 17: ...center and surround audio levels SOURCE AV AUDIO Dialogue mode enhances speech clarity Movie mode provides balanced playback for most listening situations Night mode adjusts dialog and volume during l...

Страница 18: ...ogle Play store Amazon Kindle Fire users download from the Amazon Appstore for Android GET IT ON Follow the instructions in the app to complete setup including adding the system to your Wi Fi network...

Страница 19: ...pp again From within the app select Settings Add or Reconnect Speaker The app guides you through setup Connect the system to a new network If your network information changes add your system to your n...

Страница 20: ...stream or cabled mobile device Set a preset 1 Stream music using the app 2 While the music is playing press and hold a preset in the app Play a preset Once you personalize your presets press a preset...

Страница 21: ...If your device does not support NFC or if you are unsure Follow the instructions for Connect your mobile device If your device supports NFC Follow the instructions for Pair a device with NFC on page 2...

Страница 22: ...bile device from the remote control Once paired you can use the remote control to access your connected mobile devices Select Bluetooth from the menu To connect a device see page 21 You can use the re...

Страница 23: ...evice press the button and select Bluetooth Setup see page 13 Reconnect a device When powered on the console tries to reconnect with the most recently connected device Note The device must be within r...

Страница 24: ...ables when powering on your system Updating the system software If your system is connected to your home network it checks for software updates every time the system is used If an update is available...

Страница 25: ...shows system status The LED glows according to system state Console LED indicator Indicator activity System state Off System is off Blinking white System is powering on Solid white System powered on...

Страница 26: ...Disconnected from the console Blinking white Downloading system software update Blinking red Firmware error contact Bose customer service Wireless receiver LED indicator Indicator activity System sta...

Страница 27: ...vered by a limited warranty Details of the limited warranty are provided on the product registration card that is in the carton Please refer to the card for instructions on how to register Failure to...

Страница 28: ...n on your remote control The system status indicator on the control console should blink with each press Make sure the remote control s batteries are installed correctly and do not need replacement se...

Страница 29: ...Output or OUT Unplug the power cord for the console wait 30 seconds and plug it firmly into a live AC mains outlet Cannot complete network setup Select the correct network name and enter password cas...

Страница 30: ...ected device is not responding consistently to remote commands Try setting up the device again Press the button on the control console Select the device options and follow the on screen instructions t...

Страница 31: ...again Refer to your device s documentation See No sound from the system on page 29 Setting up your IR emitter If you are having issues with the responsiveness of your remote and your connected devices...

Страница 32: ...ll exist reposition the IR beads and test again Checking for sound 1 Power on your TV 2 If you are using a cable satellite box or other secondary source Power on this source If your secondary source i...

Страница 33: ...se this 3 5 mm input with your headphones or as an audio option with your favorite mobile device The headphone setting is the default option If you d like to use this input as an AUX IN press the butt...

Страница 34: ...ed L C or R into the red terminal and the plain wire into the plain silver terminal For rear speakers Insert the bare ends of the two pin cable into the adapter by placing the red wire marked into the...

Страница 35: ...ep see page 14 If you are moving your system but have already completed setup refer to the following instructions in order to reassemble the rear portion of your home entertainment system CAUTION Do n...

Страница 36: ...ter connected to the wire marked L into the speaker on the left of your TV 3 Insert the adapter connected to the wire marked R into the speaker on the right of your TV 4 Insert the adapter connected t...

Страница 37: ...completed setup refer to the following instructions in order to reassemble the rear portion of your home entertainment system Note If you are unable to pair your rear speakers to the console you can a...

Страница 38: ...rm that the switch on one wireless receiver is set to L left 2 Confirm that the switch on the other wireless receiver is set to R right Note Make sure that one wireless receiver is always set to L lef...

Страница 39: ...akers You can mount the speakers on wall brackets floor stands or table stands To purchase these accessories contact your local Bose dealer or visit www Bose com CAUTIONS Only use Bose hardware to mou...

Страница 40: ...a noticeable decrease in range or when you see the console LED indicator blink red see page 25 1 Slide open the battery compartment cover on the back of the remote control 2 Install four AA IEC LR6 1...

Страница 41: ...ish setup Unable to pair the wireless receivers with the console rear speakers If you are unable to pair your rear speakers to the console you can also connect them directly to the system using a cust...

Страница 42: ...2017 Bose Corporation The Mountain Framingham MA 01701 9168 USA AM793508 Rev 00...

Отзывы: