


26
en | Installing a Roof Mount and Camera
AUTODOME IP starlight 5000i (pendant)
2021-01 | 1.3 |
Installation Manual
Bosch Security Systems
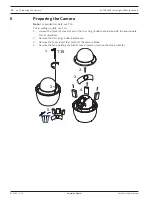
4.
Attach the Parapet Wall Bracket using at least six (6) stainless steel fasteners, three (3)
on each side. (The bracket has eight (8) holes.) Be careful not to overtighten the
fasteners because it may strip the threads. If attaching the parapet mount to a flat roof,
attach the optional LTC 9230/01 Roof Mount Plate to the roof and then attach the
Parapet Wall Bracket to the Roof Mount Plate.
5.
Insert the Parapet Pipe Arm into the mounting bracket until it bottoms in the bracket.
6.
Remove the End Cap from the front of the arm. Feed the video, control, and power wires
up through the bottom of the pipe arm and out the front end.
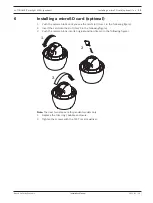
Figure 10.2:
NDA-U-RMT
1
End Cap with O-ring
2
Parapet Pipe Arm
3
1/4-20 SS Cap Screw
4
Down Pipe
5
10-24 SS Pan Head Screw
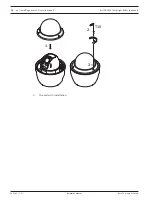
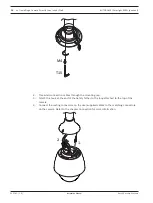
7.
Fold back the video, control, and power wires at the front end of the arm and route them
down and out through the Down Pipe. Replace the End Cap.
8.
Wrap at least five layers of Teflon tape around the Down Pipe threads.
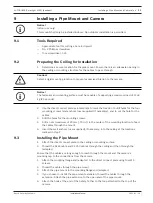
10.2
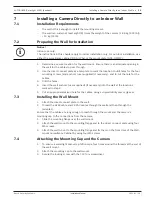
Attaching the Mounting Cap and the Camera
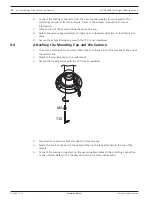
1.
To ensure a watertight seal, wrap Teflon tape four times around the threads at the end of
the wall mount.
2.
Attach the mounting cap to the wall mount.
3.
Secure the locking screw with the T15 Torx screwdriver.
Содержание NDP-5512-Z30
Страница 1: ...AUTODOME IP starlight 5000i pendant NDP 5512 Z30 en Installation Manual ...
Страница 2: ......
Страница 33: ...AUTODOME IP starlight 5000i pendant Support 33 Bosch Security Systems Installation Manual 2021 01 1 3 ...
Страница 34: ...34 Support AUTODOME IP starlight 5000i pendant 2021 01 1 3 Installation Manual Bosch Security Systems ...
Страница 35: ......


