English |
23
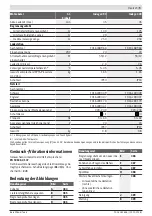
Noise/Vibration Information
Noise emission values determined according to
EN 50636-2-107
.
Typically the A-weighted noise levels of the product are:
Sound power level
61
dB(A). Uncertainty K =
2
dB.
Explanation of Figures
Action
Figure
Page
Accessories
A
384
Delivery scope/unpacking the mower
B
385
Laying out perimeter wire
C
385
Extending perimeter wire
D
386
Laying perimeter wire around new in-
ner object
E
386
Lifting up and carrying the mower
F
387
Setting the height of cut
G
387
SpotMowing
H
388
Adding a further lawn area
– with additional docking station
(right)
– without additional docking station
(top left)
I
388
Cleaning
J
389
Maintenance
K
389
Installation
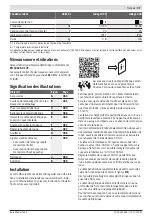
For a video guide on how to install the mower, please visit
www.bosch-indego.com or use the following QR-Code. Al-
ternatively, follow the Installation Guide delivered with the
product.
Check if the perimeter wire is fully pegged to
the ground avoiding any slack lengths of wire.
Any loose wire can be a trip hazard.
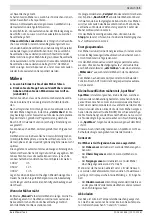
Remove straw, stones, loose pieces of wood, wire, live
mains cables and other foreign objects from the cutting area.
Make sure that the cutting area is even and has no ditches,
grooves and steep slopes above 15°/27 % that are clear ob-
structions for the mower.
The docking station must be positioned on the wire at an
outer edge of the cutting area. It may not be positioned on
the side of a tool or garden shed standing as an island within
the lawn to be mowed.
It is recommended that you mow your lawn once with a con-
ventional lawnmower before installing and before the first
mowing of the new season and whenever the grass clippings
would be longer than 5 mm.
The mower's cutting system is designed to cut small lengths
of grass (30–50 mm). The clippings can remain as mulch to
fertilize the lawn. The height of cut for mower can be adjus-
ted to 30, 40 and 50 mm.
For the first few weeks of usage, set the height of cut to
50 mm to prevent the perimeter wire being cut. Afterwards,
the wire will be covered by the lawn.
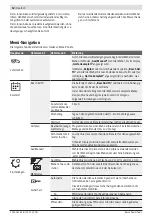
Additional perimeter wire can be added using a wire con-
nector (see figures
D
–
E
).
The perimeter wire can be extended up to a maximum length
of 250 m.
The perimeter wire can be buried up to 5 cm under the
ground (or non-metallic slabs).
To avoid causing damage to the perimeter wire, do not verti-
cut or rake the area where it is positioned.
When laying out the wire avoid angles of less than 45°. This
can affect the performance.
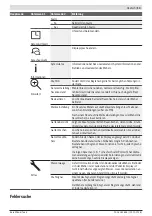
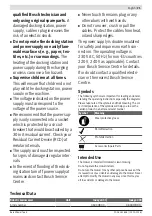
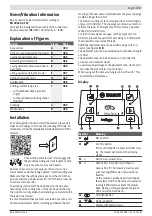
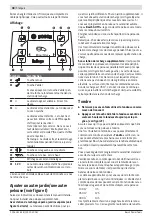
Display
Symbol
Meaning
➊
Back button
➋
Confirm button
If the confirm button is pressed whilst mow-
ing, the mower will return to the docking
station
➌
○
Red LED on: mower error
➍
○
Green LED on: mower is switched on
Green LED off: The mower is inactive and
your four-digit PIN code is required for ac-
tivation.
Or the mower is isolated and it will require
the isolator switch to be turned on and your
four digit PIN code to activate the mower.
Note: during a software update, the green
LED and red LED will be on.
➎
Left/right button
➏
Down/up button
➐
Display with dialog screen
Bosch Power Tools
F 016 L81 848 | (01.10.2018)
Содержание INDEGO 350
Страница 383: ...Lietuvių k 383 Bosch Power Tools F 016 L81 848 01 10 2018 ...
Страница 385: ... 385 C 2 m 5 m Indego 400 Indego 350 100 m 140 x 125 m 180 x B Bosch Power Tools F 016 L81 848 01 10 2018 ...
Страница 386: ...386 1cm 3 0 c m 3 cm 3 cm 3 cm 3 cm E D F 016 L81 848 01 10 2018 Bosch Power Tools ...
Страница 387: ... 387 MAX 50 mm 40 mm MIN 30 mm MAX 50 mm MIN 30 mm STOP G F Bosch Power Tools F 016 L81 848 01 10 2018 ...
Страница 388: ...388 H I F 016 L81 848 01 10 2018 Bosch Power Tools ...
Страница 389: ... 389 STOP STOP K J Bosch Power Tools F 016 L81 848 01 10 2018 ...
Страница 390: ...390 F 016 L81 848 01 10 2018 Bosch Power Tools ...

