


“Touch Classic”
Installation Guide
The Touch Classic touch screen codepad has been developed to provide an updated
user interface for Solution
TM
Classic control panels. It is very simple to install and
program with an intuitive interface and rich feature set. Please read the following guide
to familiarise yourself with the functions and limitations of the product.
Compatibility
The Touch Classic has been designed to be compatible with the following three
Solution Classic control panels.
1.
Solution 16
2.
ICP– CC488
3.
ICP– CC404
Other Solution Classic series may be supported through a later software release
dependent on demand.
Wall Mounting/Removal
The Touch Classic is supplied with a wall mount plate that should be fixed to the wall
using the supplied screws or similar. It is important that the screw heads do not foul the
indentations in the rear of the codepad. Pan head screws of 6G size are recommended.
Once the wall plate mounting is complete, the plug and lead should be soldered to the
4 core cable from the alarm panel. Now connect the plug to the socket and clip onto the
wall plate.
Note:
Ensure the Touch Classic is orientated so that the light sensor ( Fig 1) can
receive adequate room lighting for effective automatic brightness adjustment.
The orientation of the screen can be changed to be either vertical or horizontal to suit
the installation. See
Settings => Installation => Touchpad
.
To remove the Touch Classic from the wall plate insert a long thin screwdriver blade in
the release hole and gently press until the unit “pops” off of the wall plate.
Touch Classic is optimised for viewing from one direction. Ie: left/right or above/below.
The installer may have to reverse the mounting direction to obtain the best image.
Connection to the Control Panel
The Touch Classic should be powered up with the CLOCK wire disconnected at the
control panel to allow setting of the panel type.
Light sensor
Fig 1: Release catch
To access panel programming
+
Installation
-
Panel (Basic)
or
Panel
(Enhanced)
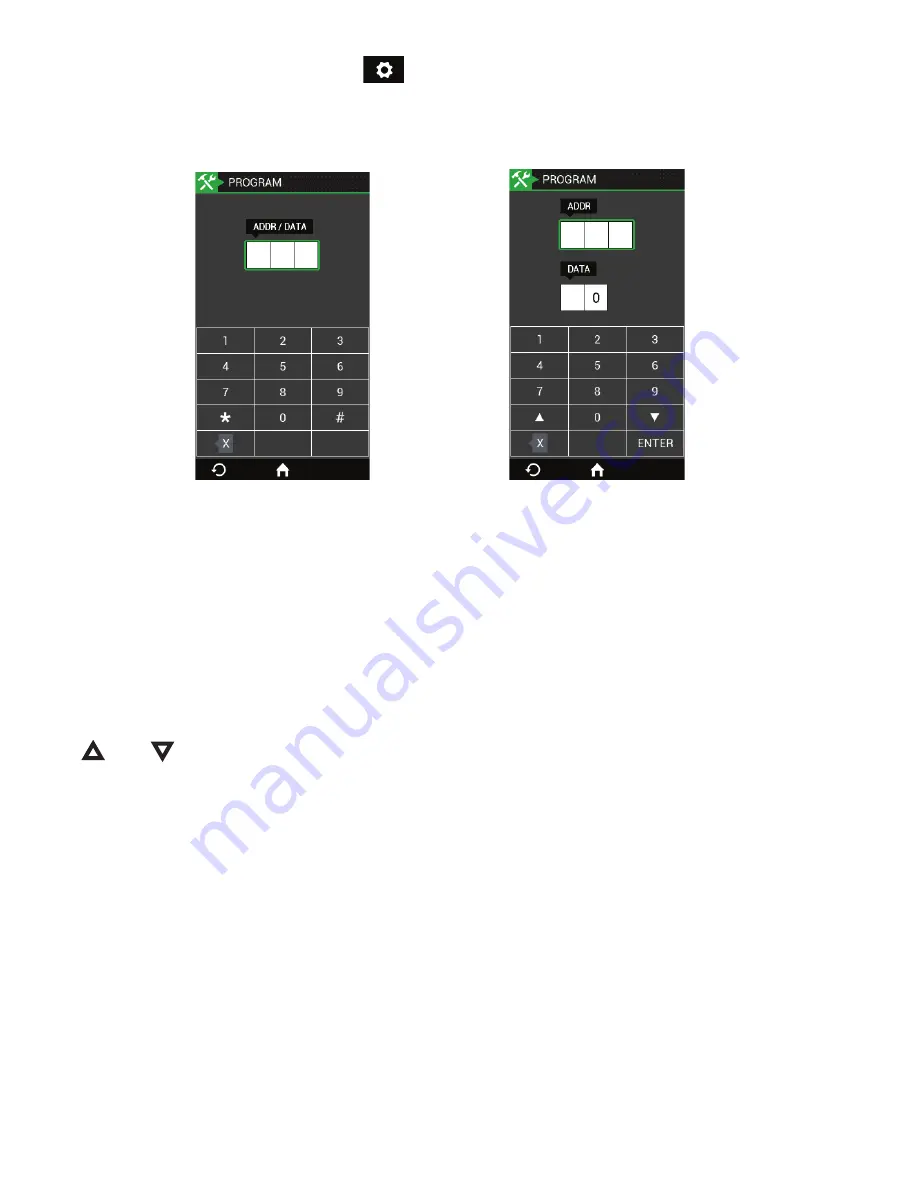
enter the installer code. You will be presented with the below.
Basic screen Enhanced screen
In
Basic
programming mode data entry is as per the LED/ICON codepads. Enter the
address and #. The data at that location will be displayed. Enter new data press
*.
The (X) button provides a backspace function.
In
Enhanced
programming mode separate windows are provided to display address
and data. You can move between these windows by touch selection. Entering an
address followed by the Enter button will display the data at that address. A new data
entry may then be made ( note position of the green window outline ) followed by the
enter key.The address locations may be stepped through one at a time by using the
or
buttons. When programming is complete touch the HOME button. There
is no requirement to enter the familiar 960 away command with the Touch Classic.
Diagnostics
From the settings menu touch
Diagnostics
and the installer will be presented with all
of the usual test functions as well as the
Alarm Memory
. The Alarm memory event
recall process steps through events as per the standard codepad however each is
displayed in numbered order on the screen.
The
Walk Test
function “ticks” off zones as they are tripped and moves them to the
bottom of the screen. The horn beep function is retained.
Warranty
THREE Years
��


