background image

Installation instructions

 en

47

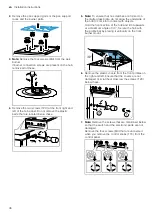
8. Note: 

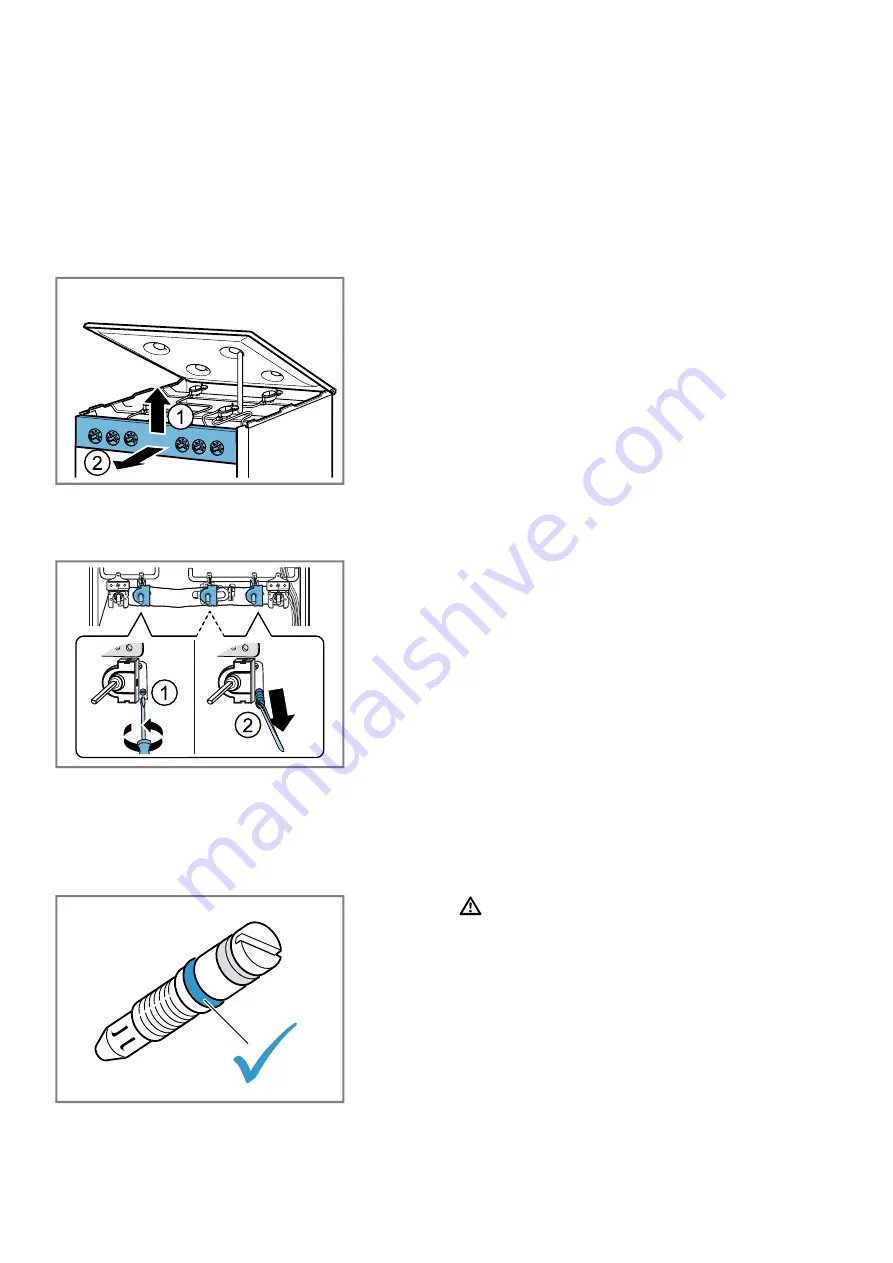
In order to access the bypass nozzles on the

right-hand side, turn the control panel clockwise
slightly. In order to access the bypass nozzles on
the left side, turn the control panel anti-clockwise
slightly. Ensure that the cables are not damaged
and the connections do not come loose.
Grip the panel with both hands and slowly pull it up-
wards. Remove the panel from the fastening lugs.
Then carefully pull the panel forwards to remove it.
Ensure that the cables are not damaged and that
the connections do not come loose.

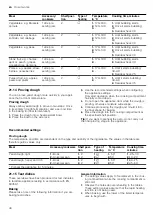
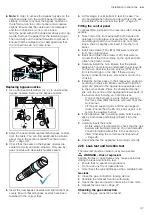
Replacing bypass nozzles

1.

Use a flat-head screwdriver (no. 2) to unscrew the
bypass nozzles. Remove the bypass nozzles.

2.

Select the appropriate replacement bypass nozzles
from the table. You can find additional information
about this in the section entitled "Technical data –
Gas" → 

Page 48

.

3.

Check that the seals on the bypass nozzles are
seated correctly and work properly. Only use by-
pass nozzles with absolutely faultless seals.

4.

Insert the new bypass nozzles and tighten them se-
curely. Ensure that all bypass nozzles have been
fastened to the correct taps.

5.

At this stage, it is important to test for leaks. You
can find additional information about this in the sec-
tion entitled "Leak and function test" → 

Page 47

.

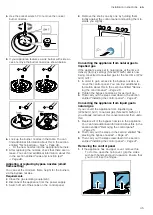
Fitting the control panel

To reassemble, proceed in the reverse order of disas-
sembly.

1.

Take hold of the front panel with both hands and
carefully fit it into place. Ensure that the cables are
not damaged and the connections do not come
loose. Lower it slightly and insert it into the front
panel.

2.

Insert the screws (T15) (M4) that were removed
from the control panel.

3.

Insert and tighten the screws (T20) that were re-
moved from the front profiles on the right and left.
Attach the plastic covers.

4.

Carefully install the hob. Ensure that the plastic
parts which must remain underneath the screws do
not fall out. Unscrew the two screws (T20) on the
front left and right on the hob. If there are any
burner connection screws, screw them all into the
cooktop.

5.

Install the burner bases in their respective positions
according to their size. Make sure that the ignition
plugs are placed in the appropriate openings next
to the burner bases. Place the enamelled burner
lids onto the centre of the appropriate lower parts of
the burner and, in doing so, note the sizes.

If one of the burners is a wok burner, screw in
the four screw (M4) that were removed from the
wok burner.

Fit the pan support grids and the pan support
racks. Ensure that the 80 mm pan support is fit-
ted on the auxiliary burner.

6.

If the appliance has a covering plate, hold it vertic-
ally by both sides and slowly reinsert it into the
holder.

7.

Carefully insert the knobs.

At this stage, it is important to check that the gas
burners are burning correctly. You can find addi-
tional information about this in the section en-
titled "Checking the correct burner behaviour"
→ 

Page 48

.

8.

Check whether the appliance is working correctly.

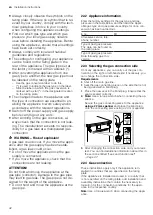
22.6 Leak test and function test

The leak test must be carried out by two people.

WARNING ‒ Risk of explosion!

Sparks, flames or open flames may cause explosions
during the leak and function test.

Ensure that no sparks are produced.

Do not use any fire or naked flames.

Only check the leak tightness using a suitable foam.

Gas leak

¡

Close the gas connection locking device.

¡

Ventilate the relevant location sufficiently.

¡

Check the gas and nozzle connections once more.

¡

Repeat the leak test → 

Page 47

.

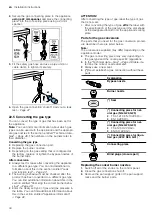
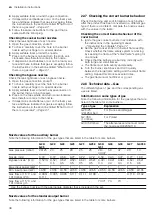
Checking the gas connection

1.

Open the gas connection shut-off.

Содержание HXC350H50N

Страница 1: ...Register your new device on MyBosch now and get free benefits bosch home com welcome Free standing cooker HXC350H50N en User manual and installation instructions ...

Страница 2: ...nnect the appliance and to convert the appliance to a different type of gas The appliance must be installed and the elec tric and gas connections must be implemen ted in accordance with the instruction and in stallation manual An incorrect connection or incorrect settings may lead to serious accidents and damage to the appliance The appliance manufacturer accepts no liabil ity for damage of this k...

Страница 3: ...rnor If you do not know what the gas pressure in your gas distributing pipes is please ask your local gas company Connection maintenance and setting of the gas governor must be carried out by an au thorised installation specialist WARNING Risk of suffocation Using the gas cooking appliance leads to a build up of heat moisture and combustion products in the room where the appliance is installed Ens...

Страница 4: ...comes hot during operation Allow the appliance to cool down before cleaning When the cooking compartment is hot any al coholic vapours inside may catch fire Only use small quantities of drinks with a high alcohol content in food Open the appliance door carefully The appliance and its parts that can be touched become hot during use Caution should be exercised here in order to avoid touching heating...

Страница 5: ...n people may bump into it resulting in injury Always keep the appliance door closed during and after operation WARNING Risk of scalding The accessible parts of the appliance become hot during operation Never touch these hot parts Keep children at a safe distance Hot steam may escape when you open the appliance door Steam may not be visible de pending on the temperature Open the appliance door care...

Страница 6: ...n Allow the cooking compartment to dry after use Do not keep moist food in the cooking compartment for a long time with the door closed Do not store food in the cooking compartment Leaving the appliance to cool down with the door open will damage the front of neighbouring kitchen units over time Always allow the cooking compartment to cool down with the door closed after cooking at high temperatur...

Страница 7: ...nteed The base of the pot or pan may be damaged Cookware that is used on the hotplate must be se curely in place Only use pots and pans with an even base Do not heat up empty pots or pans Damage may occur if hard or pointed objects fall on the hob Do not let hard or pointed objects fall onto the hob Do not hold and move the appliance at the gas pipe collector Damage to the gas pipe may lead to gas...

Страница 8: ...an may install the appliance in accordance with the instructions specified under Gas connection and conversion to a different gas type The settings for configuring your appliance can be found on the rating plate on the rear of the appli ance The gas type set at the factory is marked with an asterisk Find out about the local supply conditions regarding the gas type and gas pressure before installin...

Страница 9: ...e as this may be come damaged Fit the mains plug and socket together The mains plug can be accessed at all times The cross section of the cable is sufficient The mains cable is not kinked crushed modified or severed If required the mains cable must only be replaced by a qualified electrician A replacement mains cable is available from the after sales service Do not use any multiple plugs or multi ...

Страница 10: ...rawer Adjacent units Any adjacent units must not be made of flammable ma terials The fronts of any adjacent units must be heat resistant up to at least 90 C Wall fixing To prevent the appliance from tipping over you must fix it to the wall using the enclosed brackets To secure the appliance to the wall follow the installation instruc tions ...

Страница 11: ...s specific details such as col our and shape may differ from those pictured 1 2 3 Power kW Burner hotplate 1 1 kW Economy burner 2 3 5 kW Wok burner 3 1 7 kW Standard output burner 5 3 Control panels You can use the control panel to configure all functions of your appliance and to obtain information about the operating status Controls You can use the controls to configure all functions of your app...

Страница 12: ... buttons to set various functions for your appliance The display shows the settings If a function is active the corresponding symbol lights up on the display only lights up when you change the time Symbol Function Use Childproof lock Activate or deactivate the childproof lock Time setting options Select the time timer cooking time and the end time To select the individual time setting options pres...

Страница 13: ...pliance type set the grill settings for the grill for the large area and grill or for the small area 1 low 2 medium 3 high Heat up indicator The appliance indicates when it is heating up When the appliance is heating lights up on the dis play This symbol goes out when heating is paused When you preheat the appliance the optimal time to place your food in the cooking compartment is when the symbol ...

Страница 14: ...ccessories supplied may differ depending on the appliance model Accessories Use Wire rack Baking tins Ovenproof dishes Cookware Meat e g roasting joints or steak Frozen meals Universal pan Moist cakes Biscuits Bread Large roasts Frozen meals Catching dripping liquids e g fat when grilling food on the wire rack 6 1 Using the accessory Always slide the accessory into the cooking compart ment correct...

Страница 15: ...mperature Maximum Cooking time 1 hour 5 Switch off the appliance after the specified cooking time 6 Wait until the cooking compartment has cooled down 7 Clean the smooth surfaces with soapy water and a dish cloth 8 Clean the accessory with soapy water and a dish cloth or a soft brush 8 Cookware This information has been provided to help you save energy and avoid damaging your cookware 8 1 Using co...

Страница 16: ... wok with a flat base is not stable on the wok ring and may overturn 8 2 Tips for using a wok Note the following information to ensure the safe use of a wok WARNING Risk of injury An incorrectly positioned wok may cause injuries The wok is not stable and may overturn Use the wok only on the wok burner and the wok ring Never set the wok ring and wok on the stand ard output burner and high output bu...

Страница 17: ... the burner s selector and wait at least one minute before igniting the burner again 1 Open the top cooker cover The top cover must remain open for as long as the hotplate is in operation 2 Place suitable cookware on the pan support Suitable cookware Page 16 3 Press and hold the selector for the required burner and set it to the ignition position a The ignition process starts 4 Press and hold the ...

Страница 18: ...t the temperature or grill setting a The appliance starts heating after a few seconds 3 When the dish is ready switch off the appliance Tips The most suitable type of heating for your food can be found in the description of the types of heating You can also set a cooking time and an end time on the appliance Time setting options Page 18 Changing the type of heating You can change the type of heati...

Страница 19: ...on to end the signal prematurely To set another cooking time press the button When the dish is ready switch off the appliance Changing the cooking time The cooking time can be changed at any time Requirement is highlighted in the display Change the cooking time using the or button a The appliance applies the change after a few seconds Cancelling the cooking time The cooking time can be cancelled a...

Страница 20: ...can cause an electric shock Do not use steam or high pressure cleaners to clean the appliance ATTENTION Unsuitable cleaning agents damage the surfaces of the appliance Do not use aggressive or abrasive cleaning agents Do not use cleaning products with a high alcohol content Do not use hard scouring pads or cleaning sponges Do not use any special cleaners if the appliance is still warm Using oven c...

Страница 21: ... the appliance door open to dry the cooking compartment after cleaning it Notes Enamel burns at very high temperatures causing minor discol ouration The functionality of your appliance is not affected by this The edges of thin baking trays cannot be completely enamelled and may be rough This does not impair corrosion protection Food residues will leave a white coating on the enamel surfaces The co...

Страница 22: ...ION On the burner parts the controls and the aluminium surfaces the cleaning gel leads to damage Only use the cleaning gel on the pan supports and stainless steel surfaces Apply the cleaning gel to the burnt on dirt 4 If necessary let the dirt soak overnight 13 7 Cleaning the stainless steel surfaces 1 Observe the information regarding the cleaning agents 2 Clean using a sponge cloth and hot soapy...

Страница 23: ...nutes 14 2 Cleaning the cooking compartment after using it ATTENTION If the cooking compartment remains damp for too long this results in corrosion After using the cleaning aid wipe the cooking com partment and allow it to dry completely Requirement The cooking compartment has cooled down 1 Open the appliance door and absorb the residual water with an absorbent sponge cloth 2 Clean smooth surfaces...

Страница 24: ...of the oven If the rails are fitted correctly the distance between the two upper shelf positions is greater 16 Appliance door It is normally sufficient if you clean the outside of the appliance door If the appliance door is very dirty on the inside and outside you can remove the appliance door and clean it 16 1 Door hinges WARNING Risk of injury When the hinges are not secured they can snap shut w...

Страница 25: ... of the oven door can be removed to make cleaning easier WARNING Risk of injury Scratched glass in the appliance door may develop into a crack Do not use any harsh or abrasive cleaners or sharp metal scrapers to clean the glass on the oven door as they may scratch the surface The components in the appliance door may have sharp edges Wear gloves 1 Detach the oven door Removing the appliance door Pa...

Страница 26: ... the appliance door Reattach the oven door in the reverse sequence to re moval WARNING Risk of injury The oven door might accidentally fall or a hinge may suddenly snap shut In this case do not hold onto the hinge Call cus tomer service 1 When attaching the oven door ensure that both hinges are inserted in the opening direction 2 The notch on the hinge must engage on both sides 3 Close both lockin...

Страница 27: ...ed specialist staff If the appliance is defective call Customer Service WARNING Risk of electric shock Incorrect repairs are dangerous Repairs to the appliance should only be carried out by trained specialist staff Only use genuine spare parts when repairing the appliance If the power cord of this appliance is damaged it must be replaced by the manufacturer the manufac turer s Customer Service or ...

Страница 28: ...recisely and evenly 2 Ensure that the locking catches click into place in the recesses Burner parts are wet Carefully dry the burner parts Food remnants or dirt are located between the ignition plug and the burner Clean the space between the ignition plugs and burners The safety valve for the gas line is closed Open the safety valve for the gas line Gas cylinder is empty Replace the gas cylinder T...

Страница 29: ...portation and disposal You can find out here how to prepare your appliance for transportation You will also find out how to dispose of old appliances 19 1 Disposing of old appliance Valuable raw materials can be reused by recycling 1 Unplug the appliance from the mains 2 Cut through the power cord 3 Dispose of the appliance in an environmentally friendly manner Information about current disposal m...

Страница 30: ...d Note If you do not find the exact food or application that you want to prepare or implement look for a similar dish and take the general information into consideration 2 Remove any accessories from the cooking compart ment 3 Select suitable cookware and accessories Use the cookware and the accessory listed in the recommended settings 4 Only preheat the appliance if the recipe or the re commended...

Страница 31: ... of fire Opening the appliance door creates a draught Greaseproof paper may come into contact with the heating element and catch fire Never place greaseproof paper loosely over ac cessories when preheating the appliance and while cooking Always cut greaseproof paper to size and use a plate or baking tin to hold it down 21 4 Notes on baking When baking use the shelf positions indicated Baking on on...

Страница 32: ...dry topping Universal pan 2 170 190 25 35 Shortcrust tart with moist topping Universal pan 2 160 180 60 90 Yeast cake with dry topping Universal pan 3 170 180 25 35 Yeast cake with moist topping Universal pan 3 160 180 30 50 Plaited loaf plaited ring Universal pan 2 160 170 35 40 Swiss roll Universal pan 2 170 1901 15 20 Strudel sweet Universal pan 2 190 210 55 65 Strudel frozen Universal pan 3 20...

Страница 33: ...n the cook ing compartment Reduce the baking temperature and in crease the baking time Your cake is unevenly browned Reduce the baking temperature Cut the greaseproof paper to a suitable size Position the baking tin in the centre Shape small baked goods to be the same size and thickness Topic Tip Your cake is cooked on the outside but is not fully baked through on the in side Reduce the baking tem...

Страница 34: ...Shelf posi tion Type of heating Temperature in C Cooking time minutes Pizza fresh Universal pan 2 190 210 20 30 Pizza fresh thin crust Universal pan 2 250 2701 20 30 Pizza chilled Universal pan 2 190 2101 10 15 Pizza frozen thin crust x 1 Wire rack 2 190 210 15 25 Pizza frozen deep pan x 1 Wire rack 2 200 210 20 30 Mini pizzas frozen Universal pan 3 190 210 10 20 Savoury bakes in a tin Springform ...

Страница 35: ...nt more easily and serve it dir ectly in the cookware If you cover the cookware when you cook your food this will keep the cooking compart ment cleaner General information about roasting in cookware Use heat resistant ovenproof cookware Place the cookware onto the wire rack Check in advance whether the cookware fits in the cooking compartment Glass cookware is best Shiny roasting dishes made from ...

Страница 36: ...aporates as the meat roasts Carefully pour in more hot liquid if required The distance between the meat and the lid must be at least 3 cm The meat may expand To braise the meat sear it first as required Add wa ter wine vinegar or similar for the braising liquid The base of the cookware must be covered with 1 2 cm of liquid Fish You do not need to turn whole fish Place the whole fish into the cooki...

Страница 37: ...e without lid 2 210 220 60 70 Hamburger 3 4 cm thick Wire rack 4 33 25 301 Joint of veal 1 5 kg Cookware without lid 2 180 200 120 140 Knuckle of veal 1 5 kg Cookware with lid 2 210 230 130 150 Leg of lamb boned medium 1 5 kg Cookware without lid 2 200 210 70 804 Saddle of lamb on the bone medium 1 5 kg Cookware without lid 2 190 200 60 704 Grilled sausages Wire rack 3 3 20 251 Meat loaf 1 kg Cook...

Страница 38: ...Accessories cook ware Shelf posi tion Type of heating Temperature in C grill setting Cooking time in mins Grilled vegetables Universal pan 5 3 10 20 Baked potatoes halved Universal pan 3 170 190 55 65 Potato products frozen e g chips cro quettes potato pockets rösti Universal pan 3 200 220 25 35 21 11 Yoghurt You can also use your appliance to make your own yoghurt Making yoghurt 1 Remove the acce...

Страница 39: ...rox 250 g sugar for sweet fruit Approx 500 g sugar for sour fruit For vegetables Boiled water 5 Wipe the rims of the jars They must be clean 6 Place a damp rubber seal and a lid on each jar 7 Seal the jars with the clips Preserving fruit or vegetables 1 Slide the universal pan into the cooking compart ment at shelf position 2 2 Once they have been prepared place the jars into the universal pan in ...

Страница 40: ...wire rack 3 Use the recommended settings when configuring the appliance settings Only start operation when the cooking compartment has fully cooled down 4 Do not open the appliance door while the dough is proving otherwise moisture will escape 5 Continue processing the dough and mould it into the final shape for baking 6 Place the dough into the cooking compartment at the specified shelf position ...

Страница 41: ...the rapid heating function do not use this function for preheating Grilling Food Accessories cook ware Shelf posi tion Type of heating Temperature in C grill setting Cook ing time in mins Toasting bread Wire rack 5 3 0 2 1 5 22 Installation instructions The installation instructions contain instructions for the gas connection and for the gas conversion s as sembly Note For after sales service only...

Страница 42: ...nnections are not leaking ATTENTION Do not hold and move the appliance at the gas pipe collector Damage to the gas pipe may lead to gas leak The gas pipe is not de signed for the weight of the appliance Do not hold and move the appliance at the gas pipe 22 2 Appliance information Enter the factory settings for the gas type and gas pressure in the table below and then add the applic able gas type a...

Страница 43: ...ghten it firmly 5 Open the gas connection shut off Carry out a leak test Page 47 Connection in accordance with EN 10226 1 R TS 61 210 EN 10226 1 R 1 Insert the new seal in the connecting piece Ensure that the seal is seated correctly 2 Secure the gas connecting piece to the appliance using a 22 mm spanner and place the connecting piece into the connecting piece using a 24 mm spanner 3 Secure the c...

Страница 44: ...the section entitled Checking the correct burner beha viour Page 48 Enter the newly set type of gas and gas pressure in the table You can find additional information about this in the section entitled Appliance information Page 42 ATTENTION After converting the type of gas label the type of gas that is now set After converting the type of gas affix the label with the specification of the gas type ...

Страница 45: ...s set to natural gas at the time of delivery factory setting NG G20 G25 and is now being converted to liquefied gas for the first time LPG G30 G31 1 In order to gain access to the bypass nozzles re move the control panel You can find additional in formation about this in the section entitled Remov ing the control panel Page 45 2 Tighten the bypass nozzles as far as it will go 3 Then carry out the ...

Страница 46: ... glass plate do not allow the underside of the hob to come into contact with objects Hold the front section of the hob and tilt it upwards at a maximum angle of 30 Secure the hob with the profile bar by placing it vertically on the front burner mount 6 Remove the plastic covers from the front profiles on the right and left Ensure that the covers are not damaged or scratched Unscrew the screws T20 ...

Страница 47: ...tighten the screws T20 that were re moved from the front profiles on the right and left Attach the plastic covers 4 Carefully install the hob Ensure that the plastic parts which must remain underneath the screws do not fall out Unscrew the two screws T20 on the front left and right on the hob If there are any burner connection screws screw them all into the cooktop 5 Install the burner bases in th...

Страница 48: ...r of the cover burner 1 Ignite the gas cooker burners in accordance with the instructions in the operating manual Operating the hotplate Page 17 2 Set the gas cooker knob to the small flame setting Check whether the flame safety system is working by keeping the flame at the small flame setting for one minute 3 Check that the burners are burning correctly with both large and small flames a The flam...

Страница 49: ...1 45 1 45 1 0 88 0 94 Bypass nozzle1 mm 0 94 0 88 0 94 0 88 0 94 0 88 0 94 0 88 0 94 0 88 0 94 0 88 0 59 0 55 0 59 0 55 0 59 0 55 Max input power kW 4 4 4 4 4 4 4 4 4 Min input power kW 1 7 1 7 1 7 1 7 1 7 1 7 1 7 1 7 1 7 Gas flow at 15 C and 1013 mbar m3 h 0 381 0 443 0 381 0 381 0 443 0 443 0 433 Gas flow at 15 C and 1013 mbar g h 291 286 291 291 1 Use the bypass nozzle with the appropriate diam...

Страница 50: ......

Страница 51: ......

Страница 52: ...ing for help You ll find it here Expert advice for your Bosch home appliances help with problems or a repair from Bosch experts Find out everything about the many ways Bosch can support you www bosch home com service Contact data of all countries are listed in the attached service directory 9001685518 9001685518 020205 en BSH Hausgeräte GmbH Carl Wery Straße 34 81739 München GERMANY www bosch home...

Отзывы: