


en
Accessories
14
So that the cooking compartment cools down more
quickly after operation, the cooling fan continues to run
for a certain period afterwards.
_
Accessories
Accessories
Your appliance is accompanied by a range of
accessories. Here, you can find an overview of the
accessories included and information on how to use
them correctly.
Accessories included
Your appliance is equipped with the following
accessories:
--------
Only use original accessories. They are specially
adapted for your appliance.
You can buy accessories from the after-sales service,
from specialist retailers or online.
Note:
The accessories may deform when they become
hot. This does not affect their function. Once they have
cooled down again, they regain their original shape.
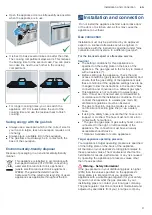
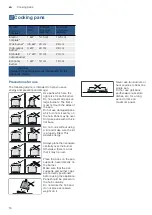
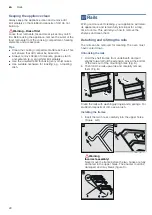
Inserting accessories
The cooking compartment has five shelf positions. The
shelf positions are counted from the bottom up.
In some appliances, the highest shelf position is
marked on the cooking compartment by the grill
symbol.
Always insert accessories between the two guide rods
for the shelf position.
Accessories can be pulled out approximately halfway
without tipping.
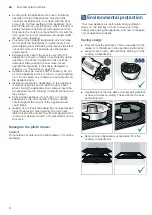
When sliding accessories into the cooking
compartment, ensure that the kink in the side rail is at
the back. Only then will they lock in place.
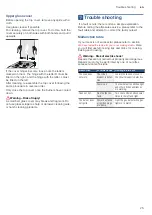
Notes
■
Hold the baking tray securely at the sides with both
hands and slide it into the shelf supports, keeping it
parallel. Do not move the baking tray from side to
side as you slide it in, otherwise it will not go in easily
and the enamelled surfaces may be damaged.
■
Make sure that you always insert the accessories
into the cooking compartment the right way round.
■
Always insert the accessories fully into the cooking
compartment so that they do not touch the appliance
door.
■
Take any accessories that you will not be using out
of the cooking compartment.
Optional accessories
You can buy optional accessories from our after-sales
service, from specialist retailers or online. You will find a
comprehensive range of products for your appliance in
our brochures and online.
Their availability and whether it is possible to order
them online varies from country to country. See your
sales brochures for more details.
Note:
Not all optional accessories are suitable for every
appliance. When purchasing, always quote the exact
product number (E no.) of your appliance.
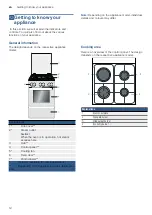
Wire rack
For ovenware, cake tins and ovenproof
dishes.
For roasts, grilled items and frozen
meals.
Baking tray
For tray bakes and small baked prod-
ucts.
Universal pan
For moist cakes, pastries, frozen meals
and large roasts.
It can be used to catch dripping fat when
you are grilling directly on the wire rack.
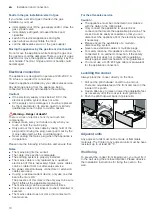
Coffee pot trivet for the economy
burner
Please use the supplied coffee pot trivet
for the economy burner when making
Turkish coffee using pans that have a
base less than 12 cm in diameter or cof-
fee pots.
Place the coffee pot trivet on the econ-
omy burner's pan support.
Do not use the coffee pot trivet with
pans with a base that is more than 12
cm in diameter.
The coffee pot trivet is suitable for the
economy burner only.


