background image

7

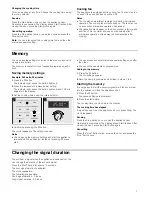
Changing the cooking time

This can be done at any time. Change the cooking time using 

the rotary selector.

Pausing

Press the Stop button once or open the appliance door. 

Operation is suspended. The display above Start flashes. After 

closing the door, press the Start button again.

Cancelling operation

Press the Stop button twice, or open the door and press the 

Stop button once.

Note: 

You can also adjust the cooking time first and then the 

microwave power setting.

Cooling fan

The appliance is equipped with a cooling fan. The fan may run 

on even if the oven has been switched off.

Notes

The cooking compartment remains cold during microwave 

operation. The cooling fan will still switch on. The fan may run 

on even when microwave operation has ended.

Condensation may appear on the door window, interior walls 

and floor. This is normal and does not adversely affect 

microwave operation. Wipe away the condensation after 

cooking.

Memory

You can save the settings for a dish in the memory and call it 

up again at any time. 
The memory is useful for if you frequently prepare a specific 

dish. 

Saving memory settings

Example: 360 watts, 25 minutes

1.

Press the 

f

 button.

The indicator light above the button lights up.

2.

Press the required microwave power setting.
The indicator light above the button lights up and 1:00 min 

appears in the display.

3.

Set the cooking time using the rotary selector.

4.

Confirm by pressing the 

f

 button.

The clock reappears. The setting is saved.

Notes

You can save the memory settings and start the appliance 

immediately. When finishing, instead of pressing 

f

, press 

start.

You cannot save several microwave power settings one after 

the other.

You cannot save automatic programmes.

Adding to the memory

1.

 Press the 

f

 button.

The old settings appear.

2.

Save the new programme as described in steps 1 to 4.

Starting the memory

It is very easy to start the saved programme. Place your meal 

into the appliance. Close the appliance door.

1.

Press the 

f

 button.

The saved settings are displayed.

2.

Press the start button.

The cooking time counts down in the display.

The cooking time has elapsed

A signal sounds. Open the appliance door or press Stop. The 

clock reappears.

Pausing

Press the Stop button once or open the appliance door. 

Operation is suspended. The display above Start flashes. After 

closing the door, press the Start button again.

Cancelling

Press the "stop" button twice, or open the door and press the 

"stop" button once.

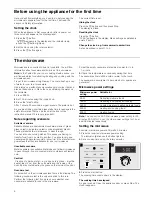
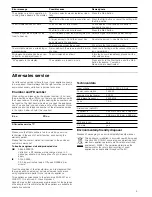
Changing the signal duration

You will hear a signal when the appliance is switched off. You 

can change the duration of the acoustic signal. 
Press the "start" button for approx. 6 seconds.
The new signal duration is adopted. 

The clock reappears. 
The following are possible: 

Short signal duration - 3 tones 

Long signal duration - 30 tones.

VWRS

VWDUW

PLQ

NJ

PLQ

Содержание HMT84M624B

Страница 1: ... en Instruction manual HMT84M624B HMT84M664B HMT84M654B Microwave ...

Страница 2: ... a kitchen Observe the special installation instructions Check the appliance for damage after unpacking it Do not connect the appliance if it has been damaged in transport Only a licensed professional may connect appliances without plugs Damage caused by incorrect connection is not covered under warranty This appliance is intended for domestic use only The appliance must only be used for the prepa...

Страница 3: ...ne of our trained after sales technicians If the appliance is defective unplug the appliance from the mains or switch off the circuit breaker in the fuse box Contact the after sales service Risk of electric shock The cable insulation on electrical appliances may melt when touching hot parts of the appliance Never bring electrical appliance cables into contact with hot parts of the appliance Risk o...

Страница 4: ...king compartment may lead to overloading Never switch on the appliance unless there is food in the cooking compartment An exception to this rule is a short crockery test see the section Microwave suitable crockery Microwave popcorn Never set the microwave power too high Use a power setting no higher than 600 watts Always place the popcorn bag on a glass plate The disc may jump if overloaded Liquid...

Страница 5: ...se special accessories from the after sales service or specialist retailers Please specify the HEZ number You will find a comprehensive range of products in our brochures and on the Internet The availability of special accessories and whether it is possible to order them online may vary depending on your country Please see the sales brochures for more details 1 Display for clock and cooking time 2...

Страница 6: ...ain ceramic or heat resistant plastic These materials allow microwaves to pass through You can also use serving dishes This saves you having to transfer food from one dish to another You should only use ovenware with decorative gold or silver trim if the manufacturer guarantees that they are suitable for use in microwaves Unsuitable ovenware Metal ovenware is unsuitable Metal does not allow microw...

Страница 7: ... lights up and 1 00 min appears in the display 3 Set the cooking time using the rotary selector 4 Confirm by pressing the f button The clock reappears The setting is saved Notes You can save the memory settings and start the appliance immediately When finishing instead of pressing f press start You cannot save several microwave power settings one after the other You cannot save automatic programme...

Страница 8: ...e error messages Troubleshooting Area Cleaning agents Appliance front Hot soapy water Clean with a dish cloth and dry with a soft cloth Do not use glass cleaners or metal or glass scrapers for cleaning Appliance front with stainless steel Hot soapy water Clean with a dish cloth and dry with a soft cloth Remove flecks of limescale grease starch and albumin e g egg white immediately Corrosion can fo...

Страница 9: ... button or cancel the setting with the Stop button The microwave does not work The door was not fully closed Check whether food residue or debris is trapped in the door The Start button was not pressed Press the Start button It takes longer than before for the food to heat up The microwave power level setting was too low Select a higher microwave power setting A larger amount of food than usual ha...

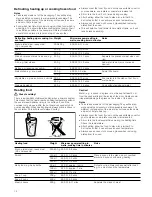
Страница 10: ...ht to set the programme Liquid will be produced when defrosting meat or poultry Drain off this liquid when turning meat and poultry and under no circumstances use it for other purposes or allow it to come into contact with other foods Ovenware Place the food in a microwaveable shallow dish e g a china or glass plate but do not cover Resting time The defrosted food should be left to stand for an ad...

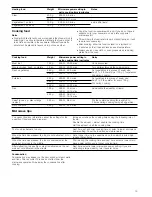
Страница 11: ...ing the defrosting time Large pieces of food should be turned several times Leave defrosted items to stand at room temperature for a further 10 to 20 minutes so that the temperature is even throughout The giblets can be removed from poultry at this point The meat can still be further prepared even if it has a small frozen core Programme no Weight range in kg Cooking P 05 Rice 0 05 0 2 P 06 Potatoe...

Страница 12: ...he meal may not require the same amount of time to heat up Always cover the food If you do not have a suitable cover for your container use a plate or special microwave foil Stir or turn the food several times during the heating time Check the temperature After heating allow the food to stand for a further 2 to 5 minutes so that it can achieve an even temperature Always use an oven cloth or oven g...

Страница 13: ...0 mins Cut vegetables into pieces of equal size Add 1 to 2 tbsp water per 100 g of vegetables Stir during cooking 500 g 600 W 10 15 mins Potatoes 250 g 600 W 8 10 mins Cut potatoes into pieces of equal size Add 1 to 2 tbsp water for every 100 g Stir during cooking 500 g 600 W 11 14 mins 750 g 600 W 15 22 mins Rice 125 g 600 W 5 7 mins 180 W 12 15 mins Add double the quantity of liquid 250 g 600 W ...

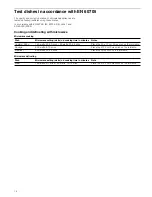
Страница 14: ...icrowave defrosting Dish Microwave setting watts nd cooking time in minutes Notes Custard 565 g 180 watts 25 30 mins 90 watts 20 25 mins Place the 20 x 17 cm Pyrex dish on the turntable Sponge 600 watts 8 10 mins Place the Ø 22 cm Pyrex dish on the turntable Meatloaf 600 watts 20 25 mins Place the Pyrex dish on the turntable Dish Microwave setting watts nd cooking time in minutes Note Meat 180 wat...

Страница 15: ......
Страница 16: ... 02 940128 9000923532 9000923532 Robert Bosch Hausgeräte GmbH Carl Wery Straße 34 81739 München Germany www bosch home com ...

Отзывы: