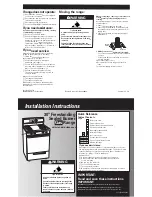
background image

5

Upper glass cover

Caution:

 The glass cover may crack due to heat. Before 

closing the cover, turn off all burners. Wait until the oven has 

cooled down before closing the glass cover.

Causes of damage

Hob

Caution!

Only use the burners when cookware has been placed on 

top. Do not heat up empty pots or pans. The saucepan base 

will be damaged.

Only use pots and pans with an even base.

Place the pot or pan centrally over the burner. This will 

optimise transfer of the heat from the burner flame to the pot 

or ban base. The handle does not become damaged, and 

greater energy savings are guaranteed.

Ensure that the gas burners are clean and dry. The burner 

cup and ¶burner cap must be positioned exactly.

Ensure that the top cover is not closed when the oven is 

started up.

Damage to the oven

Caution!

Do not push baking trays onto the oven floor. Do not line the 

oven floor with aluminium foil. Do not place any food 

containers on the oven floor, as this could cause heat to 

accumulate. The baking and roasting times will no longer be 

correct and the enamel will be damaged.

Do not pour water directly into a hot oven. This could damage 

the enamel.

Do not use too much fruit when baking a very liquid fruit 

cake. Fruit juice, which drips from the baking tray, may cause 

stains that cannot be removed.

Do not use the open oven door as a seat or footstool.

Damage to the plinth drawer

Caution!

Do not place hot objects in the plinth drawer. It could be 

damaged.

Damage to the fronts of adjacent units

Caution!

Only allow the oven to cool down with the oven door closed. 

Even if the door is only open slightly open, the fronts of 

adjacent units could be damaged over time.

If the oven seal is very dirty, the oven door will not close 

properly during operation. The fronts of adjacent units will 

become damaged over time. Always keep the door seal 

clean. 

Set-up, gas and electricity connection

Gas connection

Installation must only be performed by an approved expert or a 

licensed after-sales service engineer in accordance with the 

instructions specified under "Gas connection and conversion to 

a different gas type".

For the licensed expert or after-sales service
Caution!

The setting conditions for this appliance are specified on the 

rating plate on the back of the appliance. The gas type set in 

the factory is marked with an asterisk (*).

Before setting up the appliance, check the grid access 

conditions (gas type and gas pressure) and ensure that the 

gas setting of the appliance meets these conditions. If the 

appliance settings have to be changed, follow the instructions 

in the section "Gas connection and conversion to a different 

gas type".

This appliance is not connected to a waste gas main. It must 

be connected and commissioned in accordance with the 

installation conditions. Do not connect the appliance to a 

waste gas main. All ventilation regulations must be observed.

The gas connection must be made via a fixed, i.e. not mobile 

connection (gas line) or via a safety hose.

If using the safety hose, ensure that the hose is not trapped 

or crushed. The hose must not come into contact with hot 

surfaces.

The gas line (gas pipe or safety hose) can be connected to 

the right or left-hand side of the appliance. The connection 

must have an easily accessible locking device.

Faults in the gas installation/smell of gas

If you notice a smell of gas or faults in the gas installation, you 

must

immediately shut off the gas supply and/or close the gas 

cylinder valve

immediately extinguish all naked flames and cigarettes

switch off electrical appliances and lights

open windows and ventilate the room

call the after

­

sales service or the gas supplier

Electrical connection

Caution!

Have the appliance set up by your after-sales service. A 16 A 

fuse is required for connection. The appliance is designed for 

operation at 220-240 V. 

If the electricity supply drops below 180 V, the electrical 

ignition system does not work.

Any damage arising from the appliance being connected 

incorrectly will invalidate the guarantee.

For the after-sales service
Caution!

The appliance must be connected in accordance with the 

data on the rating plate.

Only connect the appliance to an electrical connection that 

meets the applicable provisions. The socket must be easily 

Содержание HGG933150J

Страница 1: ... en Instruction manual 3 it Istruzioni per l uso 23 Free standing cooker HGG933150J HGG933250J Cucina da libero posizionamento HGG933150J HGG933250J ...

Страница 2: ......

Страница 3: ...oven 12 The oven s lower gas burner is set with the upper heating element as follows 12 This is how you adjust the electric grill in the oven 12 Setting hot air grilling 13 Care and cleaning 13 Upper glass cover 13 Cleaning agents 13 Detaching and refitting the rails 14 Detaching and attaching the oven door 15 Removing and installing the door panels 15 Troubleshooting 16 Malfunction table 16 Repla...

Страница 4: ...ircuit Never trap the mains cable of electrical appliances in the appliance door when it is hot or pull the cable over burners when they are hot The cable insulation could melt ã Risk of scalding Never pour water into the hot cooking compartment This will produce hot steam Hot accessories and ovenware ã Risk of burns Never remove ovenware or accessories from the cooking compartment without an oven...

Страница 5: ...nstructions specified under Gas connection and conversion to a different gas type For the licensed expert or after sales service Caution The setting conditions for this appliance are specified on the rating plate on the back of the appliance The gas type set in the factory is marked with an asterisk Before setting up the appliance check the grid access conditions gas type and gas pressure and ensu...

Страница 6: ...the oven and the bottom edge of the extractor hood must meet the requirements of the extractor hood manufacturer Ensure that the appliance is not moved again after set up The distance from the high output burner or wok burner to the fronts of adjacent units must be at least 50 mm Measures to be noted during transport Secure all mobile parts in and on the appliance using an adhesive tape that can b...

Страница 7: ...rner This will optimise transfer of the heat from the burner flame to the pot or ban base The handle does not become damaged and greater energy savings are guaranteed 6WHDP RXWOHW XULQJ RSHUDWLRQ WKH RYHQ VKRXOG EH VZLWFKHG RQ DXWLRQ KHQ WKH RYHQ LV LQ RSHUDWLRQ KRW VWHDP LV UHOHDVHG IURP KHUH RE FRYHU URQW FRYHU RE 2YHQ GRRU 3OLQWK GUDZHU RQWURO SDQHO 6WHDP RXWOHW DXWLRQ RW DLU LV UHOHDVHG KHUH 6...

Страница 8: ...sed like a kitchen timer Setting procedure Set the timer for the desired cooking time The time has elapsed When the time has elapsed a signal sounds The switch turns to the OFF position automatically The Positions Function gas oven þ Zero position The oven is switched off Settings area Large flame highest setting Economy flame lowest setting The Positions Function ÿ Zero position Oven not hot 170 ...

Страница 9: ...oping edge facing towards the oven door Universal pan HEZ332000 For moist cakes pastries frozen meals and large joints It can also be used to catch dripping fat when grilling directly on the wire rack Slide the universal pan into the oven with the sloping edge fac ing the oven door Wire insert HEZ324000 For roasting Always place the wire insert in the universal pan This ensures that dripping fat a...

Страница 10: ... press the button The oven light comes on 4 Turn the switch for the electric grill clockwise to 5 Turn off the switch for the electric grill after 30 minutes Turn off the multi function button Glass roasting dish HEZ915001 The glass roasting dish is suitable for pot roasts and bakes that are cooked in the oven It is ideally suited to automatic programmes or automatic roasting Metal roasting dish H...

Страница 11: ...If the flame goes out again repeat the process from step 2 7 To end the cooking process Turn the burner knob û clockwise to the Off position The ignition device should not be actuated for more than 15 seconds If the burner does not light within 15 seconds wait for at least one minute Then repeat the ignition process The gas burner does not ignite If there is a power cut or if the ignition plugs ar...

Страница 12: ...switched on at certain intervals you can bake on a baking sheet with the oven door closed Example in the picture Heat to 200 C 1 Open the top cover The top cover must remain open for as long as the oven is in operation 2 Open the main gas supply to the appliance Connect the plug in the socket Open the oven door 3 Push in the switch for the lower gas burner and turn it clockwise to 200 C 4 While ho...

Страница 13: ...astic and metal Shadows on the door panel which look like streaks are caused by reflections made by the oven light Enamel is baked on at very high temperatures This can cause some slight colour variations This is normal and does not affect operation The edges of thin trays cannot be completely enamelled As a result these edges can be rough This will not impair the anti corrosion protection Upper g...

Страница 14: ...ccurately it will be harder to ignite the burner The burner covers are coated with black enamel Due to the high temperatures discolouration may occur This will not impair the function of the burner Replace the wire rack in the oven Electric hob option Clean with the hard side of a scouring sponge and some liquid scouring agent After cleaning switch the hob on briefly to dry it Wet hobs rust over t...

Страница 15: ...igure B Attaching the door Reattach the oven door in the reverse sequence to removal 1 When attaching the oven door ensure that both hinges are inserted straight into the opening figure A 2 The notch on the hinge must engage on both sides figure B 3 Fold back both locking levers figure C Close the oven door ã Risk of injury If the oven door falls out accidentally or a hinge snaps shut do not reach...

Страница 16: ...les service technicians Replacing the bulb in the oven ceiling light If the bulb in the oven light fails it must be replaced Heat resistant 25 watt spare bulbs can be obtained from our after sales service or a specialist retailer Only use these bulbs ã Risk of electric shock Switch off the circuit breaker in the fuse box 1 Place a tea towel in the cold oven to prevent damage 2 Unscrew the glass co...

Страница 17: ...oking times the oven can be turned off 10 minutes before the end of the cooking time and the meal can be finished using residual heat Saving energy with the hob Use pots and pans with thick even bases Uneven bases increase energy consumption The diameter of pan bases should be the same size as the hotplate In particular small saucepans on the hotplate cause energy losses Note that cookware manufac...

Страница 18: ... surface The glass could break If you want to use silicone moulds follow the guidelines in the manufacturer s instruction manual Silicone moulds turn out slightly smaller than normal cake tins For this reason the quantities may be slightly different to those indicated in your recipe Baking tables for the lower burner in the gas oven In the tables you will find the optimum types of heating for a se...

Страница 19: ... Baking sheet 3 200 170 25 35 Toast without preheating Baking sheet 3 200 170 10 20 Biscuits Baking sheet 4 130 170 10 25 Puff pastry Baking sheet 3 170 170 20 30 Small cakes Baking sheet 4 130 170 25 35 You wish to bake according to your own recipe Use similar items in the baking tables as a guide How to tell whether sponge cake is baked through Approx 10 minutes before the end of the baking time...

Страница 20: ...ectly on the wire rack If you are grilling a single piece the best results are achieved by placing it in the centre of the wire rack Also insert the baking tray at level 1 The meat juices are collected in the pan and the oven is kept cleaner Baking sheets and the universal pan should not be inserted at level 4 or 5 while the grill is in use They may become deformed at high temperatures and damage ...

Страница 21: ...en whole 1 6 kg Wire rack 2 5 190 210 80 90 Chicken half 500 g each Wire rack 2 5 200 220 40 50 Chicken pieces 300 g each Wire rack 3 5 200 220 30 40 Duck whole 2 0 kg Wire rack 2 5 170 190 90 100 Goose whole 3 5 4 0 kg Wire rack 2 5 160 170 110 130 Small turkey whole 3 0 kg Wire rack 2 5 170 190 80 100 Turkey drumsticks 1 0 kg Wire rack 2 5 180 200 90 100 Fish Weight Accessories and ovenware Leve...

Страница 22: ... made from shortcrust pastry biscuits gingerbread cookies Dish Accessories and oven ware Level Type of heating Temperature in C electric grill Cooking time in minutes Toast Brown the toast from above 4 slices Wire rack 4 5 160 170 10 15 Brown the toast 9 slices Wire rack 4 3 3 5 Brown the stuffed toast from above 9 slices Wire rack 4 3 5 7 Brown the toast from above 12 slices Wire rack 4 5 160 170...

Страница 23: ...re del forno viene impostato con l elemento riscaldante superiore come segue 33 Così viene impostato il grill elettrico del forno 34 Impostazione del grill ventilato 34 Cura e manutenzione 34 Coperchio in vetro superiore 34 Detergente 34 Sgancio e riaggancio dei supporti 36 Sgancio e riaggancio della porta del forno 36 Montaggio e smontaggio dei pannelli della porta 37 Che cosa fare in caso di gua...

Страница 24: ...i allacciamento degli apparecchi elettrici non deve mai rimanere impigliato nella porta calda dell apparecchio o essere fatto passare sopra le zone di cottura calde L isolamento del cavo potrebbe fondersi ã Pericolo di bruciature Non versare mai acqua nel vano di cottura caldo per evitare la formazione di vapore acqueo bollente Accessori e stoviglie caldi ã Pericolo di scottature Estrarre sempre g...

Страница 25: ...urante il funzionamento Con il tempo le parti anteriori dei mobili circostanti vengono danneggiate Mantenere la guarnizione della porta sempre pulita Installazione collegamento elettrico e allacciamento del gas Allacciamento del gas L installazione può essere eseguita solo da un tecnico o da un addetto dell assistenza clienti autorizzati in conformità alle istruzioni riportate nella sezione relati...

Страница 26: ...se in modo che l apparecchio sia orizzontale Installazione dell apparecchio L apparecchio deve essere installato in conformità alle dimensioni indicate e direttamente sul pavimento della cucina Non è consentito installare l apparecchio su altri tipi di oggetti La distanza tra il bordo superiore del forno e il bordo inferiore della cappa di aspirazione del vapore deve essere conforme alle prescrizi...

Страница 27: ...ano cottura XUDQWH LO IXQ LRQDPHQWR RFFRUUH DFFHQGHUH LO IRUQR WWHQ LRQH XUDQWH O XVR GHO IRUQR GD TXHVWR SXQWR IXRULHVFH YDSRUH FDOGR 0DVFKHULQD IURQWDOH 3LDQR GL FRWWXUD 3RUWD GHO IRUQR DVVHWWR QHOOD EDVH 3LDVWUD GL FRSHUWXUD XRULXVFLWD GL YDSRUH 6XSHUILFLH GL ODYRUR XRULXVFLWD GL YDSRUH WWHQ LRQH XRULXVFLWD GL DULD FDOGD GD TXHVWR SXQWR UXFLDWRUH VHPLUDSLGR UXFLDWRUH DXVLOLDULR UXFLDWRUH VHPLUD...

Страница 28: ...lsante multifunzione Con questo pulsante è possibile impostare 3 diverse funzioni Premendo il pulsante multifunzione viene acceso il grill elettrico La lampada del forno si accende Inoltre il pulsante multifunzione serve per accendere l aria calda Per spegnere il pulsante multifunzione premere nuovamente Posizioni Funzione fornelli a gas þ Posizione zero Fornello spento Campo di imposta zione Fiam...

Страница 29: ... sono compatibili con tutti gli apparecchi Al momento dell acquisto indicare sempre il codice prodotto E Nr del proprio apparecchio Posizione Funzione û Posizione zero Impostazione Off S Fine del tempo impo stato Segnale al termine del tempo impostato S 60 Indicatore dei minuti Indicatore del tempo in minuti Griglia Per stoviglie pentole stampi per dolci arrosti grigliate e pietanze sur gelate Ins...

Страница 30: ...one di program mazione o cottura automatica Tegame in metallo HEZ6000 Il tegame è adatto alla zona per pentole ovali del piano di cot tura in vetroceramica al sistema di cottura a sensori e alla fun zione di programmazione o cottura automatica Le pareti esterne del tegame sono smaltate mentre le pareti interne sono dotate di un rivestimento antiaderente Estensione telescopica doppia HEZ338250 Graz...

Страница 31: ...ucia in caso negativo ripetere il procedimento a partire dal passaggio 3 7 Chiudere lentamente la porta del forno 8 Dopo 30 minuti spegnere il selettore per il bruciatore a gas inferiore Impostazione del grill elettrico 1 Aprire il coperchio superiore Quando il forno è in funzione il coperchio superiore deve essere aperto 2 Aprire l alimentazione di gas principale dell apparecchio Collegare la spi...

Страница 32: ...ondi il bruciatore non si accende attendere almeno un minuto Quindi ripetere la procedura di accensione Il bruciatore a gas non si accende In caso di interruzioni di corrente o se gli elettrodi di accensione sono umidi è possibile accendere il bruciatore a gas mediante un accendigas o un fiammifero Tabella cottura Per ciascuna zona di cottura scegliere una pentola di dimensioni adeguate Il diametr...

Страница 33: ... del forno viene impostato con l elemento riscaldante superiore come segue Quando il bruciatore a gas inferiore brucia e l elemento riscaldante superiore si accende a intervalli definiti è possibile cuocere su una teglia da forno con la porta del forno chiusa Esempio nella figura Cottura in forno a 200 C 1 Aprire il coperchio superiore Quando il forno è in funzione il coperchio superiore deve esse...

Страница 34: ...a lungo il piano di cottura e il forno in ottime condizioni Sono qui illustrate le modalità corrette di cura e pulizia di entrambi Avvertenze Lievi differenze di colore sul lato anteriore del forno sono dovute a diversi materiali quali vetro plastica o metallo Eventuali ombreggiature sul vetro della porta simili a striature sono dovute al riflesso della luce della lampada del forno A temperature m...

Страница 35: ...e il funzionamento dei bruciatori Inserire nuovamente la griglia nel forno Piastra elettrica opzionale Pulire con il lato ruvido di una spugna abrasiva e un detergente liquido abrasivo Dopo la pulizia accendere brevemente la piastra elettrica per favorirne l asciugatura Con il tempo infatti le piastre elettriche umide si arrugginiscono Quindi stendere un prodotto specifico per la cura delle piastr...

Страница 36: ...le leve di bloccaggio sono aperte per consentire la rimozione della porta del forno figura B le cerniere sono bloccate Non è possibile farle scattare ã Pericolo di lesioni Se le cerniere non sono bloccate scattano con una forza maggiore Controllare che le leve di bloccaggio siano sempre completamente chiuse e durante l estrazione della porta del forno che siano completamente aperte Sgancio della p...

Страница 37: ...assistenza tecnica consultate la tabella in quanto potreste essere in grado di risolvere il problema da soli Tabella guasti Se la cottura di una pietanza non riesce bene consultare la sezione Abbiamo provato per voi le pietanze nel nostro laboratorio Qui potete trovare consigli e informazioni utili per la cottura al forno di diversi tipi di pietanze ã Pericolo di folgorazione Le riparazioni non es...

Страница 38: ...ella ricetta Utilizzare teglie scure laccate o smaltate nere in quanto assorbono particolarmente bene il calore Aprire il meno possibile la porta del forno durante la cottura In caso di tempi di cottura prolungati il forno può essere spento 10 minuti prima del termine della cottura e la pietanza può terminare la cottura con il calore residuo Risparmio energetico con il piano di cottura Utilizzare ...

Страница 39: ...ilizzare stampi in silicone attenersi alle istruzioni per l uso del produttore Gli stampi in silicone sono un po più piccoli rispetto ai normali stampi per dolci pertanto le quantità possono essere leggermente diverse dalle indicazioni nella ricetta Tabelle di cottura per il bruciatore a gas inferiore del fornello a gas Nelle tabelle sono riportati i tempi ottimali per una selezione di dolci e tor...

Страница 40: ...da forno 3 170 170 25 35 Rotolo di pan di Spagna Teglia da forno 3 130 170 5 15 Treccia lievitata 500 g di farina Teglia da forno 3 170 170 15 25 Stollen 500 g di farina Teglia da forno 3 170 170 40 50 Pizza Teglia da forno 3 170 170 20 30 Pane lievitato 1 2 kg farina Teglia da forno 3 200 170 25 35 Pancarré senza preriscaldare Teglia da forno 3 200 170 10 20 Biscottini Teglia da forno 4 130 170 1...

Страница 41: ...a della carne e il forno resta più pulito Durante la cottura alla griglia la teglia da forno o la leccarda non dovrebbero essere inserite all altezza 4 o 5 A temperature elevate potrebbero deformarsi e danneggiare il forno durante l estrazione L elemento scaldante del grill si accende e si spegne di continuo Questo è normale La frequenza di questa alternanza dipende dal livello grill impostato Nel...

Страница 42: ... 1 2 kg Griglia 2 5 200 220 60 70 Pollo intero 1 6 kg Griglia 2 5 190 210 80 90 Pollo metà 500 g cia scuna Griglia 2 5 200 220 40 50 Porzioni di pollo 300 g cia scuna Griglia 3 5 200 220 30 40 Anatra intera 2 0 kg Griglia 2 5 170 190 90 100 Oca intera 3 5 4 0 kg Griglia 2 5 160 170 110 130 Tacchinella intera 3 0 kg Griglia 2 5 170 190 80 100 Cosce di tacchino 1 0 kg Griglia 2 5 180 200 90 100 Pesc...

Страница 43: ...ne prodotti da forno sottili di pasta frolla biscotti panpepato biscotti natalizi speziati Pietanza Accessori e stoviglie Livello Tipo di riscalda mento Temperatura in C grill elet trico Durata minuti Toast Dorare i toast da sopra 4 pezzi Griglia 4 5 160 170 10 15 Dorare i toast 9 pezzi Griglia 4 3 3 5 Dorare i toast farciti da sopra 9 pezzi Griglia 4 3 5 7 Dorare i toast da sopra 12 pezzi Griglia...

Страница 44: ...01 910218 9000603651 9000603651 Robert Bosch Hausgeräte GmbH Carl Wery Straße 34 81739 München Germany www bosch home com ...

Отзывы: