background image

Getting Started

English 10

Extension Oven Rack (some models)

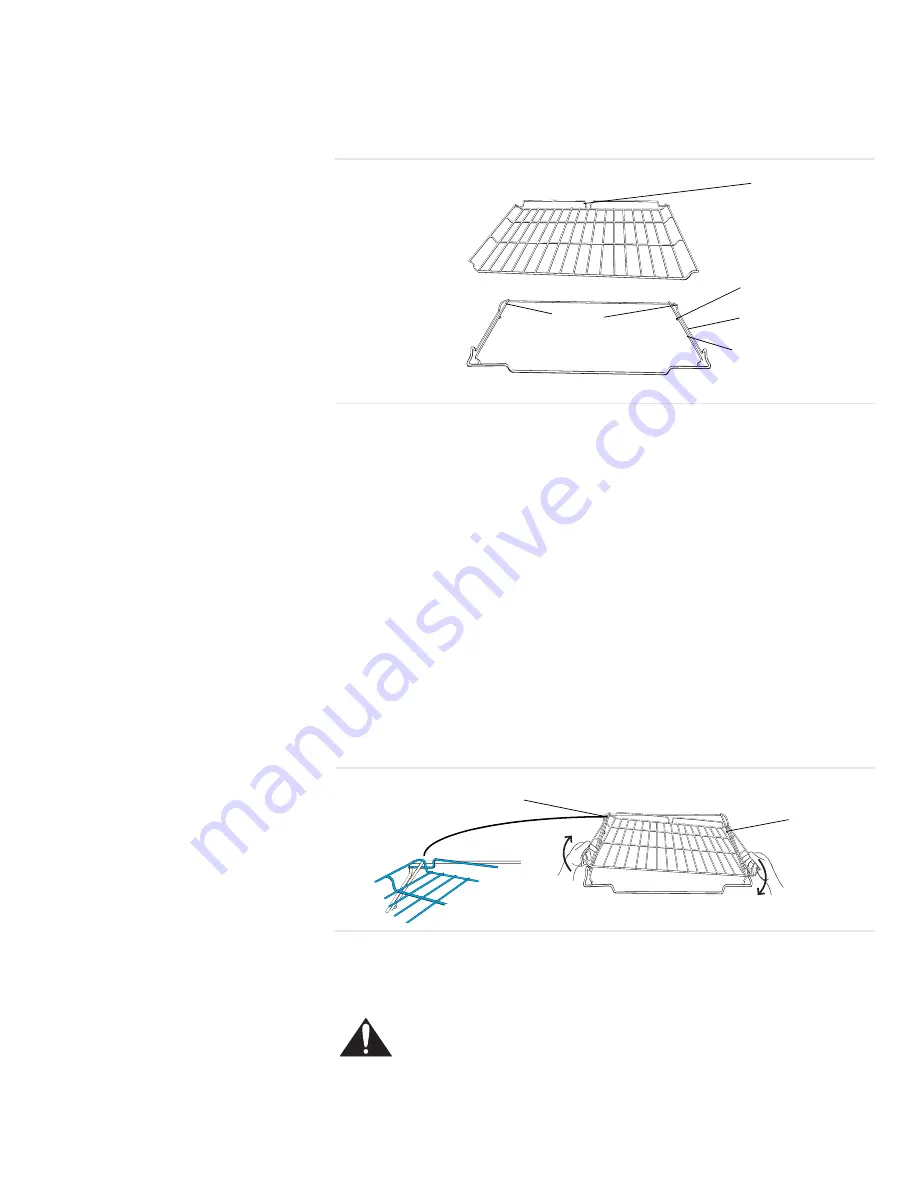
The Full Extension Rack allows for easier access to cooking foods. The bottom 
section extends as far as the standard flat rack. However, the top section 
extends beyond the bottom section bringing the food closer to the user. To order 
a full extension rack, contact Service or a dealer near you.

Removing and Replacing

Note: 

The full extension rack must be in the closed position when removing and 

replacing. Grasp the entire rack (both sections).

1. Grasp the bottom section and pull straight out. 
2. Once the stop is reached, grasp the top section and pull straight out until the 

second stop is reached. If the top rack will not extend fully, it is not installed 
correctly. Reinstall it so that the pan stop is in the back of the oven.

Disassembly (for cleaning)

The two sections of the rack are designed to come apart for easier cleaning. 

1. Place rack on flat surface in the closed position top side up. 
2. Rotate one side of top rack towards you until it is past the stop (ball). 
3. Pull the rack up and out, rotated side first. 

Reassembly

CAUTION

Always verify that top rack is installed correctly after reassembly. 
The back edges of the top rack must be under the rack guide on the 
bottom rack. DO NOT simply rest the top rack on top of the bottom 
one.

 Figure 9: Full Extension Rack

 Figure 10: Disassembly

Top Rack

Back of Rack

Pan Stops

Bottom 
Rack

Stops

Top Rack Rest

Rack Guide

Front of Rack

Top Rack 
Stop (Ball)

Closed Position

Back of Rack

Front of Rack

Stop (Ball)

Содержание HDI7032C

Страница 1: ...Use and Care Manual Bosh Dual Fuel Range ...

Страница 2: ...or the First Time 17 Operation Cooktop 17 About the Cooktop 17 Operation 17 Operation Oven 18 About the Oven 18 Operation 18 Operation Warming Drawer some models 22 About the Warming Drawer 22 Operation 23 Getting the Most Out of Your Appliance 24 Getting the Most Out of Your Cooktop 24 Getting the Most Out of Your Oven 25 Getting the Most Out of Your Warming Drawer 33 Cleaning and Maintenance 33 ...

Страница 3: ...struc tions Fire Safety Do not use aluminum foil or protective liners to line any part of an appliance especially surface unit drip bowls or oven bottom Installation of these liners may result in a risk of electric shock or fire Set the burner control so that the flame does not extend beyond the bottom of the pan If materials inside an oven or warming drawer should ignite keep door closed Turn off...

Страница 4: ...TER including wet dishcloths or towels a violent steam explosion will result d Use an extinguisher ONLY if 1 You know you have a Class ABC extinguisher and you already know how to operate it 2 The fire is small and contained in the area where it started 3 The fire department is being called 4 You can fight the fire with your back to an exit 5 Have an appropriate fire extinguisher available nearby ...

Страница 5: ...nd or steam proceed with your cooking Keep doors shut unless necessary for cooking or cleaning purposes Do not leave open doors unattended Do not heat or warm unopened food containers Build up of pressure may cause the container to burst and cause injury Always place oven racks in desired location while oven is cool If a rack must be moved while oven is hot do not let potholder contact the heating...

Страница 6: ...ce food directly on oven bottom Follow the manufacturer s directions when using cooking or roasting bags Hold the handle of the pan when stirring or turning food This helps prevent spills and movement of the pan Use Proper Pan Size The use of undersized cookware will expose a portion of the heating element or burner to direct contact and may result in ignition of clothing Select cookware having fl...

Страница 7: ...horized servicer Do not obstruct oven vents Do not repair or replace any part of the appliance unless specifically recom mended in this manual Refer all servicing to a factory authorized service center In the event of an error the display flashes and beeps continuously If this happens during self clean disconnect appliance from the power supply and call a qualified technician In the event of an er...

Страница 8: ...shown 6 Rack Positions Rack Guides 18 Oven Rack Full Extension some models not shown 7 Oven Racks Flat 2 or 3 varies by model 19 Literature Package not shown 8 Oven Door Gasket 20 Oven Lights 2 oven back wall not shown 9 Storage Drawer some models a a Depending on the model your appliance has either a storage drawer or a warming drawer 21 Convection Fan and Element oven back wall not shown 10 Warm...

Страница 9: ...her information on each Diffusion Burner Caps Depending on the model the appliance is equipped with either 2 or 4 diffusion burner caps They provide a more even heat espceially when cooking at lower temperatures Burner Grates Warning To prevent flare ups do not use the cooktop without all burner caps and all burner grates properly positions Do not use a grate if the feet are missing or damaged Mod...

Страница 10: ...s on top of the edge of the right side grate The locating pins on the outside edges of the cooktop fit into notches on the bot tom of the grates Burner grates should rest flat on the cooktop When properly positioned the grates will be level and will not move back and forth Figure 5 Grates for Slide in Models Top View Figure 6 Installing Grates for Slide in Models Side View Figure 7 Grates for Slid...

Страница 11: ...ell suited for gentle cooking of small amounts of food Use the burner to melt butter or choco late or to prepare delicate sauces Oven Racks Depending on model the range is equipped with one of the following combina tions Three flat racks Two flat racks and one full extension rack Two flat racks and one half rack Flat Oven Racks The racks are designed with a stop so they will stop before coming com...

Страница 12: ... If the top rack will not extend fully it is not installed correctly Reinstall it so that the pan stop is in the back of the oven Disassembly for cleaning The two sections of the rack are designed to come apart for easier cleaning 1 Place rack on flat surface in the closed position top side up 2 Rotate one side of top rack towards you until it is past the stop ball 3 Pull the rack up and out rotat...

Страница 13: ...e Models The half oven rack can be used as a simple flat rack or as a half sized rack With the right half of the rack removed you can place a tall item such as a turkey on one side of the rack below and a shorter item such as a casserole on the other side A second shorter item can then be placed on the half rack above the first shorter item This allows for easier access to all items and better uti...

Страница 14: ...t block the vent as it is impor tant for air circulation Automatic Shutoff The oven will automatically shut off after 12 hours 24 hours if the time format is set for 24 hour in the Select Function section Self Cleaning The oven features a self cleaning function that eliminates the manual labor involved with cleaning your oven Indicators and Other Features Beep Signals that more information must be...

Страница 15: ...knob to change the time of day or the timer Cooking Mode Press pad to display cooking mode Cooking Mode Icon Shows the cooking elements that are active for the mode that is selected The icon will also display a fan if the convection fan is utilized in the selected mode Control Knob Used to set the clock timers select cook ing mode and temperature Turn clockwise to increase and turn counterclockwis...

Страница 16: ...4 Turn knob to change hours 5 Press Time again and minute digits flash 6 Turn knob to change minutes 7 Press Time again and the clock is set Note To cancel the TIME selection when setting the clock press OFF at any time while in the clock mode The Select Functions Menu SELECT FUNCTIONS is the section of the menu where you can set or change the range features listed below To access the SELECT FUNCT...

Страница 17: ...a different language 5 Press Start to accept a language change Lock Unlock the Oven Control Panel The oven keypad can be locked for safety purposes This feature can be used to prevent changes to the oven function This function DOES NOT lock the oven door 1 Access SELECT FUNCTIONS Menu 2 Turn knob clockwise until LOCK KEYS is flashing 3 Press Start KEY PAD LOCKED is displayed The display will beep ...

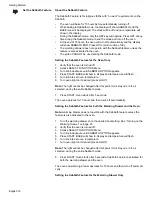
Страница 18: ...rature will flash 5 Turn knob to set oven temperature 6 Turn oven light on if desired press LIGHT Note The light cannot be changed after this point It will stay on or off as selected during the entire Sabbath mode 7 Press START Oven starts after 5 seconds The oven operates for 73 hours and then turns off automatically Setting the Sabbath Feature for both the Warming Drawer and the Oven Note warmin...

Страница 19: ...il AUTO CONVECT BAKE is displayed 3 Press Start 4 Turn knob to select ON or OFF 5 Press Start to accept new selection Before Using the Appliance for the First Time Remove all packing materials and labels from range Remove packing materials from inside the oven and inside the drawer While cool wipe with a clean damp sponge and dry For models with a glass ceramic cooktop apply the glass ceramic cook...

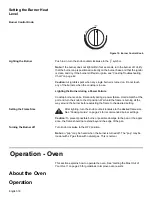
Страница 20: ...he port and turn the knob to the HI position Wait until the flame is burning all the way around the burner before adjusting the flame to the desired setting Setting the Flame Size After lighting turn the knob counterclockwise to the desired flame size See Cooking Guide on page 24 for recommended burner settings Caution To prevent possible burns or possible damage to the pan or the appli ance the f...

Страница 21: ...o select new temperature and press START 11 Once cooking has been completed press OFF to turn off oven Automatic Convection Conversion models with convection bake In the convection bake mode the temperature is automatically reduced 25 F from the package or recipe temperature Simply enter the package or recipe temperature when setting the mode and the range calculates the correct tem perature The A...

Страница 22: ...when not in a setting mode will turn off the oven Using Timed or Delayed Cook The TIMED COOK feature sets the oven to a cooking mode for a set period of time and then turns it off The TIMED COOK feature is available for each of the following oven modes Bake Convection Bake and Convection Roast Be sure that the time of day clock displays the correct time before begin ning See Changing the Clock on ...

Страница 23: ... section explains how to operate the probe See The Probe some models on page 27 for guidelines tips and suggestions The probe can be used to determine the internal doneness or the END temper ature of many foods especially meats and poultry The temperature range for the probe is 135 F to 200 F 57 C to 93 C Oven temperature can be set for 100 F up to 450 F 38 C up to 232 C Setting the Probe 1 Prepar...

Страница 24: ...and press START again Note Always remove probe from oven when cooking is complete The probe symbol will remain in the display until the probe is removed Do not leave probe attachment in oven during self clean Oven will not self clean with the probe installed in the oven This section explains how to operate the warming drawer See Getting the Most Out of Your Warming Drawer on page 33 for guidelines...

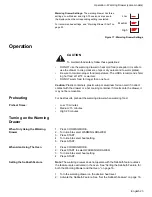
Страница 25: ... the Warming Drawer When Only Using the Warming Drawer 1 Press COOKING MODE 2 Turn knob to select WARMING DRAWER 3 Press START 4 Turn knob to select heat setting 5 Press START When Also Using The Oven 1 Press COOKING MODE 2 Press START to select WARMING DRAWER 3 Turn knob to select heat setting 4 Press START Setting the Sabbath Feature Note The warming drawer does not operate with the Sabbath feat...

Страница 26: ...g Water Time to boil can vary greatly depending on environmental conditions Try the fol lowing tips to decrease boil time Use a lid Use a pan that is appropriately sized for the amount of water and the size of the burner Select a pan with a flat base See Cookware Selection Guide on page 25 for details Choose a medium weight pan rather than a heavy weight one Start with water that is already warm B...

Страница 27: ...a Match Pan Diameter to Flame Size The flame should be the same size as the bottom of the pan or smaller Do not use small pans with high flame settings as the flames can lick up the sides of the pan Place oversized pans that span two burners front to rear not side to side Tight Fitting Lids A lid shortens cooking boiling time by holding heat inside the pot Cookware Tips Use of pots and pans with r...

Страница 28: ... pans Follow manufacturer recommendations Use glass or dark metal pans for pies Insulated baking pans may increase the recommended baking time Preheating the Oven Preheat the oven if the recipe recommends it Preheating is necessary for good results when baking cakes cookies pastry and breads Setting a higher temper ature does not shorten preheat time Place oven racks in proper position before preh...

Страница 29: ...ter of the thickest part of the food Oven Cooking Modes Bake Proof and Warm Baking is cooking with dry heated air Both the upper and lower element cycle to maintain the oven temperature Bake mode can be used to prepare foods like pastries and casseroles as well as to roast meats Note Depending on the model you may hear the convection fan while the oven is preheating for the bake mode This is norma...

Страница 30: ...F Refer to Convection Baking chart Place food in low sided uncovered pans such as cookie sheets without sides Center baking pans side to side on the oven rack Automatic Convection Conversion In the convection bake mode the temperature is automatically reduced 25 F from the package or recipe temperature Simply enter the package or recipe temperature when setting the mode and the range calculates th...

Страница 31: ...ded cooking time see Broil Chart for examples When top browning casseroles use only metal or glass ceramic dishes such as Corningware Never use heat proof glass Pyrex they can t tolerate the high tempera ture Breads Yeast bread loaf 9x5 Yeast rolls Quick bread loaf 8x4 Biscuits Muffins 2 3 2 3 3 400 400 425 375 400 400 425 450 18 22 12 15 45 55 11 15 15 19 Pizza Frozen Fresh 3 3 425 475 450 475 23...

Страница 32: ...r grid with foil It is designed to drain fats and oils away from the cooking surface to prevent smoking and spattering Salt after cooking Pork Pork chops 1 Sausage fresh Ham slice 1 2 4 3 5 high high high 160 160 160 6 8 5 7 2 4 4 6 4 6 2 3 Seafood Fish filets 3 4 1 buttered 5 low Cook until opaque and flakes easily 9 11 Do Not Turn Lamb Chops 1 Medium rare Medium Well 5 5 5 high high high 145 160...

Страница 33: ...10 15 minutes after removing from the oven Pork Pork chops 1 1 4 or more Sausage fresh 4 4 high high 160 160 7 9 5 7 6 8 3 5 a Convection broiling times are approximate and may vary slightly Times are based on cooking with a pre heated broil element Table 6 Convection Broiling Chart Food Item Thickness Rack Position Broil Setting Internal Temp o F Time Side 1 min a Time Side 2 min a Table 7 Convec...

Страница 34: ...oasting time The minimum safe temperature for stuffing in poultry is 165 F Table 8 Dehydrate Chart Food Item Preparation Approx Drying Time hours Test for Doneness Fruit Apples Bananas Cherries Orange peels slices Pineapple rings Strawberries Dipped in 1 4 cup lemon juice and 2 cups water 1 4 slices Dipped in 1 4 cup lemon juice and 2 cups water 1 4 slices Wash towel dry Fresh cherries remove pits...

Страница 35: ...original cooking container or in a heat safe serving dish Aluminum foil may be used to cover food However DO NOT line the warm ing drawer with aluminum foil Do not use the warming drawer for storage Table 9 Warming Drawer Chart Food Temperature Covered Uncovered Bacon Hi Uncovered Beef Medium and well done Med Covered Beef rare Med Covered Bread hard rolls Med Uncovered Bread soft rolls coffee cak...

Страница 36: ...uidelines Avoid these Cleaners Glass cleaners which contain ammonia or chlorine bleach These ingredi ents may permanently etch or stain the cooktop Caustic Cleaners Oven cleaners such as Easy Off may etch the cooktop surface Abrasive Cleaners Metal scouring pads and scrub sponges such as Scotch Brite can scratch and or leave metal marks Soap filled scouring pads such as SOS can scratch the surface...

Страница 37: ...lish such as Stainless Steel Magic to protect the finish from staining and pitting enhances appearance Hard water spots Household white vinegar Mild Abrasive Cleaners Kleen King stainless steel liquid cleaner Cameo aluminum stainless steel cleaner Bon Ami Heat discoloration Bar Keepers Friend Stainless steel resists most food stains and pit marks providing the sur face is kept clean and protected ...

Страница 38: ...ubborn Soil Glass Ceramic Cooktop Models Type of Soil Possible Solution Dry sugar sugar syrup milk or tomato spills Melted plastic film or foil All these items require immediate removal Remove only these types of spills while the surface is hot using the razor blade scraper Be sure to use a new sharp razor in your scraper Remove pan and turn off the burner Wearing an oven mitt hold scraper at 30o ...

Страница 39: ...for specific surfaces and items Cleaning Guidelines Avoid these cleaners Do not use caustic cleaners such as Easy Off They may etch the surface Flammable cleaners such as lighter fluid or WD 40 Surface scratches Small scratches are to be expected on the glass surface but do not affect cooking In time small scratches will become smoother and much less noticeable with daily use of the glass ceramic ...

Страница 40: ...ve all utensils and bakeware 2 Remove oven racks If oven racks are left in the oven during the self clean cycle they will permanently lose the shiny finish and change to a dull dark finish See Oven Cleaning Chart for proper care 3 Wipe up excessive soil spills and grease before self cleaning the oven Excess grease will cause flames and smoke inside the oven during self cleaning Glass other than co...

Страница 41: ... To change cleaning time turn knob to change number of hours Otherwise continue to step 4 4 Press START SELF CLEAN flashes Press START 5 REMOVE RACKS appears in the dis play as a reminder to remove oven racks 6 Press START again to begin the self clean Note The door locks at the beginning of the cycle The door lock symbol will appear in the display at this point If door does not lock press OFF and...

Страница 42: ...he oven 3 Wipe rack edges with cooking oil to allow for proper glide Wipe off excess After self cleaning the entire oven can be safely cleaned with a soapy sponge rinsed and dried If stubborn soil remains follow the guidelines on this page Always use the mildest cleaner that will remove the soil Rub metal finishes in the direction of the grain Use clean soft cloths sponges or paper towels Rinse th...

Страница 43: ...is correctly and securely in place 4 Door should be straight not crooked Replacing an Oven Light Each light assembly consists of a removable lens a light bulb and a light socket housing that is fixed in place WARNING When removing the door Make sure oven is cool and power to the oven has been turned off before removing the door Failure to do so could result in electrical shock or burns The oven do...

Страница 44: ...lly to avoid breaking Broken glass could cause an injury Light socket is live when door is open Service Table 13 Cooktop Troubleshooting Chart Cooktop Problem Possible Causes and Suggested Solutions A slight odor is noticeable when an element is turned on This is normal with new cooktops and will disappear after several uses Scraper is not working prop erly The scraper blade is dull The scraper is...

Страница 45: ...d allow to cool Dry burner cap and base thor oughly Uneven flame LP gas users Call service Table 13 Cooktop Troubleshooting Chart Cooktop Problem Possible Causes and Suggested Solutions Table 14 Oven Troubleshooting Chart Oven Problem Possible Causes and Suggested Solutions The oven mode or temperature selected or the numbers selected do not appear in the display The knob was turned too rapidly Tu...

Страница 46: ...d the lens cover Wipe lens cover area with a clean dry towel prior to attempting to remove the lens cover Oven will not Self Clean properly Allow the oven to cool before running Self Clean Always wipe out loose soils or heavy spillovers before running Self Clean If oven is badly soiled set oven for a five hour Self Clean See Preparing the Oven to Self Clean Clock and timer are not working properly...

Страница 47: ...osch or one of its authorized service providers will repair your Product without charge to you subject to certain limitations stated herein if your Product proves to have been manufactured with a defect in mate rials or workmanship If reasonable attempts to repair the Product have been made without success then Bosch will replace your Product upgraded models may be available to you in Bosch s sole...

Страница 48: ...hout limitation rain wind sand floods fires mud slides freezing temperatures excessive moisture or extended exposure to humidity lightning power surges structural failures surrounding the appliance and acts of God In no event shall Bosch have any liability or responsibility whatsoever for damage to surrounding property including cabinetry floors ceilings and other structures or objects around the ...

Страница 49: ...s warranty shall be effective unless authorized in writing by an officer of BSH How to Obtain Warranty Service To obtain warranty service for your Product you should contact the nearest Bosch authorized service center BSH Home Appliances 5551 McFadden Avenue Huntington Beach CA 92649 800 944 2904 ...

Страница 50: ......

Страница 51: ......

Страница 52: ......

Страница 53: ......

Страница 54: ......

Страница 55: ......

Страница 56: ...5551 McFadden Avenue Huntington Beach CA 92649 800 944 2904 www boschappliances com 9000135016 10091B 3 06 BSH Home Appliances Corporation Litho in USA ...

Отзывы: