background image

-6-

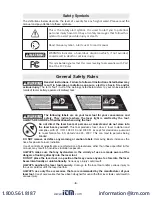
Safety Symbols

The definitions below describe the level of severity for each signal word. Please read the 
manual and pay attention to these symbols.

This is the safety alert symbol. It is used to alert you to potential 
personal injury hazards. Obey all safety messages that follow this 
symbol to avoid possible injury or death.

Read manual symbol - Alerts user to read manual.

WARNING indicates a hazardous situation which, if not avoided, 
could result in death or serious injury.

This symbol designates that this laser leveling tool complies with Part 
15 of the FCC Rules.

Read all instructions. Failure to follow all instructions listed below may 
result in hazardous radiation exposure, electric shock, fire and/or 

serious injury.

 The term “tool” in all of the warnings listed below refers to your mains-operated 

(corded) tool or battery-operated (cordless) tool.

The following labels are on your laser tool for your convenience and 
safety. They indicate where the laser light is emitted by the tool. 

ALWAYS BE AWARE of their location when using the tool.

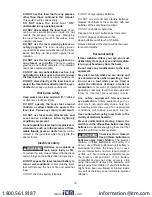
Do not direct the laser beam at persons or animals and do not stare into 
the laser beam yourself.

 This tool produces laser class 2 laser radiation and 

complies with 21 CFR 1040.10 and 1040.11 except for deviations pursuant 
to Laser Notice No. 50, dated June 24, 2007. This can lead to persons being 
blinded.

DO NOT remove or deface any warning or caution labels.

 Removing labels increases the 

risk of exposure to laser radiation.

Use of controls or adjustments or performance of procedures other than those specified in this 
manual, may result in hazardous radiation exposure.

ALWAYS make sure that any bystanders in the vicinity of use are made aware of the 
dangers of looking directly into the laser tool.
DO NOT place the laser tool in a position that may cause anyone to stare into the laser 
beam intentionally or unintentionally.

 Serious eye injury could result.

ALWAYS position the laser tool securely.

 Damage to the laser tool and/or serious injury to 

the user could result if the laser tool fails. 

ALWAYS use only the accessories that are recommended by the manufacturer of your 
laser tool.

 Use of accessories that have been designed for use with other laser tools could result in 

serious injury.

General Safety Rules 

www.

.com

[email protected]

1.800.561.8187

Содержание GLL3-330C

Страница 1: ...r English Version Version française Versión en español See page 5 Voir page 19 Ver la página 33 Call Toll Free for Consumer Information Service Locations Pour obtenir des informations et les adresses de nos centres de service après vente appelez ce numéro gratuit Llame gratis para obtener información para el consumidor y ubicaciones de servicio GLL3 330C GLL3 330CG www com information itm com 1 80...

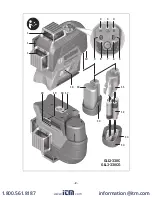
Страница 2: ... 2 1 2 3 4 5 6 9 8 7 10 16 17 18 19 20 11 15 12 14 13 13 1 1 GLL3 330C GLL3 330CG GLL3 330C www com information itm com 1 800 561 8187 ...

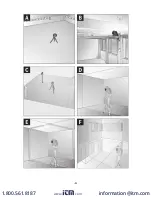
Страница 3: ... 3 www com information itm com 1 800 561 8187 ...

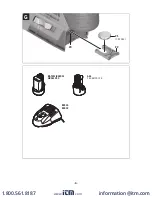
Страница 4: ... 4 BAT411 BAT415 GBA12V30 AA1 1 608 M00 C1B BC330 BC430 21 CR 2032 22 23 G www com information itm com 1 800 561 8187 ...

Страница 5: ...0 05B GLL3 330C 1 608 M00 05J GLL3 330CG 28 30 BT 150 0 601 096 B00 LR8 0 601 069 J11 LR 6 0 601 069 H10 24 BM 1 0 601 015 A01 31 BP350 0 601 015 B00 25 26 29 6 082 762 25N www com information itm com 1 800 561 8187 ...

Страница 6: ...direct the laser beam at persons or animals and do not stare into the laser beam yourself This tool produces laser class 2 laser radiation and complies with 21 CFR 1040 10 and 1040 11 except for deviations pursuant to Laser Notice No 50 dated June 24 2007 This can lead to persons being blinded DO NOT remove or deface any warning or caution labels Removing labels increases the risk of exposure to l...

Страница 7: ...nal injury DO NOT short any battery terminals DO NOT charge alkaline batteries DO NOT mix old and new alkaline batteries Replace all of them at the same time with new batteries of the same brand and type DO NOT mix battery chemistries Dispose of or recycle batteries per local code DO NOT dispose of batteries in fire Keep batteries out of reach of children Remove batteries if the device will not be...

Страница 8: ...specified by the manufacturer A charger that is suitable for one type of battery pack may create a risk of fire when used with another battery pack Use laser tools only with specifically designated battery packs Use of any other battery packs may create a risk of injury and fire When battery pack is not in use keep it away from other metal objects like paper clips coins keys nails screws or other ...

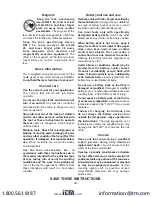
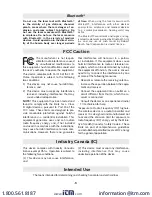
Страница 9: ...nd receiver t POOFDU UIF FRVJQNFOU JOUP BO PVUMFU PO B circuit different from that to which the re ceiver is connected t POTVMU UIF EFBMFS PS BO FYQFSJFODFE SBEJP TV technician for help Exposure to Radio Frequency RF Signals The wireless device is a radio transmitter and receiver It is designed and manufactured not to exceed the emission limit for exposure to radio frequency RF energy set by the M...

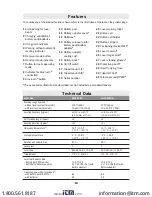
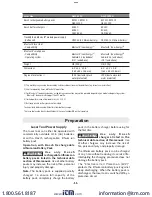
Страница 10: ...Tripod BT 150 31 Telescopic rod BP350 The accessories illustrated or described are not included as standard delivery Features Technical Data Laser Line GLL3 330C GLL3 330CG Working range typical 1 without laser receiver diameter with laser receiver diameter 200 ft 60m 15 330 ft 5 100m 200 ft 60m 15 330 ft 5 100m Leveling Accuracy typical 3 32 in at 30 ft 2 40 mm at 10 m 3 32 in at 30 ft 2 40 mm at...

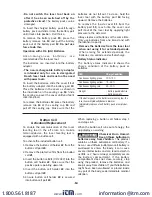
Страница 11: ...s not included Technical data determined with battery from delivery scope The laser tool can be clearly identified with the serial number 19 on the type plate Preparation Laser Tool Power Supply The laser tool can either be operated with commercially available LR 6 AA batteries or with a Bosch rechargeable lithium ion battery pack Operation with Bosch Rechargeable Lithium ion Battery Pack U s e o ...

Страница 12: ...e and self discharge Battery Status Indicator The battery status indicator 2 shows the charge condition of the battery pack or batteries LED Charge Condition Continuous lighting green 100 75 Continuous lighting yellow 75 35 Continuous lighting red 35 10 No light Battery pack defective Batteries empty If the battery pack or the batteries are running low the laser lines will gradually become dimmer ...

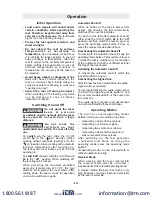
Страница 13: ...ooling down the tool is ready for operation and can be switched on again Automatic Shut off When no button on the tool is pressed for approx 120 minutes the tool automatically switches off to save the batteries To switch on the tool after automatic shut off either slide the On Off switch 16 to the off position and then switch the tool on again or press the operating mode button 7 once or press the...

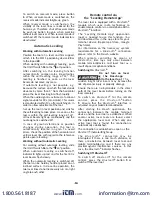
Страница 14: ... When the automatic leveling is switched off the tool can be held by hand or placed on an inclined surface In cross line operation the two laser lines do not necessarily run at a right angle to each other Remote control via the Leveling Remote App The laser tool is equipped with a Bluetooth module which uses radio technology to enable remote control via a smartphone with a Bluetooth interface The ...

Страница 15: ...power by a battery pack or batteries an internal energy storage battery provides continuous monitoring by the sensors for 72 hours The sensors are activated when the laser tool is started up for the first time Calibration warning triggers If one of the following events occurs the CAL guard calibration warning is triggered and the indicator 3 lights up red The calibration interval every 12 months h...

Страница 16: ...height deviation of the tool alongside the lateral axis On the measuring distance of 2 x 16ft 32ft the maximum allowable deviation is 32ft x 0 0024in ft 5 64 0 078 in Thus the difference d between points I and III must not exceed 5 64 in max Checking the Leveling Accuracy of the Vertical Line For this check a door opening is required with at least 8ft of space on a firm surface to each side of the...

Страница 17: ...commercially available camera tripod For fastening to a commercially available construction tripod use the 5 8 11 tripod mount 18 Tighten the tool with the tripod mounting stud Fastening with the BM 1 Positioning Device Accessory see figure B With the BM 1 positioning device 24 you can fasten the tool e g to vertical surfaces pipes or magnetic materials The BM 1 positioning device is also suitable...

Страница 18: ... AND RELATED ITEMS THESE ITEMS RECEIVE A 90 DAY LIMITED WARRANTY To make a claim under this Limited Warranty you must return the complete product transportation prepaid For details to make a claim under this Limited Warranty ANY IMPLIED WARRANTIES SHALL BE LIMITED IN DURATION TO ONE YEAR FROM DATE OF PURCHASE SOME STATES IN THE U S AND SOME CANADIAN PROVINCES DO NOT ALLOW LIMITATIONS ON HOW LONG A...

Отзывы: