background image

24

Bread and rolls


When baking bread, preheat the oven, unless instructions state 

otherwise.

Never pour water into the hot oven.
When baking on 2 levels, always insert the universal pan above 

the baking tray.

Cakes on trays

Accessories

Level

Type of 

heating

Temperature 

in °C

Cooking time 

in minutes

Sponge mixture or yeast dough with dry 

topping

Baking tray

2

%

170-190

20-30

Universal pan + baking 

tray

3+1

:

150-170

35-45

Sponge mixture or yeast dough with 

moist topping, fruit

Universal pan

3

%

160-180

40-50

Universal pan + baking 

tray

3+1

:

150-170

50-60

Swiss flan

Universal pan

2

%

210-230

40-50

Swiss roll (preheat)

Baking tray

2

%

190-210

15-20

Plaited loaf with 500 g flour

Baking tray

2

%

160-180

30-40

Stollen with 500 g flour

Baking tray

3

%

160-180

60-70

Stollen with 1 kg flour

Baking tray

3

%

150-170

90-100

Strudel, sweet

Universal pan

2

%

180-200

55-65

Burek

Universal pan

2

%

180-200

40-50

Pizza

Baking tray

2

%

220-240

15-25

Universal pan + baking 

tray

3+1

:

180-200

35-45

Small baked products

Accessories

Level

Type of 

heating

Temperature 

in °C

Cooking time 

in minutes

Biscuits

Baking tray

3

:

140-160

15-25

Universal pan + baking tray

3+1

:

130-150

25-35

2 baking trays + universal pan

5+3+1

:

130-150

30-40

Viennese whirls (preheat)

Baking tray

3

%

140-150

30-40

Baking tray

3

:

140-150

30-40

Universal pan + baking tray

3+1

:

140-150

30-45

2 baking trays + universal pan

5+3+1

:

130-140

35-50

Macaroons

Baking tray

2

%

110-130

30-40

Universal pan + baking tray

3+1

:

100-120

35-45

2 baking trays + universal pan

5+3+1

:

100-120

40-50

Meringue

Baking tray

3

:

80-100

130-150

Choux pastry

Baking tray

2

%

200-220

30-40

Puff pastry

Baking tray

3

:

180-200

20-30

Universal pan + baking tray

3+1

:

180-200

25-35

2 baking trays + universal pan

5+3+1

:

160-180

35-45

Leavened cake

Baking tray

3

%

180-200

20-30

Universal pan + baking tray

3+1

:

170-190

25-35

Bread and rolls

Accessories

Level

Type of 

heating

Temperature 

in °C

Cooking time 

in minutes

Yeast bread with 1.2 kg flour

Universal pan

2

%

270
200

8
35-45

Sourdough bread with 1.2 kg 

flour

Universal pan

2

%

270
200

8
40-50

Bread rolls (do not preheat)

Baking tray

3

%

210-230

20-30

Rolls made with sweet yeast 

dough

Baking tray

3

%

170-190

15-20

Universal pan + baking tray

3+1

:

160-180

20-30

Содержание Fornuis HGD74W555N

Страница 1: ... en Instruction manual 3 nl Gebruiksaanwijzing 32 Free standing cooker Fornuis HGD74W555N ...

Страница 2: ...2 Ø cm ...

Страница 3: ...Type of heating and temperature 15 Rapid heating 15 Setting the time functions 15 Timer 15 Cooking time 16 End time 16 Time 17 Childproof lock 17 Changing the basic settings 17 Care and cleaning 18 Cleaning agents 18 Upper glass cover 19 Detaching and refitting the rails 20 Detaching and attaching the oven door 20 Removing and installing the door panels 21 Troubleshooting 21 Malfunction table 21 R...

Страница 4: ...nal ventilation for example opening of a window or more effective ventilation for example increasing the level of mechanical ventilation where present This appliance is not designed for operation with an external timer or by remote control Do not use inappropriate child safety shields or hob guards These can cause accidents This appliance may be used by children over the age of 8 years old and by ...

Страница 5: ... prepare food containing large quantities of drinks with a high alcohol content Only use small quantities of drinks with a high alcohol content Open the appliance door with care Risk of burns The hotplates and surrounding area particularly the hob surround if fitted become very hot Never touch the hot surfaces Keep children at a safe distance Risk of burns During operation the surfaces of the appl...

Страница 6: ...allation Risk of electric shock Incorrect repairs are dangerous Repairs may only be carried out by one of our trained after sales engineers If the appliance is faulty unplug the mains plug or switch off the fuse in the fuse box Contact the after sales service Risk of electric shock and serious injury The cable insulation on electrical appliances may melt when touching hot parts of the appliance Ne...

Страница 7: ... not place any cookware or accessories on the appliance door Inserting accessories depending on the appliance model accessories can scratch the door panel when closing the appliance door Always insert the accessories into the cooking compartment as far as they will go Carrying the appliance do not carry or hold the appliance by the door handle The door handle cannot support the weight of the appli...

Страница 8: ... on the inside of the plinth 2 Use an Allen key to raise or lower the adjustable feet as necessary until the cooker is level picture A 3 Push the plinth drawer back in picture B Wall fixing To prevent the cooker from tipping over you must fix it to the wall using the enclosed bracket Please observe the installation instructions for fixing the oven to the wall Setting up the appliance The appliance...

Страница 9: ...n overview of the control panel The design depends on the respective appliance model Explanations 1 Hob cover 2 Steam outlet Caution When the oven is in operation hot steam escapes here 3 Hob 4 Control panel 5 Cooling fan 6 Oven door 7 Plinth drawer Optional available for some appliances Depending on the appliance model details may vary Explanations 1 Standard burner 2 Economy burner 3 Wok burner ...

Страница 10: ...t air For cakes and pastries These can be baked on three levels A fan located on the rear wall of the oven disperses the heat evenly Top and bottom heat ing For cakes au gratin dishes and lean meat roasts e g veal or game on one level The heat is provided by the bottom and top heating elements 6 Pizza function Quick preparation of frozen foods without pre heating e g pizza chips or puff pastry The...

Страница 11: ...tion about this in the sales brochures Not all special accessories are suitable for all appliances When purchasing always quote the exact identification number E no of your appliance Wire rack For ovenware cake tins roasts grilling and frozen meals Slide the wire rack into the oven with the open side facing the oven door and the curvature pointing downwards Enamel baking tray For cakes and biscuit...

Страница 12: ...uantities Telescopic shelves 3 level complete pull out HEZ338352 The pull out rails at levels 1 2 and 3 allow you to pull the accessories out further without them tipping The 3 level complete pull out is not suitable for appliances that have a rotary spit 3 level complete pull out with stop function HEZ338357 The pull out rails at levels 1 2 and 3 allow you to pull accesso ries out fully without t...

Страница 13: ...e burner cup The openings in the burner cup must remain unobstructed at all times All parts must be dry 1 Open the upper cooker cover The upper cover must remain open whilst the cooker is in operation 2 Turn the control for the required hotplate anti clockwise to the ignition position 8 This starts the ignition process 3 Press and hold the hotplate control for 1 3 seconds Gas begins to flow out an...

Страница 14: ...use a wok Burner electric hot plate Minimum pan diameter Maximum pan diam eter Electric hotplate 14 5 cm 14 5 cm Wok burner 3 6 kW 24 cm 28 cm High output burner 3kW 24 cm 28 cm Standard burner 1 7 kW 18 cm 24 cm Economy burner 1 kW 12 cm 18 cm Option for models with an electric hotplate Option for models with a wok burner Use pans which are the right size for each burner Do not use small pans on ...

Страница 15: ... functions The 0 sensor activates the menu and moves through the different functions The time symbols remain lit up while settings are programmed The square brackets indicate the time function selected You can modify an already programmed time function directly with the sensors or A provided the time symbol is situated between square brackets Timer The timer works independently of the oven The tim...

Страница 16: ...e 0 sensor repeatedly until the brackets are around the required symbol The corresponding value will be shown for a few seconds on the display panel End time The oven allows you to set the time when you want the food ready The oven switches on automatically and switches off at the set time E g the food may be placed in the oven in the morning and the oven set so that it is ready at midday Please e...

Страница 17: ...mmed when the childproof lock is on When the heating type and temperature or grill level are programmed the childproof lock turns off the heating Activating the childproof lock No cooking time or end time should already be set Press the D button for approximately four seconds The display panel shows the symbol D The childproof lock is now activated Turning off the childproof lock Press the D butto...

Страница 18: ...pers for cleaning Control panel Hot soapy water Clean with a dish cloth and dry with a soft cloth Do not use glass cleaner or glass scrapers for cleaning Optional available for some appliances depending on the appliance model Upper glass cover depending on appliance model Glass cleaner Clean with a soft cloth You can remove the upper glass cover for cleaning To find out how to do this please refer...

Страница 19: ...se when the cooking compartment is cold Please use the self cleaning function to clean self cleaning surfaces To find out how to do this please refer to the section Self cleaning Caution Never use oven cleaner on self cleaning surfaces Glass cover for the oven light Hot soapy water Clean with a dish cloth Shelf Hot soapy water Clean with a dish cloth or a brush You can remove the shelves for clean...

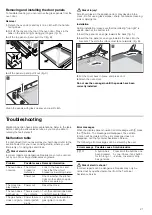
Страница 20: ...secured in place It cannot be detached When the locking levers are open in order to detach the oven door Fig B the hinges are locked They cannot snap shut Risk of injury Whenever the hinges are not locked they snap shut with great force Ensure that the locking levers are always fully closed or when detaching the oven door fully open Detaching the door 1 Open the oven door fully 2 Fold up the two l...

Страница 21: ...n out as well as you had hoped refer to the section Tested for you in our cooking studio where you will find plenty of cooking tips and tricks Risk of electric shock Incorrect repairs are dangerous Repairs may only be carried out by one of our trained after sales engineers Error messages When the display panel shows an error message with press the 0 button The message will disappear The set time f...

Страница 22: ...ce Rely on the professionalism of the manufacturer You can therefore be sure that the repair is carried out by trained service technicians who carry original spare parts for your appliances Energy and environment tips Here you can find tips on how to save energy when baking and roasting in the oven and when cooking on the hob and how to dispose of your appliance properly Saving energy with your ov...

Страница 23: ...ons for your dishes If you are baking with 3 cake loaf tins at the same time place these on the wire racks as indicated in the picture Baking tins It is best to use dark coloured metal baking tins Baking times are increased when light coloured baking tins made of thin metal or glass dishes are used and cakes do not brown so evenly If you wish to use silicone baking tins use the information and rec...

Страница 24: ...ories Level Type of heating Temperature in C Cooking time in minutes Biscuits Baking tray 3 140 160 15 25 Universal pan baking tray 3 1 130 150 25 35 2 baking trays universal pan 5 3 1 130 150 30 40 Viennese whirls preheat Baking tray 3 140 150 30 40 Baking tray 3 140 150 30 40 Universal pan baking tray 3 1 140 150 30 45 2 baking trays universal pan 5 3 1 130 140 35 50 Macaroons Baking tray 2 110 ...

Страница 25: ... rest for 10 minutes in the oven For roast pork with a rind score the rind in a crossways pattern then lay the roast in the dish with the rind at the bottom You wish to bake according to your own recipe Use similar items in the baking tables as a guide How to establish whether sponge cake is baked through Approximately 10 minutes before the end of the baking time specified in the recipe stick a co...

Страница 26: ...210 230 50 Steaks medium 3 cm thick Wire rack 5 3 15 Veal Joint of veal 1 0 kg Uncovered 2 190 210 100 2 0 kg 2 170 190 120 Pork Joint without rind e g neck 1 0 kg Uncovered 1 4 200 220 100 1 5 kg 1 4 190 210 140 2 0 kg 1 4 180 200 160 Joint with rind e g shoulder 1 0 kg Uncovered 1 4 200 220 120 1 5 kg 1 4 190 210 150 2 0 kg 1 4 180 200 180 Smoked pork on the bone 1 0 kg Covered 2 210 230 70 Lamb...

Страница 27: ...for the weight of the joint Select the next lowest weight from the instructions and extend the time How to tell when the roast is ready Use a meat thermometer available from specialist shops or carry out a spoon test Press down on the roast with a spoon If it feels firm it is ready If the spoon can be pressed in it needs to be cooked for a little longer The roast is too dark and the crackling is p...

Страница 28: ... 20 30 Universal pan wire rack 3 1 170 190 25 35 Pizza baguette Universal pan 3 6 170 190 20 30 Mini pizza Universal pan 3 6 180 200 10 20 Pizza chilled preheat Universal pan 1 6 180 200 10 15 Potato products frozen Chips Universal pan 3 6 190 210 20 30 Universal pan baking tray 3 1 180 200 30 40 Croquettes Universal pan 3 6 190 210 20 25 Rösti stuffed potato pockets Universal pan 3 6 190 210 15 2...

Страница 29: ...ou can dry foods brilliantly Use unblemished fruit and vegetables only and wash them thoroughly Drain off the excess water then dry them Line the universal pan and the wire rack with greaseproof or parchment paper Turn very juicy fruit or vegetables several times Remove fruit and vegetables from the paper as soon as they have dried Dish Ovenware Type of heating Temperature Cooking time Yoghurt Cup...

Страница 30: ...rm in the jars set the temperature back to between 120 and 140 C Depending on the type of vegetable heat for approx 35 to 70 minutes Switch off the oven after this time and use the residual heat Taking out the jars After preserving remove the jars from the cooking compartment Caution Do not place the hot jars on a cold or wet surface They could suddenly burst Acrylamide in foodstuffs Acrylamide is...

Страница 31: ... directly on the wire rack the universal pan should also be inserted at level 1 The liquid is then collected keeping the oven cleaner Dish Accessories and oven ware Level Type of heating Temperature in C Cooking time in minutes Whirls preheat Baking tray 3 140 150 30 40 Baking tray 3 140 150 30 40 Baking tray universal pan 1 3 140 150 30 45 2 baking trays universal pan 1 3 5 130 140 40 55 Small ca...

Страница 32: ...Verwarmingsmethode en temperatuur 44 Snel verwarmen 45 Programmeren van de tijdfuncties 45 Kookwekker 45 Duur van de kooktijd 45 Eindtijd 46 Tijd 47 Kinderslot 47 De basisinstellingen wijzigen 47 Onderhoud en reiniging 48 Schoonmaakmiddelen 48 Bovenste glasafdekking 50 Inschuifrails verwijderen en bevestigen 50 Ovendeur verwijderen en inbrengen 50 Deurruiten verwijderen en inbrengen 51 Wat te doen...

Страница 33: ...an een raam of extra ventilatie bijv door de afzuigkap op een hoger vermogen te zetten Dit apparaat is niet geschikt voor het gebruik met een externe wekker of afstandsbediening Maak voor de bescherming van kinderen geen gebruik van ongeschikte beveiligingsvoorzieningen of tralies Dit kan leiden tot ongevallen Dit toestel kan worden gebruikt door kinderen vanaf 8 jaar en door personen met beperkte...

Страница 34: ...ren of vormen worden zeer heet Neem hete toebehoren en vormen altijd met behulp van een pannenlap uit de binnenruimte Risico van verbranding Alcoholdampen kunnen in de binnenruimte vlam vatten Nooit gerechten klaarmaken die een hoog percentage alcohol bevatten Alleen kleine hoeveelheden drank met een hoog alcoholpercentage gebruiken De deur van het toestel voorzichtig openen Risico van verbranding...

Страница 35: ...Wordt het toestel onbevestigd op een sokkel geplaatst dan kan het hiervan afglijden Het toestel moet goed aan de sokkel worden bevestigd Kantelgevaar Waarschuwing Om te voorkomen dat het apparaat kantelt moet een kantelbeveiliging worden gemonteerd Lees de montage instructies door Kans op een elektrische schok Ondeskundige reparaties zijn gevaarlijk Reparaties mogen uitsluitend worden uitgevoerd d...

Страница 36: ...oestel kunnen de toebehoren krassen geven op de deur Toebehoren altijd tot de aanslag in de binnenruimte schuiven Apparaat transporteren Het apparaat niet aan de deurgreep vasthouden of dragen De deurgreep houdt op den duur het gewicht van het apparaat niet en kan afbreken Schade aan de schuiflade Attentie Leg geen hete voorwerpen in de schuiflade Deze kan beschadigd raken Opstelling gas en elektr...

Страница 37: ...zo nodig met een zeskantsleutel omhoog of omlaag draaien tot het fornuis waterpas staat Afbeelding A 3 Ovenlade weer inschuiven Afbeelding B Bevestiging aan de wand Om te voorkomen dat het fornuis kantelt dient u het met de meegeleverde haak aan de wand te bevestigen Neem het montagevoorschrift voor bevestiging aan de wand in acht Plaatsen van het apparaat Het apparaat moet volgens de opgegeven ma...

Страница 38: ...eel De uitvoering hangt van het type apparaat af Toelichting 1 Afdekplaat 2 Vrijkomende stoom Attentie Als de oven in gebruik is komt op deze plaats hete stoom vrij 3 Kookplaat 4 Bedieningspaneel 5 Koelventilator 6 Ovendeur 7 Ovenlade Optioneel Beschikbaar bij enkele apparaten Afhankelijk van het apparaattype zijn detailafwijkingen moge lijk Toelichting 1 Normale brander 2 Spaarbrander 3 Wokbrande...

Страница 39: ...nste en onderste weerstand 6 Pizzafunctie Snelle bereiding van diepvries voedsel zonder voorverwarmen bv pizza frites of bladerdeegge bak De warmte is afkomstig van de onderste weerstand en van de turbine die zich in de achterwand bevindt 7 Heteluchtgrill Braden van stukken vlees gevo gelte en vis De grillweerstand en de ventilator worden afwisselend in en uitgeschakeld De turbine zorgt ervoor dat...

Страница 40: ...t de welving naar achteren in de binnenruimte worden geplaatst Alleen zo klikken ze in Aanwijzing Wanneer de toebehoren heet worden kunnen ze vervormen De vervorming verdwijnt weer nadat ze zijn afgekoeld Dit heeft geen invloed op de werking ervan Houd de bakplaat aan weerszijden met beide handen vast en schuif de bakplaat recht in het frame Vermijd bij het inschuiven bewegingen naar links of rech...

Страница 41: ...zza s die een knapperige bodem moeten heb ben De baksteen moet altijd op de aanbevolen temperatuur worden voorverwarmd Emaillen bakplaat HEZ331003 Voor gebak en koekjes Plaats de bakplaat met de schuine kant naar de ovendeur in de oven Emaillen bakplaat met antiaanbaklaag HEZ331011 Gebak en koekjes kunnen gemakkelijker van de bakplaat wor den losgemaakt Plaats de bakplaat met de schuine kant naar ...

Страница 42: ...an vier gasbranders Hier kunt u nalezen hoe u de gasbranders aansteekt en de kookplaat instelt Reinigen van de branderkelk en het branderdeksel Reinig het branderdeksel 1 en het branderdeksel 2 met water en afwasmiddel Droog deze onderdelen goed af Plaats de branderkelk en het deksel weer op de branderkom 5 Let erop dat de ontsteking 3 en de vlambeveiligingspin 4 niet worden beschadigd De sproeier...

Страница 43: ...r na 60 seconden onderbroken De gasbrander ontsteekt niet Bij stroomuitval of bij vochtige bougies kunt u de gasbrander met een gasaansteker of lucifer ontsteken Tabel koken Kies voor elke kookzone de juiste pangrootte De diameter van de pannenbodem moet met de grootte van de kookzone overeenstemmen De kooktijden zijn afhankelijk van de soort het gewicht en de kwaliteit van de gerechten Daarom zij...

Страница 44: ...der 3 6 kW 24 cm 28 cm Extra krachtige bran der 3 kW 24 cm 28 cm Normale brander 1 7 kW 18 cm 24 cm Spaarbrander 1 kW 12 cm 18 cm Optie voor modellen met elektrische kookplaat Optie voor modellen met wokbrander Gebruik pannen met een geschikte maat voor elke brander Gebruik geen kleine pannen op grote branders De vlam mag de zijkanten van de pan niet raken Gebruik geen vervormde pannen die onstabi...

Страница 45: ...epaneel zijn de symbolen van de tijd verlicht en de haakjes staan nu naast U 2 Programmeren van de tijd van de kookwekker met de toetsen of A Voorgestelde waarde voor de toets 10 minuten Voorgestelde waarde voor de toets A 5 minuten Na enkele seconden verschijnt de geprogrammeerde tijdsduur De tijd van de kookwekker begint te lopen Op het indicatiepaneel is het symbool U verlicht en de tijdsduur l...

Страница 46: ... de afbeelding het is 10 30 u de kooktijd bedraagt 45 minuten en de oven moet uitgeschakeld worden om 12 30 u 1 Stel de functieknop in 2 Stel de temperatuurknop in 3 Druk tweemaal op de toets 0 4 Programmeer de duur van de kooktijd met de toetsen of A 5 Druk op de toets 0 De haakjes staan bij p Het tijdstip waarop het gerecht klaar is wordt getoond 6 Stel de eindtijd in met de toetsen of A De oven...

Страница 47: ...rd zijn Druk de toets D gedurende ca vier seconden in Op het indicatiepaneel verschijnt het symbool D Het kinderslot is geactiveerd Deactiveren van het kinderslot Druk de toets D gedurende ca vier seconden in Het symbool D van het indicatiepaneel wordt uitgeschakeld Het kinderslot is gedeactiveerd De basisinstellingen wijzigen Deze oven is voorzien van verschillende basisinstellingen Deze instelli...

Страница 48: ...stof en zeefdruk opper vlakken afhankelijk van het type apparaat Warm zeepsop Met een schoonmaakdoekje reinigen en met een zachte doek nadrogen Geen glasreiniger metalen of glazen schraper gebruiken voor het schoonmaken Optioneel beschikbaar voor enkele apparaten afhankelijk van het apparaattype Bedieningspaneel Warm zeepsop Met een schoonmaakdoekje reinigen en met een zachte doek nadrogen Geen gl...

Страница 49: ...elfreinigingsfunctie gebruiken Neem hierbij de aanwijzingen van het hoofdstuk Zelfreiniging in acht Attentie Gebruik nooit schoonmaakmid delen voor zelfreinigende oppervlakken Glazen kapje op de ovenlamp Warm zeepsop Met een schoonmaakdoekje reinigen Zone Schoonmaakmiddelen Optioneel beschikbaar voor enkele apparaten afhankelijk van het apparaattype Telescooprail Warm zeepsop Met een schoonmaakdoe...

Страница 50: ...rstel Inhangroosters bevestigen 1 Inhangrooster eerst in de achterste bus plaatsen iets naar achteren drukken Afbeelding A 2 en vervolgens in de voorste bus plaatsen Afbeelding B De inschuifrails passen links en rechts Let erop dat evenals in afbeelding B hoogte 1 en 2 beneden is en hoogte 3 4 en 5 boven Ovendeur verwijderen en inbrengen Om de deurruiten schoon te maken en te demonteren kunt u de ...

Страница 51: ...ar beneden op een doek leggen 2 De afscherming bovenaan de ovendeur afnemen Hiervoor links en rechts het lipje met de vingers indrukken Afbeelding A 3 Bovenste ruit optillen en naar buiten trekken Afbeelding B 4 Ruit optillen en naar buiten trekken Afbeelding C Reinig de ruiten met glasreiniger en een zachte doek Risico van letsel Wanneer er krassen op het glas van de apparaatdeur zitten kan dit s...

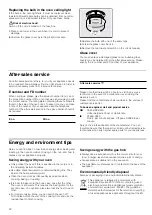
Страница 52: ...service of uw speciaalzaak Gebruik uitsluitend originele lampen Kans op een elektrische schok Zekering in de meterkast uitschakelen 1 Theedoek in de onverwarmde oven leggen om schade te voorkomen 2 Glazen afscherming eruit halen door de schroeven naar links te draaien 3 Lamp vervangen door een van hetzelfde type 4 Glazen afscherming er weer inschroeven 5 Theedoek eruit nemen en de zekering inschak...

Страница 53: ...voor het einde van de bereidingstijd uitzetten en de restwarmte gebruiken voor het afbakken Energie besparen met de gas kookplaat Kies altijd een pan die de juiste grootte heeft voor uw gerechten Een grote slechts weinig gevulde pan heeft veel energie nodig Sluit de pan altijd af met een passend deksel De gasvlam moet altijd contact met de bodem van de pan hebben Milieuvriendelijk afvoeren Voer de...

Страница 54: ... 5 tot 10 minuten korter wanneer u voorverwarmt Bijkomende informatie vindt u onder Tips voor het bakken na de tabellen Gebak in vormen Vorm Hoogte Verwar mingsme thode Temperatuur in C Tijdsduur in minuten Cake eenvoudig Krans rechthoekige vorm 2 160 180 40 50 3 cakevormen 3 1 140 160 60 80 Cake fijn Krans rechthoekige vorm 2 150 170 60 70 Taartbodem roerdeeg Vorm vruchtentaartbodem 2 150 170 20 ...

Страница 55: ...00 20 30 Braadslede bakplaat 3 1 170 190 25 35 Gebak op de plaat Toebehoren Hoogte Verwar mingsme thode Temperatuur in C Tijdsduur in minuten Brood en broodjes Toebehoren Hoogte Verwar mingsme thode Temperatuur in C Tijdsduur in minuten Gistbrood van 1 2 kg bloem Braadslede 2 270 200 8 35 45 Zuurdeegbrood van 1 2 kg bloem Braadslede 2 270 200 8 40 50 Broodjes niet voorverwarmen Bakplaat 3 210 230 ...

Страница 56: ...is afhankelijk van de ingestelde grillstand Vlees Draai stukken vlees na de helft van de tijd om Als het vlees klaar is moet het nog 10 minuten in de uitgeschakelde gesloten oven blijven Het vocht kan zich dan beter verdelen Wikkel rosbief na de bereiding in aluminiumfolie en laat het 10 minuten in de oven nagaren Snijd bij varkensvlees met zwoerd het zwoerd kruisgewijs in en leg het vlees eerst m...

Страница 57: ... 1 4 210 230 50 Steaks medium 3 cm dik Rooster 5 3 15 Kalfsvlees Gebraden kalfsvlees 1 0 kg open 2 190 210 100 2 0 kg 2 170 190 120 Varkensvlees Braadstuk zonder zwoerd bijv halsstuk 1 0 kg open 1 4 200 220 100 1 5 kg 1 4 190 210 140 2 0 kg 1 4 180 200 160 Braadstuk zonder zwoerd bijv schouder 1 0 kg open 1 4 200 220 120 1 5 kg 1 4 190 210 150 2 0 kg 1 4 180 200 180 Casselerrib met been 1 0 kg ges...

Страница 58: ... Viskotelet 3 cm dik Rooster 3 2 20 25 Voor het gewicht van het vlees staan geen gegevens in de tabel Maak uw keuze in overeenstemming met het eerstvolgende lagere gewicht en houd een langere tijd aan Hoe kunt u vaststellen of het vlees klaar is Gebruik de vleesthermometer verkrijgbaar in de speciaalzaak of doe de lepeltest Druk met een lepel op het vlees Voelt het stevig aan dan is het klaar Geef...

Страница 59: ... ter 3 1 170 190 25 35 Pizza baguette Braadslede 3 6 170 190 20 30 Minipizza Braadslede 3 6 180 200 10 20 Pizza gekoeld voorverwarmen Braadslede 1 6 180 200 10 15 Aardappelproducten diepvries Frites Braadslede 3 6 190 210 20 30 Braadslede bak plaat 3 1 180 200 30 40 Kroketten Braadslede 3 6 190 210 20 25 Rösti gevulde aardappelflappen Braadslede 3 6 190 210 15 25 Brood en banket diepvries Broodjes...

Страница 60: ...Leg op elke pot een natte rubberen ring en een deksel 4 Sluit de potten af met klemmen Plaats niet meer dan zes potten in de ovenruimte Instellen 1 Braadslede op hoogte 2 plaatsen Plaats de glazen potten zó dat ze elkaar niet raken 2 Liter heet water ca 80 ºC in de braadslede gieten 3 Ovendeur sluiten 4 Onderwarmte instellen 5 Temperatuur op170 tot 180 C instellen Inmaak Fruit Na ca 40 tot 50 minu...

Страница 61: ...u Donkere springvormen verspringend naast elkaar plaatsen Bedekte appeltaart op 2 niveaus Donkere springvormen diagonaal boven elkaar plaatsen zie afbeelding Gebak in springvormen van blik Met boven en onderwarmte op 1 niveau bakken Gebruik de braadslede in plaats van het rooster en plaats hier de springvorm in Aanwijzing Gebruik voor het bakken eerst de laagste opgegeven temperatuur Groente met k...

Страница 62: ... 20 35 Bakplaat 3 150 170 20 35 Bakplaat braadslede 1 3 140 160 30 45 2 bakplaten braadslede 1 3 5 130 150 35 55 Waterbiscuit voorverwarmen Springvorm op het rooster 2 160 170 30 40 Springvorm op het rooster 2 160 170 25 40 Donkere appeltaart Rooster 2 springvor men Ø 20 cm 1 170 190 80 100 2 roosters 2 springvor men Ø 20 cm 1 3 170 190 70 100 Om voor te verwarmen niet de functie Snelvoorverwarmin...

Страница 63: ......
Страница 64: ...02 181295 9001141214 9001141214 Robert Bosch Hausgeräte GmbH Carl Wery Straße 34 81739 München Germany www bosch home com ...

Отзывы: