background image

Digital Video Recorder    

Connections and settings | en  

43

Bosch Security Systems  

User Manual 

F01U | 2.0 | 2008.12

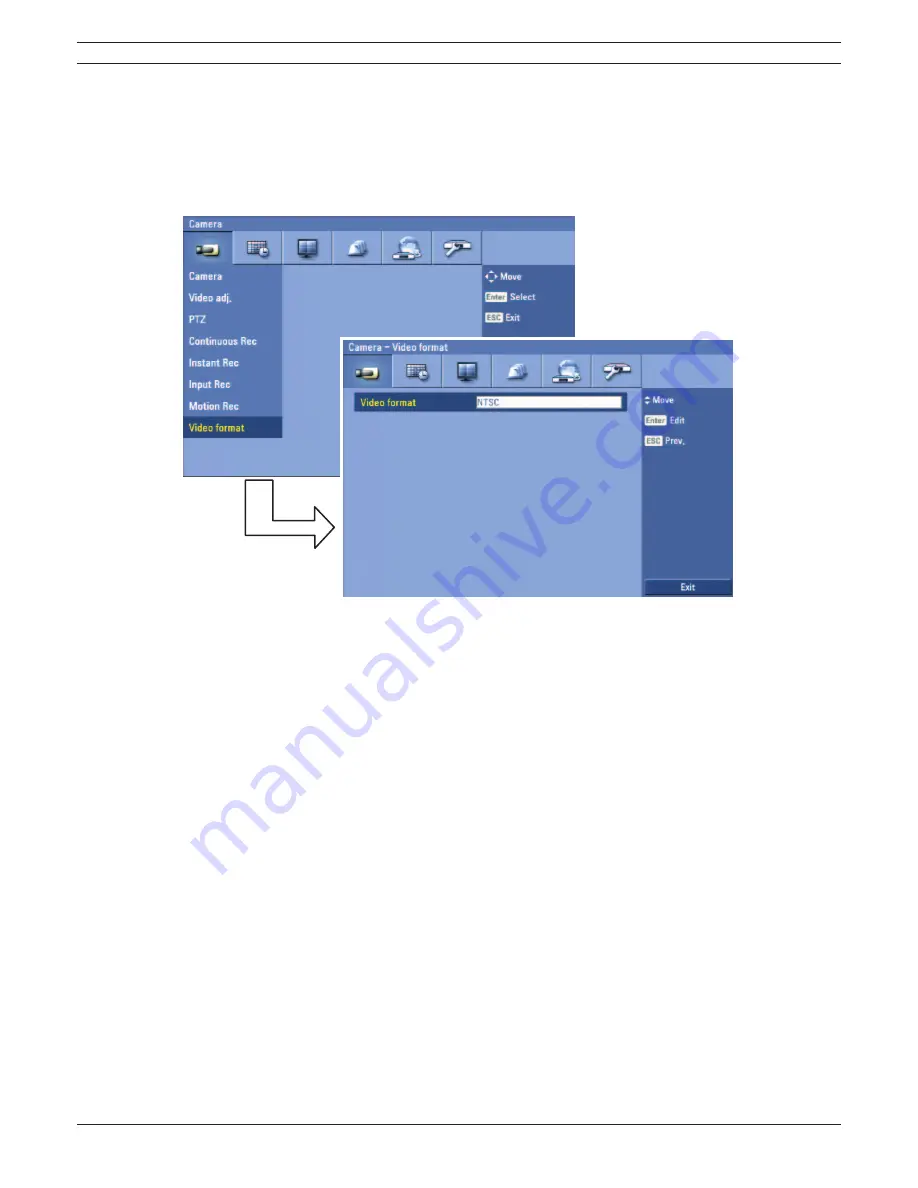
3.19.8 Video 

format

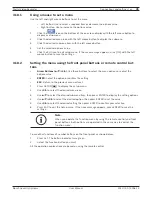
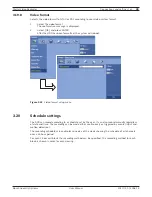
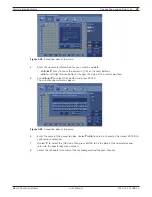
Selects the video format to NTSC or PAL according to your video system format.

1. 

Select the video format.
The confi rmation message is displayed.

2. 

Select [OK] and press ENTER.
After the HDD has been formatted, the system will reboot.

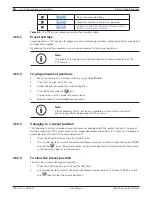
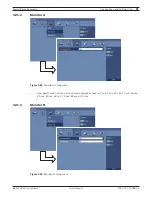
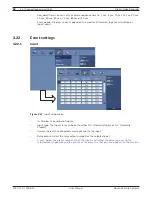
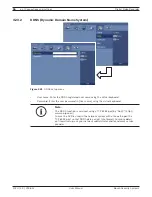
Figure 3.22  

Video format setup menu

3.20 Schedule 

settings

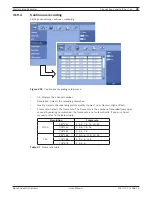
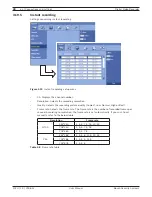
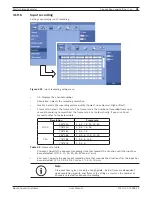
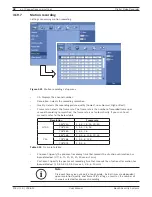
The DVR can record according to a schedule set by the user. It can also record manually regardless 
of date and time. The recording can be made either continuously or triggered by events (input and 
motion detection).

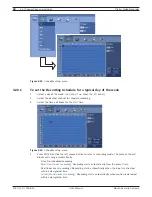
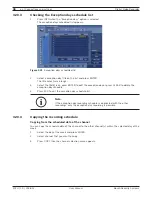
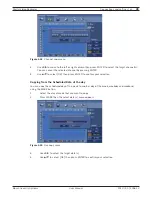
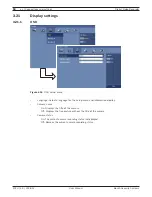
The recording schedule screen displays one day of the week showing the schedule of all channels 
over a 24-hour period.

For each 1-hour cell block the recording method can be specified. The recording method for each 
block is shown in color for easy viewing. 

Содержание Divar DVR-16K

Страница 1: ...Divar MR Digital Video Recorder Type numbers DVR 8K DVR 16K DVR 8L DVR 16L en Operation Manual_en ...

Страница 2: ......

Страница 3: ...ection 19 3 7 Connecting the USB device 19 3 8 Connecting a RS 422 485 device 20 3 9 Connecting the BIPHASE port 21 3 10 Connecting the ALARM I O port 22 3 11 System operation 23 3 12 Selecting the main monitor type 24 3 13 General explanation of the live screen on the main monitor 25 3 14 Selecting live screen mode 27 3 15 PTZ camera control 28 3 16 Viewing System Information 32 3 17 Viewing the ...

Страница 4: ... Live Mode 88 6 6 Search mode 93 6 7 Remote Setup mode 97 6 8 Remote Export Settings 107 7 Additional programs 109 7 1 Alarm Notifier program 109 7 2 Main Screen of Alarm Notifier program 110 7 3 Archive Player program 112 7 4 Web Viewer program 115 8 REFERENCE 119 8 1 Troubleshooting 119 8 2 Recommended devices 122 8 3 Time zones 124 8 4 Factory default configuration settings 125 8 5 Recording Time ...

Страница 5: ...periods unplug the unit from the wall outlet and disconnect the cable system This will prevent damage to the unit from lightning and power line surges 7 Controls adjustment Adjust only those controls specified in the operating instructions Improper adjustment of other controls may cause damage to the unit Use of controls or adjustments or performance of procedures other than those specified may re...

Страница 6: ...ch as Dangerous Voltage inside the product If not avoided this will result in an electrical shock serious bodily injury or death WARNING Medium risk Indicates a potentially hazardous situation If not avoided this could result in serious bodily injury or death CAUTION Medium risk Indicates a potentially hazardous situation If not avoided this may result in minor or moderate injury Alerts the user t...

Страница 7: ...his device is intended for use in public areas only U S federal law strictly prohibits surreptitious recording of oral communications Disposal Your Bosch product was developed and manufactured with high quality material and components that can be recycled and reused This symbol means that electronic and electrical appli ances which have reached the end of their working life must be collected and d...

Страница 8: ...against harmful interference in a residential installation This equipment generates uses and can radiate radio frequency energy and if not installed and used in accordance with the instructions may cause harmful interference to radio communications However there is no guarantee that inter ference will not occur in a particular installation If this equipment does cause harmful interference to radio...

Страница 9: ...as been thoroughly verified The text was complete and correct at the time of printing The ongoing development of the products may mean that the content of the user guide can change without notice Bosch Security Systems accepts no liability for damage resulting directly or indirectly from faults incompleteness or discrepancies between the user guide and the product described More information For ad...

Страница 10: ...8 en Safety Digital Video Recorder F01U 2 0 2008 12 User Manual Bosch Security Systems ...

Страница 11: ...ous live display recording playback network transmission back up Various search functions Date time search event search bookmark search smart search Event data protection by event partition recording Pre alarm recording up to 1 minute Motion event recording and preview test function of motion sensitivity Recording image rate quality adjustment per individual camera Powerful record scheduling Insta...

Страница 12: ...hannel is used for the description operation and details provided in this operation manual 2 2 Accessories Remote Control AAA Type Batteries for Remote Control Rack Mount Bracket Mouse Divar MR PC software Screws for rack mount bracket SHIELD CTRL 1 1A 1B 2A 2B 1 2 3 4 5 6 7 8 9 10 11 12 13 14 15 16 GND GND GND GND R E L A Y 3A 3B 4A 4B SHIELD CTRL 2 IN IN IN IN SHIELD CTRL 3 SHIELD CTRL 4 SHIELD ...

Страница 13: ...up menu Display the monitor A control menu to set the screen mode to full 4 6 8 9 or 16 screens Set the video output signal to VGA mode Display the monitor B control menu Set the video output signal to MON A mode Switches the unit to PTZ mode to control the connected PTZ camera Press to see different multiscreen modes View all channels in sequence Displays the search menu Starts or stops instant r...

Страница 14: ...ou can set the mark point during the single channel playback of recorded data 11 IRIS 12 IRIS Adjusts iris position of the PTZ camera 13 SET Registers the PTZ camera s preset position 14 CLEAR Deletes a memorized preset position of the PTZ camera 15 MOVE Moves the PTZ camera to the preset position 16 TOUR Tours all registered preset positions in the PTZ camera e Shuttle Ring Fast forward or revers...

Страница 15: ...t a pan tilt zoom control unit via the supplied 15 pole D type connector board f AUDIO IN Connect the audio output of an external device g ALARM I O Connect up to 16 alarm inputs via the supplied 25 pin D type connector board Connect up to 8 alarm output relays via the supplied 25 pin D type connector board h RS 422 485 Terminals Connect RS422 485 compatible cameras i KBD IN Connect a Bosch CCTV k...

Страница 16: ... to change user type or disable system operation ACK Cancels alarm activation and returns the system to the condition before the alarm was activated Display the monitor A control menu to set the screen mode to full 4 6 8 9 or 16 screens Display the monitor B control menu to allow spot monitor control Press to see different multiscreen modes View all channels in sequence ESC Use to return to previo...

Страница 17: ...ecorded images in forward sequence Number Buttons 0 1 9 To select the PTZ preset number ID or channel INFO Displays or removes the system information window LOG Displays or removes the System Log List window PTZ Switches this unit to PTZ mode to control the connected PTZ camera TOUR Tours all registered preset positions in the PTZ camera ZOOM Adjusts the zoom level of the PTZ camera FOCUS Adjusts ...

Страница 18: ...16 en Introduction Digital Video Recorder F01U 2 0 2008 12 User Manual Bosch Security Systems ...

Страница 19: ... necessary for additional connection information Be sure to switch off the camera before installation and connection Default the main monitor MON A will start up in VGA mode See section 3 12 for selection of the main monitor type 3 1 Basic connection overview SHIELD CTRL 1 1A 2A 3A 4A 1 2 3 4 5 6 7 8 9 10 11 12 13 14 15 16 GND GND GND GND R E L A Y 5A 6A 7A 8A SHIELD CTRL 2 IN IN IN IN SHIELD CTRL...

Страница 20: ... for each camera Either connector can receive a camera s signal This signal is looped through directly connected to the other connector so that you can send the camera s signal to other equipment The camera input connectors are auto terminating so you do not need to add a terminator to the output connector if no additional equipment is connected If the camera signal is looped through to additional...

Страница 21: ...n 9841 or equivalent 3 6 Network connection 3 6 1 LAN connection Connect the LAN port to an available 10 100 base T port with a straight ethernet cable not supplied 3 6 2 Automatic network configuration The DVR can automatically obtain and configure the network interface via DHCP 3 6 3 Manually configure network The DVR may be manually configured by assigning an IP address subnet mask gateway and ...

Страница 22: ...to RX of the PTZ unit and TX of the DVR to RX of the PTZ unit correctly Recommended initial data are 9600 Baud Rate 8 Data bits 1 Stop bit and No parity When connecting PTZ cameras to DVRs it is necessary to set the setup menu for this unit according to the RS 485 settings of the camera and DVRs Figure 3 2 RS 422 485 connections RS 422 485 Terminal Description TX DATA Data Transmission TX DATA Dat...

Страница 23: ...tput 1 8 9 15 SHIELD CTRL 1 SHIELD CTRL 2 SHIELD CTRL 3 SHIELD CTRL 4 SHIELD SHIELD CTRL 5 Figure 3 3 Biphase port connector BIPHASE port 15 pole D type socket Signal name Pin no Description Code 1 1 Biphase control ch 1 minus Code 1 2 Biphase control ch 1 plus Shield 3 System ground cable shield Code 2 4 Biphase control ch 2 minus Code 2 5 Biphase control ch 2 plus Shield 6 System ground cable sh...

Страница 24: ...ces Wire them as either N O Normally Open or N C Normally Closed You can configure the alarm inputs as N O or N C in the menu system The default is N O 3 10 2 Connecting the Alarm Outputs The eight alarm output relays respond to input alarms and triggers You can configure the alarm outputs as N O or N C in the menu system The relays are active for the duration of the driving event Connect the appl...

Страница 25: ...configuration 3 11 System operation Default monitor setting is VGA 1 Turn on the unit System booting will commence The BOSCH logo image will be displayed on the main monitor during the system booting 2 When booting is complete the login window will be displayed Select a user ID by using the mouse or arrow then the ENTER button on the remote control or front panel Figure 3 5 Login window ADMINISTRAT...

Страница 26: ... Off YES YES NO PTZ YES YES NO Instant Record YES YES NO Export YES YES NO Search Play YES YES NO Setup YES NO NO Table 3 4 User access rights 3 12 Selecting the main monitor type You can select the main monitor type to display the main screen during power on 3 12 1 Using the VGA monitor 1 Connect the VGA monitor to the VGA connector on the back of the DVR 2 Turn on the VGA monitor 3 Press and hol...

Страница 27: ... 3 7 The B button on the front panel Note You can select the monitor type by using the A or B button at any time If you change the monitor type the system will be rebooted automatically 3 13 General explanation of the live screen on the main monitor Main monitor screen a b c d e f g Figure 3 8 Main monitor screen ...

Страница 28: ...u to change the user type or disable system operation Displays the system log list window Displays the system information window Turns the alarm off Displays the screen division selection window for the monitor A Displays the screen division selection window for the monitor B Click at a desired point to be marked during playback Up to 15 points can be marked Display copy export menu Displays the r...

Страница 29: ...t screen mode a b c d e Figure 3 9 The screen mode select menu of monitor A a Selected channel of the monitor A b Channel buttons Press the 1 to 16 channel button to see the current camera images in selected live screens on the monitor A c Screen mode Full Screen Mode When you see the selected channel on the full screen 4 6 8 9 and 16 view Mode Displays selected multi screens on the monitor A d Se...

Страница 30: ...ull Screen Mode When you see the selected channel on the full screen 4 view Mode Displays 4 view screens on the monitor B d Selected view mode e Sequence View all channels in sequence 3 Select OK B and press ENTER to confirm your selection Note On Monitor B output always the channel number CH01 CH16 is displayed Camera name can only be displayed on Monitor A output 3 15 PTZ camera control You can c...

Страница 31: ...e control b Use to pan tilt the camera c Confirm the preset position d Adjust the camera zoom e Manually adjust the focus of a camera f Manually adjust the iris of a camera g Displays the Selected Preset Number h Input the preset number i Delete a memorized preset position j Start a preset tour k Sends the Aux OFF command Used only for BOSCH Auto Dome camera l Display the setup menu of the PTZ cam...

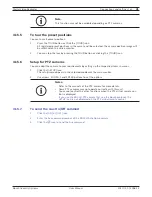
Страница 32: ... icon The position and its number are memorized 5 Repeat steps 1 4 to add additional positions Note Preset numbers from 0 to 255 are available on this unit but the actual preset range differs depending on PTZ cameras 3 15 3 Changing to a preset position The following function is available only with cameras provided with the preset function The preset function makes the PTZ camera move to the progr...

Страница 33: ...an adapt the camera to your requirements by setting up the respective items in menus 1 Click the SETUP icon The setup menu appears in the selected window of the main monitor 2 Use arrows ZOOM and ENTER buttons to set the options Notes Refer to the manuals of the PTZ camera for more details Some PTZ cameras may not operate correctly with this unit You cannot control the other functions when the PTZ...

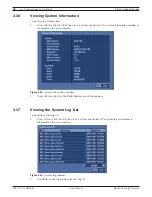
Страница 34: ...bar The system information window is displayed on the main monitor Figure 3 12 System information window 2 Press INFO or click the Exit Info button to exit the window 3 17 Viewing the System Log List To view the system log list 1 Press LOG or click the LOG icon in the system control bar The system log list window is displayed on the main monitor Figure 3 13 System log window 2 Use b B to see the p...

Страница 35: ...te 31 HDD Removed HDD2 9 Normal User Logout Remote 32 HDD Removed HDD3 10 Admin Login Local 33 HDD Removed HDD4 11 Admin Logout Local 34 HDD Formatted HDD1 12 Advanced User Login Local 35 HDD Formatted HDD2 13 Advanced User Logout Local 36 HDD Formatted HDD3 14 Normal User Login Local 37 HDD Formatted HDD4 15 Normal User Logout Local 38 HDD Changed HDD1 16 Configuration Changed 39 HDD Changed HDD2...

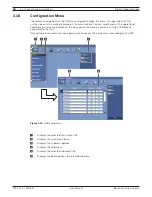
Страница 36: ...lect and set the operational conditions by using the buttons on the front panel the remote control or using a USB Mouse connected to the unit Only administrator level users have permission to access the Setup menu and configure the DVR a b c d e f Figure 3 14 DVR setup menu a Displays the selected main menu title b Displays the main menu icons c Displays the submenu options d Displays the help men...

Страница 37: ...Arrow Buttons v V b B Use these buttons to select the menu options or adjust the options value ENTER Select the option or confirm the setting ESC Return to the previous menu or level 1 Press SETUP to display the setup menu 2 Use b B to select the desired menu icon 3 Use v V to select the desired submenu item then press ENTER to display the setting options 4 Use v V b B to select the desired option ...

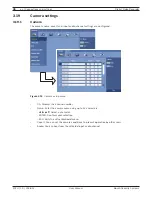
Страница 38: ...udio channel settings are configured Figure 3 15 Camera setup menu Ch Displays the channel number Name Enter the camera name using up to 12 characters b B v V Select a character ENTER Confirms your selection ESC Exits the virtual keyboard menu Covert You can set the camera conditions to prevent operation by other users Audio You can hear from the selected input audio channel ...

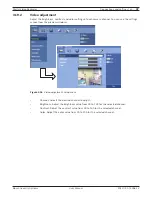
Страница 39: ...each camera channel You can see the settings screen from the preview windows Figure 3 16 Video adjustment setup menu Channel Selects the desired channel to adjust Brightness Adjust the brightness value from 00 to 100 for the selected channel Contrast Adjust the contrast value from 00 to 100 for the selected channel Color Adjust the color value from 00 to 100 for the selected channel ...

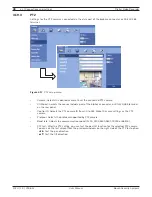
Страница 40: ...ed data port of the biphase connecter or RS 422 485 terminal on the rear panel Control ID Selects the PTZ camera ID from 00 to 255 Make the same settings as the PTZ camera Protocol Selects the protocol supported by PTZ camera Baud rate Selects the communication speed 1200 2400 4800 9600 19200 or 38400 PTZ test After the PTZ setting you can test the pan tilt function for the selected PTZ camera You...

Страница 41: ... resolution Quality Selects the recording picture quality Lowest Low Normal High or Best Frame rate Selects the frame rate The frame rate is the number of recorded frames per second According to resolution the frame rate is set automatically If you wish to set manually refer to the below table Resolution Frame rate NTSC 352 240 1 3 5 7 5 15 20 30 704 240 1 3 5 7 5 15 704 480 1 3 5 7 5 PAL 352 288 ...

Страница 42: ...olution Quality Selects the recording picture quality Lowest Low Normal High or Best Frame rate Selects the frame rate The frame rate is the number of recorded frames per second According to resolution the frame rate is set automatically If you wish to set manually refer to the below table Resolution Frame rate NTSC 352 240 1 3 5 7 5 15 20 30 704 240 1 3 5 7 5 15 704 480 1 3 5 7 5 PAL 352 288 1 3 ...

Страница 43: ...u wish to set manually refer to the below table Resolution Frame rate NTSC 352 240 1 3 5 7 5 15 20 30 704 240 1 3 5 7 5 15 704 480 1 3 5 7 5 PAL 352 288 1 3 5 6 12 5 20 25 704 288 1 3 5 6 12 5 704 576 1 3 5 6 Table 3 9 Frame rate table Pre event Specify the pre event recording time that records the situation until the input has been detected Off 5 10 20 30 40 50 sec or 1 min Post event Specify the...

Страница 44: ...f you wish to set manually refer to the below table Resolution Frame rate NTSC 352 240 1 3 5 7 5 15 20 30 704 240 1 3 5 7 5 15 704 480 1 3 5 7 5 PAL 352 288 1 3 5 6 12 5 20 25 704 288 1 3 5 6 12 5 704 576 1 3 5 6 Table 3 10 Frame rate table Pre event Specify the pre event recording time that records the situation until motion has been detected Off 5 10 20 30 40 50 sec or 1 min Post event Specify t...

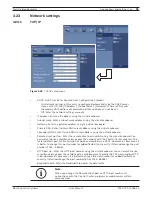
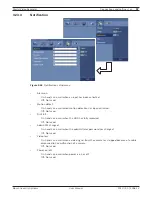
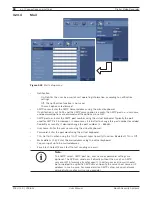
Страница 45: ...em will reboot Figure 3 22 Video format setup menu 3 20 Schedule settings The DVR can record according to a schedule set by the user It can also record manually regardless of date and time The recording can be made either continuously or triggered by events input and motion detection The recording schedule screen displays one day of the week showing the schedule of all channels over a 24 hour peri...

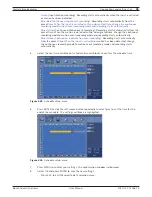
Страница 46: ... the time cell block for the start time Figure 3 24 Schedule setup menu 4 Press ENTER or click the left mouse button to select a recording mode The color of the cell blocks will change automatically Gray No scheduled recording Blue Continuous recording Recording starts automatically from the preset time Red Input event recording Recording starts automatically when the input is activated within a d...

Страница 47: ...ntinuous recording mode to motion event recording mode and recording starts automatically Blue Green Continuous Input Motion event recording Recording starts automatically from the preset time When the input is activated or motion has been detected change the continuous recording mode to motion event recording mode and recording starts automatically 5 Select the next time cell block of schedule ti...

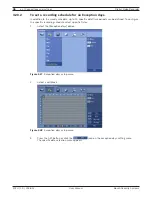
Страница 48: ... weekly schedule up to 10 specific date time periods can be defined To configure the specific recording schedule select Specific Dates 1 Select the Exception days option Figure 3 27 Exception days setup menu 2 Select a cell block Figure 3 28 Exception days setup menu 3 Press the SET button or click the icon on the exception days setting menu The specific date selection menu appears ...

Страница 49: ...button Changes the value at the current position 5 Use b B v V to select OK button and press ENTER The virtual keyboard menu appears Figure 3 30 Exception days setup menu 6 Enter the name of the exception day Use v V b B to select a character then press ENTER to confirm your selection 7 Use v V to select the OK icon then press ENTER to fix the date of the special day and return to the special day me...

Страница 50: ...icon press ENTER to edit the exception day or press CLEAR to delete the exception day schedule 4 Press ESC to exit the exception day schedule list Note If the exception day recording schedule is duplicated with the other recordings only the exception day recording is possible 3 20 4 Copying the recording schedule Copying from the scheduled data of the channel You can copy the schedule data of the ...

Страница 51: ...l by pressing ENTER 5 Use v V to select OK then press ENTER to confirm your selection Copying from the Scheduled Data of the day You can copy the scheduled day of the week to another day of the week weekday and weekend using the MARK button 1 Select the day of week that you want to copy 2 Press MARK then the select date s menu appears Figure 3 33 Day copy menu 3 Use b B to select the target date s ...

Страница 52: ...3 21 1 OSD Figure 3 34 OSD setup menu Language Select a language for the setup menu and information display Camera name On Displays the title of the camera Off Displays the live picture without the title of the camera Camera status On The current camera recording status is displayed Off Remove the current camera recording status ...

Страница 53: ... Systems User Manual F01U 2 0 2008 12 3 21 2 Monitor A Figure 3 35 Monitor A setup menu Seq dwell time You can set the camera sequence time to 2 sec 5 sec 10 sec 20 sec 30 sec 40 sec 50 sec 60 sec 70 sec 80 sec or 90 sec 3 21 3 Monitor B Figure 3 36 Monitor B setup menu ...

Страница 54: ... all motion or input occur 3 22 Event settings 3 22 1 Input Figure 3 37 Input setup menu In Displays the number of inputs Input type The input state can be set to either N O Normally Open or N C Normally Closed Camera Select the connected camera channel to the input Relay output Select the relay output number for the selected input Preset Select the preset number When the input is activated the ca...

Страница 55: ... on the preview window screen b B v V Moves the yellow cell box to another cell zone ENTER Selects or cancels the motion detection area at the current cell position Press ESC to exit the settings You can select the motion detection area by using the mouse To select the area Drag drop a cell to the right to select the motion detection area To cancel area Drag drop a cell point of a selected cell ar...

Страница 56: ...anual Bosch Security Systems 3 22 3 Alarm acknowledgement Figure 3 39 Alarm acknowledgement setup menu Alarm ackn Manual Use the ACK button on the remote control or button on the front panel to stop alarm Post event time The alarm is stopped after the programmed post event time ...

Страница 57: ...server address using the virtual keyboard Remote client port no Enter the remote client port number using the virtual keyboard You can watch the live surveillance image over the network with the Control Center program The factory default port for transmission of video and audio data is 9001 However in some cases it is better to change this port number for added flexibility or security If desired ch...

Страница 58: ...r name using the virtual keyboard Password Enter the user password in User name using the virtual keyboard Note The DDNS function is serviced using a TCP 8245 port by No IP http www no ip com In case the DVR is used in the network system with a firewall open the TCP 8245 port so that DDNS data can get into firewall For more detail on firewall setup ask your network administrator and or network ser...

Страница 59: ...ends an e mail when motion detection has been activated Off Not used Disk full On Sends an e mail when the HDD has fully recorded Off Not used Admin PW changed On Sends an e mail when the administrator password has changed Off Not used Video loss On Sends an e mail when a video signal from the camera has stopped because of a cable disconnection or malfunction of a camera Off Not used Power on off ...

Страница 60: ... is better to change this port number for added flexibility or security If desired change the port number 1 65535 User name Enter the user name using the virtual keyboard Password Enter the password using the virtual keyboard TLS Set to On when using the TLS Transport Layer Security function By default TLS is Off Mail address 1 3 Enter the mail address using the virtual keyboard You can input up to...

Страница 61: ...nformation according to your notification settings Off Notification function is not used IP address Port no Enter the IP address port number of the Alarm notifier program using the virtual keyboard The factory default port for this function is 9002 However in some cases it is better to change this port number for added flexibility or security If desired change the port number 1025 65535 You can set up...

Страница 62: ...he current date Time Enter the current time 24 HR or 12 HR Date format Select the date display format Time format Select the time display format Time zone Select your Time zone for more details see 8 3 Time zones Daylight saving Set to On to use the daylight saving function Daylight saving start Select the Daylight saving start time Daylight saving end Select the Daylight saving end time ...

Страница 63: ...server Private time server Sync interval and NTP test options are deactivated Time server For most cases select public The DVR will obtain the average time among 5 public servers time nist gov time a nist gov time b nist gov ntp nasa gov clock isc org Private time server Enter the private time server s IP address or host name using the virtual keyboard Sync interval You can set synchronized interv...

Страница 64: ...eeper On Makes a sound when a input is activated Off Turns off the input beeper Motion beeper On Makes a sound when a motion is detected Off Turns off the motion beeper System beeper On Makes a sound when a cooling fan is not activated or the HDD has a bad sector Off Turns off the system beeper Note The beeper is a low sound on this unit If you want to make a loud sound connect an external alarmin...

Страница 65: ... Displays the user number ID Enter the new user ID using the virtual keyboard Level Select the level of the new user Password Enter or change the password for the user using the virtual keyboard You can use the password with number special character or characters minimum length 4 maximum length 8 Note Remember the password If you forget the password please contact an authorized service center or t...

Страница 66: ...se the media from which to perform the update USB Select USB and then insert the USB drive into the DVR All USB devices must be disconnected before you can use the USB drive Network Select Network and then do the following a Select the update server settings box The virtual keyboard is displayed b Enter the update server IP address The DVR network settings must be configured and you must know the u...

Страница 67: ...from this DVR to the USB memory stick Factory defaults You can reset the DVR to its original factory settings Some options cannot be reset Video format Date Time Time zone Daylight saving Daylight saving start Daylight saving end User settings Event partition settings Notes Configuration data import is available when the configuration data of a DVR is the same kind as this unit s data If you use a...

Страница 68: ... When the HDD has overflowed a warning message is displayed Event partition Set the space of event partition for event recording Auto delete Set the auto delete date Off 1 day 2 days 5 days 7 days 10 days 20 days 30 days 40 days 50 days or 60 days If you set the auto delete date the recorded data will be deleted except the data within the selected date period of time The Auto delete function is act...

Страница 69: ...ly or daily The backup data will be automatically saved according to the setting Device Select a backup device Schedule start Set the schedule start date a day of the week and time Time range date Enter the backup time range Enter the date you want to backup Time range start Enter the start day of the week or time Time range end Enter the end day of the week or time Estimate size Displays the size...

Страница 70: ...onnect the backup USB device or insert a recordable disk to the disc driver for backup 2 Select the partition you want to backup 3 Select INSTANT from the schedule options 4 Select the backup device 5 Select the Time range date Time range start time and Time range end time for backup 6 Select the Estimate size icon and press ENTER 7 Check the size of the selected data and free space If the device ...

Страница 71: ...r erase the connected USB device Note You cannot stop the backup while in progress The warning message will appear for the conditions listed below When the start time and end time setting are wrong A media does not have enough space When you set the time for data that does not exist When the selected USB device is disconnected The estimated size of backup data is only the approximate size Be sure ...

Страница 72: ...R remote controller Select the IR remote ID for this unit 01 09 If you use multi systems set the IR remote ID for each DVR unit DVR ID Select the DVR ID for this unit 01 16 If you use multi systems set the DVR ID for each DVR unit Auto user logout Logout is automatical at fixed intervals You can set auto logout time to 5 min 10 min 30 min 60 min or Off ...

Страница 73: ...re you start recording first SETUP the recording settings in the instant recording menu of the system setup 1 Select the desired channel for instant recording 2 Press the REC button on the remote control or press button on the front panel to start record The red dot is blinking on the selected channel screen of the main monitor Figure 4 1 Rec buttons 3 Press the REC button on the remote control or...

Страница 74: ...deo input for display Overwrite is set to Off or Normal Partition and event partition is full On the HDD setting the event partition is set to 0 The schedule Input Motion record is not set HDD partition according to a recording type Normal Partition It is the space in the HDD that stores the continu ous and instant recorded data Once the normal partition is set to 0 the event partition is 100 you ...

Страница 75: ...e playback image will be displayed on the selected channel window Figure 5 1 Playback window 3 Press x STOP to stop the playback Note The playback window is fixed and only in selected channel 5 2 Search The various search functions of this unit can be used to go to the beginning of the desired picture This unit is equipped with 4 search functions 5 2 1 Select source device This item is used to set ...

Страница 76: ...ys back or searches recorded contents of the internal HDD device Source device Plays back or searches backup contents of the source device 5 Press ENTER to confirm your selection Notes While the backup is in progress you can not search the data on the backup device Do not remove the external USB device while the backup search is in progress from the USB device It may cause a malfunction 5 2 2 Date ...

Страница 77: ...time 4 Press ENTER to confirm it 5 Select the Update icon then press ENTER The search result is displayed in the time table of the search menu 6 Use the channel buttons on the front panel to select the channel s you want to play back 7 Press bB or Click the Play B icon to start playback The picture s is are displayed in the main monitor Figure 5 5 Playback showing system control bar 8 Press STOP x ...

Страница 78: ...view the detailed time by 6 hour intervals 5 2 3 Event Search Search a recorded picture by date and type of event Figure 5 6 Event search menu 1 Select the Event Search menu 2 Set the year month day and time v V b B Moves to the previous or next column or changes the setting at the current position ENTER Selects the column or confirms the setting 3 Select the channel for event search using ENTER 4 ...

Страница 79: ...number start time end time and sensitivity options b B v V Moves to the options or sets the selected option ENTER Selects option or confirms the setting Note The time between the start time and the end time is automatically set at 1hour 3 Select the Set in the Area option then press ENTER The picture from the selected camera is displayed 4 Set the motion mask setting The area switches between activ...

Страница 80: ...ayback and return to motion detect list menu 9 Press ESC repeatedly to exit the smart search menu 5 2 5 Bookmark Search Search the desired picture with a bookmark registered by the bookmark function 1 Select Bookmark Search menu Figure 5 10 Bookmark search menu 2 Select the recording data on the list then press bB click Play B or double click the selected data to start playback The picture is disp...

Страница 81: ...able during playback Button Function System Control Bar Remote Control Front panel Stop playback Pause playback Press repeatedly to select the required scan speed M MB MM MMB or m mb mm mmb Press repeatedly to play frame by frame in pause mode Press to play reverse or normal playback Press MARK at a desired point to be marked during playback Up to 15 points can be marked Notes You can play back th...

Страница 82: ... external recording devices 1 Press COPY or click The export menu window appears Figure 5 11 Export menu window 2 Select a target device to export 3 Select the channel number s 4 Set the start date time and end date time to copy 5 Press COPY or Click icon to start exporting The exported data will be authorized by the unit before saving and it can only be played back with the Archive player ...

Страница 83: ...options The warning message appears for the conditions listed below When the start date time and end date time are the same value When the start date time is later than the end date time The export media does not have enough space When you set the time for data that does not exist An external media has to be formatted on this unit to prevent a malfunc tion DVD RW and DVD RW discs have to be initia...

Страница 84: ...82 en Search and playback Digital Video Recorder F01U 2 0 2008 12 User Manual Bosch Security Systems ...

Страница 85: ...or above Recommended PC Requirements OS Windows XP CPU Intel Pentium IV RAM 512 MB Graphics Card AGP VGA with 128 MB Video RAM 6 2 Control Center installation 1 Insert the Divar MR PC software CD which will be started automatically If the disc does not run automatically on your PC open the Divar MR PC software CD and install the program manually 2 Run the install file and install the programs to yo...

Страница 86: ...tup menu is displayed Figure 6 2 Connection setup window 4 Enter the site name IP address and port Site Name Enter the description of the site IP Address Enter the IP Address or URL of the DVR Port Enter the Port number of the DVR If it isn t entered the port number is set by default 5 Select OK Figure 6 3 Connection list window 6 Select OK to confirm the settings The registered site name is displa...

Страница 87: ...ons Normal User Shows the live image only Figure 6 4 Remote log on window 4 Select OK and the Divar MR Control Center main window is activated If someone is logged on to the DVR using the Admin ID you can not log on using the Admin ID If you want to log off right click the mouse on the site name and select User log off Up to 5 users can connect to the DVR system using the Control Center program as...

Страница 88: ...lays or removes the date time of playback data in the channel window Select All Displays all OSD options in the channel window Sequence Dwell Time Select the sequence to 5 seconds 10 seconds 15 seconds or 20 seconds Video Size Select the video size from 100 150 or 200 Language Select the language for Control Center program Tools Connection Infomation To register a site name Help Control Center Inf...

Страница 89: ... 6 7 3 Event setup Network See 6 7 4 Network setup System See 6 7 5 System setup 3 Remote Export Icon Click to display the Export pop up windows See 6 8 Remote Export Settings 4 Screen Mode Selection Icons When the icon is clicked the screen will be changed to multiscreen view If the icon is clicked again the screen will be changed by sequence You can view the live window s in full screen view To ...

Страница 90: ...he plus mark Figure 6 7 Divar MR Control Center Window 4 Select the channel number you want to view 5 Click the channel number and drag and drop to live window position If you select Cameras and drag and drop to a live window then all channels are displayed 6 Live image is displayed in the selected window Figure 6 8 Camera View window 7 Repeat steps 3 5 to set the other live windows Notes Configur...

Страница 91: ...ists 3 Select playback start time When using timeline to search a start time use the zoom in out icons for more detailed searches 4 step 4 Select playback speed and mute speaker icon 5 Start playback using these control buttons Notes If you don t want to play with sound click the speaker icon to mute You can not use the playback function when you log in with the Normal User ID 6 5 3 Using the Pan ...

Страница 92: ...reset numbers To input the preset number To register preset positions To move the camera to the preset position To delete a memorized preset position To start a preset tour To displays the setup menu of the PTZ camera Table 6 1 Virtual remote control button table Notes If someone is controlling a PTZ camera using the DVR you cannot use the PTZ function and vice versa You can not use the PTZ functi...

Страница 93: ...a moves to the preset position and the picture from the camera in that position appears on the monitor To clear the preset position You can delete a memorized preset position 1 Click the CLEAR icon 2 Use number icons to enter the memorized preset index number Click the icon The preset position will be deleted To tour the preset positions You can tour all preset positions 1 Click the TOUR icon All ...

Страница 94: ... of selected site names in the remote setup tab via the network 1 Select the log view tab Log search menu appears Figure 6 11 The log search menu window 2 Click the date icon and select the day for the log search The selectable days are displayed in blue text color Figure 6 12 The day select window 3 Click the search icon The system log is displayed in the list ...

Страница 95: ... a selected site name in the remote setup tab via the network 6 6 1 Using the Date Time Search function Use to search a recorded picture by specifying date hour and minute Figure 6 14 The Date Time search window 1 Select the date time search tab 2 Click the date icon and select the day the selectable days are displayed in blue color 3 Select the channel window you want to view ...

Страница 96: ...ecorded data Figure 6 16 Recorded data search window 5 Playback the searched data using the playback control buttons Figure 6 17 The playback control buttons 6 6 2 Using the Event search function Search a recorded picture by date and event type Figure 6 18 The Event search window 1 Select the event search tab 2 Click the date icon and select the day The selectable days are displayed in blue color ...

Страница 97: ...h the desired picture with a registered bookmark using the bookmark function Figure 6 19 The Bookmark search window 1 Select the bookmark search tab 2 Click the search icon All bookmark data is displayed in the list 3 Select the data in the list 4 Play the searched data using the playback control buttons 6 6 4 Using the Smart search function Picture recorded via motion detection can be searched by...

Страница 98: ...t the camera channel 4 Select the start time using the timeline Figure 6 21 Selected start time 5 Select the end time 6 Select the motion sensitivity level and motion area on the display window using the mouse Cancel the selected area Select the all area Figure 6 22 The sensitivity level setting window Selected area within red box Figure 6 23 Selected motion area 7 Click the search icon The smart ...

Страница 99: ... 24 The searched data list 8 Select the channel from the list 9 You can play the searched data using the playback control buttons 6 7 Remote Setup mode You can set the DVR of a selected site name in the remote setup tab via the network 6 7 1 Camera Display setup Figure 6 25 The Camera Display setup window ...

Страница 100: ...rotocol Select the protocol supported by PTZ camera Baud rate Select the communication speed 1200 2400 4800 9600 19200 or 38400 5 Set the motion options Sensitivity Set the sensitivity level for the created motion detection area Sensitivity can be set from 0 to 10 Relay output Select the number of the ALARM I O port for the output alarm signal when motion is detected Area Select the desired motion...

Страница 101: ... 6 27 The Continuous recording setting window 2 Set each option using the mouse see 3 19 4 Continuous recording 3 Click the OK button to confirm the settings Instant recording settings 1 Click the Instant Rec button The instant recording setting window appears Figure 6 28 The Instant recording setting window 2 Set each option using the mouse see 3 19 5 Instant recording 3 Click the OK button to con...

Страница 102: ...e 6 29 The Input recording setting window 2 Set each option using the mouse see 3 19 6 Input recording 3 Click the OK button to confirm the settings Motion recording settings 1 Click the Motion Rec button The instant recording setting window appears Figure 6 30 The Motion recording setting window 2 Set each option using the mouse see 3 19 7 Motion recording 3 Click the OK button to confirm the setti...

Страница 103: ...recording Recording starts automatically when the input is activated or motion has been detected Blue Red Continuous Input event recording Recording starts automatically from the preset time When the input is activated within a designated time change the continuous recording mode to input event recording mode and recording starts automatically Blue Yellow Continuous Motion event recording Recordin...

Страница 104: ...urce day to copy 2 Select the destination day from the day of the week weekday or weekend options 3 Click the copy button to copy the schedule data Exception day settings Figure 6 34 The Exception day setting window 1 Mark up the exception day option 2 Select the date to set the exception day schedule 3 Mark up the desired recording option 4 Select the channel to set the schedule 5 Click the start...

Страница 105: ...w 1 Set the event options Input Displays the number of the ALARM I O port Input type The alarm state can be set to either N O Normally Open or N C Normally Closed Linked camera Select the connected camera channel with the ALARM I O port Relay out Select the alarm output number of the RELAY OUT terminal for the output alarm signal Preset Select the preset number When the input is activated the came...

Страница 106: ...curity function SMTP server Enter the SMTP server address SMTP port no Enter the SMTP port number Typically the TCP port used for SMTP is 25 However in some cases it is better to change this port number for added flexibility or security If desired change the port number 1 65535 User name Enter the user name Password Enter the password Mail address 1 3 Enter the mail address You can input up to 3 e ...

Страница 107: ...TCP 8245 port by No IP http www no ip com In case the DVR is used in the network system with a firewall open the TCP 8245 port so that DDNS data can get into firewall For more detail on firewall setup ask your network administrator and or network service provider Emergency Notification Notify the Alarm Notifier about unit operating information according to your notification settings IP Address Port E...

Страница 108: ...on or All This function is possible when the selected HDD type has fully recorded Disk full warning When the HDD has overflowed the warning message is displayed Event partition Sets the space of event partitions for event recording Log Out Auto user logout Setting the logout time You can set the auto logout time to 5 minutes 10 minutes 30 minutes or 60 minutes Sound settings Select the beeper optio...

Страница 109: ...n click OK to confirm your selection Edit the registered User You can change the User ID password or user level 1 Choose the user ID and then click the Edit button 2 Change the ID Password or User level then click OK to confirm your selection Delete registered User 1 Choose the user ID you want to delete 2 Click the Delete button 6 8 Remote Export Settings You can copy the recorded images and audio ...

Страница 110: ...a of the selected export setting Cancel Click it to cancel data exporting Exit Click to exit the window How to export the data 1 Set the Channel options You can select more than one channels 2 Set the Start date time options 3 Set the End date time options 4 Select the folder on the computer to save the exported data 5 Enter the export data name 6 Select the data format 7 Click the Export button t...

Страница 111: ...ttom right of the screen Figure 7 1 The Alarm Notifier icon in the system tray 2 Whenever a notification function occurs a message box is displayed on the bottom right of the screen The message box is displayed for 5 seconds Figure 7 2 The message box window 3 Check the message 4 Click the message box within 5 seconds to display the Divar MR Alarm Notifier Received Messages window or Right click the...

Страница 112: ...7 3 Main Screen of Emergency Agent a Displays message type b Displays IP Address c Displays received date and time d Displays the port settings window e Displays the search window f Refreshes the received message on the list g Detailed view of the received message h Deletes the selected message from the list i Closes the Divar MR Alarm Notifier Received Messages window ...

Страница 113: ... some cases it is better to change this port number for added flexibility or security If desired change the port number 1025 65535 3 Click the OK button to exit 7 2 3 Message search Figure 7 5 Message search window 1 Click the button The message search window is displayed 2 Select the search method Event search Search by selected type of event for the message Date search Search by selected date 3 C...

Страница 114: ...gure 7 6 The confirmation window 3 Click Yes to delete the message 7 3 Archive Player program You can playback from the archived data on the PC using this program The Archive Player program is saved automatically when you install the Control center program or archive the data 7 3 1 Main screen of Archive Player Figure 7 7 The Archive Player window Program Menu File F Open Open the archived file Pri...

Страница 115: ...pe of the data Time Displays the recorded date and time of data Recording Mode Displays the save mode of the data continuous motion or other Camera Number Displays the camera channel number of recorded data 7 3 2 Playing data 1 Double Click the Divar MR Archive Player icon on the PC or Archive Player folder of the external USB device If you insert the exported data CD or DVD disc the Archive Playe...

Страница 116: ...114 en Additional programs Digital Video Recorder F01U 2 0 2008 12 User Manual Bosch Security Systems Figure 7 9 The Archive Player window 5 Click the button to stop playback ...

Страница 117: ...e Web Viewer and the Remote log on menu will be displayed Figure 7 10 The Remote log on menu 4 Enter the User Type and Password 5 Click OK Notes If the web viewer is not displayed check the TCP IP settings of the DVR If you connect the DVR for the first time the Security Warning window is displayed You must click Install on the Security Warning window to install the program for using the Web Viewe...

Страница 118: ... Mode select icon Click to change the PTZ View mode or Live View mode Multiscreen selection icons Live screen display window 7 4 3 Live screen control Left mouse button Select the channel If you want to set to full screen double click the selected channel To return to the previous screen double click again Right mouse button If you want to exit full screen mode right click the mouse to return to t...

Страница 119: ... 2008 12 7 4 4 PTZ View control Click the icon to change the PTZ view mode The PTZ virtual remote control is displayed Figure 7 12 The PTZ virtual remote control window Use virtual remote control buttons to control the PTZ camera For more details refer to 6 5 3 Using the Pan Tilt Zoom function ...

Страница 120: ...118 en Additional programs Digital Video Recorder F01U 2 0 2008 12 User Manual Bosch Security Systems ...

Страница 121: ...era images are not displayed Check that the camera video output is connected to the DVR system correctly Check that the power cable on the camera is connected correctly Check the video cable connection from the camera to the DVR system Turn off the DVR system and turn it on again The camera video is shown on the screen but the system does not record the video Check the recording mode in the record...

Страница 122: ...ideo signal output from the camera has a problem Ensure the camera is not damaged by trying another camera with a working video output Check if the video cable connection between the camera and the DVR is cut crosswired or shorted Check if there is a high voltage wire around the video cable connection between camera and DVR system It can cause interference and affect video quality Check that the v...

Страница 123: ... or internet cable mes sage is displayed Check the SMTP server address Check the SMTP port number Default setting is 25 Check the network settings When the Please check the authentication information message is dis played Check the user name Check the password The mail reception failed without error message Check the receiver s mail address Check that your e mail is not classified as spam on the r...

Страница 124: ... Ver 2 0 8 2 2 Supported CD DVD Media list Maker CD R CD RW DVD R DVD RW DVD R DVD RW Mitsubishi Yes Yes Yes Yes Yes Yes Imation Yes Yes Yes Yes Yes Yes Tayioyuden Yes No Yes No Yes No TDK Yes No Yes Yes Yes Yes Note 8cm 1 4G mini DVD is not supported 8 2 3 Supported function list for device Device Instant backup Schedule backup Export Configuration Import Export CD DVD Yes No Yes No USB memory Ye...

Страница 125: ...YES YES YES PELCO D PELCO YES YES YES YES YES YES YES PELCO P PELCO YES YES YES YES YES YES YES GANZ_DSCP CBC YES YES YES YES YES YES YES GANZ_P360V1 CBC YES YES YES YES YES YES NO LG_MULTIX LG YES YES YES YES YES YES YES LG_SD168 LG YES YES YES YES YES YES YES KALATEL_ CYBERDOM KALATEL YES YES YES YES YES YES NO PANASONIC_ CS850 PANASONIC YES YES YES YES YES YES YES SAMSUNG_SCC SAMSUNG YES YES YE...

Страница 126: ...els Copenhagen Madrid Paris Berlin Bern Rome Stockholm Vienna West Central Africa AMS 01 00 02 00 Athens Istanbul Minsk AIM 02 00 03 00 Bucharest Cairo Pretoria Jerusalem Harare Pretoria BCP 02 00 03 00 Helsinki Riga Israel Kyiv Sofia Tallinn Vilnius HRI 02 00 03 00 Baghdad Kuwait Riyadh Nairobi BKR 03 00 04 00 Moscow St Petersburg Volgograd MSV 03 00 04 00 Tehran THE 03 30 04 30 Abu Dhabi Muscat ...

Страница 127: ...nuous Rec Ch Resolution 352X240 NTSC 352X288 PAL Yes Quality Normal Yes Frame rate 30 IPS NTSC 25 IPS PAL Yes Instant Rec Ch Resolution 352X240 NTSC 352X288 PAL Yes Quality Normal Yes Frame rate 30 IPS NTSC 25 IPS PAL Yes Input Rec Ch Resolution 352X240 NTSC 352X288 PAL Yes Quality Normal Yes Frame rate 30 IPS NTSC 25 IPS PAL Yes Pre event Off Yes Post event 10sec Yes Motion Rec Ch Resolution 352X...

Страница 128: ...lay output None Yes Area On Yes Alarm ackn Alarm ackn Post event time Yes Network TCP IP DHCP On Yes IP address NULL Yes Subnet mask NULL Yes Gateway NULL Yes Primary DNS NULL Yes Secondary DNS NULL Yes Remote client port no 9001 Yes HTTP port no 80 Yes Bandwidth limit 100 Mbps Yes DDNS User name NULL Yes Password NULL Yes Notification Alarm on Off Yes Motion detect Off Yes Disk full Off Yes Admin...

Страница 129: ... time server NULL Yes Sync interval 1 day Yes Beeper Button beeper Off Yes Input beeper Off Yes Motion beeper Off Yes System beeper On Yes User No ID NULL No Level Normal user No Password 000000 No Update Item System firmware Yes Method USB Yes Update server NULL Yes Configuration Import configuration Export configuration Factory defaults Hard disk Overwrite Normal partition Yes Disk full warning ...

Страница 130: ...823 658 411 329 5 5 1048 838 524 419 884 707 442 354 3 3 1185 948 593 474 979 784 490 392 1 1 1926 1541 963 770 1436 1149 718 574 Normal 30 25 321 257 160 128 304 243 152 121 20 20 342 274 171 137 323 258 161 129 15 12 5 550 440 275 220 501 401 251 201 7 5 6 717 573 358 287 636 509 318 254 5 5 815 652 408 326 712 570 356 285 3 3 875 700 438 350 758 606 379 303 1 1 1401 1121 700 560 1122 898 561 44...

Страница 131: ... 317 254 570 456 285 228 3 3 700 560 350 280 623 498 312 249 1 1 1101 880 550 440 921 737 460 368 High 15 15 358 287 179 143 337 270 168 135 7 5 7 5 481 385 241 193 444 355 222 177 5 5 541 432 270 216 493 395 247 197 3 3 593 474 296 237 536 429 268 215 1 1 923 738 461 369 793 634 396 317 Best 15 15 208 167 104 83 201 161 100 80 7 5 7 5 314 252 157 126 298 238 149 119 5 5 395 316 198 158 369 295 18...

Страница 132: ...lution NTSC PAL Quality IPS NTSC PAL Recording Time Hr Video NTSC PAL Video Audio NTSC PAL DVR 8K DVR 8L DVR 16K DVR 16L DVR 8K DVR 8L DVR 16K DVR 16L 352x240 352x288 Lowest 30 25 176 141 88 70 160 128 80 64 20 20 183 146 91 73 166 133 83 66 15 12 5 267 213 133 107 232 186 116 93 7 5 6 379 303 190 152 313 251 157 125 5 5 457 365 228 183 364 292 182 146 3 3 548 438 274 219 420 336 210 168 1 1 865 6...

Страница 133: ...183 114 92 704x240 704x288 Lowest 15 15 205 164 103 82 184 148 92 74 7 5 7 5 290 232 145 116 250 200 125 100 5 5 365 292 183 146 304 243 152 122 3 3 411 329 205 164 335 268 167 134 1 1 725 580 363 290 517 414 259 207 Low 15 15 190 152 95 76 172 137 86 69 7 5 7 5 267 213 133 107 232 186 116 93 5 5 283 227 142 113 245 196 122 98 3 3 304 243 152 122 260 208 130 104 1 1 503 402 252 201 393 315 197 157...

Страница 134: ...0 62 50 117 93 58 47 5 5 148 118 74 59 137 109 68 55 3 3 162 130 81 65 149 119 74 60 1 1 252 201 126 101 221 177 110 88 Normal 7 5 7 5 90 72 45 36 85 68 43 34 5 5 97 77 48 39 92 73 46 37 3 3 107 86 54 43 101 81 51 40 1 1 160 128 80 64 147 117 73 59 High 7 5 7 5 70 56 35 28 68 54 34 27 5 5 84 67 42 34 81 64 40 32 3 3 93 74 47 37 88 71 44 35 1 1 141 113 70 56 131 105 65 52 Best 7 5 7 5 52 42 26 21 5...

Страница 135: ... Up to 200 IPS 352x288 Up to 100 IPS 704x288 Up to 50 IPS 704x576 Up to 400 IPS 352x288 Up to 200 IPS 704x288 Up to 100 IPS 704x576 Search Playback Function FF FB Frame Advance Search Mode Date Time Event Motion Input Bookmark Smart Display Frame Rate sec NTSC 240 IPS Real time per each channel 480 IPS Real time per each channel PAL 200 IPS Real time per each channel 400 IPS Real time per each cha...

Страница 136: ...W with 1x HDD Max 120 W with 4x HDD Dimension WxDxH 430 x 425 x 88 mm 16 9 x 16 7 x 3 5 inch Net Weight with 4x HDD 9 Kg 19 8lbs Operation Temp Humidity 0 ºC 40 ºC 32 ºF 104 ºF 0 RH 80 RH Bi phase Impedance 128 ohm max Overvoltage protection 40V Max cable length 1 5 Km 0 9 miles Keyboard Output Conform RS485 max signal voltage 12V DVD writer DVD R DVD RW DVD R DVD RW CD R CD RW ...

Страница 137: ...Digital Video Recorder Reference en 135 Bosch Security Systems User Manual F01U 2 0 2008 12 ...

Страница 138: ...136 en Reference Digital Video Recorder F01U 2 0 2008 12 User Manual Bosch Security Systems ...

Страница 139: ......

Страница 140: ...Bosch Security Systems www boschsecurity com Bosch Security Systems 2008 F01U 2 0 2008 12 P N MFL ...

Отзывы: