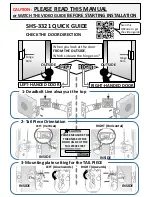
3. Latch Support Post
4. Positioning the Spindle
Installation
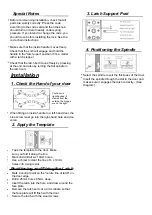
Check the Hand of your door
1.
2. Apply the Template
Special Notes
Positioning and Fixing the Latch
Before commencing installation, check that all
parts are workly correctly: Press the code
according to the code card and then the knob
should turn and return easily under spring
pressure. If you intend to change the code, you
should do so before installing the lock. See the
code chain instructions.
Make sure that the inside handle moves freely.
Check that the snib will engage and hold the
handle in the "latch-open" position if it's a model
with a latch stopper
Check that the latch bolt moves freely by pressing
at the end and also by turning the flat spindle in
the latch cam
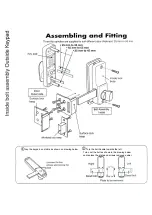
Select the spindle to suit the thickness of the door.
Insert the spindle through the slot in the door and
makes sure it engages the latch correctly - (See
Diagram)
When fitting an inside handle to a left-hand door, the
blue screw must go into the right-hand hole and vice
versa.
Your door is
right-handed, if
viewed from the
outside, the hinges
are on the right
Tape the template to the door. Make
sure you fold it along the line.
Mark and drill all six 10mm holes.
Use a chisel to clear the line of 4 x 10mm
holes into a single slot.
Mark a central point on the "centre line of latch" on
the door edge.
Drill a 25mm hole x 85mm deep.
Insert the latch into the hole, and draw around the
face plate.
Remove the latch and cut a 3mm rebate so that
the face plate will fit flush with the door.
Secure the latch with the wood screws.


