background image


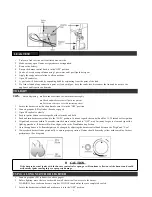
LEAK TEST 


1  

Perform  a leak test in a well ventilated  area outside 

2  

Make  sure any open flames  or cigarettes  are extinguished. 

3  

Remove  the battery. 

4  

Ensure the burner  control  knob is in the "OFF" position 

5  

In a bowl, create a soap solution  using 1 part water and 1 part liquid detergent 

6  

Apply  the soapy  water  solution  to all connections. 

7  

Open LP tank valve. 

8  

A gas leak will be detected  by expanding  bubbles  originating  from the point of the leak 

9  

If a leak is found at any connection  point or if you smell gas, close the tank valve, disconnect  the tank and do not use the 
appliance  until repairs  can be made. 

TO LIGHT


TIPS: 

Before Beginning    ● Read and understand  the instructions  thoroughly. 


   ● Check and make sure that all parts are present. 

   ● For future reference,  save this instruction  sheet. 

1  

Locate  the burner  control  knob and make  sure it is in the "OFF"  position. 

2  

Connect  propane  (LP) cylinder.  (See above pages). 

3  

Open LP tank valve slowly. 

4  

Push in igniter  button  to create  sparks  at the electrode  and hold. 

5  

Push and turn burner  control  knob  to the "LOW"  position.  Continue  to push the control  knob for 15-30  seconds  after ignition. 

6  

If ignition  does occur within  30 seconds,  turn the burner  control  knob to "OFF",  wait 5 minutes  for gas to clear and repeat  the 

lighting  procedure.  If burner  still will not light, refer  to the Troubleshooting Section. 

7  

Once the appliance  is lit, flame height can be changed  by adjusting  the burner control  knob between  the "High" and "Low" 

8  

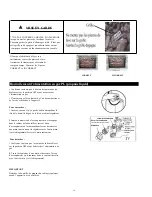
Always  check burner  flames  periodically  to ensure proper operation.  Flames  should be mostly  yellow  with some blue for best 

performance.  (See diagram) 


CAUTION 


If the burner  does not ignite  with  the burner  control  valve  open,  gas will continue  to flow out of the burner  and could 

accidentally  ignite  causing  injury  or property  damage.


USING A LONG MATCH OR LIGHTER


1  

Connect  propane  (LP) cylinder  (see above  pages). 

2  

Before  lighting,  move the lava rocks with a small shovel  to allow access  to the burner. 

WARNING:  Lava rocks can become  very hot. DO NOT touch unless they are completely  cooled. 

3  

Locate  the burner  control  knob and make sure it is in the "OFF" position. 


LEAK TEST 

Содержание 66595

Страница 1: ...is appliance must be attended at all times WARNING Battery may contain mercury Do not deposit in fire or put in trash Recycle the battery as hazardous waste OWNERS MANUAL READ BEFORE USE Model No BH50...

Страница 2: ...n Children must be supervised and kept at a safe distance while the appliance is in use Children and adults should be alerted to the hazards of high surface temperatures and keep a safe distance to av...

Страница 3: ...acteristics before using any LP gas product Propane Characteristics Flammable explosive under pressure heavier than air and settles in pools in low areas In its natural state propane has no odor For y...

Страница 4: ...e used Be sure to use only one 20 lb 9 1 kg LP gas cylinder with a Type 1 valve with this appliance as required by the American National Standards Institute ANSI and the Canadian Standards Steering Co...

Страница 5: ...ighten the CGA No 791 connection nut onto the LP gas cylinder service valve Hand tighten only 5 Be careful to not cross the threads on the connection when tightening the CGA No 791 connection on to th...

Страница 6: ...PC L 1 PACKAGE B G J K H I Accessories ITEM DESCRIPTION QTY A LAVA ROCKS 1 BOX B CHIMNEY 1PC C BATTERY AAA 1PC D FAKE LOGS 4PCS E TANK SEAT 1PC F PVC COVER 1PC G REAR PANEL 1PC H SIDE PANEL 2PCS I DO...

Страница 7: ...RIM pedestal using 2pcs M6 x 50 screw and 2pcs M6 nut II Attach the door assembly and 2pcs of decorative panel to the FRIM pedestal using 2pcs M6 x 50 screw and 2pcs M6 nut III Attach the 2pcs of side...

Страница 8: ...o the cylinder valve and tighten the black coupling nut by turning it clockwise with one hand while holding the regulator with the other hand See diagram Hand tighten only To Disconnect 1 Always confi...

Страница 9: ...o create sparks at the electrode and hold 5 Push and turn burner control knob to the LOW position Continue to push the control knob for 15 30 seconds after ignition 6 If ignition does occur within 30...

Страница 10: ...d stains loose dirt and soil Wipe with a soft cloth STUBBORN STAINS Stubborn stains discoloration and possibly rust pitting can occur from exposure to harsh outdoor conditions Be careful not let any p...

Страница 11: ...linder is empty If yes replace Excess flow safety valve has been activated Turn the control knob to OFF Close the LP tank valve and disconnect the regulator from the tank Turn the control knob to HIGH...

Страница 12: ...areil en tout temps MISE EN GARDE La pile peut contenir le mercure Ne la mettez pas dans le feu ni au rebut Jetez la pile comme d chet dangereux Conception homologu e sous les exigences ANS Z21 97 CSA...

Страница 13: ...e gaz N installez pas cet appareil sous une enceinte sur lev e vitez de l utiliser proximit de ou sous des arbres et arbustes en surplomb Il ne faut jamais tenir des mat riaux combustibles dans une di...

Страница 14: ...cet appareil d ext rieur quand il fonctionne N utilisez pas cet appareil d ext rieur proximit des voitures camions camionnettes ou v hicules r cr atifs Certaines surfaces de cet appareil d ext rieur d...

Страница 15: ...pes de capuchons ou bouchons peuvent entra ner des fuites de propane Ne rangez pas une bouteille de GPL de rechange sous ou proximit de cet appareil gaz Ne remplissez jamais la bouteille un niveau sup...

Страница 16: ...s pour permettre la remise du dispositif ouvrez le robinet de service de la bouteille ensuite ouvrez la soupape du br leur et allumez l appareil selon les instructions pour l allumage 2 Assurez vous d...

Страница 17: ...VE 1 bo te B Chemin e 1PCE C PILE AAA 1PCE D FAUX BOIS 4PCES E SI GE DE BOUTEILLE 1PCE F COUVERCLE PVC 1PCE G Panneau arri re 1PCE H Panneau lat ral 2PCES I Assemblage de porte 1PCE J Panneau d corati...

Страница 18: ...crous M6 II Attachez l assemblage de porte et les deux panneaux d coratifs au pi destal FRIM utilisant 2 vis M6 x 50 et 2 crous M6 III Attachez les deux panneaux lat raux au panneau arri re et l assem...

Страница 19: ...l air de combustion et de l air de ventilation l appareil Pour raccorder 1 Assurez vous qu il n y a pas de d bris attrap dans la t te de la bouteille de gaz ou la t te du robinet r gulateur 2 Ins rez...

Страница 20: ...s bulles en expansion provenant du point de la fuite 9 Si une fuite est trouv e n importe quel point de raccordement ou si vous sentez une odeur de gaz fermez le robinet de la bouteille d tachez la bo...

Страница 21: ...ement la flamme du br leur pour assurer un bon fonctionnement Les flammes doivent tre plut t jaunes avec un peu de bleu pour le meilleur rendement voir le diagramme AVERTISSEMENT Si le br leur ne s al...

Страница 22: ...t pas utilis Assurez vous que l unit est compl tement refroidie avant de 4 toucher un des composants ou avant de mettre la housse ENTRETIEN COURANT Gardez les mat riaux combustibles loin de votre appa...

Страница 23: ...turi extr mit du tube du br leur Nettoyez le venturi Les orifices du br leur sont bouch s Ins rez un trombone ouvert dans chaque orifice du br leur pour les nettoyer Assurez vous que l appareil est te...

Страница 24: ...mme ne sort pas sur toute la longueur du br leur Les orifices du br leur sont bouch s Voir Le br leur ne s allume pas quand on utilise une allumette ci dessus POUR TOUTE QUESTION OU PR OCCUPATION VEUI...

Страница 25: ...mento ADVERTENCIA La pila puede contener mercurio No la ponga en un fuego o la basura Desh gase de la pila como desechos peligrosos Dise o homologado bajo los requisitos ANS Z21 97 CSA 2 41 2014 para...

Страница 26: ...Nunca utilice una llama de fuego para comprobar si hay fuga de gas No instale este aparato debajo de un recinto suspendido Evite usarlo cerca de o debajo de rboles o arbustos colgantes Mantenga siemp...

Страница 27: ...as o veh culos de recreo Algunas partes de este aparato para exteriores al uso estar n demasiado calientes al tocarlas No toque las superficies calientes hasta que la unidad se haya enfriada a menos q...

Страница 28: ...uchones o tapones pueden causar fugas de propano No almacene una bombona de gas LP de repuesto debajo o cerca de este aparato de gas Nunca llene la bombona a un nivel superior a 80 Las bombonas de gas...

Страница 29: ...la de servicio de la bombona despu s abra la v lvula del quemador y encienda el aparato seg n las instrucciones para el encendido 2 Aseg rese de proteger la manguera de cualquier superficie caliente U...

Страница 30: ...ACCESORIOS PIEZA DESCRIPCI N CTD A PIEDRAS DE LAVA 1 Caja B CHIMENEA 1 PZA C PILA AAA 1 PZA D FALSO MADERA 4 PZAS E ASIENTO DE BOMBONA 1 PZA F FUNDA 1 PZA G PANEL TRASERO 1 PZA H PANEL LATERAL 2 PZAS...

Страница 31: ...njunto de puerta y los dos paneles decorativos al pedestal FRIM utilizando 2 tornillos M6 x 50 y 2 tuercas M6 III Junte los dos paneles laterales al panel trasero y al conjunto de puerta utilizando 8...

Страница 32: ...rotectiva visible Este tamiz met lico debe quedar libre y limpio de obstrucciones en todo momento para asegurar funcionamiento propio El quemador de la fogata a gas debe estar completamente cubierto p...

Страница 33: ...Desconectar 1 Siempre confirme que la v lvula de la bombona est en la posici n OFF antes de desconectar el suministro de gas 2 Mantenga el regulador en una mano y afloje el cuello de conexi n gir ndol...

Страница 34: ...e que est en la posici n OFF 2 Conecte la bombona de propano LP v ase las p ginas arriba 3 Abra lentamente la v lvula de la bombona de gas LP 4 Oprima el bot n de encendido para crear chispas al elect...

Страница 35: ...s LP Desconecte el regulador de la bombona LP para cerrar el 3 suministro de gas cuando el aparato no est en uso Aseg rese de que la unidad est completamente enfriada antes de 4 tocar uno de los compo...

Страница 36: ...dor Limpie el tubo de venturi Las bocas del quemador est n atascadas Limpie las bocas del quemador El aparato emita mucho humo negro cuando est encendido La llama est obstruida en las bocas del quemad...

Страница 37: ...n un cerillo arriba SI TIENE PREGUNTAS O DUDAS SE RUEGA LLAMAR A BOND SIN CARGOS al 1 866 771 BOND 2663 O PARA ACELERAR SU PEDIDO NO DEJE DE MANDARNOS UN CORREO ELECTR NICO AL customerservice bondmfg...

Отзывы: